Installing lamps in a suspended ceiling is not much different from work when using other materials. You just need to comply with the technology and requirements class=”aligncenter” width=”1062″ height=”768″[/img]
Lighting plays a significant role in creating interior spaces. It is easy to transform a room if you choose the right arrangement of elements on the surface. This will allow you to divide a large space into zones, and visually expand a small one. But every decision has its nuances.
Features of the lighting device
The choice of design ideas is influenced by the tasks being solved:
- Hiding certain parts of the room.
- Highlighting important areas.
- Distribution of light sources throughout the room.
In both suspended and suspended ceilings, installing spotlights is an acceptable solution.
A small dispersion angle is the main feature of such systems. This value is 30 degrees. Because of this, the light spreads over a small part of the space. Therefore, the arrangement of lamps is made as dense as possible. The light flux has a cone shape. If the cone light streams intersect at a level above other objects, then the light distribution is correct.
Requirements for spotlights
In the case of PVC films, there are some restrictions related to lighting:
- The power of a light bulb with a filament is a maximum of 40 W.
- For a halogen lamp this figure should be only 20 W.
If the canvas is satin, then the rules are different:
- Maximum 35 W – in the case of halogen.
- LN – no more than 60 W.
The use of LED bulbs and strips is becoming an increasingly popular option. This is due to the reduced release of heat and electricity. To power the lamps, drivers or special power supplies are required. They must be placed so that access to all elements is maintained. In the case of lamps of the same type, the drivers are built into the sockets initially.
Appearance
Any spotlight is equipped with a certain shape, which is hidden inside a niche. Because of this, the overall height of the ceiling is reduced, which must be kept in mind during installation. An unsuccessful solution when the ceiling drops 12 cm or lower.
Power
The rules regarding this parameter have already been discussed above. The power depends on the material from which the suspended ceiling is made, as well as the type of light bulbs used.
Calculation of the number of light sources
The number of lighting fixtures is measured by the following calculation: 1 lamp per 1.5-2 m2. For example, in a room with an area of 30 m2 it is optimal to install 20 light points. However, when calculating, it is necessary to take into account both the power indicators of the lamps and the purpose of the room. It is possible that auxiliary light sources, such as chandeliers, will be used. Attention should also be paid to the dimensions of the lamps; their number should correspond to the size of the room.
Types of spotlights
There are several groups of these devices:
- External.
- Hanging.
- Invoices.
- Built-in.
Built-in lamps do not have a lampshade or housing initially. They only have fastening parts, a cartridge and a decorative insert. The light bulb is installed in the socket. It is permissible to use sockets marked GU10. A decorative frame is mounted on the outside of the drywall. They also carry out installation on other finishing materials.
Sometimes there is an additional part near the body or a special diffuser that covers the decorative area.
For spot lighting of furniture, it is convenient to install overhead models. Such designs do not require additional space in the back.
Pendant types are a middle option between a chandelier and a spotlight.
In design, outdoor models often resemble small spotlights and are installed as a source of directional light.
Materials and accessories
Tools and material that you will need to install mortgages and connect spotlights:
- pliers, or better yet, narrow “platypus”
- roulette
- cable VVGng-Ls 3*1.5mm2
- electrician knife
- stationery knife
- indicator screwdriver
- punched paper tape 12*0.7mm or rigid adjustable stand
- Wago clamps
- thermal ring
- screwdriver
- hammer drill
- dowel-nails
Types of lamps
The types of lamps inside the lamp are an equally important parameter when choosing the appropriate option. Incandescent and halogen lamps are the main types that were used previously.
Halogen
The design of such lamps is in many ways similar to incandescent lamps. The only differences are in the types of glass used. Halogen analogues are based on the use of inert gases or halogen pairs. Usually the main substances are bromine or iodine.
Long service life is considered the main advantage of this type of lamp. On average, this figure is 3.5-4 thousand hours of operation. More power than incandescent light bulbs. This is related to the percentage of electricity converted into light.
But they cannot be touched without special gloves. Otherwise, contaminants are formed, which then lead to premature failure of the lamps. They are highly sensitive to voltage surges.
Incandescent lamps
Current is supplied to them, after which the coil begins to heat up. After this, the device begins to emit light. Among the advantages noted:
- Combination with various lighting fixtures.
- Soft warm measured color.
- Low price level.
But there are also negative sides:
- The service life is one of the shortest - about 1000 hours.
- Over time, the light loses its brightness.
You should not use lamps indoors where you need to leave the light on for a long time. Strong heating makes installation together with suspended ceilings impossible. The best option in the case of corridors, toilets and bathrooms.
Energy saving
This includes two types of products:
- LED.
- Luminescent.
The difference from previous types is that all the energy entering the device is converted into light.
Halogen ones are also sometimes included in this group.
Features of LED lamps
Today they are considered the most economical. Compared to an incandescent lamp, in this case the efficiency is ten times greater. The lamp outperforms other analogues in terms of overall service life. But the cost of this type is the highest.
The design is based on a semiconductor device. It produces light if there is a constant electric current. In this case, variable types of energy are easily converted into constant ones. And heat generation losses remain minimal. Therefore, the products are economical and safe.
There are two types of bulbs available for these light bulbs – matte and transparent. More diffused light is typical for the matte version. For transparent designs it is the brightest.
The main parameters when choosing a suitable product:
- Base types.
- Power parameter.
- Manufacturer.
- Scattering angle.
- Light flow.
Connecting the cable
The VVGng-LS 3*1.5mm2 power cable must be laid in advance along the luminaire location route.
You cannot use any kind of wires and cords, such as SHVVP, as home lighting wiring. The approved brand is VVGnG-Ls, or NYM.
In this case, select the minimum permissible cross-section of group cable lines to be
at least 1.5 mm2 .
No 2*0.75mm2! Even if your load is very small. In the place where the light spot will be located, leave a supply of cable in the form of a loop (it will need to be cut later).
This loop should hang at least 10-15cm from the already stretched fabric or the lower edge of the embed.
How to install built-in light bulbs on a suspended ceiling?
The main thing is to choose the right lamps with suitable characteristics. The lamps can be positioned in the same way as in the case of plasterboard structures. The material of the ceiling also influences the choice of certain product options. For example, incandescent lamps are not suitable for traditional PVC film.
In the absence of central lighting, more powerful designs must be used. It's good if rotation is supported. Choosing the right tone will create a harmonious look of lighting.
It is recommended to install dimmers that allow you to adjust the brightness level.
How to install above the level of a stretch ceiling?
In this case, the glow will come directly from the ceiling. Looks very nice. But the efficiency of the devices is not fully utilized. Some of the energy spreads above the ceiling and does not enter the room.
In any case, dismantling the ceiling panel will be a necessary step. The task is simplified only if the wedge shape is used. The material itself needs to be heated a little before completing installation.
Mounting on one level
The main thing is to provide additional places for fastening; the material may not withstand the weight of the products. This installation option is simple: just use standard connecting elements like hooks and similar options.
How to secure below the level of a stretch ceiling?
In this case, light dispersion is maximum. But certain problems may arise with power and current layer. Any light bulb will have a power limit: it is permissible to use indicators of up to 35 watts or less. The voltage should not exceed 220 V. In this regard, transformers are used.
Selecting a lighting fixture
To choose shades or a chandelier for a hanging canvas, you need to imagine what kind of lighting you want to see in the room.
- Chandeliers and lampshades differ in the following parameters:
- number of light bulbs. When connecting, it is convenient to make two groups of light bulbs with a separate two-key switch. This way you can easily adjust the brightness of the lighting;
- cartridges. When purchasing light bulbs, make sure that their base matches the lamp socket.
For safety reasons, when buying light bulbs, pay special attention to their power.
Installation
The diameter of the holes for spotlights is a parameter that needs to be determined before starting work. Otherwise, it will be impossible to choose the right tool to solve the issue.
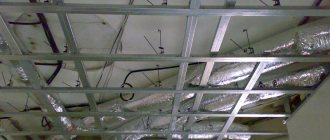
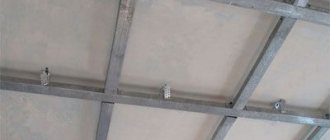
The next stage is drawing up the most accurate layout diagram. In the case of a suspended ceiling, you must remember that the devices are attached to the main surface. The work is carried out using an impact drill or hammer drill and a set of fastening materials. Only after making all the holes will it be possible to assemble the structure completely.
How to make markup?
When choosing lamps, you need to take into account not only the power, but also the distance to the walls. This is due to surface heating. The minimum required value is 20 centimeters. Otherwise, the structure will be damaged.
30 centimeters is the minimum distance between lamps during installation. When developing schemes, this indicator is one of the key ones.
For marking, it is recommended to glue pieces of electrical tape crosswise where the lamps will be mounted. It is acceptable to apply marks with pencils and markers.
Calculation of the number of ceiling lamps
Usually, calculations are based on current standards. They vary for individual premises. The calculation procedure is as follows:
- The area of the room is multiplied with the standard of illumination. The result is the total lighting power.
- After this, the indicator for specific sources and their type are determined. It is necessary to determine what luminous flux comes from the products.
- The total power is divided by the power of the lamps. The result is the number of devices to install. All that remains is to decide on a suitable layout.
Lamps are divided into several groups to make the lighting easier to control. Depending on this, further installation is carried out.
Calculation of the number of spotlights
A so-called standard regarding the level of lighting for one square meter of a room has long been developed. For 1 sq. m you need at least 20 W of incandescent lamp power. This method is also suitable for other types of lamps, although it cannot be called the most accurate.
But you can perform a special calculation based on the area of the room. The formula itself looks like this:
N = (S * W) / P
P – power for one of the spotlights.
W – specific power for luminous flux.
S is the area of the room, in square meters.
N – number of places where lamps are installed.
Materials and accessories
The owner of the premises will need the following equipment to complete the work:
- Wires of the required length.
- Distribution boxes.
- Electric drill.
- Terminal blocks.
- Pliers.
- Knife for installation.
- Screwdriver.
Making a mortgage
In this case, we are talking about special plastic rings with holes of a certain diameter. So-called universal varieties of products are sold. These are monolithic pyramids of several rings with different diameters. The mortgages are trimmed, taking into account that the mounting diameter of the lamps must coincide with the ring of the top of the pyramid.
Special hangers are indispensable assistants during installation. The operating procedure is as follows:
- Installation of baguettes.
- Cords are wedged into baguettes. Dowels or wedges are the best option when doing the job.
- Marking places on the ceiling for the location of future lamps.
- Placement of anchors and dowels in the same place for connection to the hangers.
- Fixation of mortgages at the level of the cord.
Using a grinder, carefully cut off the hanging elements that remain superfluous.
Installation diagram of adjustable racks
One of the first stages when performing installation work. This is a special part of the structure, which includes several elements:
- Two guides.
- A special ring, the diameter of which coincides with the same parameter of the lamp seat.
The racks are secured with dowels or screws to the surface of the ceiling itself. The main thing is to set it exactly according to the level at which the canvas is located. An important guideline for owners should be the position of the seat and the markings previously applied to the walls. The length of the wire is maintained at up to 15 cm, otherwise the installation of the lamp itself cannot proceed correctly.
How to route the cable
When marking, it is recommended to follow the following order:
- Determination of installation locations for electrical equipment.
- Finding places where the wires will run.
Routes for open electrical wiring are marked with a special painted marking cord. From the end points, separately mark the places where the fastenings are located. Markings on walls must be strictly horizontal or vertical.
How to hang terminal blocks and piercing clamps
The main advantage of terminal blocks is that they allow you to connect several wires, even if they are made of different metals. A simple and cheap solution is terminal blocks. It is enough to cut off as many cells from them as you need to connect pairs of wires.
With clamping options, wiring is even easier. The wire is inserted into a special hole until it reaches the end. With the help of a pressure plate, fixation is carried out automatically. The additional force is maintained throughout the entire operating time.
Terminal blocks with levers are suitable for reusable use.
How to install thermal rings
Installing this element with your own hands involves using several methods. Some products are equipped with special fasteners. Then a polymer gasket is placed on the visible part of the structure. For final fastening, glue is needed.
The adhesive installation method involves the following steps:
- Preparing the base for the lamp. A wood panel or a square piece of board are equally suitable. The level of the future canvas and the height of the base must correspond to each other.
- The necessary wiring is supplied to the installation point of the lamp, along the base base.
- The tension fabric is mounted on a pre-arranged frame.
- Through the elastic fabric they look for a platform for the lamp.
- The thermal ring itself is glued to the installation site.
- A neat cutout is made inside the ring, and electrical wires are routed through it.
- Connect the lighting device with insulation of the connection points.
- The lamp is connected to wires. They install a platform on it.
It is recommended to use only ABS plastic.
The final stage
The process of installing lamps is as follows:
- Drill holes for the mounting plate. The main thing is to be close to the wires.
- Holes are made only in solid bases. If there is a void at the installation site, it is recommended to move the structure slightly to the side.
- The mounting plates are fixed using dowels.
- Sometimes lamps require additional mounting points.
- Connect the contacts to the electrical wiring; first turn off the electricity.
- The lamp body is placed on the mounting plate eyes and secured with screws.
- Transparent parts are placed on the fixed body and the functionality of the product is checked.
Popular installation schemes
Layout of lamps on the ceiling
The main advantage of using spotlights is their ability to make the lighting even, very soft and diffused. They are also extremely economical to operate. Such lighting devices can be controlled using switches, which makes it possible to regulate the consumption of electrical energy. In combination with multi-level ceiling structures, spotlights give the interior a unique architectural design.
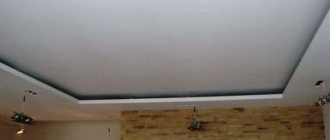
Installation of lamps on a suspended ceiling is possible according to the following schemes:
- Parallel placement in 2 or more rows is an ideal scheme for long and narrow rooms.
- Rectangular placement - visually expands the room space, goes well with the chandelier in the center.
- A checkerboard arrangement is well suited for rooms with an “island”, where it is necessary to illuminate the corners of the room and its center, for example, a kitchen.
- Arc-shaped placement - allows you to emphasize a specific part of the room, for example, a work area or a transition in multi-level ceilings.
- Chaotic placement of light sources in the “Starry Sky” style is well suited for rooms without symmetry, where furniture is arranged in a non-geometric order, for example, a living room.
- The cross-shaped arrangement is an excellent variation for small interiors where it is impossible to install massive chandeliers and pendant lamps.
- Square layouts without central lighting are a practical and optimal option for hallways and bathrooms.
These are just the basic layouts of light points. The available options are not limited by anything except the designer’s imagination.
Subtleties
Remember that LED lamps require some space around (minimum 2 centimeters). Otherwise, cooling will not occur properly and the system will burn out.
How to install a lamp with a driver?
Simple connection and reliable operation are the main advantages of simple luminaire circuits equipped with drivers. Choose an inverter that has enough power to keep the system running smoothly. Otherwise, there are no difficulties; the wires are connected to the base in a standard way.
How to embed a chandelier?
First, they connect the electrical part, then move on to installing the chandelier. Controllers usually display special diagrams that facilitate the installation of elements. Then they move on to installing the mounting strip that comes with the chandelier. The chandelier is hung on decorative bolts.
Installation of LED strips
Here are a few steps, the work is done quickly:
- Determine how long the tape is needed.
- Connect the tape to the controller.
- The controller is connected to the power supply.
- The assembled system is connected to an outlet.
- The selected ceiling structure is being installed.
The main thing is to assemble the electrical circuit correctly, since errors occur frequently at this stage.
Wago terminal blocks and piercing clamps
Cut the loop at the bottom in half, remove the insulation from the wires by 11-12mm and connect them back through the Wago 2273 series terminal block.
In this case, the remaining free terminal will be connected to the power wires from the lamp itself. This connection scheme is called parallel or daisy chain connection.
1 of 2
By the way, you don’t have to cut the cable at all for this purpose, leaving it intact. It is enough to use special piercing clamps instead of Vago.
When using them, remove only the upper protective sheath from the VVGng-Ls cable, the main cores remain untouched. Insert these wires into the top of the piercing clamp and snap it into place.
The built-in knives should automatically pierce the insulation, creating reliable contact. The wires to the lamp are connected to the lower half in the same way.
Having mounted the terminal blocks, connect the entire group of lamps to the supply wire. It is advisable to then check with an indicator screwdriver the presence of voltage at the end contacts, so that later you do not have to disassemble the ceiling and look for where the phase disappeared.
If everything is fine, the main part of the installation of the mortgages is complete. Now it’s time to proceed directly to the installation and connection of the spotlight.
After stretching the canvas, according to previously established marks on the floor surface, mark with a marker and a laser beam of the level the points where it will be necessary to cut the canvas.
If you don’t have a level, then measure the distance from the walls with an ordinary tape measure.
Can a luminaire be added to an existing lighting system?
The answer to the question is yes, but this cannot be done without dismantling the ceiling covering. Depending on the tasks assigned, it is removed partially or completely. With a harpoon attachment, the problem is easier to solve. The procedure assumes the following order:
- Dismantling the canvas using a special screwdriver.
- Applying markings on the surface of the base ceiling.
- Preparation and installation of embedded platforms.
- Re-wiring.
- Installing the canvas in place.
- Creating holes, using thermal rings.
- Installation of additional lamps.
Think in advance about the placement of lighting elements on the ceiling.
LED lamps are a purchase accessible to everyone. Products are presented in large quantities on the Internet, in construction markets and in stores. The principles of working with lamps are the same. Connection takes a minimum of time and effort. But there are some nuances that cannot be avoided.
Marking
When using a level, you can first make all the marks below, and then use a laser to transfer these points directly to the ceiling.
When marking on the floor, it is convenient to work not with a tape measure, but with a pre-made template. For example, a piece of plinth or plastic cable channel, cut to a certain length corresponding to the distance between the light points.
To avoid damaging the floor covering, use paper tape.
After stretching the canvas, thanks to the marks on the floor surface, it will be very easy to transfer all these fastening points to the finished ceiling.
The main thing is to maintain a minimum distance from the edge of the hole in the PVC film and baguette.
It should be at least 2.5-3cm.
