A car garage is a purely utilitarian building, in which harsh Russian men do not tolerate excesses. Every detail of the “auto-dwelling” serves primarily the convenience of the owner, and for DIY construction they choose the simplest construction solutions and affordable materials. Only car owners who are not financially constrained can afford a gable or hip roof; for the rest, we will tell you how to make a gable roof for a garage.
A roof that has not two slopes, but one, is rarely found in residential buildings; it is more typical for outbuildings: garages, bathhouses, sheds, rectangular gazebos. It received this application due to its ease of design and assembly. A single slope with a pediment wall visually resembles a right triangle, the most stable geometric figure. Despite the imaginary artlessness, the pitched roof looks no worse than other varieties, decorating the land in its own way.
Rules for roof installation
The construction of a pitched roof begins with the installation of a rafter system, which will bear the main load during operation. Its strength and reliability will allow the roofing covering to serve for a long period. This important stage of the garage construction work can be done independently if you carefully study the information available in specialized literature and on the Internet. Particular attention should be paid to the connection diagram of individual elements of the truss structure, since its durability depends on this. A do-it-yourself pitched roof for a garage can become the first object in mastering useful skills in performing work related to construction and repair.
The rafter system is the basis of the frame of the future roof; it will have to reflect adverse external influences and resist strong wind loads. One of the main elements of such a structure is considered to be rafter legs, which rest their ends on the constructed “box” of the garage. Coniferous wood is used to make them. Then, before making a pitched garage roof, it is thoroughly dried (as a result, the moisture content of the material should not exceed 20%), after which it is treated with antiseptic agents and fire-fighting impregnation.
The remaining components of the rafter system are auxiliary parts and are necessary for its full functioning:
- lintels - connect rafter beams to provide additional rigidity;
- additional supports - their installation is required when creating a truss structure for volumetric roofs; they protect the long legs of the beams from deflection;
- lathing made of thin wooden bars - needed for high-quality fastening of flooring materials on the roof surface, installed perpendicular to the rafters (
Design features and calculations
The rafter system of a pitched roof consists of a series of laid parallel wooden inclined beams. The rafters themselves become the basis for the sheathing for laying the roofing.
The roof design is based on calculations of such parameters as:
- angle of inclination and its direction;
- shape and design of rafters;
- cross-section and length of load-bearing beams;
- complexity of truss design;
- thermal insulation.
Angle of inclination and its direction
The greater the angle, the steeper the roof slope. Its minimum value is determined in accordance with SNiP 2.01.07-85*. Using its map and table, the maximum snow load at the site of construction of the box and the main direction of the winds are determined.
Based on these data, the optimal roof slope angle is found in the corresponding table. The direction of inclination of the roof is chosen in the direction of the prevailing winds so that the forceful flow of air masses presses the roof downwards.
In addition, the slope of the roof should facilitate the rapid removal of melting snow, and also correspond to a certain type of roofing:
- from 10 to 200 – profiled flooring;
- more than 200 – slate, ondulin, natural tiles;
- from 250 – metal tiles.
Shape and design of rafters
Rafters, rafter legs, support beams, beams and struts are made from three types of wood:
- Solid timber.
- Logs.
- Glued laminated timber.
Solid timber
Rafters and sub-rafter elements are made of timber. This is the most popular material for installing roofing systems.
A beam with a cross-section of 50 x 150 mm or more has a high load-bearing capacity, withstanding maximum snow and wind loads and the weight of coatings made from the heaviest materials.
Logs
In rare cases, the supporting part of the garage roof is built from logs. To do this, use tree trunks ø 15–20 cm , cleared of bark and treated with antiseptics.
Glued laminated timber
It is obtained by gluing individual boards into a single monolith in a factory setting.
The material has increased load-bearing capacity, but is “afraid” of increased humidity levels. Such rafters will cost more than beams made of solid timber and logs.
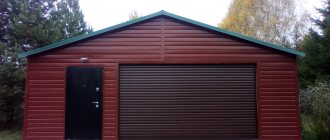
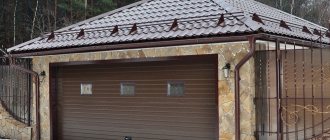
If the high part of the roof is located above the garage door, then the rafters are extended with overhangs with roofing in order to protect the place of entry and exit of vehicles from the box from precipitation.
Section and length of load-bearing beams
The standard size of a garage box is 3 x 6 m . The length of the rafters, if laid in the long direction, will be approximately 6.2 - 6.5 m, depending on the length of the overhangs. Often the rafters are mounted parallel to the plane of the box gate. Then the beams are made 3.2 - 3.4 m long.
With a length of more than 6 meters, the supporting beam with the remaining elements forms a frame support structure - a truss. As for the cross-section of load-bearing beams, for a span length of up to 3.5 meters (including overhangs), it is sufficient to use solid or glued beams 50 x 150 mm, or logs ø 150 mm. For a length of 6 meters or more, I use timber with a section of 50 x 200 mm or logs ø 200 mm.
Complexity of truss design
A truss differs from a simple rafter system in that one or two additional struts (rafter legs) are installed inside the frame. Their function is to relieve the span of rafters as much as possible. Such rafter systems are called hanging.
Various truss design solutions are presented in the lower figure. The lower fragment of the figure shows a diagram of the roofing of a garage span from 12 to 16 meters long. Such garages are built for enterprises that maintain their own fleet of vehicles.
Thermal insulation
Insulating the roof makes sense if the box will be heated . To do this, install boilers of various designs, electric heaters, or extend pipes to radiators from the house boiler. In any case, in order to retain heat inside the garage, you need to insulate not only the floor, walls, but also the ceiling.
The best option for thermal insulation of a pitched roof with a rafter system is to lay roll insulation between the floor beams on a backing of boards or OSB sheets.
Since roll insulation material comes in widths of 1 m and 1.2 m, the pitch between the beams is maintained at this size along the axes. When laid, the insulation tightly occupies its space, leaving no gaps. Thermal insulation mats 50 mm thick are laid overlapping in three layers.
In the second option, when the shed roof of the garage consists of reinforced concrete slabs laid at an angle on walls of different heights, the roof insulation is carried out as follows:
- Along the perimeter of the roof, sides with a height of 150 - 200 mm are installed. This may be a continuation of the masonry walls or special panels made of sheet material;
- the dry surface of the slabs is cleaned of dirt and debris;
- covered with film vapor barrier;
- everything is covered with expanded clay 100 - 150 mm thick;
- the backfill is compacted using improvised means;
- a screed of cement mortar of a grade of at least M 150 and a thickness of 50 mm is made on top;
- The screed is covered with a soft roof on bitumen mastic.
Useful tips
In most cases, property owners are concerned with the problem of creating a pitched roof for a garage at a minimal cost. A reasonable approach to the work allows you to save on construction.
Features of creating pitched roofs are as follows:
- since the strength of the structure directly depends on the distance between the load-bearing walls, which is provided for by projects of garages with a pitched roof, then with a gap of less than 4.5 meters, the installation of additional supports will not be required. In this case, beams are laid between the two racks. If the distance is greater, additional supports are indispensable;
- When building garage walls from bricks, one is made higher than the other. When calculating the angle of inclination of a pitched roof, take into account the fact that it cannot be less than 25 degrees. It is calculated based on the distance between load-bearing opposite walls and the difference in their height;
- when choosing a tilt angle of 25 degrees, each meter of distance between opposite load-bearing support elements adds 300 millimeters to the height of the second wall. For example, with a distance of 4 meters, the increase in one of the walls will be 300x4 = 1200 (millimeters). Thus, one wall should exceed the other by 1.2 meters.
How and how to insulate a garage roof
Every motorist dreams of a warm garage, and making the roof insulated is quite simple.
In modern construction, the garage roof is insulated in combination, that is, traditional insulation is combined with a heat insulator that reflects light and does not allow infrared radiation to pass through. However, in some cases such costs may be unreasonably high, for example, if the building is detached. Then use classic materials such as:
- Mineral wool. It has excellent technical characteristics. It is used only with hydro- and vapor barrier material, which protects mineral wool from water. In addition, mineral wool is quite affordable.
Mineral wool is inserted into the cells between the rafters and secured with wire or fishing line before the final ceiling covering is laid - Glass wool. This material is cheaper than other insulation materials, but has a low degree of fire resistance. If you plan to make a pitched roof, then it is better to buy a special type of glass wool, which has a high density structure. This material is produced in rolls with a width equal to the normal distance between the rafter legs.
Glass wool is one of the most inexpensive and accessible materials for roof insulation - Styrofoam. This is a waterproof material, which in its thermal insulation characteristics is similar to mineral wool. Polystyrene foam is a flammable insulation material, but the PBS-S brand with the addition of fire retardants has the property of self-extinguishing. Due to these features of the material, it is used as insulation for garage roofs. In addition, it does not rot, mold and mildew do not form on it.
Laying foam plastic in the sheathing of a garage roof does not require special skills - Penoizol. It is a liquid foam, but with better performance. It is resistant to fire and water, hardens when placed in a confined space, and forms an ideal seamless coating. With all this, penoizol is cheaper than any sheet foam, and its service life is about 40 years without loss of characteristics.
To insulate the roof with foam insulation, it is necessary to use special equipment for spraying
You can also use traditional options for insulating a garage roof, for example, using sawdust, but they cannot be compared with modern materials.
The garage space is an object with a high probability of fire, so it is necessary to purchase insulation with improved fire resistance characteristics.
Insulating the garage roof from the inside
Required tools:
- special buttons or furniture stapler with staples;
- vapor barrier film;
- carpentry tools;
- self-adhesive tape;
- waterproofing;
- insulation.
Thermal insulation of the roof from the inside is carried out as follows:
- We carry out waterproofing. We seal the joints with special tape.
A special film is used to waterproof the garage roof from the inside. - We install a heat barrier. When using sheet foam, you must first install the sheathing, and only then secure the material with self-tapping screws, while simultaneously gluing all joints with polyurethane foam. The mineral wool is placed in the space between the rafters and is held there due to a slight tension caused by the slightly larger sheet sizes than the distance between the rafters.
Polystyrene foam is placed in the cells between the rafters and secured with special dowels or polyurethane foam - Vapor barrier. We cover the insulation layer with sheets of vapor barrier film, and glue the joints with self-adhesive tape.
Vapor barrier material is attached to the rafters on top of the insulation
Such a cake is laid not only on wooden beam structures, but also on reinforced concrete slabs. Before installation, the beams are protected with sheet material, after which waterproofing is attached to it, then insulation and vapor barrier.
Do not allow the waterproofing film to come into contact with the insulation; there must be a certain distance between these materials for ventilation. Direct contact is only allowed if a superdiffusion membrane has been used.
Video: how to insulate the inside of a garage roof
We insulate the garage roof from the outside
From the outside, the roof is insulated during the construction stage, since it is not very convenient to open a completed building in order to correct shortcomings. Please note the presence of a vapor barrier, which must be installed on the side of the room. This way you can prevent not only re-condensation of vapors, but also avoid unpleasant leaks. How to insulate a garage roof from the outside:
- The vapor barrier is the first layer. This is the main protection against condensation penetrating the insulation.
A properly installed vapor barrier will protect the insulation from condensation - Thermal insulation layer. During its installation, it is necessary to ensure that there are a minimum number of cracks. If the fit of the sheets is not tight enough, use polyurethane foam.
Installing insulation from the outside is in many ways similar to installing it from the inside - the material is also laid between the rafters - The hydrobarrier is the last layer. It is advisable to seal the joints with adhesive tape.
A well-laid water barrier will protect the garage roof from water penetration - At the last stage, we install the material for the garage roof.
Video: how to insulate a garage roof from the outside
Mauerlat for a pitched garage roof
The rules for creating pitched roofs presuppose the presence of a base for installing a rafter system; for this, beams, metal or wooden (mauerlat), are attached along the perimeter of already erected walls. This element is necessary to evenly distribute the load on the roof structure; it is transmitted along the entire wall of the building from the legs of the rafters. It is done on a prepared reinforced belt. In some cases, when the building is small in size and the roof is not too heavy, the Mauerlat can be attached only to two walls, without reinforcement. The Mauerlat also serves to secure the roof and garage.
Tools and materials
To install the garage roof truss system, you will need tools and materials.
Tools:
- circular and miter saw;
- jigsaw;
- wood saw;
- hammer, axe;
- electric drill and screwdriver;
- tape measure, laser level;
- marker.
Materials:
- solid or glued timber;
- boards;
- plywood or OSB sheets;
- roll waterproofing;
- roofing felt;
- liquid antiseptic;
- hardware (bolts, nuts, screws, self-tapping screws, nails);
- metal mounting angles.
Features of creating a pitched roof
- Construction begins with the installation of the Mauerlat. To do this, take a wooden beam 200x100 millimeters. Every 500 millimeters, holes are drilled on top of it for attaching anchors with a diameter of 24 millimeters and a bolt length of 300 millimeters. These holes are made taking into account the fact that the anchor bolt will be partially attached to the beam and at the same time located in the wall. Beams must be secured at all corners. To ensure that the structure of the pitched garage roof is held firmly, special construction adhesive is additionally poured into the holes for the anchor.
Advantages and disadvantages
A pitched roof has its pros and cons.
The positive aspects of its creation include:
- Ease of implementation.
- The device can be produced independently; this does not require special knowledge.
- The consumption of materials is minimal, you can save a lot on this.
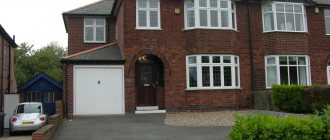
- It is most often used for non-residential buildings and structures, but can also be created on a house.
- Great for areas where there are strong winds. The wind resistance area is small.
The negative points are:
- There is no attic, which reduces the usable area of the house.
- It does not look as beautiful and aesthetically pleasing as other options, for example, gable.
- Water drainage occurs only on one side. It is necessary to create a reliable water drainage system.
Choice of lathing
The sheathing also has the same numerous manufacturing options. For soft roofs, the sheathing should be solid, but it can be made either from sheets of plywood or OSB, or from tightly knit edged boards. For metal tiles and profiled sheets, there is no need to make a continuous expensive sheathing, and the distance between the slats depends on their size and the thickness of the metal sheets. Of course, snow loads should always be taken into account. As you can see, even this far from complete list of factors influencing the truss system of a pitched roof allows for a wide selection of optimal truss systems for each specific case. And we have not yet considered options with insulated roofs; they also influence the design features.
How to make eaves overhangs and install sheathing for a single-pitch rafter system
Step-by-step instructions for building a roof
Initial data: garage 6x7 m, asbestos-cement slate is used for covering, a box made of foam blocks, rafters are fixed to the walls of the building. For a pitched roof you will need a 150x50 mm board 6.5 m long, roofing felt, unedged boards for sheathing, and slate nails. If you plan to do drainage, then you should buy all the elements of the system.
Step 1. Check the dimensions and geometry of the garage. Unfortunately, builders often allow themselves significant inaccuracies in length and width; not all angles are right. If deviations in geometry are found, they will have to be taken into account during the installation of the roof. It is necessary to achieve right angles of the rafter system so as not to buy extra sheets of slate and cut them.
First you need to check the construction site
Step 2. Using a construction cord, mark off the position lines for the bases of the rafter legs on the wall. It should be sloped, the values depend on the difference in height of the front and rear walls of the garage.
Important. Carefully check the position of the lines; they must be located in the same plane and be strictly horizontal. If this condition is neglected, the roof will turn out to be sloping in one direction. This will not affect performance, but will ruin the appearance of the garage.
Tapping the position of the rafter legs
It is better to do this with a water level. Place one end of the plastic tube against the mark on one wall, and use the other end of the tube to find the position of the mark on the second wall. This should be done on the front and rear walls of the garage.
Construction water level
If there is no water level, then you can check the height of the lines along the plane of the foundation with a tape measure. But you should always keep in mind that the foundation has a variation in height. Even experienced builders allow a deviation in angles of at least ±2 cm. And for non-professionals, the deviation from the horizontality of the foundation strip can reach even greater values; the slope of the roof to the side will become noticeable to the eye.
Step 3. On the line, mark the locations of the rafters, constantly check the markings are correct, make sure that all the rafters are parallel. Using a large grinder with a diamond blade, cut holes in the foam blocks for the rafters, and use a chisel to level the landing area.
Using a grinder, holes are cut for the rafters
Step 4. Reinstall the two outer rafters and check the horizontal position with a level. If there is a slope, then use pads; they should have the same dimensions as the seats for the rafters. Foam blocks are a very fragile masonry material; they cannot withstand point forces. Some builders place rafters on walls without waterproofing, but professionals do not advise doing this; it is advisable to protect them from moisture with roofing felt.
The process of laying rafters
Step 5. Stretch a rope between the two outer boards and lay all the remaining ones along it. The distance between the rafters is 75 cm, but it can be adjusted in any direction; this does not have a big impact on the stability of the roof.
Step 6. Nail batten boards onto the rafters. In our case, a layer of roofing material will be laid under the slate for additional protection against leaks. For waterproofing, a continuous sheathing is required. For these purposes, unedged lumber with a thickness of 20 mm is used; it is much cheaper than edged lumber. The boards can be of second or third grade; they do not bear any mechanical loads.
Sheathing boards are stuffed
Important. On unedged boards, it is necessary to remove the bark. If this is not done, then in a year or two bark beetles will appear, and in another year or two they will damage all wooden structures so much that they will have to be completely replaced. It is better to remove the bark on the ground; you need to work with a sharp ax. You can do this operation on the roof, but professionals don’t do that. There is a general rule: all preparatory work should be done on the ground; this is not only faster, but also safer. At heights, you must strictly adhere to safety regulations. A cheap garage roof can result in expensive hospital treatment.
You shouldn’t do this - it’s better to remove the bark on the ground
The maximum size of the gaps between the boards should not exceed five centimeters; if they are wider, the soft roofing material will sag and water will begin to flow inside the garage.
Step 7. Stretch ropes along the edges of the sheathing and straightly cut off the protruding ends of the sheathing boards along them. You can cut with an electric hand-held circular saw or chain saw.
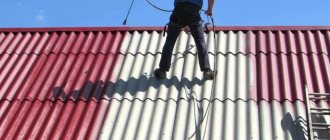
Step 8. The roof must be laid from the lower end of the roof. Roll out the first row of roofing felt and attach it to the boards with a construction stapler.
The first roll of roofing felt has been rolled out
Step 9. Stretch the rope along the back wall of the roof and begin nailing the slate sheets along it. They are fixed into the upper wave with special nails with wide heads. If you do not have any experience in driving slate nails, it is recommended to practice first; unskillful actions can split the slate. If a nail gets into a gap between the boards, there is no need to make a new hole. Raise it a little and try to hammer it in at an angle, find the board with the tip and only then hit the head with a hammer.
The first sheet of slate is nailed
Practical advice. Lay the first row very carefully; it is better to waste a little time on this operation than to try for a long time to correct the mistake. It is impossible to level asbestos-cement sheets due to their slight displacement; they will constantly take their place. The first row will have to be removed and re-laid.
Special slate nails are used for the job.
Laying the first row of slate
Step 10. Roll out the second strip of roofing felt and cover it again with slate sheets. Using this algorithm, cover the garage roof completely. Always make sure that the next strip of roofing material overlaps the previous one by at least ten centimeters.
The second strip of roofing felt is being rolled out
The entire garage roof is covered in the same way.
Prices for roofing material
This completes the installation of the roof. If you wish, you can install a drainage system. Remember that the angle of inclination of the drain must be at least one centimeter per linear meter.
Video - Shed roof 21✕12 m
Choosing a roof angle
The roof slope angle is determined by a combination of indicators - wind and snow loads and the type of roofing material. First, the angle is determined according to climatic conditions (depending on the amount of precipitation and wind loads). Then they look at the minimum recommended slope for the selected type of roofing material (in the table below).
| Name of roofing material | Minimum tilt angle (in degrees) |
| Asbestos-cement slate and ondulin | 6° |
| Cement-sand and ceramic tiles | 10° |
| Flexible bitumen shingles | 12° |
| Metal tiles | 6° |
| Asbestos-cement or slate slabs | 27° |
| Galvanized steel, copper, zinc-titanium sheets | 17° |
| Corrugated sheet | 6° |
If the desired angle is greater, everything is fine; if it is less (which happens very rarely), increase it to the recommended one. It is not advisable to make a roof with an angle less than the minimum angle recommended by the roofing manufacturer - it will leak at the joints. To make it easier to navigate, let’s say that for central Russia the recommended slope of a pitched roof is 20°. But it is advisable to calculate the figure for each region, and even for different locations of buildings on the site.
By the way, keep in mind that different manufacturers of the same type of roofing material may require different minimum slopes. For example, laying metal tiles of one brand can be done on roofs with a minimum slope of 14°, another - 16°. And this despite the fact that GOST defines a minimum slope of 6°.
It is also worth remembering that with a slope of up to 12°, in order to ensure the tightness of any roofing material, it is necessary to coat all joints of the material with a liquid waterproofing compound (usually bitumen mastic, less often - roofing sealant).
Sequence of roof installation
If we outline the installation process step by step, it will consist of the following stages:
- Installation of the Mauerlat. Its purpose is to evenly distribute the weight of the roof onto the walls of the garage. It also serves as a base for attaching the rafters. The Mauerlat can be two wooden beams with a cross-section of 100×150 mm or two metal beams, which are installed on the inner border of the opposite walls on which the rafters will rest. The installation height of the beams is determined by the designed roof slope, so they are laid at different heights and secured to the garage walls using brackets and anchor bolts. You can also use steel corners for this, which are attached with one side to the mauerlat and the other to the rafter leg. Between the Mauerlat timber, laid on the wide side, and the wall of the garage (if it is not wooden), one or two layers of roofing felt are laid, protecting the wood from rotting. Between the outer rafters and the side walls of the garage, parallel to them, a gap of 50 mm is left.
- Next, the rafters are installed. They are laid at a distance of 70-80 cm from each other and secured to the mauerlat with staples or nails 9 (on both sides of the rafter leg). The angle between the rafter and the mauerlat should be 90 degrees. During installation, the planned length of the roof overhangs must be observed.
Related article: Mansard roof rafters structure structure
- A lath is placed across the rafters, which is necessary for laying the roofing material. If you plan to cover the garage with rolled materials, then the sheathing should be continuous. If these are piece materials. then she can fit with gaps. As lathing, you can use unedged or edged boards or small-section timber. When using piece material for roofing, care must be taken to install a waterproofing material that will protect the roofing structures from possible roof leaks.
- The last stage is the installation of the roof covering. The rules for its installation depend on the type of material chosen. In any case, you need to remember: the lower the roof slope, the greater the overlap of adjacent sheets of rolled covering or sheet material should be.
After installing the roof, a cornice wind board with a cross-section of approximately 25×100 mm is attached to the ends of the rafters. The eaves overhangs need to be hemmed.
If the roof has a slight slope, and a lot of snow has fallen and it is not blown away by the wind, the roof must be cleaned regularly.
Otherwise, in the spring, when the snow melts, ice that is difficult to remove forms on the roof, which can cause a roof leak.
Thus, it is quite possible to install a pitched garage roof yourself. The main thing is the correct calculation of the cross-section of the rafters, taking into account all possible loads on them.
Pros and cons of a lean-to building
In order to understand whether it is worth making a choice in favor of a pitched roof, it is worth assessing what advantages will be obtained and minimizing the impact of the disadvantages. The advantages include the following criteria:
- Economical in terms of financial costs not only for building materials, but also for strengthening walls to increase their resistance to compressive and tensile stresses.
- The simplicity of the design will allow even non-specialists to build roofs of this type and at the same time obtain optimal service life, as well as the absence of any maintenance requirements.
- Possibility of arranging an attic with panoramic views.
- Reduced roof windage in the presence of predominantly directional winds and the choice of the correct location of the slope.
- High maintainability due to the simplicity of the design of the rafter system and sheathing.
- It is permissible to use any roofing materials if the correct angles of inclination are selected.
Even an inexperienced craftsman can build a lean-to structure
A do-it-yourself pitched roof, built step by step, also has a number of disadvantages: it cannot withstand significant loads during heavy snowfalls, does not have a very aesthetic appearance, and also does not hold the roofing material during strong gusts of wind from the side opposite to the angle of inclination of the slope. In fact, for competent designers these disadvantages are not so significant and, if necessary, they can easily be turned into advantages. So, for example, to prevent the roof from falling off, it is enough to plant trees on the site or build a higher building nearby. To improve the aesthetics of the perception of a pitched roof, it is enough to use a trick and implement a project with multi-level slopes of the slopes on two opposite sides of the house.
Description of the rafter system
We must remember that there are no two completely identical rafter systems; each has its own characteristics. With the same length and width of the garage, one 50x150 mm or two 25x150 mm board can be used for rafters; the lumber can be solid 6 m long, but it is possible to extend two shorter boards. The rafters may simply sag or have additional stops or braces. The final decision is made by an experienced craftsman based on personal practical experience. Strong, whole rafters do not need to be reinforced with spacers, but thin or extended rafters cannot do without such elements. Supports can be placed in the center of the roof or at its corners.
Options for installing a pitched roof for an attached garage
Alternative technology for constructing a truss system for a pitched roof
Calculation
Calculation of a pitched roof
For design, you can find a lot of programs on the Internet that will calculate and calculate everything themselves, based on the basic parameters. All that remains is to measure the estimated weight of a square meter of the roof and find out the weight of the snow cover using a reference book.
Small garage roofs up to four meters will perfectly withstand beams laid on the walls. But large roofs up to six meters require the installation of struts, otherwise the rafters may bend or even break. A roof over six meters requires the installation of support columns or it must rest on load-bearing walls or partitions.
Materials for garage construction
In order to create a project for an object, we suggest looking at photos of already built garages for cars, which will help you not only make up your mind, but also make sure of the professional approach of the company’s craftsmen. When building a garage, different materials can be used, in particular when choosing a roofing material, you can choose the following options:
The roof of the garage will be done correctly only if the craftsmen correctly select the angle of inclination of the roof slope, while the rafter system allows you to build a reliable roof that will serve for a long time. In addition, you will need to decide on the materials for constructing the walls, and in these matters you can listen to the advice of the company’s specialists who have extensive experience in this area of activity.
There are factors that influence the angle of the roof slope:
- Climatic features of the region where the building is located. In areas where a lot of snow falls in winter, there is no point in installing a flat roof with an inclination angle of up to 5-7 degrees. Snow, lingering on such a slope, can cause destruction of the roof. But for areas with strong winds and little snow, such roofs are well suited. At the same time, a roof slope of 20-25 degrees is too large for windy areas - there is a risk of the roof falling off. You should also not build steep slopes over small garages and sheds.
- The angle of the rafters also affects the choice of roofing material. If the roof slope is no more than 8 degrees, then the likelihood of leaks increases, so bitumen or bitumen-polymer roll roofing materials laid in 3-4 layers are used. With a roof slope of 8-10 degrees, roll materials can be laid in 2 layers. The angle of inclination of the rafters of 15-20 degrees allows you to install metal seam roofing, wavy and flat slate. With a slope of more than 25 degrees, you can use materials such as profiled flooring or metal tiles.
- Take into account the requirements of landscape design - within the same territorial area, roofs made of the same material or at least the same color look best. Therefore, it is possible that you will have to choose not a material that corresponds to the roof inclination angle designed for the garage, but rather a garage roof inclination angle that corresponds to the roofing material of the house and other buildings on the site.
- Please also note that for a steep roof you will have to build walls of different heights. And if the slope is flat, then you can arrange a cantilever-girder frame on one side.
The advantages of these roofs are difficult to dispute:
- Their construction does not require large financial investments, since the amount of necessary materials is minimal.
- The design of the roof is simple - it is formed by rafter legs resting on walls of different heights.
- The service life of a flat roof is calculated in decades. If the roof is erected correctly, then it is freely washed by air currents, which ensure its good ventilation. This prevents the formation of condensation under the roof and allows you to keep wooden load-bearing structures in working condition for a long time.
Typically, a roof without an attic is built over garages. And the very configuration of the roof makes it inconvenient to use for storing any materials in the attic.