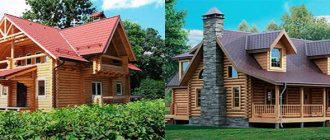
In terms of complexity, a cuckoo roof is not inferior to a broken or hipped structure, and often even experienced carpenters are reluctant to get down to business. A good knowledge of the layout and installation features of roof rafters is required. But, despite the increased complexity, designs with a cuckoo are extremely popular. A frame house with a cuckoo looks much more interesting and expressive than a primitive structure with a simple gable roof.
What is a cuckoo on the roof
This roof element received such an unusual name for its striking resemblance to the legendary mechanical wall cuckoo clock. The upper part of the clock case is a gable element in the form of a roof with a cuckoo window on the pediment.
In the construction industry, a cuckoo is a small rectangular room with a window or glazed door, embedded in the structure of the slope above the overhang:
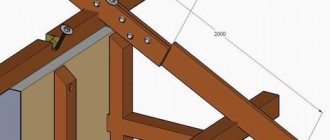
- The cuckoo frame is connected to the rafter base of the roof;
- The roof of the cuckoo house is installed according to a gable scheme. In this case, the roofing and insulation of the built-in room are connected to the roofing pie of the main roof.
For your information!
Initially, cuckoos were placed on the roofs of buildings to ventilate the roof space and illuminate attics. The idea of arranging a cuckoo house to illuminate the attic appeared several centuries earlier than the invention of the light bulb. There were clearly not enough windows located on the gables of the building, especially in buildings with large overhangs and a high ridge. It was extremely risky to appear with a kerosene lamp or candle in the attic, insulated with straw and seed husks, while in the roof space of a house with two cuckoos it was always dry and light enough to do without fire.
Already after, at the beginning of the 15th-16th centuries, the attic on a hip roof with a cuckoo of the Danish and Dutch design began to be actively used as living quarters, cuckoo houses acquired full-fledged windows and even balconies with flower pots.
Device principle
The roof on which the cuckoo is placed has in its design a small protrusion located in the attic floor . As a rule, a window is placed in such an addition to increase the amount of natural light in the rooms. It received this name because in appearance this element resembles a cuckoo clock.
The installation principle includes several stages, but before starting work it is necessary to take measurements . Work on the construction of such a “cuckoo” should be carried out carefully, monitoring the design parameters - angle of inclination, depth of cut, etc.
Stages of work:
Pros and cons of a cuckoo on the roof
Of course, today people resort to installing cuckoos on the roof for a variety of reasons. Modern construction technologies make it possible to solve the problems of lighting, ventilation and drainage of the under-roof space in a much more effective and efficient way than just a cuckoo window on the roof.
A cuckoo house cannot be placed on the same level as dormers and ventilation hatches; it is more than just a birdhouse, an outlet, or a way to enhance the design of a building.
Usually a cuckoo box is built on a roof frame, based on completely rational considerations:
- Residential attics and similar spaces located in the under-roof space always suffer due to a certain degree of isolation from the surrounding space. According to sanitary standards, the size of the window opening in the room must be at least a quarter of the area of the room. The strong and reliable design of the cuckoo makes it possible to make a full-size window even with a door and a balcony platform, which allows you to turn the attic with a cuckoo into a full-fledged home;
- Arranging a cuckoo birdhouse is a simple and at the same time effective way to improve the roof, make the entire building more stylish and functional; often, with the help of a window, it is possible to build a separate entrance to the second floor and isolate the room, even if the design of the walls and ceilings inside the building did not provide for such a possibility.
Of course, there are disadvantages to such a solution. For example, there is nothing good about building a rather heavy outer window frame on a rafter frame. The rafters always mutually balance the pressure of the roof slopes, so a regular roof always seems to automatically adjust when the load on the roof is uneven.
Another thing is the rafter system of a gable roof with a cuckoo. In this design, it is necessary to use additional struts and supports to avoid deflection of the rafters and separation of the roof frame from the mauerlat on the opposite side of the building.
There are even more surprises at Hatched Roofs with the Cuckoo. The built-in cuckoo box increases the number of joints and seams at which waterproofing leaks could potentially form, so you have to be especially careful to seal the roof in the area where the covering adjoins the walls of the superstructure.
Main functions
Even at the design stage, you should decide on the tasks that will be assigned to the extension. Its production is associated with construction difficulties and additional costs.
With proper planning, a cuckoo bird can perform the following functions:
- Expanding the space under the roof up to the creation of an additional floor. It becomes possible to arrange a living room, a workshop, a warehouse, or a gym.
- Organization of natural lighting, which is more comfortable for perception. Reduced energy costs, since the lamps will only turn on at night.
- Arrangement of a small pediment with standard vertical glazing. This option is much cheaper than inclined and horizontal products.
- High-quality ventilation of the room. The window will provide an influx of fresh air, create draft and effectively remove moisture.
- Improving the appearance of the building. Every property owner wants it to look unusual and stand out from the surrounding buildings.
The cuckoo attic is worth the investment and effort due to its practicality and functionality.
Types of cuckoos on the roof
There are quite a large number of design projects for a cuckoo house, but it does not always make sense to copy the design and style of the extension. The shape of the cuckoo frame, its dimensions and method of attachment are always chosen individually by the designer, based on the parameters of the building and roof.
Of all the amateur cuckoo designs, the most popular are:
- Schemes with a simple window opening;
- Structures with a full-height opening, a balcony and an extension of the platform on additional supports;
- Cuckoo boxes for pitched roofs and attic spaces.
All of the listed schemes differ only in the size of the window opening and the shape of the roof. Structurally, cuckoos are just a timber frame sewn onto the roof rafters. The scheme has remained virtually unchanged since the advent of the classic cuckoo roof truss system.
Types of gable roofs
| Illustrations | Types and description |
| Symmetrical roof . This design is characterized by rafters of the same size on one side and the other. A simple system with symmetrical slopes is relevant for both stone and wooden houses. | |
| Broken roof (gable roof) . This is a type of symmetrical system, but here the rafters have a characteristic bend along the line of the crossbar. Such designs are an excellent option if the roof has an attic that turns into a pediment. |
Cuckoo roof design
In order to build an additional exit on the roof, no special calculations or search for suitable schemes are required; most often, the shape and size of the cuckoo extension is determined by the height of the ridge and the width of the ceiling. It is enough just to correctly connect the cuckoo box with the roof rafter frame.
Cuckoo - hatch
It is worth noting a relatively new type of superstructure, which appeared relatively recently, with the widespread use of double-glazed windows and aluminum fittings. Most often it is used in an attic roof with cuckoos in a situation where, due to the specifics of the device and the size of the frame, it is not possible to build a full-fledged box. Instead of a small window hatch, a double-leaf structure is mounted on the rafters.
For your information! This roof scheme for a cuckoo house, photo, unlike classic “houses,” ensures ideal convergence of snow and rainwater from the roofing surface, without creating a load on the frame and roof in strong winds.
The upper part folds up and is used as a canopy, the lower half is used as a platform. In addition to the sashes, the cuckoo window scheme uses a folding fence that folds easily and does not require additional maintenance. Despite the fact that the system is limited by the size of the double-glazed window, its capabilities are sufficient to ensure that the attic floor of the cuckoo house receives enough light and air.
Another important advantage is the simplicity of the design, in this way it is possible to convert and use the attic space of hipped roofs with a cuckoo, even if the slopes are very flat and the overhangs protrude far beyond the Mauerlat line.
Window-type cuckoos
The roof superstructure can be configured in a slightly different way. For example, if the size of the attic or attic room is small, and there is no particular need to install a balcony, then you can get by with a window and a hatch.
This scheme has its advantages:
- The built-in cuckoo window does not weaken or overload the rafter structure, since the base of the superstructure rests not on the rafters, but on the wall or mauerlat of the building. In this case, the roof of an attic cuckoo house is not inferior in strength and stability to conventional gable structures;
- Paired with a transparent ventilation hatch, the cuckoo provides effective ventilation, while most of the fresh air flowing into the living attic moves along the surface of the walls, which means there is no draft in the room.
The problem of strength can also be solved by transferring the cuckoo box to the wall of the building. The window is formed as a continuation of the wall, so such solutions are used only for houses made of bricks and blocks.
True, in this case, the roof of the building loses part of the overhang and eaves, so there is a risk of rainwater flowing under the cuckoo roof.
For your information! Cuckoo window is perfect for completing sloping roofs, since it is possible to support the frame of the superstructure on floor beams or on a wall.
A mansard roof with cuckoos looks even more elegant than in schemes using hatches or balconies.
The only inconvenience is the tunnel shape of the structure, even though in broken types of roofing the lower part of the slope is always inclined at a very large angle to the horizontal. The advantage of the design is the absence of parts protruding above the roof, due to which huge amounts of snow often accumulate on the eaves.
Full size cuckoos with stem
A scheme using a building wall to support the cuckoo frame is often used when arranging a full-size version of the cuckoo with an external platform, a door and a small balcony.
This is the most complex and time-consuming version of the cuckoo, and its design has to be included in the gable roof project at the design stage.
In addition to the increased size of the opening, which seriously weakens the roof slope, the weight of the rafter system changes. Therefore, if the owners choose a cuckoo design for a residential attic with a gable roof, it is best to place it above a bay window or an extension to the facade of the building. This will allow you to move the cuckoo with the balcony as far as possible from the roof rafters, and thereby make the rafter frame more stable.
Classic roof extension option
The most common and frequently used type of cuckoo is a box-shaped superstructure secured between a pair of layered rafters.
The roof of a cuckoo house can be gable, usually triangular, or the classic “fallen book” shape. Sometimes the cuckoo body is built in the form of a turret with a hipped roof, but this is rather an exception to the rule, since such structures require additional rigid supports on the ceiling beams and special measures to ensure the tightness of the joints in the roof abutment area.
Several cuckoos can be installed on one roof, or, alternatively, one superstructure in a double design.
This type of cuckoo house is considered the easiest to make with your own hands, but under one condition - before construction begins, you will need to draw up a detailed diagram or drawing of the cuckoo roof.
Dormer window
Such window structures are installed flush with the roof slope. The windows are slanted, so more sunlight enters the attic than when using a “cuckoo” (by 40%). The next advantage of roof windows is uniform lighting of the room.
Window structures are usually placed between the rafters, so when choosing them it is important to take into account the dimensions. The height of the windows depends on the area of the attic and the size of the slopes. The purpose of the room plays an important role. If you plan to arrange a living room or office here, it is preferable to choose large windows. In the bedroom they can be smaller.
It is desirable that the lower edge of the window be at a distance of 0.8-1.0 meters from the floor, and the upper edge - 1.8-2.0 meters. Its form is:
- Rectangular. The structure includes a frame and a double-glazed window. The sash can be either blind or opening.
- Balcony. These are two double-glazed windows of different sizes, united by a common profile. They are installed in the roof slope and look very unusual and interesting.
- Cornice. Used if the attic has a high wall.
Cuckoo roof truss system
The most difficult to manufacture is the balcony type of cuckoo. If you look at the roof diagram, it becomes clear why craftsmen prefer to make most of the frame parts in advance in carpentry.
In this case, the assembly of the rafter frame of the house begins with the installation of the outer beams on the gables, after which they install the rafters on which the cuckoo superstructure will rest, and only then install the row beams.
Other types of cuckoos are installed after the roof truss frame has been assembled. For example, the diagram of a window supported on a Mauerlat is built according to the dimensions of the inter-rafter distance and the height of the ridge. Therefore, this type of superstructure is used for small buildings where the installation height of the ridge beam does not exceed two meters.
DIY installation technology
The manufacture of a cuckoo-shaped roof extension is carried out in the following sequence:
- Assembling two gable rafters.
- Installation of a ridge beam.
- Assembling the extension frame from vertical and horizontal parts.
- Installation of counter-lattice and sheathing.
- Installation of insulation and membrane film.
- Covering the structure with roofing material.
- Carrying out interior lining of the attic and extension.
Finally, the installation of additional parts, windows and decoration of the structure is carried out.
How to make a cuckoo on the roof
The construction of a cuckoo window begins with the assembly of two gable rafters. You will first need to measure the height of the ridge beam and select a place on a pair of rafter beams for the future installation of the superstructure.
The gable rafter blanks must be cut with a margin of 50 mm along the length of each element; this helps to level and trim the supporting surfaces when installing the V-shaped blank on the mauerlat. The ends of the beams are cut vertically with a hacksaw and nailed to the heels of the ordinary rafters.
Next, you need to install the ridge beam of the cuckoo. First, under the ridge girder of the house roof, between the supporting rafters, a support board is stuffed, to which the cuckoo ridge will be attached, the second part is sewn between the beams above the mauerlat. The ridge beam must be measured at the installation site as soon as the gable of the superstructure is aligned with the vertical line of the building plumb line.
Next comes the installation of the cuckoo window frame; before fastening it, it also needs to be aligned vertically and along the plane of the pediment. After the cuckoo tunnel has been reinforced with the frame, they proceed to sealing the roof sheathing of the superstructure. Typically, plywood or OSB boards are used for these purposes. All that remains is to install the waterproofing, insulation and install the roofing covering from the valley.
Building a classic version of the cuckoo
Assembling a cuckoo house with a flat roof is somewhat more difficult; its arrangement will take approximately twice as much materials and time. Since the classic cuckoo superstructure is built in the middle of the roof slope, the weight of the structure creates increased pressure on the rafters, and most importantly, with strong gusts of wind, the side beams can be torn off from the ridge girder. Therefore, a superstructure body with a height of more than 60 cm must be built with additional supports for the ceiling.
Initially, you will need to assemble the frame of the base of the future “house”. It is sewn from 60x80 mm timber. The frame is attached to the rafter legs using clamps, the waterproofing sheet is inserted and sewn with self-tapping screws.
The next step is to install the vertical pediment supports, connect them at the top with a horizontal cross member and secure the board of the future window sill. Next, the cuckoo roof cross members and vertical sheathing bars are installed.
To install a flat roof, you will need to stuff a support board between the rafters, on which the frame of the upper part of the cuckoo will rest. It is cut out of a magpie and attached to the rafters with nails; the upper edge of the crossbar should protrude 15-20 mm above the roofing.
The simplest stage is the installation of the sheathing; it is stuffed from waterproof plywood or assembled from profiled lining. After the cuckoo body is assembled, counter-lattice boards and slats are sewn onto the ceiling. An isospan sheet is stretched over the top, and the insulation is run under the junction line with the roof covering of the roof of the house.
Small cuckoo for ventilation and lighting
If you need to make small ventilation windows, you can make a cuckoo in a simpler way. In this case, the frame is installed on the rafters without additional supports. It is believed that this option is least prone to leaks at the waterproofing joints.
To support the body of the cuckoo house, the roof beams are doubled. In this case, the pieces of timber that form the side walls are nailed directly to the rafters, and a frame on the front beams is used to make the pediment.
The gable roof is assembled from slats, the entire structure of the cuckoo house is covered with plywood, both inside and outside the building. The structure is usually insulated with EPS and covered with film waterproofing.
Installation technology
Despite the complexity of the design, a cuckoo, made by professional craftsmen according to the project without violating the technology, will never lead to leaks. Before starting construction, it is important to calculate the load-bearing capacity of the frame and the total weight of the roof so that the house can withstand the increased load. In this case, roof installation is performed in the following sequence:
- Laying the Mauerlat.
- Assembly of the rafter system. At the same time, free space is left between the rafters where the cuckoo is located.
- Installing the front lip beams.
- Installation of vertical posts at the ends of the cuckoo.
- Laying the purlin on vertical posts and lintel beams above the window.
- Installation of cuckoo rafter legs.
Frame making
Dormer window frame trim
Please note that after assembling the complex rafter frame, further work on the construction of the roof is carried out as usual. However, it must be remembered that in places where the ends of the cuckoo meet the surface of the slope, there is a vulnerability to leaks, so these areas require additional waterproofing.
Tips and tricks
All parts of the superstructure are connected only with nails; the use of self-tapping screws is allowed only when using metal corners, for example, when connecting vertical posts and rafter beams. This is not done for the sake of economy; any frame structure assembled on a roof from timber and boards is subject to strong blows from gusts of wind. The higher and more powerful the cuckoo bird, the more the wind blows it.
In such conditions, the use of self-tapping screws means that the boards and beams will very quickly become covered with cracks at the place where the fasteners are installed, whereas a properly driven nail will not split the material along the grain line. Of course, to build a cuckoo, you can use elm or even oak instead of pine wood, but in this case the cost of construction will be too high.
In addition, special attention must be paid to the quality of waterproofing at the junction of the walls and roof of the house. Usually these places are filled with liquid rubber and metal eaves strips are installed in the color of the main roof. The seams can also be sealed with bitumen sheeting, but in any case it will need to be covered with metal overlays so as not to spoil the appearance of the building's roof.
Rafter section
The cross-section of the rafters can be determined based on the following data:
- step;
- type of wood;
- type of material - logs, beams, etc.;
- load;
- rafter length.
Here are the approximate dimensions of lumber for a rafter system for a gable roof:
- Mauerlat, section 10×10 or 15×15 cm;
- tie rods and rafter legs, 10×15 or 10×20 thick, in some cases timber with a cross-section of 5×15 or 5×20 cm is used;
- for struts and purlins - beams 5x15 or 5x20 cm, based on the width of the rafters;
- racks – section 10×10 or 15×15 cm;
- beds, section 5×10 or 5×15, based on the thickness of the racks;
- sheathing, section 2×10 or 2.5×15 cm - the value is determined by the type of roofing materials.
Why should you contact our company?
We have our own production of materials. They are made by Russian craftsmen using unique technology. This allows for cheaper and faster turnkey construction. You can buy an inexpensive wall frame made of unplaned timber. You just need to choose the appropriate size. We present options 100x150 and 150x150 mm. Decide which one you need, and we will provide prompt delivery to any corner of Russia.
But the benefits of contacting us do not end there. Our production base is located in Pestovo, Novgorod region. And we do not include the first 500 km of the journey to the desired location in the delivery cost. Make a choice in favor of quality - buy a house made of timber from the manufacturer at a favorable price and enjoy living in it: it will be comfortable and cozy to stay there all year round.
Tags
building roofs on the roof of your own mansard roof with a gable roof making a roof with make a cuckoo of us a cuckoo make a cuckoo of us a cuckoo the majority with a cuckoo turns out to be a gable cuckoo refers and a cuckoo has Design features and Design features and the whole structure a rafter structure is required cuckoo design assumes a rafter system and a rafter system its rafter system is the same rafter system on a sling strong design the main rafter system the entire rafter structure such a rafter system the entire rafter system
featuressource
Installation
In addition to standard configuration windows, developers often install systems that have the shape of a trapezoid, arch, triangle, etc. If the developer is both the owner and does not have special knowledge and skills, he should definitely become familiar with the installation technology.
When choosing a window design, you should take into account the total area of the attic, as well as the distance that is present between the rafters (in this case, you do not have to carry out work to change the roof structure).
Important! In order to prevent problems that arise in winter, it is necessary to install a battery or heater.
Installation is carried out as follows:
- The place is being prepared.
- The waterproofing material is cut out, leaving a margin on each side of approximately 20 cm. All edges are wrapped inside the attic.
- The sheathing is cut (an opening of the required size is created).
- The roof covering is cut out or removed in the place where the roof window will be located.
- A mounting beam is nailed into the lower part of the resulting opening. Its thickness should not be less than 50 mm, since during operation it will be subject to significant load.
- The edges of the film (waterproofing) are secured. The lower part is attached to the beam (mounting), and the upper part of the insulation is attached to the wooden sheathing. The side parts of the waterproofing coating are pulled out and fixed to the wooden elements of the rafter system.
- The window structure is inserted and leveled using a building level. Its fixation to the rafter system is carried out using special fasteners, which are sold together with the roof windows (included in the package). To make the system easier to install, experts recommend temporarily dismantling the opening doors. The bare frame is lighter in weight and can be handled by one person without assistance. Also, for more reliable fixation and additional thermal insulation, polyurethane foam is used (in winter, polyurethane foam should be used with a mark indicating the possibility of use at sub-zero temperatures)
When carrying out self-installation, developers should not forget about thermal insulation. To do this, it is better to use mineral wool, which can easily be placed in the resulting cavities and fixed with a construction stapler. Upon completion of installation, the double-glazed window is installed in place and the functionality of the attic structure is checked.
