The use of drywall to level walls has made it a very common building material. It has so many advantages that many people forget about its poor resistance to mechanical stress. Because of this fragility, many problems and misunderstandings arise. For example, not everyone understands how to hang a cabinet on drywall, but doing it is not that difficult.
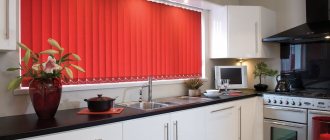
Most often this problem occurs when finishing a kitchen using gypsum plasterboard. In such a situation, it is necessary to hang kitchen cabinets without fear of damaging the material. It is clear that they must be firmly fixed. Not everyone considers this possible when working with plaster that is wrapped in a layer of cardboard.
Selection of materials for reliable fastening
With the correct selection of fastening materials, you can hang anything you want on a gypsum board wall. Therefore, the answer to the question of whether it is possible to hang kitchen cabinets on drywall is yes. However, you need to choose the right fasteners and skillfully carry out all the work.
You can’t just screw a self-tapping screw into a plasterboard wall and hope that it will stay there firmly. Gypsum is a loose material, so there is no need to attach anything to it with simple self-tapping screws. Over time, such fasteners will become loose and damage the main coating.
Nails and regular screws should not be used to attach anything directly to drywall.
You cannot use the usual fastening system with dowels, as is done with concrete and brick walls. The fact is that the plasterboard sheets were attached to a frame made of metal profiles, which means there is space between them and the wall. For this reason, it will not be possible to hang cabinets on drywall in the kitchen or other room using ordinary dowels. They must completely fit into the surface to which they are attached. In our case, there is a cavity, which means that the fastening will not be unreliable.
Various types of fasteners for hanging cabinets
Depending on the chosen installation method, different tools and accessories may be required:
- roll-up dowels for drywall (for example, driva);
- expansion anchors (for example, molly);
- umbrella dowel;
- embedded timber;
- special tire.
It is worth considering in more detail the possible methods of installing a cabinet on a plasterboard wall, then everyone will be able to choose the option that suits them best. Let's consider all these options in more detail.
How to strengthen a plasterboard wall for a kitchen
Nowadays, kitchens made of plasterboard are not uncommon, that is, not only walls and ceilings are made from this material, but also shelves. Pressed mud, pasted on both sides with thick paper, perfectly replaces plaster, and also does not require “wet” work, which means that during installation, a minimum of dirt remains in the apartment.
Ceilings and walls in the kitchen - plasterboard
Mounting on plastic dowels for drywall
Before hanging cabinets on drywall, you need to know what kind of fasteners will be used for this. The weight of the cabinet itself is also important. If the structure is not very heavy, then you can take special plastic dowels. However, in this situation it is not advisable to use a drive. Someone will say that one such dowel can withstand a pullout load of up to 10 kg. However, no one will tear the cabinet; it will hang and press down, which is too serious a test for a small tree. It is ideal for a hanger or shelf, but not for a kitchen cabinet.
Results of incorrect fastening
The butterfly dowel is often used for medium-heavy objects. It is rarely used for hanging kitchen cabinets, but if this happens, then the profile under the drywall must be connected.
Working principle of a butterfly dowel
It is necessary to know in advance at what height the cabinet needs to be hung on plasterboard, so that a metal profile passes through the place of its attachment (horizontally). This will add rigidity to the fastening, because the fixation will be carried out not only to the gypsum board, but also to the guide. The butterfly dowel will clamp both the plasterboard sheet and the profile.
You can find where the profile goes using a magnet. They need to move along the wall until a guide is found. This way you can accurately determine the location of the profile and not miss when drilling a hole.
Such installation is very reliable, despite its simplicity. It is necessary to drill a hole in the drywall and profile. Then a dowel is inserted, which, when pressed from the reverse side, will release “petals”. With their help, reliable fixation is made. Then the screw is unscrewed and it is used to fix the wall cabinet.
It is necessary to work with a plastic butterfly dowel in the same way as with a metal adjustable anchor. The operating principle for these two situations will be described below.
More options
The above methods of strengthening are the most common and most reliable. But you can hang objects on plasterboard walls without using a mortgage. Instead, you need to use special fasteners: butterfly dowels, anchor bolts and brackets.
These methods differ in the weight of the item that needs to be installed on the plasterboard wall. Depending on the weight and dimensions of the products, the following methods are distinguished:
- for light objects;
- for heavy objects.
The method for lightweight objects allows the product to be installed on a plasterboard wall without special tools. Here only special fasteners are used: butterfly dowels or anchor bolts.
With their help, you can easily sew through a plasterboard sheet. In order to firmly fix a lightweight object on the wall, fasteners should be installed in a metal profile or wooden frame elements. It is the frame elements that will act here as an analogue of a mortgage.
You can easily detect the metal profile under the sheet using a magnet. For a wooden frame, you can either calculate the location of the slats according to the installation plan, or simply by tapping the wall. Next we carry out the following steps:
- We stick double-sided tape in the place where the butterfly dowel is screwed in to avoid the accumulation of construction debris on the floor;
- make a hole with a drill;
Note! The diameter of the hole must match the diameter of the dowel. inserts a butterfly dowel into the hole and twist it until it is completely open. inserts a butterfly dowel into the hole and twist it until it is fully opened
inserts a butterfly dowel into the hole and twist it until it is completely open.
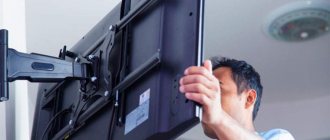
This fixation will allow you to firmly secure a small and lightweight object to the wall without using a mortgage. The method for heavy and large items involves installing a special shelf or brackets. In this way, you can easily install an LCD TV, a water heater or a heavy kitchen cabinet on the wall.
Here you need to make a special shelf so that it fits perfectly with the interior of the room. And if there is a need to install an electrical appliance, you can use special brackets. They are produced for certain models. Therefore, choose them responsibly so that the mounting system exactly fits the purchased model of the device. The brackets and shelves must be fastened only to metal profiles. Wooden frame elements will not always be able to withstand the load from the device. Therefore, it is better to use this method for a metal frame. Instructions for strengthening the wall in such a situation involve the following actions:
- detection of metal profiles using a magnet;
- making marks. Remember that they need to be aligned to the building level, that the shelf or brackets have been installed level;
- We install double-sided tape around the marks so that during drilling all the debris sticks to it and does not fall off onto the floor;
- We drill holes and install anchor bolts in them. They are more reliable than butterfly dowels and can withstand greater loads;
Note! The anchor, like the butterfly dowel, should fit tightly in the drilled hole. This is the only way it will stay firmly in the wall, taking on most of the load. After installing the anchor bolts, you need to attach a shelf or fasteners to them
After installing the anchor bolts, you need to attach a shelf or fasteners to them.
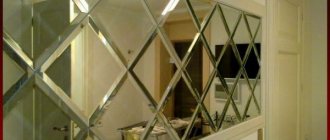
Only after this will the wall be prepared to withstand even very high loads. Boilers, water heaters and televisions are mounted in this way. If the wall strengthening work is carried out correctly, you can decorate the plasterboard walls of your home with mirrors, wall cabinets, or simply install an LCD TV. Carrying out the above steps will give you the opportunity to hang even such heavy electrical appliances as a water heater on a plasterboard wall. This will make your home more practical and functional.
Pasting plasterboard walls with wallpaper Features of installing plasterboard structures in the bathroom Covering walls with plasterboard inside a wooden house Plasterboard structures in the toilet and their finishing Making corners from plasterboard, installation secrets How to cover a balcony with plasterboard at minimal cost
We use a metal molly dowel
Using metal molly dowels is a more expensive and higher quality version of the butterfly. If you need to hang kitchen cabinets on drywall without worrying about the profile or doing other preparatory work, then metal dowels are the best option.
Regardless of which dowel (plastic or metal) you decide to use, the technology for installing the cabinet on a plasterboard wall will be almost the same.
- On the wall you need to mark the places where the cabinets will hang. This is a job for two. One must place the cabinet against the wall, and the second must use a level to make the appropriate markings. You need to understand in advance at what approximate distance from the floor they should hang. Doing everything with just one tape measure, taking the necessary measurements, will be extremely difficult for a beginner.
- After marking the lines, it is necessary to select specific points where the fastening will be carried out. At these points, a hole of the appropriate diameter is drilled, which depends on the fasteners used. Typically the diameter is 8mm, 10mm or 12mm.
- Before attaching your kitchen cabinets to drywall, you must secure the anchor correctly. The dowel is inserted into the drilled hole, and then a screw is inserted and the molly is opened using a special gun. In the process of unclenching the fastener, it compresses the sheet on both sides. On one side, a washer with teeth presses, and on the back side, the legs open, which clasp the gypsum board. If you don’t have a spice tool, you can use a hammer drill with the appropriate attachment and pliers.
- The expansion dowel will first be fixed in the drywall, and then the screw itself will be screwed in to mount the cabinet.
- It is advisable to first make sure that the dowel is securely fixed and everything is done correctly. Only after this you need to start hanging the cabinets. It is quite normal to first tighten the screw to install the anchor/dowel, then unscrew it back and tighten it again, already in the process of directly installing the hanging items .
The clamping area is so large that it is impossible to pull out the molly's expansion anchor. Fastening kitchen cabinets to a plasterboard wall using molly is so reliable that it will be possible to pull out the dowel only with a piece of plasterboard to which it is attached. Using metal expansion fasteners, you don’t have to try to hit the profile, because the fixation is already very reliable.
Finishing and useful recommendations
Finishing is also easy to do yourself. Initially, irregularities and seams are sealed. The joints are glued with a mounting mesh, and then leveled using starting putty. Rub and level the putty with an abrasive mesh or sandpaper.
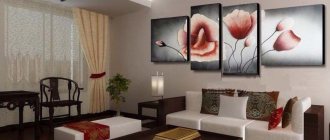
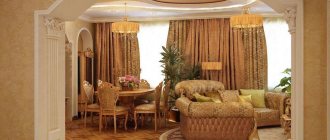
After this, finishing begins. Choose any material at your discretion. Drywall is universal, so it can be easily combined with any options. Among the traditional ones are wallpaper or paint. If desired, you can leave the drywall itself. If the work is done well, it looks attractive. This option is suitable for high-tech or minimalist design.
Living room with plasterboard partition
The partition is a useful element of the interior. With its help, they zone the space, achieving individuality and originality of the interior. Creation is a feasible task for everyone, so you can save on calling specialists.
- There is no need to select a beam that is ideally suited to the thickness of the partition - the profile will set the required thickness of the frame. The pieces of timber are screwed to it with self-tapping screws during the installation process and do not dangle;
- The metal profile jacket protects the timber from cracking and provides additional rigidity.
The embedded elements are pre-installed into a wall or partition made of plasterboard at the required height during the installation of the frame. Each fastener can withstand a pullout load of 35 kg; it turns out that furniture with a total weight of 70 kg can be hung on two anchors. In this case, the total load is distributed over a large number of dowels, so this mount can withstand the weight of cabinets from 50 kg. Sets of modern kitchen sets and wall furniture often include metal rails - a rigid shaped strip with holes and bends for hanging kitchen cabinets on special hooks.
To do this, hatch holes are cut into the gypsum board so that you can drill into the main wall with a hammer drill and install anchors. The anchor consists of a metal or plastic dowel and a long threaded screw or hook. I do not take into account chemical dowels, because they are used quite rarely and have some difficulties in installation. The above methods of strengthening are the most common and most reliable.
But you can hang objects on plasterboard walls without using a mortgage. Instead, you need to use special fasteners: butterfly dowels, anchor bolts and brackets. Drywall is a regular guest in modern renovations.
This is an ideal material for leveling walls, assembling complex ceiling structures, installing partitions, niches and other decorative elements. Along the length of the working part, expansion anchors have two standard sizes, which are 13 mm and 26 mm. As in the previous case, the first size is used for single-layer plasterboard, and the second is intended for double-layer gypsum board. Depending on the load-bearing load, it can be equipped with M4, M5 or M6 threaded screws. For example, the MOLA 5/13 expansion anchor is equipped with an M5 threaded screw and is designed for fastening to single plasterboard.
From my personal experience, I can immediately say that almost anything that can be found in any residential apartment can be hung on a plasterboard wall, however, for reliable and safe installation, it is important to correctly calculate the fastening points and correctly select the appropriate fasteners
Installation using metal anchors
Such anchors are most often used when you need to attach something to the ceiling, so they can handle a regular cabinet.
Special extended anchors are used to reach the load-bearing wall. They go through the drywall and are attached to the main wall. This is reminiscent of fastening with regular dowels without using gypsum board. However, with this method, everything must be clearly calculated in advance so that along the way such anchors do not rest against the fastening used to create the frame for the drywall.
Anchors and their components
The advantage of such anchors is the ability to use screws with different heads. This could be a regular clamping screw. Also, instead of a standard head, a hook, ring or other element can be used, which is best suited for installing cabinets.
Using an anchor in a section
- First, markings are made and holes of a given diameter are drilled. Anchors can only be attached to a concrete or brick wall, the thickness of which should be 8 cm or more. The depth of the hole should be 5 cm. To this minimum depth, you need to recess the anchor into the main wall.
- Before hanging a cabinet on a drywall wall, you need to install the anchor correctly. The studs are inserted into the prepared holes so that the anchor goes in first and the nut remains outside. If it's tight, you can hammer it in.
- The anchor screw is screwed in with a wrench. We listen carefully, because during such a clamp the petals will open and rest against concrete or brick. This will be accompanied by a characteristic creaking sound. You need to do everything carefully so as not to damage the sheet of drywall.
- When the anchor is firmly fixed, you need to tighten the nut.
- Wall cabinets are hung on protruding studs and then fixed.
Other types of fasteners
To hang several rather heavy cabinets on self-tapping screws already screwed into the wall, you can attach a strip to their back surface. This flat piece has a slot that resembles a keyhole in configuration. It is selected so that the diameter of the widest part of the hole is slightly larger than the head of the screw. The narrow part of the hole should be slightly larger than the diameter of the thread. When hanging the cabinet, the head of the self-tapping screw enters the wide part of the slot, and then moves under weight into the narrow zone, ensuring reliable fastening.
You can simplify the process if you correctly calculate the length of the screw. In order for the kitchen wall cabinet to be firmly fixed, several values are added up: the thickness of the drywall, the gap from the finish to the wall, the layer of plaster, the depth of the hole in the wall itself.
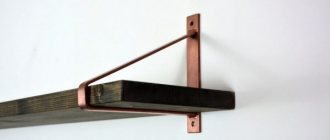
Mortgage beam
Hanging kitchen cabinets using tie-down timber is a fairly old technique. It is usually used in the kitchen, when they know in advance exactly where the furniture will be installed. The beam is installed in a frame made of metal profiles during its assembly, and is provided at the time of planning. The fact is that it is best to drive the wooden beam into the profile and install them at the same time.
The width of the beam for greater reliability of installation should be within 8-10 cm.
This method is very reliable, because not only is the block securely fastened to the frame (by the profile itself, nails or screws), but it is also a reliable base for fastening the cabinet.
One of the options for installing embedded beams
Before you hang a cabinet on a plasterboard wall using an embedded beam, you need to find it under a layer of finishing. You can look for a horizontal profile using a magnet, but it is advisable to think through everything even earlier. After assembling the frame, it is necessary to measure at what height from the floor (ceiling) the center of the beam is located. Then this data will be used for high-quality installation.
There are several options for attaching to a wooden beam:
- We simply use wood screws to fix wall cabinets;
- we drill holes for dowels, onto which we will then attach everything;
- We use special dowels with hooks for more convenient hanging.
Remember that you will need two such beams, since the cabinet is attached not only at the top, but also at the bottom. So reliable. One mortgage is needed if hanging a bookshelf or something similar.
For greater reliability, the bars can be attached directly to the wall with anchors or dowels. This will be safer than inserting a mortgage into the frame. However, they need to be flush with the frame.
Fastening techniques
Let's start with the fact that fastening methods entirely depend on the parameters of the object being hung (dimensions, weight), and based on the data obtained, you can get an answer to the question - is it possible to hang kitchen cabinets on drywall.
Professional techniques
- The most popular and accessible method even for beginners is to attach kitchen cabinets to plasterboard using butterfly dowels and special plasterboard dowels.
When attaching cabinets to the so-called “butterflies”, you need to make holes in the wall and then install the fasteners. When screwing a self-tapping screw into a “butterfly”, the tendrils of this type of dowel spread in different directions and tightly press the installed fastener to the surface of the gypsum board.
Operating principle of the butterfly dowel
If the cabinet is mounted on special dowels, use a screwdriver to screw the dowel into the cavity of the material and only then screw in the fastening bolt (screw). This method allows you to fasten only lightweight structures whose weight with all contents does not exceed 5 kg.
dowel nail; 2. snail dowel; 3. butterfly dowel;
- The second method is to attach kitchen cabinets to drywall using mounting strips. The main feature of this fastening technology is that the mounting strips are attached to a sheet of drywall, and not to the suspended structure. The strips are fixed in several places (both to the gypsum board and to the metal profile located under the drywall). Fixation is done with self-tapping screws.
Mounting rails for wall cabinets
After completing the installation work, you can hang a cabinet on such slats, the weight of which when fully equipped will not exceed 15 kg. But this method has one significant drawback - the use of unaesthetic fasteners that are unlikely to decorate your kitchen.
If you need to hang bulkier and heavier cabinets on the wall, there are other secure mounting options that will help you do the job yourself:
Extended anchor bolts can be used as fasteners - such fasteners will allow you to attach bulky kitchen cabinets and even household appliances to the wall.
In order to secure them, you should drill deep holes with a hammer drill through the drywall at the very base. We insert anchor bolts into the resulting holes and clamp them there using ordinary wrenches.
This method of fastening is relevant only if there are base walls (this fastening option is not applicable for a plasterboard partition);
Anchor Bolt Installation
The price of mortgages is zero - they can easily be made from leftover building materials.
Unconventional fastening methods
- Thus, a heavy kitchen cabinet suspended on a plasterboard wall can be additionally secured to the ceiling using decorative cables;
Hole in the shelf for the cable
- As additional elements for fastening kitchen cabinets, experts often use decorative chrome-plated tubes - they are screwed to the floor and installed in the form of a frame, which bears the weight of the suspended structure;
In order for the hanging cabinets to be mounted as efficiently and productively as possible, several recommendations must be followed:
- Use only those fasteners that have a quality certificate and meet aesthetic standards;
- When marking fastening points, you must use a building level, and not do the work by eye - correct marking will allow you to evenly distribute the load on all fastening points.
If you follow all the instructions and recommendations described above, then you will probably end up with a reliable fastening system that will quietly serve until the next repair.
In addition to cabinets, the presented techniques allow you to attach any other hanging accessories and attributes to the walls (hoods, air conditioners, cornices, curtains and paintings). All of the above work can be carried out without problems by beginners, without the involvement of expensive specialists.
Shelf on plasterboard for various accessories
Installing the mounting rail for the hitch bracket
It is not always possible to think in advance where everything will be in the room before the renovation work. Often the thought of hanging cabinets comes after the walls have been covered with plasterboard and the finishing has been done. So the question arises, how to hang a cabinet on drywall in such a situation.
You can use special dowels, but not everyone will be able to carry out the correct marking so that each fastener is in a clearly designated place. This is where you need to use a horizontal bus. The essence of the method is simple: two rails are mounted on the wall, on which all the cabinets will then be hung.
Fixing the bracket on the bus
The tire is a narrow metal profile of a special shape with many holes for self-tapping screws. Using these holes and self-tapping screws, the tire is attached to the drywall. You can buy several of these two-meter profiles, which is quite enough for your purposes.
In order to be able to fasten cabinets using this technology, they must be equipped with special brackets that can be hooked onto the tire.
The installation technology itself is quite simple.
- Markers are installed at specified heights on both edges of the wall. They will then connect into horizontal lines.
- Don't forget to measure all the distances between the brackets and lines. The cabinet will be attached with upper and lower brackets to two rails at once.
- The level checks the horizontality of the lines.
- The total width of all kitchen cabinets is measured, after which the tire is cut to the specified size. It may be necessary to use two or three tires in one row. It all depends on the selected furniture.
- The tires are attached to the drywall with self-tapping screws.
- Now you can hang your kitchen cabinets on drywall. The brackets have adjusting screws so that the cabinets can always be adjusted to the desired position.
Although everything is attached with simple self-tapping screws, there are a lot of them and the pressure is evenly distributed throughout the tire. Moreover, the locker will be supported by two tires at once. The video below shows the principle of using the busbar when attaching cabinets to a regular wall.
General rules for carrying out such work
Finally, pay attention to a number of simple rules, the implementation of which will help you get a high-quality result:
Always choose only high-quality building materials from trusted sellers
- Before you start work, carefully take measurements; this will help you avoid the lion's share of mistakes and you won't have to redo your work several times. When taking measurements, use a level;
- Choose your material carefully. Take only high-quality hardware, dowels and other components for work. Buy them from trusted sellers who can provide product quality certificates upon your request, and the result of your work will be protected from sudden breakdowns;
- Make sure you haven't forgotten anything and get to work.
When working, do not forget to use protective equipment, in particular construction glasses. This will protect you from possible injury. And best of all, trust the experts.
Plasterboard structures are a multifunctional system that differs from other similar structures in practicality, durability and ease of installation. As statistics have shown, today drywall is the most popular and in demand material among our compatriots.
But there is one significant “BUT” - due to the low level of mechanical strength, this material has many limitations in operation, thereby forcing even experienced builders (not to mention beginners) to think about this question - how to attach kitchen cabinets to plasterboard? To answer the question posed, let's look at the situation in more detail.
Kitchen wall cabinets mounted on a wall lined with plasterboard
Here the corner cabinet is neatly and securely fixed to the wall lined with plasterboard
Additional accessories
A bulky cabinet with a large mass is hung on the wall using hooks or hangers and two galvanized decorative cables, which are mounted to the ceiling base. The thickness of the cable must be at least 4 mm.
A widely used technique is the use of chrome slats and tubes fixed to the floor as a frame. They take on the main burden.
When hanging a cabinet on the wall on your own, sometimes they use a mixture of techniques, techniques and fastening devices. This is acceptable provided that the resulting fastening system is of high quality, productive and aesthetically attractive.
No hangers
When creating a suspended ceiling, it is not recommended to skimp on hangers. Fastening without the use of hangers is often used when they want to install a frame on an uneven base; this temptation is especially great when working with wooden coverings.
As a result of such installation, the profile loses its mobility - due to shrinkage deformations, cracks may appear on the surface of the drywall. In addition, when rigidly fixed to the ceiling, the main advantages of a suspended structure are lost: the ability to level the surface, hide communications and additional insulation inside the ceiling.
Plasterboard ceilings are mounted on an anchor or direct suspension. Read more about installation methods in the article “Drywall - ceiling installation”.
At the stage of installation of the frame, no attachments were made for hanging things
If you plan to use drywall in finishing work, then you need to immediately think about hanging heavy things, because to secure them inside the frame you need to make embedded parts from wood or plywood. Embeds are a reliable guarantee that a TV or shelf will not fall off the wall.
An example of using mortgages to install a TV.
Sophisticated adjustable closet awnings
Press-in mounting for wall-mounted cabinets Traser-6
The Traser-6 wall cabinet mount is designed for attaching a wall cabinet to a wall. Mounted on the side wall of the cabinet.
The hitch has the following adjustment options: vertically (18 mm), horizontally (16 mm), front (25 mm). The canopies are suitable for cabinets with a height of 600-1000 mm and a depth of 300-350 mm. One suspension can withstand a significant load of 65 kg.
| Rice. 5. Press-fit mounting for Traser-6 wall-mounted cabinets |
| Rice. 6. Adjustments for hinges for Traser-6 wall-mounted cabinets |
The concealed mounting bracket is located behind the rear wall after installation. To access the adjusting screw, a through hole is made in the rear wall.
To hang cabinets, in addition to the hangers, you need a counter strip or rail, which is attached to the wall at the required height using dowels.
| Rice. 7-8. Striker for awnings |
| Rice. 9. Press-fit canopy for upper cabinets - rear view of the product |
Cabinet hinge with protection
The safety cabinet mount also has the pleasing aesthetic feature of being concealed behind the rear wall. Withstands a load of 130 kg per pair. To hang a cabinet using such canopies on the wall, you need a rail or a strike plate, a rail, whatever you call it.
To access the adjustments, a through hole is made in the rear wall.
| Rice. 10. Installation diagram of the canopy on the side wall |
| Rice. 11. Live photo of the canopy |
| Rice. 12. The hanger is mounted on the side wall of the cabinet |
| Rice. 13. Through hole in the back wall made of chipboard for access to the adjusting screws |
Hinge for cabinets Scarpi-4
The hangers are completely made of metal. Vertical adjustment is 13 mm, horizontal adjustment is 8 mm, front adjustment is 17 mm. The adjustment screws are accessible from inside the cabinet. The load of the hitch can withstand a significant load - 65 kg for one hitch or 130 kg for two hitches.
| Rice. 14. Set of hangers for Scarpi-4 cabinets |
| Rice. 15. Installation diagram of hinges for Scarpi-4 cabinets |
| Rice. 16. Adjustment of hinges for Scarpi-4 cabinets |
| Rice. 17. Hinges for Scarpi-4 cabinets, right and left, on plugs |
| Rice. 18. The hanger is installed on the side wall of the bathroom cabinet |
Adjustable canopy
An adjustable canopy with screws is also used for securely fixing cabinets and shelves on the wall; this is the most popular and at the same time reliable way to hang a cabinet on the wall.
The canopies have three-dimensional adjustment: down – 7 mm, up – 11 mm, back – 3.5 mm, forward – 12.5 mm. A pair of canopies can withstand a load of 130 kg. Like the previous awnings, it is used in conjunction with a mounting plate or, in other words, a rail or rail.
There are options for universal canopies, as well as with division into right and left. The second option is preferable. Moreover, awnings of European origin, for example from the Blum company, are superior in quality and reliability to Chinese ones, but are also much more expensive.
| Rice. 19. Adjustable canopy right and left from Blum |
| Rice. 20. Adjustable universal canopy |
| Rice. 21. Installation diagram of an adjustable canopy |
| Rice. 22. Hook with which the awnings cling to the rail on the wall |
The Pros and Cons of Hanging Cabinets on the Wall Using Sophisticated Adjustable HangersPros of using sophisticated adjustable awnings
Cons of Using Complex Adjustable Awnings
|
Using profiles for other purposes
Each type of plasterboard profile has its own purpose. Sometimes a ceiling profile is used instead of a rack profile, this leads to the fact that the partition structure turns out to be fragile. In addition, this is associated with difficulties in work, since sheets cannot be attached to the ceiling profile on both sides. It is not recommended to bend profiles, cut or change their geometry.
This error is due to the fact that the use of ceiling profiles is allowed when covering walls or when creating boxes for shelves, a fireplace or a TV.
Ceiling profile partition.
Read more about the types of profiles for fastening drywall in the article “Profile for drywall: a brief educational program”
Why is it better to build a house than to buy a ready-made one, especially if this house was built for sale.
Why is it better to build a house than to buy a ready-made one, especially if this house was built for sale.
The beginning of this story was absolutely ordinary.
In a newly purchased residential building, one heating radiator was not heating. The plumber who had been called before “improved” this radiator by removing the control valve and stupidly installing a plug in its place. Remember how Celentano repaired the car in “The Taming of the Shrew”, since then he has had many followers
Source: homemasters.ru