When renovating indoors, plasterboard (GCR) is often used to create partitions, walls and multi-level ceilings. GKL sheets are excellent for hiding curved surfaces and in this regard can serve as a replacement for wet finishing. In this article we will look at what and how to plaster drywall before finishing the room.
We recommend that you familiarize yourself with when plasterboard is used instead of plaster to level walls.
Features of drywall
Drywall (GKL) is a building material in the form of sheets, which consist of 2 layers of construction paper and a gypsum core. Such sheets are sheathed on various surfaces and all kinds of designs are created. Drywall is attached to the walls using self-tapping screws or by gluing with suitable adhesives.
Structure of plasterboard sheet
In terms of strength, plasterboard is inferior to stone, brick, concrete, wood, and therefore often requires additional protection. Often the edges of drywall sheets break, corners break off, and screw heads stick out unattractively. All these defects can be covered with plaster, although not every solution is suitable for gypsum plasterboard. Plaster that is too heavy will deform the sheets; too wet a mass will cause destruction and a decrease in strength. Therefore, the question of how to plaster drywall is quite complex and requires making the right decisions.
Drywall plaster - what is it for?
Despite the apparent evenness of the plasterboard, processing is necessary for the following reasons:
- After installation, curvatures, irregularities, roughness, and joints appear on the surface.
- Protruding screw heads and the dark base of the sheet will show through the finish and spoil the look.
- Plastering with HA is important to improve adhesion and increase the service life of the repair.
- The coating protects the sheets from mold, rodents, insects, and temperature fluctuations.
- GKL plaster saves paint and decorative materials.
By skipping the stage of plaster plaster, you can get a low-quality final result, only wasting money.
Why is drywall plastering necessary?
The paper layer of drywall does not look very attractive. It must be covered with decorative materials - wallpaper, paint. But when forming walls, ceilings and partitions, the sheets have to be joined, and the seams and heads of fasteners will be visible through the thin finishing materials. Therefore, before painting the walls or gluing wallpaper, smooth the surface of the gypsum board coating with plaster.
Other situations where plastering is mandatory are:
- Subsequent application of decorative plaster. To improve the quality of adhesion to the decor, regular plastering work is first carried out.
- Need for additional protection. Plaster will help protect the gypsum board from insects, rodents, mold, and external influences.
- Rolling and bending of sheets. When it is not possible to correct deteriorated structures, some problems can be solved by plastering.
Covering gypsum board walls with decorative plaster
Plaster must be applied to the entire sheet of drywall or only to the seams and joints. In any case, standard plastering work is possible with moisture-resistant material. Ordinary gypsum board sheets will be damaged by simple plaster because it contains water. Only a building mixture that does not release moisture is suitable for them.
When is it permissible to apply plaster to drywall?
Plasterboard walls and ceilings can be plastered in one single case: when the structure is installed unevenly and of poor quality. If mistakes were made during the installation of the frame, the profiles or wooden beams were not level, the finished plasterboard surface may have deflections and protrusions, and it may be filled up.
USEFUL INFORMATION: Fasteners for gypsum boards and plasterboard profiles
In this case there are two ways:
- Remove plasterboard sheets, disassemble the frame and mount everything again.
- Level the surface with plaster.
Since they can be damaged during the process of dismantling and reattaching the sheets, in some cases it will be easier to plaster the surface.
Plaster and putty - what's the difference?
These materials have a general purpose - they are both used for leveling various surfaces. However, the difference between plaster and putty is great:
- plaster allows you to smooth out significant unevenness in walls and ceilings, and putty eliminates only minor defects;
- plaster is characterized by the content of large particles, so it is used for rougher leveling; putty has a very fine grain size, it is laid down in a thin layer;
- plaster is needed for rough leveling, and putty is needed for finishing (although fine-grained putties can also be used for finishing work);
- plaster is usually applied in a thicker layer than putty (the latter’s layer does not exceed 1-3 mm);
- the strength of plaster is higher than putty, but shrinkage is also more significant;
- plaster can be applied to a large area at once and then leveled, while putty can be applied only in small portions and smoothed out with a spatula.
Final leveling of walls with putty
When choosing a material for finishing gypsum boards, you should take these features into account in order to choose a truly suitable product.
Plaster or putty?
They differ mainly in grain size . The smaller the grain of the binding element, the thinner the minimum applied layer, the less roughness. For example, on the popular universal plaster KNAUF Rotband the largest fraction size is 1.2 mm. But in fact, the particles of gypsum are, of course, smaller. They are simply sifted less thoroughly than in putty. Therefore, after mixing with water, grains are visible in the solution. The putty has the consistency of sour cream.
The thickness of the applied plaster layer recommended by the Knauf manufacturer is 5-50 mm, for KNAUF Rotband Finish putty it is 0.2-5 mm.
If you need to level out large depressions and holes, use plaster. After drying, putty it or go over it with the finest grater. In case of hiding drywall joints, you can immediately use putty.
Let's return to the processing of gypsum board joints.
Types of drywall
Depending on the composition of the core, properties and purpose, gypsum boards are classified as follows:
- Wall plasterboard. It is a standard material based on building gypsum. It is produced in two versions: regular and ceiling. The latter is characterized by reduced thickness and reduced weight.
- Moisture-resistant gypsum board. Lined with green cardboard, typically used in bathrooms or where it will be puttied. Treated with special impregnations, as well as antiseptics, therefore it is not afraid of moisture, fungus and mold.
- GKLO. Fire-resistant material with the addition of reinforcing and fiber components. Suitable even for lining fireplaces and chimneys. In direct contact with fire, only the paper part is charred.
- Flexible arched plasterboard. The core of the material contains fiberglass, which bends in any direction with a radius of up to 30 cm. It has a small thickness and a high price.
- Moisture-resistant gypsum board. It is characterized by the properties of moisture-resistant and fire-resistant plasterboard.
- Combined material. Designed for wall insulation, contains a layer of expanded polystyrene.
Main types of plasterboard sheets
Plastering plasterboard - we get a solid base for finishing
When installed correctly, plasterboard sheets (GKL) form a smooth and even base, which, unfortunately, is not monolithic.
It has many joints, bulges, and small pits. GKL plaster can correct this situation. Experts in matters of carrying out finishing activities do not have a common opinion on whether it needs to be treated in a special way - plaster, drywall under wallpaper and other finishing options. Some pros say you don't need to do this. Others make a lot of arguments in favor of doing this kind of work. After many years of debate, supporters of different theories came to a common result. They advise plastering the cladding material we are interested in in the following cases:
- when it is planned to decorate plasterboard surfaces with decorative plaster;
- before painting;
- if there are minor flaws on the sheets that can be hidden by applying a thin layer of plaster.
In this case, treatment with dry mixtures is carried out only in situations where moisture-resistant plasterboard sheets are used. There is little point in plastering ordinary cladding material. It deforms very quickly during use. This will lead to cracking and shedding of the applied protective layer. Another prerequisite for the use of plaster is thorough treatment of the gypsum board with a deep penetration primer.
If there are flaws on the sheets, it is necessary to putty the plasterboard
Why plaster drywall under paper and other wallpaper? At first glance, there is no need to do this. After all, the wallpaper will be deformed under the influence of the composition diluted with water. On the other hand, try to properly stick wallpaper material onto a surface with many joints, protruding screw heads, dents and potholes. Of course, you won't succeed. This means that you will have to plaster the gypsum board base. The main thing here is not to overdo it. The leveling mixture should be applied several times (alternately) in as thin a layer as possible (up to 3 mm). We will talk about the features of using plaster a little later.
Now the construction market offers a huge variety of compositions for processing drywall. Manufacturers produce mixtures that are recommended exclusively for covering small cracks and dents, for continuous application to the base, and for forming a decorative layer. Plastering drywall should be done in each specific case with certain compounds. They are usually divided (depending on the type of binding component used) into three groups:
- gypsum;
- polymer;
- cement.
Plasters for drywall are divided into gypsum, polymer and cement
Gypsum mixtures are recommended for use in dry rooms - in offices, children's rooms, bedrooms. But for rooms with high humidity (bathrooms, kitchens), compositions based on cement are more suitable. Their moisture resistance is significantly higher. Polymer compositions are considered universal. They have a high level of elasticity and are easy to work with without seeking help from finishing specialists. Therefore, if you decide to plaster the gypsum board with your own hands, opt for universal dry mixes. The likelihood of high-quality work completion in this case will increase significantly.
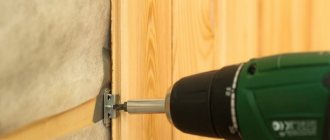
Before starting the main work, you need to level the plasterboard base, remove the protruding heads of fasteners from it, and remove peeled sections from the joints between individual sheets. It is recommended to drown the hardware (tighten it until it stops). This procedure must be carried out very carefully. If you twist too hard, there is a risk of deep holes appearing. Peeled pieces of material should be carefully torn off and trimmed (use a sharp knife) to the root. And then take sandpaper and clean out the wrinkles at the joints of the sheets.
Failure to perform the described operations will lead to peeling of the remaining paper along with the layer of applied plaster, the formation of bubbles on the gypsum board, which will subsequently cause cracks to appear on the surface.
Leveling drywall for wallpapering or painting is done with putty. It is necessary to cover up all the joints, hide roughness, bumps and dents. Nuance. If you purchased gypsum board without a finished edge, you will definitely need to cut the edges of the sheets yourself at an angle of 45°. Then it will be easier to seal the seams and join individual parts of the finishing material.
Drywall must be primed before painting.
The next step is to prime the plasterboard surface. If the base is planned to be wallpapered or painted, the primer composition (use deep penetration solutions) must be evenly applied to the gypsum board. This operation will create a unique film on the surface. It will have high water-repellent potential. Due to this, the glue under the wallpaper will not be absorbed into the base. Important point! Alkyd primers should not be used. They have a special set of components that significantly deform the cardboard covering.
The priming process itself is simple. Take a bucket, dilute the composition in it (add regular water, following the manufacturer’s recommendations), mix. Using a roller or paint brush, apply primer to the wall or ceiling. Wall surfaces are always primed from top to bottom.
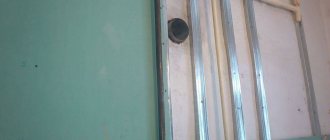
Next, you need to cover all corners and seams on the surface with reinforcing mesh. This function is usually performed by a fiberglass serpentine. It is advisable to purchase self-adhesive tape. It is very convenient to work with her. Glue the serpyanka so that the masked area (seam, corner) runs strictly in the center of the tape.
Plastering the surface of drywall requires several layers. First, the seams are covered with a rough compound. It hardens quickly. Therefore, cook it little by little (about half an hour of work). The plaster is applied to joints and problem areas with a 30 cm wide spatula, and then evenly distributed with a narrow (15 cm) tool. After rough processing, the sheet (ideally) should have no visible defects. After the mixture has hardened, it will not be possible to level them with sandpaper. Most likely, you will simply damage the drywall surface.
Which is better: heated floors or radiators?
Warm floorBatteries
Before finishing plastering, the screw heads for drywall need to be covered.
Before final plastering, it is additionally necessary to strengthen window and door slopes, as well as other external corners with metal products (corners). These elements increase the structure’s resistance to mechanical stress and provide it with a high level of rigidity. The corners are cut into pieces of the required size, mounted on the designated areas, and fixed with a stapler or putty. After installation, the elements are leveled with plaster composition.
We proceed to the final processing of the gypsum board. Final plastering on drywall is carried out as follows:
- 1. Treat the heads of drywall screws with the diluted mixture (the composition is applied crosswise - along and across the hardware).
- 2. Plaster the corners. Apply the mixture to one part of the corner first. Wait for it to dry. Then you process the second connection. This is the only way you can get really smooth and neat corner joints.
Now apply plaster to the entire gypsum board surface. Important! Do not try to cover the sheets with one thick layer. With this approach, you are guaranteed to get an uneven base. Treat the drywall with a thin layer of plaster. Wait for it to dry completely. Apply another thin layer. Repeat this operation as many times as necessary to obtain a visually smooth surface.
Perform final leveling with fine-grain sandpaper and then with zero-grit paper. It is advisable to perform these procedures in a respirator. After leveling, apply finishing putty with a wide spatula. The last step in processing gypsum boards is to apply a very thin (up to 1 mm) layer of plaster. The work is completed. Start gluing wallpaper or painting the base.
Now you know whether it is possible to plaster moisture-resistant and ordinary drywall, and you have also studied all the nuances of performing such an operation. You shouldn't have any problems with gypsum boards!
Selection of plaster
Drywall can be plastered with different materials, which are not the same in composition and properties. For wall and ceiling gypsum boards, it is allowed to use only those solutions that do not contain water or include a minimum amount of it. Polymer compositions are suitable for all sheets, and cement compositions are suitable only for moisture-resistant ones.
Gypsum plaster
The material is used in dry rooms because it contains gypsum, which does not tolerate moisture well. Gypsum-based plaster is well suited for gypsum board sheets, as it has a similar composition and quickly sets and hardens. The advantages of the gypsum mixture are:
- vapor permeability, no influence on the microclimate;
- environmental friendliness and fire safety;
- light weight, versatility;
- ease of mixing, application, restoration of damaged areas;
- minimal shrinkage, no cracks;
- low consumption.
Gypsum plaster composition Volma
In addition to fear of hydrophobia, gypsum plaster has other disadvantages - reduced frost resistance, the solution hardens too quickly, and the inability to add large portions at once.
Cement plaster
The main component of such a building mixture is Portland cement. Sand, plasticizers, and various additives are used as additives. Most cement plasters are considered frost-resistant, so they can be used for exterior work. They quickly and firmly adhere to the base, are easy to spread and apply, durable, resistant to moisture. Using cement mixtures, you can give moisture-resistant drywall additional protection from water.
Moisture-resistant cement-based composition Weber.Vetonit
The disadvantages of such plasters are:
- heavy weight, unsuitable for thin gypsum board sheets;
- long-term development of final strength;
- poor vibration tolerance.
Modern polymer compositions
Polymer plasters are an invention of recent years. They may have a gypsum or cement base, but their properties are still determined by the added polymer materials:
- acrylic;
- silicone;
- siloxane, etc.
Acrylic-silicone plaster
Such building mixtures easily withstand high humidity, are elastic and do not shrink, quickly gain strength and do not deteriorate from mechanical stress and vibration. They are suitable for any premises, as well as for outdoor work.
The weight of such mixtures is small, so they do not weigh down the plasterboard wall. The disadvantages include the high price of such products. In addition, they are sold already diluted in small packages, which is not always convenient.
Selection of materials for surface leveling
It is necessary to level the planes. Firstly, this will hide all existing seams and other joints of sheets or parts of the covering. Secondly, such leveling is simply necessary if surfaces are to be painted or finished with thin varieties of decorative plasters.
Which putty to choose for leveling drywall depends on your financial capabilities and preferences among manufacturers.
With rare exceptions, two trains are used here - “Uniflot” and “Fugenfühler”. Both types of mixtures are produced by the Knauf company, and it was the specialists of this company who developed the main types of gypsum plasterboard, as well as methods for finishing it. Therefore, there is no reason not to trust the mixtures of this manufacturer, and you can safely recommend them.
Fugenfühler is less reliable, since seams sealed with this mixture may crack slightly due to changes in temperature and mechanical stress. But it also costs much less.
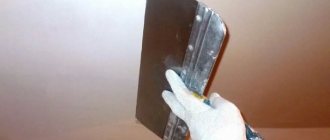
Tools and consumables for work
Working with plaster and gypsum board sheets is done using special tools. You should prepare them in advance according to the following list:
- construction mixer or drill with an appropriate attachment;
- metal and rubber spatulas of different sizes;
- reinforcing mesh (canvas) to strengthen structures;
- fine-grained sandpaper;
- masking tape and a stationery knife;
- bucket or other container, water, rags;
- screwdriver or screwdriver.
Tools for plastering work
Brushes and rollers may be required for priming walls, and a trowel is usually required for leveling plaster.
Step-by-step description of the process
In fact, puttying a plasterboard ceiling is not much different from similar work on walls. The biggest problem is that your arms, shoulders, back and neck get tired very quickly. Before you begin, arm yourself with the following tools and materials:
- starting putty (consumption about 3 kg per 1 sq.m.);
- primer (consumption about 1 kg per 1 sq.m.);
- bandage tape;
- 2 buckets – for clean water and for rinsing tools;
- container for mixing putty;
- drill with mixer attachment;
- 2 spatulas – 10 cm and 30 cm;
- priming roller;
- latex gloves.
Do not skimp on the primer, otherwise the putty will dry quickly and subsequently cling to the spatula. If you decide to putty a plasterboard ceiling that has been serving you for a long time and has become cracked over time, before finishing work you will need to cover the entire surface with a nylon mesh.
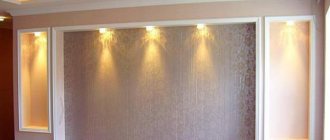
This is what a properly plastered and plastered ceiling looks like
After finishing the work, special polystyrene foam cornices fixed along the perimeter of the ceiling will help you give the ceiling a neat look.
Now that we are ready to work, let's proceed directly to the process.
Details about each stage
- Prime the ceiling. Pour the required amount of primer from the canister into the prepared container, moisten the roller in it and coat the ceiling. Work with gloves and old clothes that you don’t mind: the primer is difficult to wash off. If liquid gets on your face, wash your face as often as possible. Also try to promptly wipe the walls and floor if they get splashed.
- The next step is starting putty. Fill the solution bucket one-third full with water, pour in the putty so that it is slightly above the water level, and mix until smooth with a mixer. Scoop up the solution with a narrow spatula, transfer it to a wide spatula, and apply it to the ceiling surface.
- The starting putty is applied with wide movements. There is a peculiarity here: if you hold the tool at an acute angle, then the solution is applied, and if at a blunt angle, then it is removed. The first layer should be even to make the second easier to apply. A smooth surface at this stage is not the main thing; it will be achieved in subsequent stages.
- After two layers of starting putty have completely dried, remove all unevenness with a wide spatula. Then proceed to treat the ceiling with finishing putty, which looks like a finer powder. You need to fill in all the unevenness that arose when applying the starting layer. If you are preparing the ceiling for painting, the finishing putty must be applied twice.
- When the last layer has dried (this can take from 3 days to a week), you need to start sanding. The work is dusty, so wear special glasses and a respirator. You can purchase a special grinder with a dust collector, but this purchase is unlikely to be advisable for a one-time job.
Use bandage tape to reinforce seams
After all this work is completed, your plasterboard ceiling is almost ready for painting. All that remains is to prime it again, and it is advisable to use a white or transparent primer, otherwise the surface will acquire a yellowish tint and you will have to apply the paint in two layers.
Features of preparatory work
First you need to level the surface of the gypsum board and seal the fasteners. By inspection and palpation, check whether there are screw heads protruding above the sheet. If possible, they should be tightened tighter, but carefully so that cracks do not appear in the sheet. You can use a screwdriver - this way all actions will be better controlled. Next, the holes are filled with plaster, applying it crosswise with a narrow spatula.
There is an edge at the joints of the material, but in some cases the manufacturer does not form it. In such a situation, you will have to take a sharp stationery knife and cut the ends at an angle of 45 degrees. Otherwise, the sealing of the seams will be of poor quality. Chips in gypsum boards and other defects are covered with plaster or putty, always reinforced with a piece of mesh. Arches and other elements with bends are reinforced with special corners, which can be external or internal.
Reinforcement of joints of plasterboard sheets
The following are also taken as preparatory measures:
- clean the gypsum board well from dust, brushing it off with dry rags;
- prime the material with solutions that strengthen the structure;
- After a day, the condition of the putty defects is assessed - if shrinkage appears, the work is repeated.
Work technology
One of the most common materials for leveling walls indoors is Rotband.
Universal gypsum plaster Rotband Source prom.st
Here it is worth considering whether it is possible to plaster drywall with gypsum plaster. The fact is that metal screws are used to fasten the sheets. If they are of poor quality, then after some time corrosion processes begin. And any products that contain gypsum, even with primer impregnation, do not prevent rust from penetrating the surface. As a result, it is not recommended to use such plaster in conditions with changes in humidity.
Let's consider the main rule of how to properly plaster drywall. The gaps must first be filled and wait for the solution to harden. Only after this can the seams be reinforced with fiberglass mesh with 2*2 mm cells, special paper tape or a construction bandage.
Sample of construction bandage Source stroykray.ru
See also: Catalog of companies that specialize in finishing materials and related work
If the joint is strengthened immediately, then deformation of the tape occurs due to the movement of the plaster. It settles under its own weight, and the serpyanka enhances the process. As a result, the reinforcement often bulges beyond what is permissible along the general plane. Such places are cut off with a spatula, which means that in the joint area the tape will no longer perform its functions. As a result, a crack will appear, which will contribute to the peeling of the leveler.
Sealing longitudinal and transverse joints
With factory joints, plastering drywall is easy. First, the surface is primed. After the impregnation dries, the gap is clogged, then the reinforcing material is fixed with the same solution. It is recommended to use a spatula with a hard cloth so that when removing excess mixture, it is not pressed in. This creates a hole that originally needed to be filled.
Metal ironing board with hard cloth Source vseprokrasku.ru
In the case of corners and straight joints (transverse without a factory recess), proceed as follows:
- each edge is trimmed with a slope of approximately 45 degrees (a cone should be formed with a sharp point inward);
- the area is impregnated with a strengthening primer;
- After the surface has dried, the gap is filled.
On straight joints it would be more correct to use a construction bandage. Unlike a serpyanka type mesh, it does not provide a noticeable layer. The material is fixed using PVA glue of any modification. You need to straighten the tape with a brush to prevent deformation of the elastic fabric. After this, you can begin to putty.
Screw marks
There is one more thing left - filling the recesses from the screws. It is important here that the caps are recessed into the gypsum core by at least 3 mm. The surface is also primed and plastered. The main thing is to remove sand from the sheet and excess solution from the holes.
Prepared drywall for further finishing Source prom.st
Drywall plastering technology
Plastering of plasterboard walls is usually carried out using the “scraping” technology. Any unevenness with differences of less than 1.5 cm is treated with a wide spatula in one or two layers with mandatory intermediate drying. The applied composition is leveled using a rule, resting it on the surface of the plasterboard. In some cases, the curvature of the walls is more significant. Then the plasterboard is plastered along the beacons. Apply the material in 2 layers and sand down any unevenness.
For painting
If you plan to finish the gypsum board for painting, the surface must be perfectly leveled. It is possible to apply 2-3 layers of starting plaster, although usually it is limited to 1-2 layers. After drying, the surface is sprinkled with a little water and rubbed with a grater in a circular manner. Finishing putty must be performed, and after drying, thorough sanding to eliminate the smallest irregularities.
Under the wallpaper
Without plastering plasterboard walls under wallpaper, there is a high risk that the finish will stick tightly to the wall. If it is necessary to change the wallpaper, the top layer of plasterboard will be torn off along with it. Under thin paper sheets, careful plastering is carried out, similar to what is required for painting walls.
Thicker wallpaper can hide minor imperfections in the surface, so it is permissible to use only starting fine-grained plaster. Then the wall is rubbed down, after drying it is sanded and primed. Then it will be ready for wallpapering.
Plastering plasterboard walls under wallpaper
Tools that will definitely come in handy
Plastering plasterboard under wallpaper, paint or tiles is carried out using the same technology with minor differences only at the final stages for each material. In most cases, you need a standard set of equipment suitable for all types of gypsum boards and finishing cladding.
To work you will definitely need the following tools:
- oil level;
- roulette;
- construction mixer;
- square;
- wide and narrow steel spatulas;
- trowel;
- Master OK;
- rubber spatula;
- roller;
- paint brush;
- screwdriver;
- grater;
- stationery knife;
- rule;
- stable supports, trestles or stepladder.
In order for the finishing process to proceed without delay, you should take care of purchasing the following materials:
- deep penetration primer;
- liquid antiseptic;
- serpyanka mesh (fiberglass, wax paper);
- masking tape;
- containers for solutions and washing instruments;
- grater attachments;
- putty;
- finishing (paint, plaster, wallpaper, tiles);
- rags;
- cellophane film.
It should be taken into account that work on drywall involves handling sharp objects and is accompanied by the release of large amounts of dust and pungent odors. It is necessary to use a construction helmet, protective gloves and goggles.
Is it possible to apply decorative plaster to gypsum boards?
Decorative plaster is a finishing material. Such mixtures are widely used for plastering gypsum boards. The most common types of plaster are:
- relief (textured) - products with a coarse texture, including various fillers (mineral chips, mica, fibers, pebbles);
- structural - contain quartz or marble chips, the finished coating is almost smooth or slightly embossed;
- Venetian - they contain slaked lime and marble in the form of crumbs, so the coating imitates a natural stone surface.
Applying Venetian plaster to plasterboard
Before applying any decorative plaster to drywall, carry out the entire cycle of preparatory work with priming. For thin-layer coatings, gypsum boards are additionally coated with putty and sanded to perfect smoothness.
Apply the finishing material with a spatula, trowel or roller, following the technique for creating the selected effect. The decorative layer should not be too thick. After drying, it is coated with varnish or paint.
Summing up
Now you know how to properly plaster drywall. In order to more accurately understand the technological and practical issue, our website provides detailed photo instructions in which you will find the necessary information on this issue. Good luck!
- The instructions warn that to work with plasterboard it is necessary to use water-soluble compounds. They impregnate the top layer of sheets without penetrating deep into the material. In this way, a coating in the form of a film will be created that will prevent moisture from being absorbed from the plaster into the gypsum sheets and destroying it.
Note! This is how long the plaster mixture retains its viability. Then it starts to set. At the same time, adding water to the drying solution is extremely undesirable, since such “reanimated plaster will lose many of its qualities. Important! Such a statement is significant only when we are talking about plastering the entire surface, since the joints or transitions between walls must be puttied. As a rule, dry gypsum mixtures and reinforcing mesh are used for plastering drywall, and priming is an optional stage of construction work. The use of such materials makes it possible to seal all drywall seams and obtain an even plane.
To putty plasterboard walls with your own hands, you need to prepare the following tool: Before applying plaster, it is necessary to carry out certain preparations. The main direction of its implementation is cleaning the walls and ceiling from dust that is formed during the installation of the frame system. The main factors contributing to excessive dust formation are cutting, fixing and joining plasterboard sheets (GCR).
Once in the air, it spreads throughout the room and settles on surfaces. Preparation work includes the following tasks: Important! It is worth paying attention to the viability of the prepared solution and its drying time. These indicators depend on the binder. For example, the mixed KNAUF Uniflot gypsum putty tans in just 30 minutes, and after 1 hour its layer on the wall is completely dry.
And the WEBER-VETONIT polymer mixture with marble filler allows you to work with the solution for 24-48 hours, but the drying time of the layer will be already 24 hours. Plasterboard walls are an almost ideal plane and do not need additional leveling. Therefore, their plastering is used only as a final decoration. Also, in small quantities, a leveling solution is applied to the gypsum board to hide the joints of the sheets, small dents and screws used for fastening to the metal profile.
In essence, this is puttying, and it is necessary when rough finishing with this material under wallpaper, tiles or decorative plaster. Today there is an opinion that it is impossible to apply plaster on walls finished with plasterboard under any circumstances. A large mass of plaster in combination with water in its composition will lead to damage to such surfaces and deformation of the frame. Before plastering the drywall, it will require careful preparation, since any bump or dent will be too noticeable on a flat surface, which will not be hidden by any paint, emulsion, and possibly decorative plaster. This stage of work is considered the most critical and takes quite a long time to dry the applied layers of putty.
It includes several points. Cement putties, as well as gypsum analogues, are available for purchase, and in addition they are characterized by excellent hydrophobicity. But due to insufficient plasticity, such mixtures can only be used in buildings that are not subject to shrinkage processes.
- high degree of hydrophobicity and, as a result, the possibility of use in rooms with high humidity levels;
- resistance to sudden temperature changes;
- resistance to mechanical loads;
- crack resistance;
- acceptable adhesion indicators;
- ease of application;
- acceptable price.
- And finally, a few words about preparing the solution. The dry primer is poured into a container of suitable size, as indicated in the instructions, mixed well and applied to the wall from top to bottom using a roller. The primer layer should be at least 0.03 mm over the entire working surface.
All work must be carried out under optimal conditions. The temperature should be between +5-35°C. Moderate humidity is required. The expression “plastering drywall may seem meaningless to some, because drywall itself is installed to level the ceiling or walls, i.e. it already performs the function of plaster.
But it's not that simple. Even perfectly aligned slabs need additional finishing. And just puttingtying the seams and recesses from self-tapping screws is not enough here - a covering layer is mandatory. Below we will talk about the technology for plastering plasterboard walls and ceilings, as well as choosing the appropriate working composition. At its core, the unexpected question of how to plaster drywall is not a priority, since this material is just a dry type of plasters.
It is much more important to decide on the finish in advance, that is, it would be more correct to immediately ask yourself, is it necessary to cover a perfectly flat surface with a plaster compound? The answer will be positive if a decorative mixture is chosen as the finishing material. The experts of the site REMOSKOP.RU have prepared for you a special master class on the topic Installation of plasterboard partitions . Step-by-step instructions with exclusive photos and video materials. At its core, the unexpected question of how to plaster drywall is not a priority, since this material is just a dry type of plasters.
It is much more important to decide on the finish in advance, that is, it would be more correct to immediately ask yourself, is it necessary to cover a perfectly flat surface with a plaster compound? The answer will be positive if a decorative mixture is chosen as the finishing material. The experts of the site REMOSKOP.RU have prepared for you a special master class on the topic Installation of plasterboard partitions .
Step-by-step instructions with exclusive photos and video materials.
How to treat the surface → Room decoration → How to choose the right paint → Surface treatment technologies → Leveling and finishing the walls → Selecting and applying a primer → Removal from the surface → Stretch ceilings and technologies → Reviews and testimonials
Is it possible to plaster drywall with Rotband?
Gypsum plaster "Rotband" from "Knauf" is perfect for working with gypsum boards. This is a high-quality product made in Germany, which is suitable for dry and damp rooms, and due to its lightness, for ceilings. Rotband contains gypsum, polymers, fillers and plasticizers. The surface after applying this plaster is perfectly smooth. The only downside is that the product is unsuitable for metal, so the screw heads must be well insulated in advance.
Gypsum plaster "Rotband" for interior work
Before applying Rotband, it is necessary to treat it with a deep-penetrating primer, which improves adhesion to the base and prevents moisture from seeping from the plaster into the gypsum board sheet. For work, use a spatula measuring 30 cm or more, holding it at an angle of 40 degrees. Drying “Rotband” lasts 24-48 hours depending on the thickness of the layer.
How to plaster drywall
You will need
— capacity;
- water;
- dry plaster mixture;
— construction mixer;
- spatula (width 10 cm and 44 cm);
— serpyanka ribbon.
Instructions
- Prime the plasterboard sheets (GKL). To do this, apply a special composition based on epoxy resin or polymers using a brush or a special roller. Drying time for the primer is 40 minutes, after which you begin sealing the joints.
2. Be sure to inspect all seams before sealing to identify some deficiencies, for example, not fully screwed in screws. To find them, run a spatula along the seam; it should slide smoothly and not catch on anything. Tighten the protruding screw with a screwdriver. Treat the seams after cutting the drywall sheets. To do this, take a gypsum board knife, cut the edge at an angle of 45 degrees and 0.5 cm deep. Apply a soil solution to it.
3. Prepare putty. To do this, pour water into a container and, adding a special dry plaster mixture, bring it to a creamy state. This solution should be a homogeneous mass without lumps. To mix, use a special construction mixer or do it by hand. Stir the mixture at low speeds, as otherwise this will lead to the destruction of special reinforcing additives, which will entail a decrease in the strength of the putty.
4. Take the sickle tape, glue it to the seam and apply putty on it with a 10 cm wide spatula. This is required so that the latter does not crack at the joints of the plasterboard. As the putty dries, it shrinks slightly, so reseal the seams, but without the mesh.
5. Prepare finishing putty. A properly prepared solution should have the consistency of thick sour cream and be smooth, elastic, and not have any small grains; the quality of the work performed depends on this. You can begin applying gypsum putty after the joining seams and all corrections in the defective areas have completely dried. Apply gypsum finishing putty to the surface with a 44 cm wide spatula on the walls in a thin layer, up to 2 mm, with light, even movements, which are performed from bottom to top, from floor to ceiling.
6. Remove any irregularities on the dried surface with fine-grit sandpaper and reapply a thin layer of putty. When the surface with two layers of putty is completely dry, sand it manually or with a special sanding device. Apply primer to the finished surface.
For painting
Each option for plastering gypsum boards has its own characteristics. Preparation for painting the material is no exception. It is performed by any true professional to guarantee the actual quality of the coating. The layer is leveled using spatulas with wide blades, then the material is rubbed until perfectly smooth, and a primer is applied on top. Finish the drywall with sandpaper. You need to work very carefully, because paint will not only fail to hide defects, but will only emphasize them.
Under the wallpaper
Imitation of wallpapering walls is created with cellulose-based mixtures. Various fillers are added to it: silk, cotton, acrylic. Liquid wallpaper also contains pigments and some other components. Such mixtures are supplied in bags and are lightly moistened with water before use. The walls need to be primed, the material itself is leveled with a spatula after application.
"Rotband"
This is a truly high-quality composition made in Germany. But good surface preparation is also very important for it with the help of deeply embedded primer, which improves adhesion to the applied material. No less significant is the fact that the primer prevents the drywall sheets from becoming saturated with water, which inevitably escapes from any plaster.
When applying the primer mixture, any omissions are unacceptable, and the joints are glued with tapes (serpyankas), and then covered with special reinforcing compounds. On a dry surface, such lines are erased, removing slight deformations and sagging.
To work with Rotband, a spatula with a blade of 30 cm is recommended; it is held at an angle of 30-40 degrees. Strong pressure is contraindicated: it will provoke the appearance of waves.
If the defects of the original surface are significant, they work in two steps: 0.3-0.5 cm each. The final composition is applied to a maximum of 0.1 cm; the slightest deviations from an even layer are unacceptable. After drying (taking 24-48 hours), the plastered walls will be perfectly white.
Decorative plaster
Decorative plaster can also be applied to the surface of drywall. The Venetian version of the coating is distinguished by a combination of various colors and a glossy outer layer. In addition to completely ready-made mixtures, there are also those you can make yourself: they are prepared by adding various colors to the universal gypsum material. Most often, the first layer is made white, defining the future relief, the second one determines the texture and color. The third layer enhances the tonality, making individual segments lighter or darker.
The textured type of plaster is distinguished conventionally, because almost any mixture allows you to create an elegant relief. But there are options that are already familiar to professionals, like the “bark beetle”. Depending on personal needs and taste, you can choose abstract compositions and geometric shapes. Any builder, at least minimally experienced, can make both a duplicate pattern and a chaotic image.
The tools used are varied: these are not only spatulas, but also trowels, sponges, specially ordered dies, coarse wire brushes, and the like.
Plastering an arch also has its own characteristics. First of all, the perimeter is thoroughly cleaned, and the same manipulation is carried out with the joints. Next, the ends are polished, which protrude at least a little beyond the contours of the arch. Then the drywall is thoroughly impregnated with a primer, and the protrusions are covered with a perforated corner. Then a reinforcing layer is used - this completes the preparation.
Tips and tricks
If you decide to decorate a room with gypsum board sheets, you should purchase moisture-resistant material. It is more expensive, but much better quality. Even in dry rooms, unexpected contacts of the base with water are possible, while the integrity of the drywall will be preserved. To ensure that the work is completed efficiently, you should follow the following tips:
- work at temperatures within +5...+30 degrees and humidity up to 60%;
- eliminate drafts in the room;
- start plastering from the ceiling;
- monitor the condition of gypsum board joints - cut off loose cardboard, sand the seams with sandpaper, repair chips;
- Seal sockets and switches with masking tape to prevent splashes;
- do not forget about applying a primer, if possible, apply at least 2 layers of primer;
- apply reinforcing tape exactly in the middle of the seam;
- dilute dry mixtures only with cold water.
Working with drywall is not difficult, and the result when you follow the technology is excellent. This material allows you to give walls evenness, create beautiful designs and make the interior modern and stylish!
Mistakes made at work
Lack of reinforcement, improper priming and other errors lead to swelling and cracks. The plaster quickly falls off if the work is not done in good faith.
Examples of errors:
- Too thin a solution may drain on a crooked base.
- The thick mixture does not adhere well to the surface, so the plaster bulges or falls off.
- The surface is not primed. In such cases, the plaster adheres less well to the surface. If you do not prime the putty before applying the 2nd layer, it is guaranteed to fall off during grouting.
- Many craftsmen believe that the primer is used only to moisten the surface, so they do not wait for it to dry or water the ceilings with ordinary water.
- Lack of reinforcing elements at the junctions of joints made of different materials.
- The absence of reinforcement often leads to the formation of cracks as a result of shrinkage.
- Some builders do not know that the reinforcement should be inside the plaster layer, and not under it. Because of this error, the solution is more easily deformed.
- Beacons cannot be left in the wall as they rust. Traces of corrosion appear on the surface after finishing.
- The solution hardens worse at temperatures below +5 degrees.
- Moisture evaporates from the mixture too quickly if the room is too hot.
When plastering, the thickness of the permissible layer must not be exceeded.
Before applying each new layer of finishing materials, you must wait until the previous one has completely dried. Haste is one of the main mistakes of inexperienced builders.
Do I need to plaster?
In the process of creating plasterboard structures, the question arises whether it is necessary to plaster the plasterboard before the final decorative finishing. It would seem that drywall levels the walls, creates a smooth surface, which does not make much sense to plaster. But professional craftsmen note several important reasons why plasterboard surfaces can and should be plastered:
- A thin layer of plaster allows you to hide minor defects and the slightest curvature of the plasterboard sheet.
- Plaster allows you to hide the caps of fasteners and joints connecting several plasterboard sheets.
- Plaster helps hide surface defects that may appear as a result of long-term use of a plasterboard structure.
- Plasterboard surfaces must be puttied before painting.
- Plaster on a plasterboard wall can be an interesting decorative coating.
Preparation for plastering
The process begins with selecting the right tool. For work you will need:
- Spatulas wide and narrow. It is more convenient to apply the mixture to even and large areas first. Craftsmen recommend taking one with a width of 44 cm. The narrow one is useful for hard-to-reach places, corners and joints.
- Level. Without it, it is difficult to determine whether everything is smooth.
- Roller with a long handle for priming. It will save you from climbing stairs.
- Vacuum cleaner, preferably industrial. It will be needed to remove dust.
First of all, vacuum the surface or remove dust with a damp cloth. Contaminants interfere with the adhesion of the primer and putty to the drywall.
Cleaning dust from drywall with a vacuum cleaner
When the dust is finished, check whether the screws are screwed in correctly and their heads are recessed deep enough. Next, move on to the primer. Prime the areas that will be puttied: joints, seams, holes. After the soil has dried, they begin to putty.
The putty is taken ready for use or in the form of a dry mixture. In the second case, they spend it as quickly as possible.
First there is a layer of putty, the tape is applied and pressed on top, and then covered with a solution for better adhesion. Internal and external corners are closed in the same way, but using profiled corners with perforations, which provide access to the surface of the putty when pressed into the corner. Excess putty is immediately removed with a spatula. For reliability, the corner elements are fixed with self-tapping screws.
After drying, minor blemishes are removed with sandpaper. The quality of work is checked using a level or a regular rod. Then the entire surface is primed. A deep penetration primer is used to ensure good adhesion to the plaster. Craftsmen recommend an acrylic mixture that impregnates the plaster, strengthening it to a moisture-resistant state.
This is done with a roller, and the primer is taken in excess, but so that there are no smudges. When the soil is dry, begin plastering.
Seam reinforcement
To each his own!
How to level the walls is up to everyone to decide for themselves. As a rule, plaster is chosen by those who are interested in the result, and not the speed of work. Although it is more difficult to work with mortar than with HA sheets, high-quality plaster will last 20 years and nothing will happen to it.
The biggest disadvantage of the “wet” method is dirt and dampness during work. But as a result, they get a strong, reliable foundation.
And yet, one cannot categorically say that drywall or plaster is better. It would be most correct to say that the materials complement each other perfectly. The main thing is to use them correctly.
Recommendations for plastering plasterboard sheets
Plaster can be used both for continuous application and for individual decorative elements. Often, designers use a combined option - wallpaper and plaster finishing. If your plans include plaster finishing of sheathed walls, then the following tips are for you:
The procedure for performing work on sealing seams.
Pay attention to materials for plastering walls. Among them are lime and cement-sand mortars, as well as gypsum mixtures
Consult with experts which of these types is best for your walls. When purchasing materials needed for repairs, pay attention to their characteristics. There are a lot of plasterboard sheets, so choose only moisture-resistant ones, they have special markings. Be sure to consult with specialists and craftsmen. Be sure to use special primers for walls that promote deep penetration into the material (even when gluing wallpaper). On problem areas (for example, dents), the plaster will adhere better if it is applied in several layers. To do this, you need to give the previous layer time to completely dry. Keep in mind that plaster can easily smooth out wall unevenness up to 30 mm. Use decorative plasters for finishing walls. Application must be carried out strictly according to the recommendations contained in the instructions from the manufacturer.