You can divide rooms into partitions and interior spaces not only using the structural type of blocks used for the main load-bearing walls, but also structural and thermal insulation.
What are the requirements for partitions, what materials, consumables and building mixtures are needed, what features and errors may arise in the construction of walls - we suggest you familiarize yourself with the proposed article.
General requirements for interior walls in a house
After the load-bearing walls, lintels and ceilings have been laid, the builders begin to think about laying the partitions planned for the project. First of all, they make markings on the floor, walls and ceiling, in accordance with the intended drawing, not forgetting the basic requirements for aerated concrete partitions:
- Structural strength . It is made in such a way as to withstand mechanical and external factors in the room, and fastening elements can be attached to it.
- Light weight . According to the project, the fence is planned without additional (extra) loads.
- Sufficient sound insulation . Interior partitions must meet the requirements of 43 dB. In apartment buildings this index is 52 DB.
- Thickness _ Despite the fact that the septal cellular material comes in different thicknesses, the most optimal size is 100-175 mm. The presented indicator has sufficient strength and sound insulation.
- Environmental friendliness . The structure is made from environmentally friendly material, which is safe due to its mineral composition.
- Fire safety . The partition must prevent fire. The minimum fire resistance limit for aerated blocks is 0.25 hours.
- Availability of a quality certificate . Materials used in the work must have quality marks and markings provided by the manufacturer.
- Material density from D500 to D700 . This requirement indicates the quality characteristics of the material, according to which the higher the D, the stronger the partition will be.
The above conditions are fully met by the autoclave block, which belongs to the category of structural and thermal insulation.
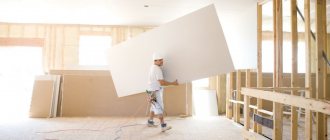
If the owner of the house wants to complete construction as quickly as possible, then experts advise using large-sized products for work , with dimensions in length and width of 750x625 mm.
For interior partitions, these blocks are the best option.
According to generally accepted standards, partition structures are directly dependent on height (h). So, for example, with h 2.5 m, a block with a thickness of 75 mm is used; at h 3 m – 100 mm; at h 3-5 m – 200 mm.
Important ! The basic rules for the construction of aerated concrete structures are contained in SP 339.1325800.2017.
Block selection criteria
Aerated concrete blocks for partitions may differ in strength grade, size and other properties. To find the best option that will correspond to the characteristics of a residential property, you need to carefully study and calculate the required parameters.
Brand
When choosing a brand of material, it is necessary to take into account the purpose of the interior partitions. For a load-bearing wall inside a building, it is customary to use a block numbered D500 or D600. The density indicators are high enough to hang furniture, decorative elements and other interior details weighing up to 150 kg on the partitions.
If you need to build a lightweight partition that will not be subject to heavy loads, the use of blocks under the brands D400-D350 is allowed.
Dimensions
The next parameter of partitions is dimensions. The classic length of the stone varies from 600 to 625 mm with a height of 200-250 mm. In this case, the thickness is 75-200 mm in increments of 25 mm. The dimensions of aerated concrete blocks can vary depending on the layout of the building.
Necessary materials and tools for installation
To build partitions from aerated blocks, you need to determine where to place them. You can use a sand-cement mixture, with a good grade of cement M400-500 and a polymer additive . The composition is purchased in dry form or prepared from the components yourself. As you use the mixture, dilute it in the required quantity. The solution is always used for the first layer of masonry.
The second and subsequent layers are faster and easier to install using foam or adhesive. The first holds the material together within 10 minutes, and the glue within 1-2 hours. For example, 1 bottle of foam replaces a bag of glue, which, like sand-cement mortar, must be diluted as it is used.
In addition to the materials presented above for laying composition, the following are used in the construction of partitions:
- Aerated concrete structural and thermal insulation blocks of the required size, indicating factory markings and quality certification.
- A container for diluting the solution, a shovel, sticks, a concrete mixer and a hand-held construction mixer.
- Waterproofing (roofing felt), any plaster (dry or ready-made in buckets).
- Electric drill, wall chaser, regular hammer, rubber mallet.
- Spatula, trowel, carriage, grater, saw, square, construction square, cord, gripper, plumb lines, laser meter.
- Reinforced rods, without signs of erosion.
- Fastening elements (anchors, strips, screws, nails).
You will also need work clothes and gloves . It’s easy to install the partitions yourself, or you can contact a construction company, which, according to the estimate, will provide consumables and tools.
Important ! If you plan on long-term cooperation with a construction company, you must conclude an agreement according to which the customer will receive guarantees for the work performed.
Execution
First row
Reinforcement of the first row of masonry, as well as every fourth row, if necessary, is carried out as follows.
The structure is reinforced with steel rods with a diameter of 8 mm, grade A III. For a wall 200 mm thick, it is enough to lay one reinforcement bar exactly in the middle of the row.
For thicker walls, use 2 rods. They are laid parallel to each other. To do this, make 2 parallel grooves using a wall chaser. The distance from the inner and outer edges of the wall to the grooves must be at least 6 cm. In the corners of the building, the grooves are rounded along a radius.
Dust is swept out of the finished grooves with a brush, filled with adhesive, reinforcement is laid and excess glue is removed using a spatula.
Important! The reinforcement in the corners should not be interrupted. It is rounded so that it follows the radius of the groove. Therefore, overlap the reinforcement approximately in the middle of the wall, fixing it with a tie wire
Therefore, overlap the reinforcement approximately in the middle of the wall, fixing it with tying wire.
Reinforcement under the window opening
Laying reinforcement in aerated concrete blocks is necessary under the window opening. The laying is done in the last row of blocks in front of the window being constructed. To do this, its planned length is measured and marked on the surface of the masonry (the reinforcement bars should be 0.5 meters longer than the length of the window). Next, in the masonry row, at a distance of 60 mm from the outer and inner sides of the wall, aerated concrete is chipped using a manual wall chaser. Namely, 2 grooves are cut, the minimum cross-section of each is 2.5x2.5 cm.
Tip: To ensure the evenness of the grooves, you can nail a wooden board onto the desired row of blocks, which will act as a rule when cutting out the recess.
From the grooves, using a brush, it is necessary to remove dust and crumbs of aerated concrete formed during the cutting process. Before laying reinforcing bars and grouting with mortar, the cut grooves are moistened with water. This is done for the best bonding of the adhesive solution with reinforced aerated concrete.
At the next stage, the groove is filled to half its height with thin-seam block masonry mortar, then profiled steel reinforcement with a diameter of at least 6 millimeters is laid. The groove is completely filled with mortar, if necessary, removing all excess and leveling the seam with a trowel.
The next masonry row can be installed immediately after strengthening the window sill area.
Vertical wall reinforcement
This type is used extremely rarely in the following cases:
- Reinforcement of a wall that may be subject to strong lateral loads. In this case, it is necessary to carry out horizontal reinforcement.
- When using low quality aerated concrete with a minimum density.
- In places where heavy elements (metal beams, etc.) rest on the wall structure.
- Corner dressing of the joining of adjacent walls.
- Strengthening small walls and door and window openings.
- Construction of a column from aerated concrete blocks.
- When using large-sized wall panels.
Find out which tool can be used to cut aerated concrete blocks.
Consider installing doors in aerated concrete at the stage of laying the walls.
Step-by-step instructions for laying interior walls
When arranging the foundation for partitions with gas blocks, it is worth pointing out that the foundation is laid in advance, before laying the main load-bearing walls. Depending on the type of soil, a strip or monolithic foundation is used. The first one after installation should take 6 months to settle, and the second one – 1 year.
After the construction of the main walls and ceilings, they wait 1 month , and only when they gain strength and strength do they begin to make partitions. Roofing felt (1-2 layers) is placed on the foundation base before the construction of the main walls. So, when they plan to make partitions, the waterproofing is most often already laid, which greatly facilitates preparation for internal construction.
Step-by-step instructions, after preparing the foundation, tools and consumables, according to masonry technology, consist of the following steps:
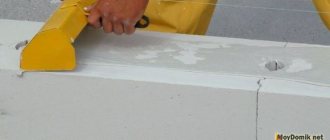
- Markings are applied to the floor, walls and ceiling, a cord is installed along which the masonry will be carried out, a sand-cement mortar is prepared, which is necessary only for the installation of the first layer of blocks (according to building regulations). Then it is more effective to use glue or foam (the best option, with instant setting).
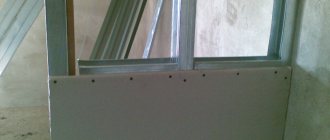
- The blocks are laid in a checkerboard pattern, the excess parts are cut off with a hacksaw. Every 2-3 layers are reinforced with metal rods or construction anchor tape. If necessary, the surface of the blocks is ground with a grater or smoothed with a plane.
- The resulting seams are filled with foam or mastic. Anchoring is carried out using flexible or rigid ties. Between the last row of masonry and the ceiling, the resulting gap is filled with construction foam, making sure to install a damper joint before doing this.
Some experts believe that if from the second layer to the very ceiling they are placed on polyurethane foam for fastening, then the blocks need not be reinforced at all. But, if the project plans to install heavy hanging structures next to the partition or on it, then reinforcement is necessary. 24 hours after installation, finishing work can be carried out on the interior partitions.
After laying the first layer of cement composition, it needs to be given time to harden . Usually it is up to 12 hours, sometimes faster, especially in the warm season. Subsequent blocks are laid in a strict geometric bandage along the seams, with settling along the surface using a rubber mallet.
Important ! In the process of work, you should not forget about the connections - flexible or rigid. Anchors and plates are repeated every 3 rows.
How to lay partitions from aerated blocks is shown in the video:
Finishing
Before starting finishing work, it is necessary to carefully study the characteristics of the material and its compatibility with different finishing options. Aerated concrete contains the following components:
- Sand.
- Lime.
- Cement.
Aluminum chips are also added to the listed raw materials, and then the resulting mass is poured into molds. When the material has completely hardened, it can be used for its intended purpose.
Based on the characteristics of aerated concrete, it is necessary to choose suitable finishing options. Since the presence of aerated concrete structures inside a residential building requires a special level of humidity, the decorative layer should not interfere with this process.
Gypsum plaster can be used as a good design solution. It is characterized by excellent vapor permeability and is sold in bags of 5-25 kg. To prepare the solution, you must follow the instructions exactly.
The plaster contains slaked lime and perlite sand. The combination of these components increases the sound insulation standards and fire safety of the building. Gypsum plasters do not require prior application of a primer to the wall or finishing with putty. But since such a mixture is not cheap, many builders settle on a budget option consisting of cement and sand.
In this case, the likelihood of plaster peeling increases as dampness increases. To prevent such consequences, it is necessary to apply several different finishing options to the wall.
Drywall can be used as a finishing material. It is versatile and can be used in any interior style.
There are 2 types of drywall available for sale:
- For the ceiling. Its thickness is 9 mm.
- For walls. The thickness does not exceed 12 mm.
The material can also be divided into the following groups:
- Classical.
- Fire resistant.
- Water resistant.
- Combined.
The final finishing layer is painting the walls. It gives the interior an attractive look and visually expands it.
Before painting, the wall must be leveled using a sanding machine. If it is missing, you can use a special grater or sandpaper, since the paint does not hide wall defects.
Any paint job involves applying a primer layer and aerated concrete products are no exception. It is better to use water-based paint as a coloring composition.
Combination of aerated concrete with wooden materials
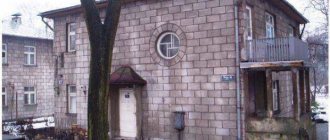
When arranging housing, the interior space can be divided by partitions made of wood, and vice versa, in houses made of timber, aerated concrete partitions can be installed. Both options include general preparation for masonry. The nuances differ slightly.
In wooden houses, masonry is done according to markings , paying close attention to the quality of fastening of flexible or rigid connections along the very surface of the wall, as well as for the first and top row. To prevent structural noise in a wooden house, you will need fibrous soundproofing material (tape), which is placed at the joints with the floor, ceiling and walls.
Frames using wood, blocks and drywall are also a very common option. This type begins with the dimensional marking of the future partition and laying the first layer of blocks. Then the timber is attached to the frame, and then the drywall. But this option is considered costly and time-consuming, so it is rarely used. This method will be inexpensive only if instead of a steel frame there is a completely wooden one.
Frame partitions will require additional insulation from mineral wool, sawdust, shavings, but the structural and thermal insulation block does not need to be insulated. That is why cellular aerated concrete is a more practical option for all types of houses .
Is it necessary to reinforce the structure, how to do it
It is important to strengthen aerated concrete walls if the building is located in an area of seismic activity.
If seismic activity is very high, then reinforcement should be done every row, otherwise - every 4-6 rows.
To do this, shallow slits are made with a wall chaser, they are cleaned of dust, lubricated with glue and the reinforcement is laid so that it is covered on all sides with the mixture.
Possible mistakes
Difficulties and mistakes made when laying aerated concrete partitions can arise in the following cases:
Purchasing low quality material that does not have labeling, certification or warranty from the manufacturer.
This applies to gas blocks, cement, glue and all other consumables. Blocks must have a high D density.- Errors in calculating the shape of the wall, its thickness and external load.
A well-drawn professional drawing from a local architectural bureau of urban planning or a construction company that provides this type of service can protect against this problem. - Lack of waterproofing, anchoring and construction technology. Such errors will contribute to the rapid destruction of the partition or the appearance of cracks on the wall, which will require additional financial costs to eliminate the problems, with additional time spent.
- Failure to comply with temperature conditions. Recommended temperature for indoor work is +5 °C. At warm temperatures, work proceeds quickly, and solutions and glue harden well.
- Construction of walls immediately after pouring the foundation. It is necessary to comply with the technical conditions for starting work, in accordance with GOSTs, so that there is no destruction or cracks in the future.
In order to avoid errors in work, it is necessary to adhere to the following standards when working with gas blocks :
- GOST 21520-89;
- GOST R 57334-2016/EN 771-4:2011;
- SP 339.1325800.2017;
- STO 501-52-01-2007;
- STO NAAG 3.1–2013.
Aerated concrete blocks are a lightweight and very practical material that is easy to construct, following technological rules.
Load on floors
If you use floors made of aerated concrete slabs, this will ensure good thermal conductivity. And the weight of aerated concrete slabs is less than those made from other materials.
It is better to use a monolithic floor, as it provides additional support for the walls during seismic vibrations.
The thickness of the ceiling depends on the reinforcement and load-bearing capacity of the walls. To do this, take slabs up to 3 m with a load-bearing capacity of up to 800 kg per 1 m2.
Installation benefits
The advantages of using gas blocks are as follows:
Ease and high speed of masonry, as well as processing (surface grinding, chipping, sawing with a hacksaw).- Good thermal insulation and sound insulation characteristics.
- Economic benefit and practicality.
- Excellent combination with reinforcement.
- Environmental friendliness and fire protection.
- Possibility of using any finish.
The disadvantages of using gas blocks are considered:
- Allowing only minimal operating loads.
- Arrangement using flexible and rigid anchoring (tapes), which must be performed several times.
When characterizing aerated concrete partitions, buildings have more advantages than disadvantages.
Existing disadvantages
- High hygroscopicity, requiring reliable waterproofing to prevent the accumulation of moisture in concrete pores. Let me give you an interesting experiment: a test sample with a density of 800 kg/m3 was left in a state of complete immersion in water for 18 hours, during which time its mass increased by 47%. Eight days later, after being removed from the water, the weight returned to its original weight.
- Susceptibility to cracking due to low prismatic strength. Easily leveled by plastering.
- The appearance of a large amount of dust during drilling and sawing.
- When installing heavy parts on walls, you will need to use special anchors.
The existing disadvantages are more than offset by numerous advantages, which makes the use of the material more and more in demand.
What it is?
An opening in a wall made of aerated concrete blocks is a hole in stone masonry for access to another room. Openings are window and door. Window openings are arranged in the middle of the wall, with approximately the same distance from the ceiling and floor.
Window elements must be reinforced with lintels, since the floor slab will have an impact on the structure. The openings for the window can be laid out at the initial stage of construction when laying aerated blocks on the walls, and can also be cut out in a ready-made wall if redevelopment is suddenly contemplated.
Openings for doors can be made both on load-bearing and on internal walls and partitions. A passage on a load-bearing wall is often the main entrance to the house or exit to the backyard. The passages in the partition walls are made for the further installation of interior doors.
Such openings also require reinforcement above the passage to avoid excessive loading. The door passage runs from the floor to the ceiling, sometimes from the floor and not reaching the ceiling a few tens of centimeters.
Calculation scheme
The principle of calculating the required material is very simple. No complex formulas are required here. To correctly calculate the number of blocks, it is enough to use the following scheme:
- To determine the total area of the wall, you need to multiply the length and height, then subtract from the resulting value the dimensions of door or window openings, which are calculated according to the same scheme. For example: a partition 10 m long, 3 m high, total area is 30 sq. m. The design has one opening measuring 1*2 m. The final number will be: 28 sq. m. For walls with complex shapes, a similar calculation principle applies.
- To determine the number of gas blocks, you will have to divide the resulting area of the future partition by the lateral parameters of the block.
It is important to add 5% of aerated concrete for unforeseen expenses or defects. Because it often happens that at the end of the work there may not be enough material. As a result, unnecessary problems will appear.
Features of aerated concrete partitions
Let's start with the advantages that aerated concrete has in comparison with other popular partition materials:
Aerated concrete for partitions is chosen for its light weight and low load on the floors and foundation;
The table shows the approximate weight of high-density blocks
Smooth, large-sized blocks are quickly and easily laid, so erecting a partition takes a minimum of time and is cheaper in terms of labor costs;
One block replaces several bricks
- It is easier to lay aerated concrete blocks with your own hands, as it is easy to process;
- The strength of the material is less than that of brick, but is quite sufficient to serve as the basis for hanging structures and furniture;
- The price of one cubic meter of aerated concrete blocks is almost half that of the same volume of brick.
Therefore, it is not surprising that when choosing a material for a partition - brick or aerated concrete - they are increasingly choosing the latter option. If we compare it with a frame structure lined with plasterboard or other sheet material, then here too its clear advantage can be seen.
It lies in the fact that you can hang a shelf or curtain for curtains on an aerated concrete wall anywhere. Whereas in frame partitions it is necessary to plan the embedded parts in advance to enhance their load-bearing capacity.
Special fasteners successfully solve the problem of insufficient strength of aerated concrete
Installation of a brick partition: installation of a reinforced concrete lintel
The installation of brick lintels in a partition is, from a constructive point of view, a complex process. An inexperienced person is unlikely to be able to assemble it on his own the first time. In terms of bending strength, such a structure cannot compete with a reinforced concrete lintel. They are usually used when constructing brick walls independently in houses and apartments.
You can purchase a ready-made element. But if it is not there, it is realistic to cast a concrete lintel in formwork with four pre-laid reinforcement bars, which must have a cross-section of at least 10 mm. The rods are connected using metal wire into a frame. It is necessary to ensure that the thickness of the lintel matches the height of the rows.
General rules
Partitions made from aerated concrete blocks have several important requirements for use.
Firstly, they cannot be load-bearing - the slabs or reinforced concrete monolith must still rest on the main walls. Secondly, the partitions themselves must rest on the foundation or the lower floor. Thirdly, they should be connected to at least one adjacent wall. In addition, aerated concrete blocks must be able to withstand the weight of hanging furniture. For example, each fastener can hold a cabinet or shelf that weighs 25 kilograms and there should be no problem. Installation must be carried out so that the partition fits tightly with the floor and adjacent structures. Both the light weight of the blocks themselves and maximum sound insulation are important.
If aerated concrete blocks are planned to be placed between the living room, kitchen or other rooms with different temperatures, then care should be taken for thermal insulation
But at the same time, it is important to strive to ensure that the thickness does not increase much and allows you to save space. It is important to comply with fire safety conditions, because in the worst case, aerated concrete can prevent the spread of fire for no more than a quarter of an hour
Experts highlight impressive advantages of such structures. The material is easy to process, so you can give it the most convenient shape and size using a regular hacksaw. By following the installation rules, you can get a neat partition with a perfectly flat surface and neat seams, the thickness of which ranges from 1 to 3 millimeters. All this is possible, since a special cement adhesive is used for masonry. The porous structure means that the light weight and small thickness are complemented by fairly decent sound insulation and thermal insulation. In addition, the material is relatively inexpensive.
There are also disadvantages to aerated concrete blocks. The design is not very durable and largely depends on the materials used. Aerated concrete absorbs water, which sometimes makes finishing work difficult. It may well happen that a layer of the same plaster simply will not stay on the surface. Finally, it is quite difficult to attach any fasteners to the gas block. Some of them simply refuse to hold on, while others oxidize and become rusty.
Aerated concrete partitions are usually erected when the external walls are already standing. If their length and width are too large, then the frame will have to be reinforced with reinforced concrete structures. At the joints of ceilings and partitions, an expansion joint filled with polyurethane foam or mineral wool is used. The edge joints are processed in the same way. It is also recommended to use reinforcing elements to connect the partition to the wall. In this case, all adjustments are made with a regular hacksaw.