In order for the finishing layer of paint or plaster to last on the wall as long as possible, it is recommended to cover the wall with a layer of primer before starting finishing work. In construction supermarkets today there are a large number of different types of primers from different manufacturers on sale. However, not everyone knows how to make a primer with their own hands, the cost of which will be an order of magnitude lower than that of a ready-made one.
Return to content
Benefits of primer
As noted above, the primer increases the service life of the wall covering, improving the quality of adhesion of the material to the wall surface. The primer is a liquid mixture that is applied to the walls in an even layer and, as it dries, creates a dense film on which plaster, paint, wallpaper, etc. fit well. If plaster is falling off your walls, and the walls themselves are loose and dilapidated, plaster will help further strengthen them.
Based on what functions the primer will need to perform, it can be divided into the following types:
- Primer to improve the quality of adhesion of the applied material to the wall surface;
- Primer for strengthening walls;
- Deep penetration primer with water-repellent and protective effects.
In addition, the primer has anti-corrosion and antiseptic properties. In some compositions, the use of additional ingredients gives it, among other things, fire resistance.
You should know that treating the working surface with a primer is required for almost any finishing work, for example, when plastering foam concrete and aerated concrete walls and painting work, such as painting concrete floors or slate.
Before you prepare a primer at home, decide what functions it will need to perform, since its composition will depend on this.
Return to content
What soil is needed for seedlings: soil composition
The soil for seedlings often includes sand. It is best if it is clean river sand that does not contain clay. It is enough to sift it to clear it of stones. Soil containing sand never forms a surface crust, which is a big plus.
When preparing soil for seedlings, refrain from using quarry sand, since it always contains clay and may contain toxic impurities such as iron or manganese salts (the brightness of the color of the raw material indicates their presence), which negatively affect plants.
In recipes for mixtures you can find manure or mullein. If you grow seedlings in an equipped greenhouse, there are no contraindications to their use. In the event that we are talking about residential premises, this issue must be approached with knowledge of the matter.
Manure happens:
- fresh, in which the straw is clearly visible;
- half-rotted, the straw is still visible in it, but it has already darkened and is easily torn;
- rotted, representing an almost homogeneous (homogeneous) mass;
- in the form of manure humus. This is the best option, since in such manure the nutrients are in the form that is most accessible to plants.
What kind of manure for soil is better when growing seedlings in a residential area? At home, only manure humus can be used as a component of the soil mixture, which is good not only from the point of view of hygiene and aesthetics, but is also beneficial to plants.
When preparing soil for seedlings, compost is also used, which still needs to be properly prepared, since the pile in the corner of the plot, consisting of food waste and weeds, has absolutely nothing in common with a real compost pile. If heating is not provided during its preparation, then plant debris and everything else that is usually put into compost will simply slowly decompose, losing nutrients and accumulating harmful microorganisms.
How to make your own primer?
The question of how to make a primer for walls with your own hands worries many today. It would seem that it would be easier to go to the nearest hardware store and purchase a ready-made solution? However, if you take a closer look at the prices, you will realize that there is a difference, and a very noticeable one at that. The primer consists of fairly simple and inexpensive components. The most important thing is to choose the right composition and calculate the amount of each component.
Return to content
How to choose material for processing
There are many primer mixtures available, among them it is easy to choose the one you need, taking into account the surface that will be treated. Main types of primer:
- Acrylic primer - can be used anywhere except metal surfaces. It is most popular among builders.
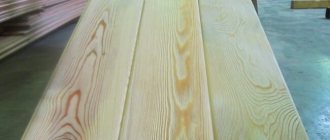
- Alkyd is good for untreated wood; it will smooth out all the unevenness.
- Shellac - used for processing knotty boards.
- Polystyrene - although it fits well on wood and plaster, it contains substances harmful to breathing. You cannot prime walls in residential areas with it.
- Glypthal, perchlorovinyl and some other primers are suitable for metals.
- If there is a possibility of mold or mildew developing, it is better to use mixtures with an antibacterial component.
How to make a primer for walls that increases their strength?
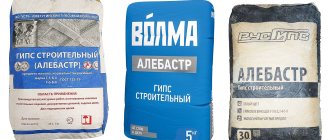
To prepare the strengthening composition, you need to take:
- 1 part copper sulfate;
- 5 parts bone wood glue;
- 2 parts 60 percent laundry soap;
- An enamel bucket or pan of suitable size. It is best if this utensil is unnecessary in the future, since it will no longer be possible to use it for cooking.
Copper sulfate
Step-by-step instructions on how to make a primer for walls:
- Fill a container with cold water and bring it to a boil.
- Pre-grind the laundry soap or grate it on a regular kitchen grater - this way you won’t have to wait long for it to completely dissolve.
- Pour the resulting soap crumbs into the pan, reduce the heat to low, and stir the soap in the water for several minutes using a wooden spatula or stick until the soap is completely dissolved.
- Add copper sulfate and wood glue to the resulting solution.
- Cover the container with a lid and leave to simmer over low heat for about half an hour. The mixture must be stirred periodically to prevent the formation of lumps.
- After half an hour, the solution must be removed from the heat, cool slightly and strain while still hot through a sieve or several layers of gauze.
- When the solution has completely cooled, you can begin to apply it to the walls.
Good to know! If you miss a moment during the cooking process and lumps still appear in the solution, you can get rid of them using a regular mixer or immersion blender. However, be careful not to damage the equipment. Immediately after you remove the mixer from the solution, you will need to rinse it thoroughly.
Return to content
Technology
I have good news here. Priming walls for painting, unlike other stages of repair, does not require special skills and is the least labor-intensive process. Primers are sold in cans of various sizes in liquid form. Usually these are 1L, 3L, 5 and 10L.
Their consumption is small, and the remains can always be applied with an additional layer. How many coats of primer should be applied to the walls before painting? Nothing bad will come of this. The tools you will need are a convenient container (usually a paint tray or bucket), a roller (preferably with long pile), a brush and a brush.
For high walls, prepare a comfortable handle. This could be a long branch, a mop, a fishing rod or any other handy item.
A small amount of primer for walls for painting is poured into the selected container. Then, dip a brush or roller into the liquid and carefully apply it to the wall. Don't forget about safety rules.
The primer splashes a lot, so take care of your face and wear work clothes and a hat. Washing primer from your hair is not the most pleasant thing. It is much easier to wash it off from areas of the skin with a small amount of water or by wiping it with a wet cloth.
When applying primer to a wall, you will most likely experience drips. This is not very scary, but still try to avoid them so that the work looks neater. A brush can be used to treat corners and other narrow areas.
For priming high walls, place the roller or brush on the holder and continue working.
It is important that the roller sits firmly on the holder, otherwise you risk getting injured from it falling. After the primer for walls for painting has completely dried, you can apply a second coat.
Before carrying out further work, make sure that the wall is completely dry.
If painting begins with a wet primer, it will begin to fall off along with pieces of plaster and mix with the paint right on the roller. Then it will stretch along the entire wall. Then you will have to start all over again, completely cleaning the wall.
Enjoy your renovation, easy preparation and excellent results!
How to make a deep penetration primer with your own hands?
For maximum protection of walls from adverse environmental conditions, use a deep penetration primer, which is most often made on the basis of PVA glue.
To prepare the plaster, we need PVA construction adhesive, which will do the best job of increasing the strength of the walls and their waterproofness. It would seem that with such useful properties of PVA construction adhesive, it could easily replace the primer itself. However, this is strictly forbidden. PVA glue forms a moisture-proof film on the surface, which over time can peel off along with the plaster layer. In addition, you probably remember from school that PVA glue tends to turn yellow over time, which will negatively affect the appearance of the finish, especially wallpaper. Therefore, PVA glue should not be used as the main component, but only as an additive.
Return to content
Why use a primer
Before you start preparing this mixture, you need to figure out what exactly it is for and what it is. Yes, such a solution can be different - each type can be used to improve the properties of a specific surface. The main purpose of using a primer mixture is to enhance the adhesion of the finishing material and the base. If you carry out repair work without using a primer, the finish will last a significantly shorter period.
Moreover, some types of paints simply cannot adhere to an unprepared substrate, especially if it is smooth. This is why you need to use a primer - to give the base the necessary properties.
Priming is a mandatory stage of preparatory work, which affects the quality of the entire finish.
Regardless of their composition, all primers perform the following tasks:
- improve adhesion between the base and the material;
- prevent cracking of the bottom layer;
- reduce glue consumption during wallpapering;
- protect walls from excess moisture;
- allow you to level out deformed areas.
How to make a primer from PVA glue?
Making a primer from PVA glue is very simple. To do this you will need to take:
- 1 part PVA construction glue;
- 8 parts water;
- A little cement.
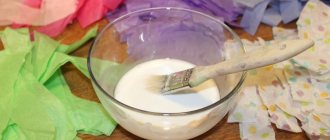
All you need to do is mix the glue with water, add cement to the mixture, mix everything well, and then strain through a sieve or cheesecloth. The advantage of this method of preparing a primer is its simplicity and convenience, as well as the absence of the need to spend time first bringing the mixture to a boil, then boiling, and then waiting for the mixture to cool. The PVC-based primer will be ready to use immediately after you strain the solution. Its only disadvantage is that it can be stored for no more than a day, so you won’t be able to stock up on homemade PVA-based primer for future use.
DIY PVA primer
There is a little trick to determine if you have used the correct proportion of glue, water and cement. Before you begin directly priming the walls, apply the homemade solution to a small area and let it dry. If, as a result, a dense film does not form on the surface of this area, then the proportions were taken correctly and you can begin priming.
Return to content
How can I replace store-bought analogues?
You can not only apply the primer to the wall yourself, but also create it.
Usually the composition of mixtures from different manufacturers is similar. On the building materials market you can purchase the components mentioned on the factory product label. From these ingredients you can easily create a product that will not be inferior in quality and characteristics to store-bought counterparts. Why create a primer with your own hands if there is a huge assortment of them in stores? Firstly, this will save money. You won't have to overpay for packaging and branding. Instead of a store-bought primer, you will get a homemade one, which is no worse. And, secondly, someone will find this idea tempting - making a building mixture with their own hands.
The components for preparing the composition can be purchased on the construction market. The product is made in a matter of minutes, after which it is immediately ready for application. The only important condition is to check the correct proportions during the manufacturing process.
How to prepare your own wood primer?
Among other materials, wood processing is perhaps one of the most difficult tasks. First of all, it is necessary to understand in which cases the wood generally needs to be primed, and in which cases it will be enough just to cover the surface with a special impregnation.
You need to prime the tree if:
- The wooden surface is part of the outer facade of the building or is in contact with the outer walls;
- If there are defects on the wooden surface that cannot be removed without using putty and hidden without further painting;
- If the wooden surface is located in a damp and unheated room;
- If the wood is planned to be subsequently coated with a layer of varnish or paint.
For additional protection of wooden surfaces, as a rule, alkyd, acrylic, antiseptic and shellac primers are used, which are very risky to undertake on your own. Wood is a capricious material, and by experimenting with various primers on it, you risk severely damaging it. Therefore, in this case it is better to purchase a ready-made primer.
Return to content
What destroys a tree?
Wood is an extremely unstable material that is destroyed due to exposure to external factors. We are talking not only about cases where houses are built entirely from wood, but even about furniture. The main reasons that contribute to the destruction of wood are:
- clay bacteria;
- fungi;
- grinder beetles;
- moisture.
Clay bacteria can weaken the structure of wood in a short period of time, and fungi, even after they are removed, leave dark spots. A humid environment produces mold spores that destroy wood products. In addition, mold can cause deterioration in human health.
Fortunately, you can increase resistance to such external factors with the help of special antiseptics. They must be used at every stage of house construction, as well as:
- during the production of lumber;
- during the production of furniture, building materials from wood;
- at high humidity.
Choosing a solution for work
Before purchasing a primer, evaluate the surface of the walls. Porous and loose? We apply a mixture with good penetrating properties. Solid and solid? We choose a material that has cohesive (adhesive) properties. Universal compositions are also used, but only if there is no strong imbalance in the criteria: hardness/porosity.
Selection of primers
Solutions or concentrates are intended for external or internal use. Used for different surfaces.
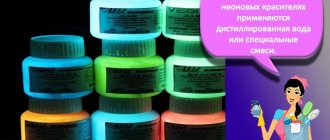
A white primer is suitable for interior decoration. Let's talk about its types:
- Acrylic mixture is universal. Almost no smell, light shade, dries quickly. In just 5 hours they begin the next type of finishing. Penetrates any surface and is suitable for brick and concrete. It is used in preparation for putty, including for exterior work. But it’s not suitable for metal – it will cause rust.
- Metal “loves” glypthal primer, which protects against rust. The only “but” is that it takes a day to dry in dry air.
- A white alkyd mixture is suitable for treating wood and other non-flowing surfaces. Not as harmless as its acrylic counterpart, but its layers retain tree resin. It is toxic due to the content of white spirit, so the room where the primed walls are drying is ventilated during work. It dries for more than 15 hours, and even at temperatures above 25 oC. But the result is worth it.
Regarding compositions used for outdoor work:
- Perchlorovinyl primer is suitable for any materials. If you have to work in winter, feel free to choose this product. Drying time – 1 hour.
- The wood is treated with a mixture that contains phenol. Can be applied to other surfaces as well. This primer protects against corrosion, rust, dries quickly, but is flammable.
- primer
is weatherproof . It is highly toxic, but is used as an antiseptic. With such impregnation, fungus and mold will not appear.
How to knead the mixture to coat wood?
How to make a primer?
Of the various materials, processing poses the most difficulties.
It is necessary to coat the wood with a primer solution if:
- the wood acts as part of the external façade of the building or is in contact with the outer wall;
- if the wood has many flaws that cannot be hidden without puttying and subsequent painting;
- if the product is located in a room with a high level of humidity and it is not heated;
- if in the future you are going to cover the surfaces with paints and varnishes.
Variety of choices
Primer manufacturers are trying to approach the issue of strengthening walls from all sides. That's why there are so many different types on the market. Some of them are universal, some are used in specific situations and for specific surfaces. What do manufacturers offer today?
- Acrylic primers are a category of universal solutions. They can be used to process any materials: from brick to metal, and even more so to prime drywall before puttying.
- Phenolic - only metal and wood can be processed. Although experts assure that it can be applied to drywall, but not to putty.
- Alkyd – used when working with wood.
- Polyvinyl acetate - used to treat any surfaces, but only if paint based on the same material is applied to them.
- All other types, such as glyphthalic, perchlorovinyl, polystyrene, can only be used for outdoor work.
This is why acrylic primers are so popular. It can be applied to drywall before and after puttying. So, now it becomes clear how to prime drywall before puttying.
Types of primer mixtures and their properties
Primer compositions are distinguished by the type of binder and by purpose. The first classification is more understandable to professionals; it is more convenient for beginners to use the second. In addition, mixtures differ in the presence of additives that give the composition additional properties, for example, antiseptic or fire-resistant. The composition may contain substances that facilitate work: coloring pigments for applying an even and dense layer, drying accelerators.
Types of primers by type of binder
The chemical composition of the primer determines the scope of application. This applies not only to the type of surface, but also to the location of the repair work. Some are suitable exclusively for external use, as they have improved properties, but can cause harm to health, others are suitable only for interior decoration, for example, due to a long drying time.
Depending on the binder, primers are classified into the following types:
- Mineral - used for preparing surfaces made of concrete, brick and expanded clay blocks. They contain cement or gypsum (sometimes it is replaced by lime). Drying time – 24 hours.
- Acrylic - almost universal in use, not suitable only for metal surfaces. They dry quickly (only 2-5 hours) and have almost no odor. Suitable for external and internal work. The basis of acrylic primer is water.
- Alkyd - used for treating wood, fiberglass, glass, plastic and metal surfaces. They add rigidity to wood fibers and prevent rotting and mold. Protect metal from corrosion. A uniform rough layer is created on a smooth surface. Drying time – 10-15 hours. Used for exterior and interior decoration. Manufactured on an oil basis.
- Phenolic – suitable for wood and metal. Dries in 12 hours. Used when working indoors and outdoors.
- Griftal - used only for interior work. Suitable for processing wood and metal. Drying time – 24 hours. At low temperatures they lose their properties.
- Polyvinyl acetate primers are special-purpose primers, suitable only as a base for polyvinyl acetate paints. Dries in just 30 minutes.
- Perchlorovinyl - used for mineral and metal substrates. Toxic, therefore suitable only for outdoor use. Dries quickly even at low temperatures - about 1 hour.
- Polystyrene - suitable for wooden and plastered surfaces. They emit harmful substances and for this reason are not recommended for interior decoration.
When choosing a primer based on the type of binder, it is necessary to take into account the material of the base on which it is planned to be applied. But to achieve quality finishing, this information is often not enough. Therefore, it is important to pay attention to the scope of application and features of the base.
Types of primers by area of application
It is easier to choose the appropriate type of primer yourself if you focus on the condition of the surface to be treated and the type of finish that will be applied to it. This information will help determine the best composition in this case.
Deep penetration primer
This type of mixture is intended for treating porous surfaces that absorb moisture and are dilapidated. Such as:
- Brickwork;
- Plaster;
- A surface covered with a layer of lime.
They penetrate deeply into the structure of the material, in some cases several centimeters. They fill cracks and pores, block the access of moisture, bind dust particles and strengthen the base for further finishing. Filling all pores and cracks with a primer ensures less consumption of finishing materials and their easy application, be it paint, putty or plaster.
A deep penetration primer is indispensable for the initial treatment of external and internal walls and ceilings.
Strengthening primer
Strengthening mixtures have similar properties to deep penetration primers, but they impregnate the material to a lesser depth, while providing greater strength if the surface is dilapidated or soft.
This primer is suitable for plaster and drywall. It saturates the top layers and deprives them of their absorbency. A dense film with good adhesion is formed on the surface.
Adhesive primer
The main task of these mixtures is to create a rough film on a smooth surface such as glass, tile or plastic that can adhere to other types of materials. To a greater or lesser extent, this quality is inherent in all types of primer compositions. But in special cases, when the surface is very smooth and does not absorb moisture at all, it is impossible to do without the use of highly specialized mixtures.
Antiseptic primer
This property of the primer is achieved by adding antibacterial components to its composition. They are necessary to prevent the formation of mold, mildew and rot in rooms with high humidity. Used for treating wooden and plastered surfaces.
Concrete contact
Dense concrete bases have a low ability to adhere to other materials; without a primer, the finish will not last long. Conventional compounds are not suitable for treating such surfaces. In order for the concrete to adhere to the plaster, a special mixture is used - concrete contact. It necessarily contains cement and sand. After drying, a rough film is formed on the surface that does not allow moisture to pass through.
Facade primer
A primer for exterior use must be resistant to weathering, temperature changes and high humidity. Since the plaster on the street side is heavy, a primer mixture with greater density and adhesion is needed. Facade primer has all these qualities. It is not suitable for treating indoor walls - most often it is prepared on the basis of toxic astringent components.
Types of primers for drywall
Manufacturers have created several types of primer compositions for treating plasterboard bases. These include:
- universal mixtures;
- oil solutions;
- primer for porous substrates;
- with antiseptic components.
Treatment of plasterboard walls with acrylic primer
The range of different primers can be confusing for an inexperienced person. Therefore, consult with an experienced person in advance. The best choice for indoor work would be acrylic primers.
Before purchasing soil, pay attention to the manufacturer. Use the composition of well-known companies that have proven themselves on the positive side. Don’t save money, because the quality of branded products will fully pay for itself.
Why treat the surface before puttying?
Priming is the coating of surfaces with a composition intended for primary treatment.
Advantages:
- helps fix finishing materials;
- fills small cracks and irregularities, creating protective layers. This saves materials intended for final finishing. Otherwise, a surface that endlessly absorbs paint or glue will make repairs more expensive;
- acts as a kind of antiseptic, preventing the formation of fungus.
The primer will “cover” minor wall defects
Do I need to prime the walls after puttying?
Treatment of walls after applying finishing putty
Many people ask: is it necessary to impregnate after applying the finishing putty? If you are working with liquid wallpaper, decorative plaster or painting walls, apply layers of primer over the finishing putty. As for the need to treat the putty surface in other cases, the opinions of the craftsmen differ. But in any case, it won’t hurt to go over the primer one more time.
source: //gipsohouse.ru/decoration/priming/1055-nado-li-gruntovat-steny-pered-shpaklevkoj.html
Renovating your own home is a long and troublesome process. Anyone who decides to carry it out with their own hands will first of all be faced with the problems of choosing the necessary building materials. For example, primer. It seems to be not the most important material, but modern repair work cannot be carried out without this liquid. And the question of whether it is necessary to prime the walls before puttingty or another type of finishing is still relevant today. Many believe that this process is an extra expense, because literally twenty years ago no one knew about this solution.
First, let's figure out why a primer is needed.
- With its help, the adhesive properties of the treated surface are increased.
- The top layer of the wall is strengthened. And it doesn’t matter whether the wall is brick, wood, block, plastered or concrete.
- The film covers grease and oil stains and areas of paint that are difficult to remove. That is, even on such a wall you can apply putty.
- Some species have antiseptic properties. This is especially important in damp rooms.
- In addition, the applied primer reduces the cost of putty.
From the point of view of economy, the last point is interesting. It turns out that less leveling material is used on the primed surface. And since primer is several times cheaper than putty, the savings are obvious. But other items on the list are no less important. Especially when it comes to old walls, fragile with large defects. Here no one will wonder whether it is necessary to prime the walls before puttingty.