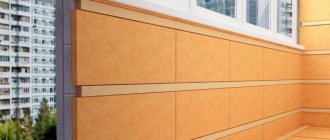
Drywall is an excellent replacement for plastering work, it saves a lot of time and money, the result looks great, and a minimal amount of dirt is generated when working with plasterboard slabs.
There are several possible ways to glue drywall to a wall. The most commonly used method is to attach plates to a structure made of steel guides. This method allows you to lay additional layers of sound and thermal insulation, extend communications, and in general is quite convenient.However, in typical small-sized apartments its use is not justified, since when mounted on steel guides, a large amount of usable space is lost. And if for a private house this is not critical, then in a city apartment the loss of up to 10 centimeters of space on each wall can reduce the area of the room from 16 to 14 square meters, which, you see, is quite noticeable.
It is this circumstance that forces one to choose in favor of gluing plasterboard sheets to the walls in order to level them.
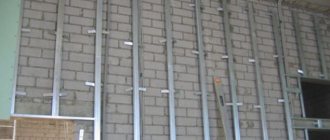
When attaching plasterboard boards, use steel guides, this will allow you to lay additional layers of thermal and sound insulation
Preparing walls and material for gluing drywall to the wall
Before gluing
drywall to the wall, it needs to be additionally prepared, namely:
- Completely remove any remnants of old wallpaper from the walls, strip down to concrete, brick or plaster. If you plan to glue drywall to old plaster, make sure its contact with the wall is strong;
- If the wall is painted, it is necessary to remove the paint using abrasives or use special primers that improve contact between the material and the wall;
- Prime the prepared surface to ensure reliable and uniform adhesion of the glue to the wall;
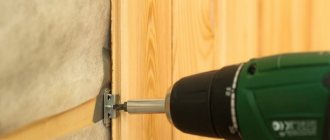
- All communications and wiring must be carried out in the main wall before cladding with plasterboard slabs begins. Cables in grooves must be secured with ties every half meter.
Helpful advice: in case of failure of individual sections of the wiring, or if it is necessary to replace them after the expiration of the wires' service life (which is up to 20 years), use a corrugated cable.
Embedded into the wall at the initial stage, a corrugation of round cross-section and small diameter, with a lingering conductor, will make it possible in the future, if necessary, to simply pull sections of wires out of the wall without destroying the external finish. With low cost and ease of installation, it pays for itself many times over. Being, among other things, additional protection for your wiring.
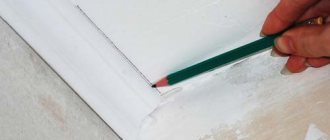
Plasterboard slabs must be laid out along the walls in advance on a flat surface, face down. Cut them so that during installation there is a gap of up to one and a half centimeters from the floor and ceiling. It is needed for ventilation and as a heat shrink seam. Leave the corners untouched for now; they are tiled last.
Install supports 10-15 millimeters high along the wall; you will place the slabs on them during the installation process.
Before gluing plasterboard boards, clean the surface of your walls by removing all remnants of old wallpaper or plaster.
How to attach drywall to a wall without profiles using self-tapping screws: step-by-step instructions
Drywall has recently become one of the most popular materials for renovation work in apartments. Large-area, even and smooth surfaces of the sheets make it possible to eliminate the curvature of the walls in a short time and prepare the room for subsequent finishing. In addition, if gypsum boards are attached to a frame structure, then it becomes possible to additionally insulate and soundproof the walls and ceiling.
How to attach drywall to a wall without profiles
But creating a frame is not possible in all cases, since such a design significantly “steals” the usable area of the room. Therefore, for owners of city apartments planning renovations, information on how to attach drywall to a wall without profiles is often more useful, so that the loss of space in already cramped conditions is minimal.
There are several methods for attaching drywall in this way. But for any of them, the wall requires some preparation.
Preparatory work
Any work begins with preparing a set of necessary tools and purchasing the necessary materials.
Materials and tools
A. Tools you will need:
- Knife for cutting drywall.
- Building level, plumb line, marking cord, tape measure, long ruler or rule, pencil or marker - for preliminary marking and constant monitoring of the verticality of the surface during the installation of sheets.
- Rubber and regular hammer.
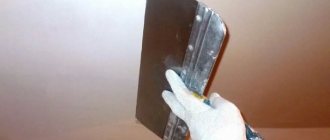
- Spatula or trowel
- Container for mixing glue.
- Screwdriver, electric drill with mixer attachment.
- A roller with a long handle and a soft brush.
- Chamfer plane
B. Materials for work:
- Drywall sheets. Depending on the room, ordinary gypsum boards and moisture-resistant gypsum plasterboards can be used, and if a wall near a stove or fireplace is being finished, then fire-resistant gypsum plasterboards will be required. The number of sheets is calculated by taking into account the area of the walls of the room, subtracting from it the areas of window and door openings, and making a reserve of approximately 15%.
The calculator below will help you quickly and accurately calculate the number of sheets of drywall.
Calculator for calculating the required amount of drywall
Go to calculations
- Cement or gypsum based adhesive composition. Depending on the specific conditions, polyurethane mastic or polyurethane foam may also be used.
- Primer composition for pre-treatment of walls. The specific type of primer and its consumption depend on the material and quality of the wall surface. Detailed information can be found in the instructions from the formulation manufacturer.
- Self-tapping screws or “fungi” dowels - depending on the surface on which the sheets will be attached.
Prices for drywall and sheet materials
Drywall and sheet materials
Surface preparation
Cleaning walls and filling defects
In order for the plasterboard sheets to adhere well to the wall, and for mold or mildew colonies to not appear in any remaining gaps between them, the surfaces must be carefully prepared. These measures should not be neglected, since the service life of the finish and the integrity of the base depend on them.
- If there is old plaster on the wall that has peeled off in places, then it should be removed completely or partially in places of defects, as it will reduce the adhesion of the materials to each other.
If there is a thick plaster “coat” consisting of several layers applied at different times, it is recommended to remove it completely. At any moment it can begin to lag behind the base, and sheets of drywall will come off along with it.
A thin, high-quality plaster layer will not interfere with the installation of gypsum boards, so it does not need to be removed.
- After cleaning the walls of old plaster, cracks or “sinks” may appear on the surface. They need to be sealed, otherwise condensation may accumulate there, which will contribute to the development of mold.
To repair cracks, they must first be cut apart.
The cracks must first be widened. This is done so that the sealing material stays more securely inside. Extended cracks and cavities must be thoroughly cleaned of small particles of sand and plaster using a soft brush, and then treated generously with a primer.
Approximate diagram of cutting cracks and crevices
- To fill surface defects, it is recommended to select a repair composition that is close to the base material, or one that will have high adhesion to it. If the cracks are wide enough and extend through most of the surface, then they can be filled with polyurethane foam.
Gaps of small width can be filled with sealant, which is plastic and will take the shape of the crack as it expands or narrows.
- After the primer has dried, all defects are filled completely with maximum density with the repair compound and brought into the general plane of the wall. If protruding protrusions are found on the surface, they are simply knocked down or cleaned to a general level.
Next, all walls should be primed with a deep-penetrating antiseptic compound.
Which primer is suitable for interior work?
The durability of the wall finishing largely depends on the quality of the applied primer. How to choose the right primer for walls under wallpaper or another type of finish - in a special publication on our portal.
This material is applied to the surface in one or two layers, each of which must dry well. The process is carried out using a soft roller, and internal corners and hard-to-reach places are additionally treated with a brush.
The time for complete drying of the soil is indicated on the packaging of the composition, and it should be adhered to, since installation of drywall should only be carried out on a dry and clean wall.
Surface marking
After the walls have been primed and dried, you should begin marking. For this, it is best to use a laser level, but if you don’t have one, then you can get by with a standard set - a plumb line, a regular building level, a long ruler (rule), a tape measure and a square.
The easiest way to mark is with a laser level.
- When marking the wall, you need to take into account deformation gaps, which must remain at the junction of the plasterboard with the floor and ceiling. When shrinking the house, they will not allow the sheets to be damaged on harder surfaces.
The gaps between the sheets of finishing material and the ceiling should be 3÷5 mm, and the gypsum boards should be raised from the floor by 8÷10 mm. For this purpose, a control horizontal line is marked from above, and on the floor it will be easier to maintain these gaps by placing pieces of plywood of the required thickness under the gypsum board. Later, after the glue has hardened and the sheets are securely fixed, these stands are removed, and the gaps at the top and bottom of the sheets are filled with polyurethane foam.
- If the sheet of drywall does not completely cover the height of the wall, then in this case, you will have to cut two lines - along the height of the whole sheet and along the top of the wall. This area will be covered with a fragment of the required size cut from the whole canvas. These elements can complement solid sheets only from above, but many professional craftsmen recommend placing them in a “checkerboard pattern,” that is, alternately from above and below.
The corners in the rooms are not always even, so using a plumb line, a vertical line is measured and accurately marked along the junction of two walls. It is necessary for installing and securing the first sheet on it so that it stands perfectly level. The evenness of the entire row depends on how it is positioned and fixed.
What glue is best to use?
Installation of plasterboard sheets on a wall without a frame is carried out on surfaces of varying degrees of evenness. Therefore, various adhesive compositions can be used for work.
We can roughly distinguish three main options:
- installation on a flat wall;
- fixing to a brick surface;
- gluing to walls with large irregularities.
Glue for flat surfaces
Smooth surfaces include concrete monolithic and stone plastered walls. Of course, they do not always have perfect smoothness, but usually do not require serious corrections in the form of alignment. It may be necessary to place beacons made of plasterboard or gypsum mixture if there is a slight slope in one direction or the other on the surface.
Drywall will be glued to a flat or corrected wall using any adhesive - it can be a gypsum- or cement-based composition, as well as polymer mastic or polyurethane foam. However, the simplest and fastest installation option would be gluing the panels onto polyurethane foam.
Adhesive foam, great for drywall
If the surface is completely flat and smooth, then you can also use glue produced in the form of mastic, which is sold in special plastic cartridge tubes and is squeezed out using a construction syringe or gun.
Glue in the form of viscous mastic
Cement or gypsum-based adhesives are produced in dry form and require dilution with water immediately before the installation process. The proportions for their dilution are indicated on the packaging, and they must be strictly followed. If such a cement or gypsum composition is used, then before installing the canvas to the wall, it is recommended to lightly spray its surface with a spray bottle.
Features of installation on a brick wall
Brick walls also have to be leveled with plasterboard. If the brickwork is of high quality and smooth, then installing a gypsum board on it differs slightly from fixing it on a flat surface. But be that as it may, such a wall requires the presence of certain defects in the form of differences and seams between the bricks. This means that the glue on its surface will be distributed unevenly, which means that the drywall sheet may not be securely fastened. In this case, the preparation of the brick surface is carried out as follows:
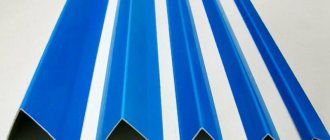
- Using a plumb line, the verticality of the wall is determined. If differences are detected that are more than 20 mm, it is necessary to make substrates from strips of plasterboard - their width should be 100÷120 mm. Level strips can be fixed vertically from floor to ceiling or parallel to these surfaces, depending on where unevenness is found. These pieces of drywall will become “beacons” for securing large canvases.
The glued strips become beacons for installing drywall sheets
- Sometimes, instead of even strips, rectangular fragments cut from the same plasterboard are used - their size can be approximately 100x150 mm. They are glued to the wall at a distance of 150 ÷ 250 mm from each other, depending on need.
When leveling a brick wall with sheets, you can use any glue, but the most economical and reliable option would be to use a gypsum or cement-based composition. If you use polymer mastic or polyurethane foam, then too much of these materials will be required, and it is not a fact that the sheets will be securely fastened.
One of the adhesives for installing drywall
One more point needs to be taken into account - the material from which the brick is made. If the masonry is made of red brick or foam concrete blocks, then any glue can be used - good adhesion will be ensured. Cinder blocks and silicate material require a special approach, since they do not have high enough adhesion to some compounds and have to be strengthened. Ready-made adhesive dry mixtures seem to be considered universal, but this is not always confirmed in practice, so many craftsmen modernize them by adding additional components. So, for example, 0.5 liters of PVA and 1 kg of gypsum can be added to 10 kg of cement-based composition, but only 0.5 liters of PVA glue can be added to 10 kg of gypsum-based mixture.
In any case, it is recommended to fix plasterboard fixed to a brick wall with glue using dowels—“fungi.”
Installation on uneven surfaces
In this case, it would be optimal to use glue produced in dry mixtures, since a fairly large amount of it will be required. Installation on a surface with large differences is similar to attaching sheets to brickwork. Only in some areas of the wall, instead of one layer of plasterboard rectangular backing, you will have to glue two or even more. This leveling method will require more time, since each of the backing layers must dry completely before the next one is applied to it.
On curved walls, you need very reliable fixation of the sheets to the surface using dowels and dense filling of the space between the wall and the drywall, especially at the edges.
When using substrates to level the wall, they can be secured to the wall with mounting foam, and to glue the main panels, use glue mixed from dry compounds.
Installation of drywall without frame
The techniques for applying different types of glue to drywall sheets differ from each other.
Installation with glue from dry construction mixture
The most common material for attaching drywall to a wall is gypsum-based adhesive. A cement composition is often used. But both the first and second are applied to the canvas according to the same principle.
- Along the edges of the underside of the sheets, glue is applied in long dotted or solid strips, since it is necessary that when pressed against the wall, the composition completely fills the gap between the base and the finishing material. Along the main plane of the sheet, the glue is applied pointwise, in slides, in increments of 200÷300 mm.
One of the methods of applying glue to a sheet of drywall
. Provided that the wall surface is perfectly flat, glue is also applied along the edges in strips, and dots of glue measuring 120÷150 mm in diameter are applied only along the middle part of the sheet.
In order for the sheet to be securely attached to the wall, the total area of the adhesive applied to the surface of the sheet must be at least 10% of the total size of the sheet.
- After applying glue to the drywall, the sheet is placed on stands prepared for it on the floor made of plywood or old ceramic tiles, 8-10 mm thick.
- After pressing the canvas to the wall, they go over it as a rule, gently tapping it on the front surface so that the glue is distributed evenly between the two surfaces and the plasterboard stands perfectly vertical.
Aligning the sheet after installing it to the wall
- Then the sheet must be checked using a building level, and if a tilt is detected in one direction or the other, appropriate adjustments must be made. This will be possible within 8 ÷ 10 minutes after gluing.
- Fixing with “fungi” dowels is carried out only after the glue has dried under the leveled sheet, otherwise its evenness can be disrupted again by pressing it too hard.
- In the same way, all the whole panels are glued, and then proceed to the installation of the missing fragments.
Before installing a narrow piece of drywall on top of the sheet, the edges at their junction need to be cut at an angle - chamfered to create a gap that will be filled with putty.
Edges of sheets with homemade chamfers
You can cut the edges with a drywall cutting knife or a plane. The edges of the material are processed with a plane before it is mounted on the wall, and with a knife you can trim the already glued canvas.
If it is more convenient, then the glue can be applied to the wall
- It is not at all necessary to apply the glue specifically to the drywall - if it is more convenient to do it directly on the wall, then you can do the gluing this way. There is no fundamental difference in the processes, but in this case the wall must be prepared with a primer.
Installation on synthetic compounds
The second installation option, using synthetic compounds, can be carried out in two ways:
- Foam or mastic is applied directly to the drywall sheet.
- The space between the wall and the installed and leveled sheet is filled with foam.
Gluing gypsum boards onto polyurethane foam
This option is used when installing gypsum boards on a wall that does not require special adjustments.
Foam is applied to the surface of the canvas more economically than glue made from a dry mixture. It is enough to foam strips along the perimeter of the sheet and crosswise or diagonally in its middle. After the composition is applied, the sheet is immediately glued to the wall. Since the foam has good adhesion to any surface, both smooth and porous, it will set quickly, and after a day it will be impossible to tear the sheet off the wall.
Options for applying polyurethane foam to gypsum board sheets
In the same way, all the material is attached to the wall and left to dry for a day.
If it is decided to use polyurethane mastic for gluing, then it is applied to the sheet in more frequent stripes and always along all edges. Inside the sheet, glue can be applied in different “patterns”, the main thing is that the lines run at a distance of 150÷200 mm from each other. In this case, when the sheet is pressed against a flat surface of the wall, the glue will be evenly distributed between them.
Polyurethane mastic from a tube is applied in strips
Drying and complete polymerization of each of the compositions take place differently, so when purchasing mastic, you should immediately pay attention to this criterion.
If small pieces of drywall are glued to the wall, then it is enough to apply mastic only along their edges.
For small fragments, coating only around the perimeter is sufficient.
Video: installation of plasterboard wall coverings on polyurethane foam
Prices for mounting foams and cleaning gun cleaners
Polyurethane foams and cleaners for construction guns
Gluing gypsum boards with subsequent filling of voids
This installation method is more labor-intensive to implement, but it gives a good result when leveling a not very flat surface. It should be noted right away that when using it, only polyurethane foam can be used, and in fairly large quantities. The consumption will depend on how curved the wall is, that is, how large the cavities will remain between it and the gypsum board.
For installation in this way, you will need some auxiliary materials that need to be purchased in advance, and some of them can be found in the household.
So, the work goes like this:
- The plasterboard sheet is installed to the wall according to pre-made markings. Holes are drilled directly through the gypsum board into the surface of the wall - there should be 10-12 of them, evenly distributed throughout the entire sheet.
Next, the sheet is removed from the wall, the holes in the wall are slightly expanded and plastic dowels are carefully driven into them.
- The next step is to glue pieces of foam rubber onto the back surface of the drywall sheet using double-sided tape. They should be located 120 ÷ 150 mm from the drilled holes. These inserts will be used as a spring adjuster that will help align the blade correctly.
Plastic dowels are driven into the wall, into which self-tapping screws are then screwed to adjust the position of the sheet
- Next, the sheet is again attached to the wall, which now needs to be fixed with wide self-tapping screws. If there are none, then washers are first put on ordinary fasteners. Self-tapping screws need to be selected to the required length, since they will be used to regulate the installation of the sheet. They are screwed through prepared holes into dowels driven into the wall, thus pulling the sheet as close as possible to the wall.
Checking the surface with a building level, it is adjusted by loosening or tightening the screws, achieving the desired vertical position.
In the same way, all sheets are aligned and adjusted to each other.
- The next step is to drill through holes with a diameter of 7–8 mm in the plasterboard sheets between the screwed-in screws. They are designed to pump polyurethane foam through them into the gap between the wall and the gypsum board. Injection occurs using a special construction gun on which foam cylinders are installed.
Before filling the gaps, it is necessary to adjust the dosage of foam coming out of the container in order to use it as economically as possible. Usually it is adjusted so that with one click on the gun a spot with a diameter of 120÷150 mm is formed. It is important to do this in advance because gluing the canvas to the wall will be done blindly.
Filling cavities with foam is best done with professional material and a gun
- When the foam has hardened and the sheets are firmly fixed to the wall, if desired, the screws can be unscrewed altogether, or even better, they can be sunk 1-2 mm into the drywall and covered with putty on top.
Sealing seams
After the installation is completed and the glue has completely dried, they proceed to sealing the seams.
The work is carried out in the following order:
- The joints between the sheets are carefully primed. The primer on the surface must dry completely. Typically, on those edges of the sheets where the chamfer was cut with your own hands, priming should be carried out several times so that the cut does not begin to crumble when sealing the joints.
Initial filling of joints with putty
- Next, putty is carefully applied along all joints with a spatula.
- A serpyanka mesh or sealing tape is glued onto the uncured, leveled putty and slightly embedded in the composition.
Seam reinforcement using uncured mortar
- After the seams have dried, they proceed to priming and filling the entire surface of the plasterboard wall.
How to finally level the walls with putty?The process of bringing walls to perfect evenness and smoothness using putty is not so simple. We recommend that you first familiarize yourself with the rules for filling walls with your own hands , set out in a separate publication on our portal.
After familiarizing yourself with the basics of the technology, it is recommended to try to do all this practically on a limited area of the wall. If everything goes smoothly, then you can safely take on large-scale work on finishing the room.
Necessary tools for attaching drywall to the wall with adhesive
Finally, before gluing drywall to the wall, you need to prepare all the necessary tools, such as:
- A notched trowel for applying glue if the curvature of the walls does not exceed 5 millimeters;
- A trowel, for mixing the glue and for applying it to the surface, if the curvature of the walls exceeds 15 millimeters or more in some areas;
- container for mixing glue - it is best to take a modern construction plastic container, the glue from which
- will come off easily after drying. Dilute the glue little by little, it sets very quickly;
- A mallet, preferably a rubber one, for leveling the sheets after they are pressed against the wall;
- Level and rule at least 2 meters long, including for leveling the surface horizontally;
- Plumb line, painting knife, construction pencil, tape measure, level. All these tools are needed during the preparatory stages.
It is important to know: you can mark the floor and ceiling using a plumb line; it will make further alignment of the walls easier.
Prepare all the necessary tools in advance, they will greatly reduce your time, and the result will be of better quality.
Advantages of gluing drywall
Anyone who wants to transform their apartment, without the skills of a professional builder and without experience working with this building material, can handle gluing plasterboard to walls. However, this is not the only advantage of this method.
Drywall is quite fragile, because... its main component is gypsum. It is easy to cut to the desired size, but if handled carelessly, this material breaks, which can easily happen when it is placed on a profile. And gluing drywall to the wall will save you from costly damage to the sheets.
The work of installing profiles under drywall is not only a troublesome and labor-intensive task. The most important thing is that the design “eats up” the usable area of the room. If you have a room of 40 sq. m, then the decrease in volume will be barely noticeable, but with a small cubic capacity of 12-15 sq. m you will immediately feel a reduction in free space.
By gluing drywall, you can level the surface of the wall to an ideal state, avoiding the noise effects of a working hammer drill when organizing a profile frame, and also perform the work much easier and faster. Covering the walls with plasterboard will save you from many repair difficulties, but this method has two limitations:
- The height of the walls to be pasted should not exceed 3.5 m.
- You will not be able to lay a layer of insulation under glued gypsum boards.
Basic ways to stick drywall to a wall
There are three main methods that are used when you need to fix drywall with glue to the wall. The choice of one method or another depends on the curvature of the walls on which installation is carried out:
- If the walls are fairly even and the curvature of individual sections does not exceed 5 millimeters, the simplest method is used: after all the preparatory procedures, putty or special glue is applied to the slabs laid out along the walls using a notched trowel; the glue is applied around the perimeter and in the center of the slab. If the slab is thinner than 10 millimeters, two strips of glue are applied in the center. In areas to be finished with tiles, the adhesive is applied in a continuous layer. The adhesive layer is from 5 to 15 millimeters.
- The technology for walls with a curvature of 5 to 20 millimeters is different in that the glue is applied with a trowel, in a layer of 25 to 35 millimeters, in piles, in a checkerboard pattern, every 30 centimeters. In this case, the height of the glue is adjusted to suit specific areas of the walls.
- For walls with a curvature of more than 20 millimeters, a third method is used: installing beacons. Before installing the slabs, strips of plasterboard 10 centimeters wide are glued to the wall. They are attached every half meter, aligned with the rule. Glue is applied to them in the same way as in the second installation method. After drying for a day, the slabs themselves are glued onto the lighthouses; the glue is applied using the first method.
How to hang a TV on a plasterboard wall without it falling
What you can’t do without: after installing the slabs, do not rush to immediately seal all the joints and seams - let the glue dry thoroughly, this will take 48 hours, during which there should be no drafts, sudden changes in temperature and humidity in the room. After this, all seams and joints can be sealed.
Scope of application
Surfaces intended for gluing gypsum boards are conventionally divided into three groups according to the material from which the wall is made.
- Aerated concrete slabs. They have a relatively smooth surface. The irregularities are small, no more than half a centimeter. Drywall can be glued to aerated concrete using any glue. The most common is polyurethane foam.
- Wall made of foam blocks. The surface of the foam block must first be well treated with deep penetration soil. Allow the foam block to dry well for 12 hours. Make holes with a diameter of 2-2.5 cm in the drywall every 40 cm, apply PerlFlix glue to the wall, then glue the drywall, and remove the excess glue that comes out through the holes with a spatula. This will ensure good reinforcement, which is important when using foam blocks.
- Brickwork. When gluing brick walls, apply depending on the appearance of the surface. For even laying, any glue can be used. For uneven brick surfaces, PerlFlix is ideal. Glue is applied to the sheets pointwise around the perimeter. The thickness of the glue layer varies from 5 to 30 mm, the distance between the “dots” should be approximately 30-50 centimeters.
For the kitchen and bathroom, special moisture-resistant plasterboard is used.
If necessary, drywall can be glued to a layer of insulation, for example, penoplex. In this case, the insulation is glued directly to the wall using any tile adhesive, and after drying, drywall is glued onto it.
An additional way to stick drywall to a wall
In addition to all of the above, gluing drywall to the wall can be done using polyurethane foam. However, this method should only be performed by professionals, otherwise the result will be of poor quality and short-lived. The advantage of this technology is that installation can be easily done by one person. Foam mounting is done using the following technology:
- The slab is leaned against the main wall on supports and secured to it with hardware using plastic dowels installed in plasterboard;
- The slab is leveled using a level and adjusting the fasteners;
- Small holes are drilled next to the dowels, sufficient to insert the spout of a foam container;
- Through the holes, foam is pumped behind the wall in small portions, since too much can cause the wall to swell, which means the whole job will have to start all over again. The holes are made in a checkerboard pattern, every half a meter or a little less from each other.
- After a day, the fasteners are pulled out of the wall, and all the holes are filled with putty.
However, this method requires a lot of skill and is not recommended for use by non-professionals.
Before starting work using polyurethane foam, you need to know what kind of work it will be used for and the composition of this substance. Please study the article Polyurethane foam Macroflex 750 ml Technical characteristics
Advantages of leveling gypsum board walls without a frame
This method of installing a gypsum board sheet:
- Economical in materials.
- Takes less time.
- Produces less debris and dirt.
- Installation and finishing are completely done by yourself, so you can feel like a pro.
Using gypsum board (plasterboard sheet) you can level any wall: brick, concrete, wood.
To install gypsum board sheets on the wall, you need to purchase special adhesives. The most popular of them are the Knauf and Volma mixtures. You can also mix gypsum putty with a small amount of PVA glue.
Summary. Useful tips
As you can see from the article, gluing drywall to a wall is not that difficult. And with constant practice, frame fastening is even easier and faster.
Depending on the condition of the walls
Several different methods can be used in one room. For example, a frame with insulation is made on the external wall of a house, and slabs are simply glued to the internal walls.
For each specific case, use the most suitable option. Do the work slowly. Having previously made all measurements and markings. This way you will save yourself from many mistakes and rework.
Drywall is the material of the future. Easy to use, it retains its qualities for a long time. Don't be afraid to try it once and you will realize that it is a comfortable and good material to work with.
source: //mrgipsokarton.ru/uroki/kak-prikleit
The installation method, in which a sheet of drywall is attached to a vertical surface with glue, has a number of undeniable advantages. It allows you to simultaneously glue the material and level the walls, protect the coatings on the reverse side from the effects of aggressive environments and the harmful effects of microorganisms, thanks to the ease of installation technology, you save your budget and personal time.
Installing drywall with glue saves space in the room, which, if the frame was installed, would be 5-6 cm less on the side of each wall. To perform a quality installation, you will need:
- decide on the choice of glue;
- prepare the surface;
- Follow the installation instructions.
Which is better: heated floors or radiators?
Warm floorBatteries
The process of gluing a gypsum board sheet
When the base is polystyrene foam
These materials are great for protecting your home from the cold. But they require the use of drywall to prevent the appearance of defects during operation. The use of polystyrene foam is selected from 5 and even 10% of the usable area of the room. An additional metal profile with plasterboard increases the loss of space. Therefore, gypsum board becomes the optimal solution.
Acrylic putties and adhesive foam do an excellent job with their assigned functions. The instructions help you figure out how to properly glue the material.
Characteristics of adhesive mixtures and their manufacturers
To install a sheet of drywall on a wall using the adhesive method, use products from two reputable manufacturers: Knauf (Perlfix series, Germany) or Volma (Montazh series, Russia). The use of a domestic brand is preferable for the following reasons:
- the cost is lower;
- the mixture consumption for applying a layer with a thickness of 1 mm and an area of 1 m² per serpyanka is only 2-3 kg, compared to 5 kg of the Knauf brand;
- The complete drying period for Volma glue is 24 hours, for the Knauf mixture it reaches 7 days;
- strong adhesion to the surface due to the content of gypsum fibers;
- the setting time of the mixture on a flat surface is 1 hour, with Perlfix this threshold occurs 30 minutes after mixing; if the mixture is applied to a sickle tape, the setting period is even less (40 and 15 minutes, respectively);
- It easily takes the shape of irregularities and does not shrink after hardening.
For DIY installation, it is preferable to use Volma glue. For a beginner, the packaging form of the material is also convenient - 5, 15 and 30 kg. This makes it easy to calculate the material, save on costs, determine the amount of work in advance and have a certain period of time left before the mixture has time to set. Knauf adhesive mixture is designed for a professional approach. Packaging form: 30 kg.
To glue a sheet of drywall to a wall with Knauf mixture, you will need professional skills to work at a fast pace. Packaging form Perlfix – 30 kg. The optimal temperature for the mass to acquire its properties is +5 degrees under normal humidity conditions.
Volma glue packaging form Installation
Finishing
Of course, installation of gypsum boards is not the final stage of interior finishing. Usually the walls are painted or wallpapered. Despite the smooth surface of drywall, the sheets need preparation before final coating.
Here is a step-by-step diagram of the work:
- If there are no factory chamfers on the edges of the sheets, they are cut out with a knife. The joints between the sheets are filled with a special putty for gypsum board joints. To do this, the composition is mixed in accordance with the manufacturer's instructions, and the joints are evenly coated using a narrow spatula.
- While the composition retains its plasticity, a reinforcing tape is pressed into it, which will be covered with a second layer. Read more about sealing seams here.
- Repeated puttying is carried out after 10–12 hours, when the first layer hardens. After this, the protruding surfaces are cleaned with sandpaper.
- Now the sheets need to be primed and wait for the composition to dry completely.
- Then the first layer of putty is applied, which must also dry.
- If the surface does not meet the requirements, priming is performed again and a second layer of the mixture is applied.
- After drying, the surface is treated with fine-grained sandpaper.
- At the final stage, another layer of primer is applied to the putty, wait until it dries and begin finishing the room.
You can learn in detail about all the stages of gluing drywall to the base by watching the video. The workflow is clearly presented here, which will be useful for novice craftsmen.
If after reading the article, viewing photos and videos, you still have questions, ask them in the comments: a gypsum board installation specialist will answer you.
Surface preparation
Before you start gluing a sheet of drywall with Volma glue, prepare the surface for it. To do this, using a level or a stretched cord, a series of measurements are made to reveal irregularities at the base of the walls. If deviations do not exceed 2 cm, proceed to the following steps:
- clean the walls from old finishes (wallpaper, paint, plaster), dust and other contaminants;
- the surface is covered with two layers of primer, which increases the level of adhesion of the material from which the vertical floors are made (brick, concrete, wood) with glue;
- if deviations in curvature are slightly more than 2 cm, a layer of plaster is applied to the wall, this will smooth out the unevenness, which will then be filled with glue;
- then they calculate the layout of the plasterboard sheets so that after installation they do not touch the floor at a distance of 10-15 mm (this space is required for climatic adaptation of the material);
On a rough wall, you can install a sheathing or glue sickle tape, which will allow the glue to adhere even more firmly to the wall.
Applying plaster over serpyanka
Additional wall treatment
Proper wall treatment before attaching drywall sheets to an unframed wall is extremely important.
- Inspect the wall itself - repair cracks, fill in holes from old communications, and apply mortar to the places where large pieces of plaster have fallen out.
- If necessary, make recesses for sockets, switches and wiring. Wires and junction boxes must be installed.
The latest generation of wire insulation means you don’t have to pack them in fireproof corrugation, so you just need to attach them to the wall with clamps.
- Remove debris, use a brush or vacuum cleaner to collect dust from the walls and floor.
- To ensure that the glue adheres firmly to the surface of the wall, it is primed evenly. In areas with fresh plaster, the primer is absorbed more strongly, so here it is applied in two or even three layers.
When installed under the gypsum board sheets, a poorly ventilated air gap remains. In rooms with high humidity, optimal conditions are created for the development of various types of rot and fungus. Treating the base wall with an antiseptic will help avoid this danger.
- Since the gypsum board sheet has large dimensions (2500 x 1200 mm), clear a suitable flat area on the floor for working with it.
GCR can be installed only when the wall is completely dry, after all the procedures have been carried out.
Glue installation
As tools for gluing a gypsum board sheet with your own hands, you will need:
- bucket or basin for kneading;
- drills or mixer;
- building level;
- trowel and spatula for applying glue;
- hammer with a wide board.
Installation steps:
- dilute the glue in a bucket of water in the proportions indicated on the Volma package;
- the calculation of the mass of the mixture is made depending on the volume of work performed and the curvature of the walls, on average it is 10-12 liters, so that it does not have time to set;
- apply the adhesive mixture to the wall or to the sheet of drywall itself, evenly distributing it over the surface in small dots in a checkerboard pattern in increments of 40 cm or in strips 15 cm wide. This application will allow you to adjust the location of the plasterboard relative to the vertical and horizontal plane;
- It is recommended to glue the gypsum sheet from the corner of the room; to do this, it is carefully pressed against the wall and leveled;
- If the level shows that the sheet is lying unevenly, by tapping with a hammer on a wooden board, the glue applied on the back side is distributed more evenly, reducing the resulting voids.
Distribution of glue over the surface of the gypsum board sheet and its correct consistency
After installation is completed, sickle tape is glued to the joints between the sheets of drywall for additional reinforcement of the seams. The gaps between the joints are filled with Volma glue or special putty. Each seam is carefully processed so that subsequently moisture does not get between the joints and destroy the structure of the gypsum boards.
After the mass has dried, the serpyanka is treated with trowelling sandpaper to remove excess glue, a primer is applied again and, after it has dried, the surface of the drywall is puttied. All stages of installing gypsum boards using the adhesive method are shown in the video below.
Step-by-step installation instructions
After we have decided whether it is possible to glue gypsum boards with glue, in what cases this is allowed and what kind of adhesive mixture is better to use, and we have also carried out the necessary preparation of the walls and prepared the required amount of the mixture, the time comes to attach the material itself to the walls.
There are 3 solutions for this problem:
- A notched trowel is used to apply the glue.
- The glue is applied in small quantities, in the form of heaps.
- Using beacons and foam or plasterboard substrates. This method is most effective for leveling curved walls.
Methods are chosen depending on the unevenness of the wall.
Gluing the first sheets
The adhesive mixture is applied to the sheet, and the applied layer can be in continuous form using a notched trowel or applied in piles in the best places for gluing. After this, the sheet is pressed to the base and raised 10 centimeters from the floor upward. Then they are leveled horizontally and vertically using a level and supported with special supports.
The second sheet of gypsum is leveled, corresponding to the first, and glued only after the first one has completely adhered to the base.
Corner processing
To process a corner, plaster is overlapped on each other; to paste external corners, you need to change the distance between the corner and the glued sheet.
Grouting joints
After all the work has been completed, they begin to hide all the resulting seams:
- All seams are treated with a primer mixture.
- After this, the joints are treated with putty.
On a note
Remember, if the wall’s unevenness reaches 10 cm, it is not allowed to glue drywall onto the Volma mixture, since the end result will not be of high quality: the sheet will not be able to fit tightly to the surface, and the adhesion strength will be impaired. And the glue consumption will be unreasonably high.
Correctly taking measurements of walls before gluing gypsum boards is the basis for high-quality installation
In such cases, it is recommended to carry out a standard installation of a metal or wooden frame. This installation method will allow you to additionally insulate plasterboard walls and hide cables and pipes. When using the adhesive method, it is not possible to carry out such work, or great efforts are required to drill special grooves for electrical wiring.
source: //gipsohouse.ru/walls/4158-kak-kleit-gipsokarton-na-steny.html
Among the many building materials intended for wall finishing, plasterboard
. It is environmentally friendly, as it consists of natural ingredients (gypsum and cardboard). In addition, gypsum boards allow you to achieve a finish that was previously beyond the capabilities of even the most qualified specialists. After installing the sheets, the surface becomes perfectly flat and ready for further work without first eliminating height differences. The material is in good contact with various types of finishes. But to do this, you need to choose the right adhesive for drywall, which will ensure maximum adhesion of the surface to the finishing components.
Preparing walls for gluing plasterboard sheets
Before you begin installing drywall without a frame, you need to clean the wall of the old finish.
- It is easier to remove wallpaper with a spatula, after wetting it with water using a sponge or spray bottle. An excellent soaking effect is obtained when using a steam generator.
It is difficult to remove paint from a concrete wall, but it is necessary, otherwise the composition for gluing gypsum boards will either not stick to it or will tear it off from the base. As a result, the sheet will not hold.
- Old plaster is tapped to detect hidden delaminations. Remove damaged and suspicious parts to a solid base.
USEFUL INFORMATION: Floating plasterboard ceiling with lighting: design options (9 photos)
If the layer of plaster is thick over the entire wall, it makes sense to remove it entirely using a hammer drill or a hammer and chisel. This will help save additional centimeters of usable space.
Properties and characteristics of gypsum board adhesive
Before you begin finishing drywall using glue, you need to thoroughly clean the base itself from dirt and dust. In addition, two coats of primer must be applied after cleaning. This will increase the adhesive qualities of the base and increase its strength. Priming is carried out in two stages:
- The first layer is applied to the entire surface, after which it is allowed to dry. The second can be applied after 24 hours.
- At the second stage, the primer is performed using an undiluted mixture, and it is also allowed to dry for 24 hours.
The properties of the adhesive base depend on its composition and characteristics. There are four main types of gypsum board adhesive:
- mounting;
- gypsum-based mastic;
- specialized glue;
- polyurethane foam.
When using assembly adhesive, it is very important to follow the technology for its preparation. It is usually indicated on the packaging. Glue for this type of gypsum board is applied to the base using a spatula in a circular motion. The distance between strokes should be no more than 30 and no less than 15 cm. During the gluing process itself, you need to carefully monitor the uniform installation of the slabs. Therefore, during installation, a special level is used, on which the sheets of drywall are placed. Note that correction of the position of the installed section is possible over the next 10 minutes.
Required materials and tools
Set of tools
To level walls with plasterboard using one of the adhesives, you will need much fewer tools than if a frame was attached to the wall. The list of everything necessary consists of the following items:
The simplest set of tools for frameless fastening of drywall to the wall
- A plumb line, a building level and a rule, preferably 1500 mm long, to control the evenness of the original wall and the created vertical plane.
- Electric jigsaw or sharp utility knife - for cutting drywall.
- Rulers of different lengths, a square, a tape measure and a simple pencil - for marking.
- Wide, medium and narrow spatula, as well as possibly a trowel (trowel) - for applying and distributing the solution.
- Construction float – for processing putty surfaces.
- Roller and brush - for treating walls with primer.
- Rubber hammer - for adjusting plasterboard sheets glued to the wall.
- Electric drill and mixer attachment - for mixing the solution.
- In some cases, a screwdriver will be required for additional fixation with self-tapping screws.
Drywall prices
drywall
Necessary materials
Now it is necessary to consider the materials that will be required to prepare the surface of the walls and for high-quality installation of drywall:
- Primer solution with antiseptic additives.
- Gypsum-based putty mixture, base and finishing.
- Dry construction mixture - drywall adhesive, or polyurethane foam.
- Serpyanka mesh tape - for sealing joints between sheets.
- Long self-tapping screws may be required to level the wall by adjusting the plasterboard sheets. The size of the fastening elements will depend on the flatness of the surface, taking into account the fact that they must be recessed into the wall by 50÷60 mm.
- One of the leveling technologies will require pieces of foam rubber - this will be discussed in due course.
About some materials - a little more detail.
Drywall
produces not only a variety of building and finishing mixtures, but also plasterboard sheets for various purposes - this is a simple, moisture-resistant, fire-resistant and moisture-fire-resistant finishing material:
The main types of drywall used for interior decoration in various operating conditions
- Ordinary drywall (GKL or, according to the Knauf proprietary classification - GSP-A) is used for rooms with normal humidity.
- Moisture-resistant sheets (GKLV or GSP-N2) can be used to level walls in bathrooms or bathrooms. After treating such a surface, ceramic tiles will fit perfectly on it.
- Fire-resistant sheets (GKLO or GSP-DF) are used for finishing walls around fireplaces, stoves, and chimneys.
- Fire- and moisture-resistant plasterboard (GKLVO or GSP-DFN2) is well suited for finishing walls in boiler rooms of private houses, in attic and attic spaces.
Here we can also briefly talk about cutting plasterboard slabs, which does not require much effort, experience or special tools - it is enough to have an ordinary sharp stationery knife on hand. The cutting process takes place in the following order:
Cutting plasterboard sheets is not difficult at all – you only need to be careful and precise in your movements
- The sheet is placed on a solid base - this can be a large table, floor or several stools placed side by side at some distance from each other.
- Then, using a tape measure or ruler, the sheet is marked, and the necessary lines are drawn with a simple pencil.
- The next step is to follow the drawn line, also along the ruler, with a knife, which should cut the top layer of cardboard.
- The sheet is moved to the edge of a hard surface and laid on it along the cut line.
- Then, pressure is applied to the edge of the drywall that extends beyond the base, which will cause the sheet to break along the cut line.
- The last step is cutting the cardboard on the other side of the sheet.
Calculator for calculating the required amount of drywall
Naturally, it is important for every owner starting such work to know how many sheets of drywall he will need to fully cover the walls. The convenient calculation calculator below should help him with this:
Go to calculations
Dry construction mixture - assembly adhesive for drywall
A few words need to be said about the adhesive composition for installing drywall sheets. The most popular for working with drywall are also German dry mixes, which have long been presented in a wide variety on the construction market and have earned the best reviews.
To work specifically with drywall, technologists have developed and craftsmen everywhere use a special composition - “Knauf-Perlfix”.
It is most convenient to use a special gypsum-based mounting adhesive - “Knauf-Perlfix”
This composition is made on the basis of gypsum, which is enriched with plasticizers, which ensure good adhesion of the solution to various materials and excellent strength of the coating after it hardens.
In principle, any adhesive mixture for frameless installation of a hyposkaton must have the following qualities:
- The setting time of the glue should be minimal.
- The composition should not shrink significantly during hardening.
- The freshly mixed solution should be homogeneous and plastic, easy to apply to walls and sheets of drywall using a spatula.
- The gypsum-based adhesive mixture should not expire, as it has a fairly “modest” shelf life. Usually it does not exceed six months from the date of manufacture of the mixture, so you must pay attention to this point when purchasing. It is not recommended to purchase such gypsum mixtures in bulk!
The mixed solution of gypsum-based glue must be used within thirty minutes, so you should not prepare it too much, because there is no way to “revive” it or dilute it after it has begun to set.
If possible, it is recommended to purchase all materials from the same manufacturer, as they interact perfectly with each other. But a solution made from Knauf mixtures is also perfect for drywall produced by other companies.
Prices for drywall adhesive
gypsum based adhesive
Polyurethane foam
This popular material today has versatile characteristics, and it is chosen based on the area in which it will be used. Polyurethane foam can have a different expansion coefficient and is intended for internal and external use, so when purchasing it at a hardware store, you should definitely study the data located on the packaging or in the certificate that the seller must have.
When choosing polyurethane foam for working with drywall, be sure to read the included instructions
In terms of its composition, polyurethane foam can be:
- One-component, ready to use. This mixture is sold in cylinders and is under pressure. It is made on a polyurethane basis.
- Two-component compositions are mainly used by professional craftsmen, as they require special equipment and precise adherence to proportions when mixing its constituent substances.
For household independent use, single-component foams are used. They consist of the following substances:
- Isocyanate, polyol prepolymers, which are the basis of the material.
- Additives - catalysts, stabilizers, substances that increase adhesion and regulate the coefficient of mass expansion.
Polyurethane foam has high performance characteristics, which are due to its following properties:
- Excellent adhesion to any materials - concrete, stone, wood, brick, metal, as well as polymer compositions.
- The temperature resistance of high-quality foam is from -40 to +90 degrees.
- The material does not conduct electric current - it is an insulator.
- Foamed polyurethane has high sound absorption rates.
- Relatively high speed of installation and drying, which varies from 8 minutes to a day.
- Non-toxicity of foam after completion of polymerization of substances.
- Low flammability of foam (fully fire-resistant materials are also produced).
- Moisture resistance.
- Shrinkage not exceeding 5% during operation.
- High strength - compression rate within 30÷50 N/mm².
- Very good thermal insulation properties.
- Elasticity and plasticity, allowing you to tightly fill various cracks and gaps. This quality of the foam prevents the destruction of structures during shrinkage of the structure.
The hardened polyurethane foam will serve as a kind of damper during deformations of structures
- An important parameter is the ability of the foam to expand. This process occurs in two stages - when the composition leaves the cylinder, and during the solidification period. For high-quality filling of gaps, the second stage of increasing the volume is especially important. However, here you need to feel the difference. For high-quality professional foam, the primary expansion is the main one, and the secondary expansion will be no more than 30-40%. But for household-grade spray cans, the situation is exactly the opposite - when applied, it may often seem that there is not enough material, but after secondary expansion, excess consumption becomes visible, which, by the way, can also result in deformation of the structure being created if there is no free exit for the foam. Therefore, it is much safer to use a professional-grade stump by purchasing a special gun for it - visual control of application becomes more objective.
— Another important selection criterion is the viscosity of the mixture, that is, its consistency, since this indicator directly affects the adhesion of the foam to the wall surface.
It must be remembered that the viscosity of the working substance decreases if the ambient temperature is below +5 or above +30 degrees, which will certainly negatively affect the quality of the foam, and therefore the results of work.
Polyurethane foam is available in cylinders with different volumes:
— 1000 ml — a professional version of the mixture, designed to fill large areas. The output is 85÷100 liters;
– 750 ml – 50÷65 liters;
— 500 ml – up to 40 liters;
- 300 ml - 30 liters.
In order not to run into low-quality material, it is recommended to purchase foam from well-known manufacturers that have earned a good reputation - these are Ceresit, Soudal, Tytan, Penosil and others.
Gypsum-based mastic
Gypsum adhesive mastic means the base contains glue and lime. The glue is filled with the required amount of water and left for about 15 hours. During this period, its granules swell. After this time, 1 kg of lime is added, which must first be diluted with liquid, bringing it to a thick state. To achieve this consistency, the mixture is boiled using the steam bath method. You can resort to the services of a regular gas stove, setting the fire to low. After reaching the desired consistency, gypsum is added. This type of mastic has good adhesion properties. Setting time varies from 40 to 50 minutes.
Gypsum sawdust is prepared on the basis of sawdust and gypsum. Glue for plasterboard sheets of this kind has the consistency of food sour cream. To achieve this appearance you need to: mix sawdust and building gypsum in a ratio of 1 to 4. Next add a glue solution (1 liter of water per 25 g of dry mixture). The setting time for this ingredient is 1 hour.
Sulfate-alcohol mastic - in production, sulfate-alcohol stillage and water are used in a ratio of 1 to 4. Gypsum is added until the consistency of sour cream is achieved.
Special glue
Most hardware stores sell specialized drywall adhesives. It comes in 750 ml bottles. Experts recommend using it in the ratio: 1 cylinder per 15/sq. This substance should be applied along the entire perimeter, and then coat the remaining surface, forming stripes every 25-30 cm.
Its peculiarity is its fast setting. But use is permissible only in cases where there are no large differences in elevation.
Gluing technology
Gluing plasterboard to the walls should occur at the stage of repair work before laying the floor covering. It is also necessary to take care in advance of laying electrical wires and communications, such as pipelines. Construction workers recommend not leaving electrical wires in free flight and not covering them with plaster, as further work may damage the cable.
To avoid undesirable consequences, it is worth laying the cable in special grooves in the wall - grooves, which can be organized using a hammer drill, and an absolutely ideal option would be to additionally lay the cables in a protective corrugation, and then place them in the grooves.
It is recommended to secure the laid wires with clamps at intervals of about half a meter. It would also be a good idea to make sockets for sockets and switches in advance. If all this is done, let's move on to a detailed description of how to glue drywall to the wall.
Surface preparation
You cannot attach drywall to the wall with glue without preliminary measurements and surface preparation. Preliminary preparation of walls has a major impact on the quality, durability and strength of the structure, so it is worth taking this stage of work responsibly.
Drywall is still not wallpaper, so it must be glued to a reliable surface. The crumbling plaster should be removed, or better yet, the wall should be completely cleaned down to the base (concrete, brick).
If the surface is not covered with paint, then it is better to first apply an antiseptic impregnation, which creates a protective barrier against moisture penetration and the formation of fungus, and dry thoroughly. After this, the wall needs to be primed for better adhesion quality.
If the surface has been previously painted, then there are two ways to continue working:
- Clean the paint, apply antiseptic impregnation, and then prime.
- Buy a more expensive specialized Betokontakt primer from any manufacturer and apply it directly to the paint.
In any case, the primer must dry completely. Before attaching drywall to the wall with glue, it is worth checking the curvature of these same walls with a level. Measurements are necessary in order to determine the adhesive mixture and gluing method.
Preparation of material
After the walls are ready for gluing, prepare the necessary material. First, the main component is drywall. If you plan to cover the walls with plasterboard in a room without an external wall, then you can purchase ordinary sheets of plasterboard. If there is an external wall, or you are going to cover a bathroom, toilet, kitchen, loggia and other places where closer contact with moisture is possible, it is better to purchase moisture-resistant drywall for this purpose.
Which is better: heated floors or radiators?
Warm floorBatteries
Drywall sheets should be kept indoors for 2-3 days to stabilize their temperature and humidity levels.
The drywall needs to be cut before gluing, taking into account the installation gap at the bottom of 1 cm. Scraps of material can also be used.
It is also worth marking and pre-cutting holes for sockets and switches. To prevent the blanks from getting tangled, you can label them or place them along the walls in the order of gluing.
We dilute the adhesive composition
For gluing drywall, mainly 2 types of specialized glue are used - Fugenfüller and Perlfix. The first is used when the differences in wall unevenness do not exceed 4 mm; in other cases, Perlfix should be used. These are high-quality materials from the famous Knauf company. If you wish, you can select mixtures from other manufacturers that are similar in effect, but the vast majority of builders use Fugenfüller and Perlfix.
To dilute the glue, you will need a deep container (bucket), a construction mixer or a drill with a mixing attachment. Instructions for mixing the glue are on each package. Follow it, and no problems will arise at this stage.
Since you are not a professional builder, dilute a small amount of glue, because it has a short hardening time, and it will begin to “set” within half an hour. Therefore, use small batches for 1 sheet. The quality of the prepared glue may be affected by its consistency, so be sure to follow the instructions and stir the mixture thoroughly.
Gluing
There are 3 ways to glue drywall to a wall. 1 way. We glue it onto relatively flat walls (difference no more than 4 mm) using Fugenfüller. The glue is applied to the sheet using a notched trowel, but not completely over the entire surface. Spread the adhesive mixture around the perimeter plus add 1-2 stripes in the middle. Do not apply glue close to the edge so that it does not come out when pressed. Place the guides on the floor to ensure an installation clearance of 1 cm. Carefully place the smeared sheet on the guides, lean it against the wall, align it using the rule, then press it firmly against the wall. We do the same with all sheets.
Method 2. If your wall has unevenness in the range from 5 mm to 3 cm, then use this method. We dilute the adhesive mixture using Perlfix. There are differences in the method of applying the glue - it does not need to be distributed in even stripes. Using a spatula, small piles of glue are formed, which are placed at a distance of 20-25 cm from each other. The height of these piles is equal to the height of the greatest difference - up to 3 cm. Next, place the drywall on the guides, apply it to the wall, align the vertical and horizontal positions using a level.
3 way. If you have completely uneven walls, then in places where there is a particular difference, small strips of plasterboard 10 cm wide are glued, maintaining verticality; if there are many such differences, you should create a grid of plasterboard strips with the same width of 10 cm around the perimeter and vertically with a frequency of every 60 cm.
Thus, a semblance of a frame is created. You need to let the structure dry well, and then install the drywall with glue to the wall as in method 2.
Sealing joints
The joints between plasterboard sheets formed during installation must be sealed with putty and a special reinforcing mesh laid. After the putty has dried, the seams are sanded with fine-grained sandpaper.
Polyurethane foam
To carry out high-quality gluing of walls with plasterboard using polyurethane foam, you need:
- Approximately 8-9 holes evenly across the entire panel area.
- Around the resulting holes (at a distance of approximately 3-4 cm), you need to drill holes whose diameter does not exceed 6 mm.
- Glue pieces of foam rubber onto the surface at a distance of 10 cm from each of the resulting holes.
- Place a sheet of drywall on the wall surface and secure it with screws. After strengthening, be sure to put on the washers. This is necessary so that the panel does not “float”.
- Polyurethane foam is poured into the 6 mm holes made.
After completing this work, the washers are removed and the screws are recessed into the base itself. Before final strengthening and removal of the washers, the sheet must be leveled using a level.
Before gluing drywall to the wall, you need to assess the situation. Pasting surfaces with plasterboard is applicable in the following cases:
When it comes to leveling surfaces with large potholes and bumps. Using starter type putty may correct the problem. But it is used only if you have the appropriate experience. In addition, this option for leveling the wall takes a lot of time. Thanks to the plasterboard sheet, you can level out depressions and hills if you fasten each sheet end-to-end.
Also, the gypsum board “sits” on the glue when working with slopes after installing metal-plastic windows.
Advantages of installing gypsum boards
The procedure for covering walls and ceilings with plasterboard is carried out to perfectly level their surface. For this type of work, the technology uses a lattice frame to make from guides and rack profiles made of thin sheet iron or aluminum. But also, along with this method, there is a method of frameless cladding.
The frame procedure has undeniable advantages in the following cases:
- When you need to make a flat surface.
- Increase the quality of heat and sound insulation.
- Hide all communications - wiring and pipes running along the wall.
- When exclusive decorations are required - shelves, niches, arches, slopes and other decorations in the style invented by the designer.
The peculiarity of gypsum board is that during installation it is not subject to deformation, its surface remains perfectly flat and smooth. This is very convenient if you do the following work: painting, laying ceramic tiles, wallpapering.
There are different types of this material that should be used for installation in certain rooms:
- Gray plasterboard is suitable for cladding in rooms with little humidity.
- Green cardboard is used for rooms with high dampness and humidity, such as a balcony, kitchen, bathroom, etc.
- Pink cardboard is used in rooms where there are heat sources, such as a stove or fireplace.
As mentioned above, for all these types there are 2 installation methods - on a frame, made of thin sheet iron, and a method without using a frame, on glue, with its composition correctly selected.
Advantages of gluing with glue:
- Very quick and easy installation on uneven ground.
- This method is the most economical when compared with the first. There is no need to purchase expensive profiles and fastenings.
- Frameless cladding does not reduce the area of the room.
- Minimum tools required.
The main disadvantage of this method is the inability to cover electrical wiring, pipes and other communications in the premises.
Technology for installing drywall with glue
The technology of installing drywall with glue itself requires certain skills from the master. The main thing is to ensure uniform application of the material. If a thick mixture is used, then it is applied to the back side in a circular motion over the entire area. It is important to maintain the uniformity of the applied circles so that the sheet lies evenly on the surface to be treated. In order for the material to completely cover the entire area on the front side, the slab is tapped using a wooden strip. Impacts should be applied carefully so as not to damage the integrity of the panel.
If a special-purpose gypsum board adhesive is selected, it is applied along the entire perimeter of the sheet, and then the entire back side is coated with stripes. The distance between strokes should be approximately 25-30 cm. This will ensure the most even distribution of the adhesive over the entire area of the material.
source: //ogipse.ru/182-kakoj-klej-dlya-gipsokartona-luchshe-ispolzovat/
Drywall or plasterboard sheets (GKL) is a material with which you can give the desired shape to both walls and ceilings, as well as level the walls and ceiling in a room. The most common way to install this material is to install it on a metal frame.
Structure of a plasterboard sheet.
However, sheets of drywall can not only be attached to the frame, but also glued to the wall. This is especially true for small rooms, when you want to save the available space in any way.
Let's look at how to glue drywall to a wall and ceiling. To work you will need the following tools:
- A hammer drill with a stirrer or a mixer is necessary to stir the glue. In addition, you may need a hammer drill to make holes in the walls for wires.
- Level or rule - used to determine the verticality of the wall and the horizontalness of the ceiling. Note that you can limit yourself to a level if its length is 1.5-2 m.
- Notched trowel - allows you to apply the glue in grooves and is used in the case of smooth walls.
- An ordinary spatula or trowel is necessary for applying glue with slaps when the wall is initially uneven.
What kind of glue can I use to glue drywall?
The answer to the question whether it is possible to glue drywall with glue sounds affirmatively yes, but for this you will need to use the right glue, which will be discussed here. The choice of mixture will largely depend on the factors present in the room.
Today, the following types of mixture are offered on the market and in construction stores:
- "Perlfix" is a specialized adhesive for gypsum products from the manufacturer, "Volma-montazh".
- “Start”, “Finish” - a mixture for plaster and putty, made on a gypsum base. Read also: How long does it take for plaster to dry on walls?
- “Knauf-fugen” is a putty mixture also based on gypsum.
- “Ceresit-SM 11” is a cement-based composition for ceramic tiles with some fillers.
- “Liquid nails” - a silicone mixture made of polyurethane and acrylic, assembly adhesive.
- “PENOSIL Premium Fix&Go Montage” – foam mounting adhesive. Remember, you need to select a mixture with a “min” coefficient.
As for sealants, they can be used on surfaces consisting of brick, concrete, or foam block.
We glue gypsum boards onto relatively flat walls
This method is applicable for concrete walls. Of course, concrete walls cannot be called absolutely smooth, but they are still much smoother than brick walls. The adhesive layer with this method of installing drywall will be quite thin. The wiring cannot pass under the sheet - in this case it is laid in pre-drilled holes in the wall.
Scheme for attaching drywall with glue
The concrete wall must be primed with a regular primer. You may need a special primer if the concrete wall is not initially bare, but painted. In this case, applying a special primer is much easier than washing off a layer of paint. It is necessary to mark and drill holes for sockets and switches in the concrete and on the sheet in advance.
After the preparatory work, we directly glue the drywall to the walls. Mix the glue according to the instructions on the package, but do not mix it too much as the glue sets quickly and may dry out. Glue is applied to the gypsum board using a notched trowel along the perimeter of the sheet and in the middle.
Next, the slab is installed on the wall on pre-prepared pads, which can be pieces of the same drywall, and the ends of the wires are brought out from behind it. Then the sheet must be leveled using a rule or level, and only then press the sheet against the wall. The pads should only be removed after the adhesive has hardened. After installing the plasterboard boards, the joints are finished, which we will discuss below.
Preparatory work
In order to facilitate the work and correctly install drywall with glue, it is necessary to prepare a certain set of tools, materials and prepare the walls.
And so it follows:
- Before starting work, decide on the type of gypsum board; it can be moisture resistant or regular.
- Dowel nails or self-tapping screws.
- Selected adhesive mixture for installation.
- Hammer and construction mixer.
- A plumb line, usually a knife, a level.
- Spatula, prepared adhesive mixture.
- Primer, roller, brush.
After selecting the required number of necessary tools, it’s time to prepare the wall for leveling:
- The walls are cleaned of everything unnecessary.
- If there are holes or cracks, they are processed and removed by rubbing with cement mixture, putty, etc.
- The prepared wall must be primed.
- After preparing the walls, they begin to prepare the drywall.
In order for the work to be carried out at the proper level, and for the repairs to last for many years, it is necessary to dilute the glue properly.
Glue recipe:
- A certain amount of water is poured into a specially prepared container.
- Then add a mixture of dry glue to this amount of water and mix everything thoroughly using a mixer.
- After this, add a little PVA glue and mix the resulting mixture thoroughly again.
- After preparation, it is necessary to keep the solution for 5 minutes to completely dissolve the entire composition of the mixture.
You can learn more about how to dilute tile adhesive from this review.
We glue gypsum plasterboard onto less even walls
Scheme for leveling a wall with plasterboard.
To glue drywall
A brick wall that is not level will require a thicker layer of adhesive. Note that the preparatory work will be the same as in the previous case, that is, the walls are grooved for wires, holes for sockets and switches are drilled, and the walls are primed.
In this case, you should use a different glue - Perlfix is most often used. In this case, the glue is applied in a different way. It should be applied using a regular trowel (or use a trowel) in slaps across the entire sheet of plasterboard with a distance of approximately 250mm between slats.
In addition, glue can be applied not over the entire sheet, but along the perimeter and in the middle of the sheet, as in the previous case. In this case, the distance between the slats should be approximately 250 mm around the perimeter, and along the middle of the sheet it is advisable to make two rows of such slats with an interval of 500 mm from each other. The distance between the flip flops should be approximately 300 mm.
Next, just as in the previous case, the sheet is placed on linings and leveled using a rule or level, and then pressed down. After the glue has hardened, the pads are removed.
Wall mounting technology with unevenness up to 2 cm
With such a magnitude of curvature, the work is performed according to a slightly different scheme. Here the glue is not applied in broad strokes, but rather in flat pieces, the diameter of which is 15 mm and the height is 25 mm (it should be larger than possible irregularities). Such piles are located evenly over the entire surface of the sheet with an interval of 20–30 cm.
Next, the gypsum board is installed on pads and pressed tightly against the wall. The correct installation of drywall is checked by the building level. As a result, the glue is distributed throughout the internal space, leveling out the unevenness of the base.
We glue gypsum boards onto very uneven walls
When the walls are completely uneven, then installation of drywall will be impossible without the use of a small frame. Only the frame is made not from a metal profile, but from the same plasterboard.
GCR is cut into strips 10-15 cm wide - the so-called beacons. These strips should be glued to the wall along the entire perimeter and vertically after about half a meter. Each strip is leveled using a rule or level and pressed against the wall. The evenness of the wall is achieved by using different layers of glue in different places of the beacon.
//www.vashgipsokarton.ru/www.youtube.com/watch?v=dH5aFLGi9RQ
As for the wiring, in this case the wiring can be hidden directly into the wall without grooves, placing it between the beacons.
After the glue under the beacons has hardened, we glue the drywall to the walls. To install drywall on the wall, use the simplest gypsum glue. Note that it can be glued to any adhesive, including polyurethane foam. Glue or foam is applied directly to the places where the sheet will stick to the strips. When installing on foam, the composition is applied in a small amount, and it must be pressed firmly against the beacons until it hardens completely, otherwise the foam will collapse. It will be very difficult to tear the gypsum plasterboard from the beacons, so if you do not press the foam in time, the resulting bumps will be impossible to fix, only to break and completely redo. Therefore, if you do not know how to handle foam, then it is better to use gypsum glue.
Installation on walls with differences of more than 2 cm
If the surface is curved, this is not a reason to refuse to apply drywall. To avoid preliminary leveling, you will need beacons - 10 cm wide strips cut from a sheet.
- Before installation, the surface is marked around the perimeter. These lines will serve as a guide for placing the heads.
- A kind of frame is created from the cut out beacons. Horizontal strips are glued at floor level and under the ceiling to serve as a guide (see previous image).
- Then vertical lines are launched from them, performing the function of sheathing.
The main thing is to maintain accuracy, so each strip is checked with a level, and the entire surface is monitored. While the adhesive composition has not yet set, the position of the stripes can be corrected.
- When the frame securely adheres to the base, proceed to gluing the drywall. Glue is applied to beacon strips over the entire surface, the sheets are lifted and pressed.
To save gypsum boards, instead of strips, you can use 10 × 10 cm squares as beacons.
Plasterboard on the ceiling
Types of drywall and their color markings.
Is it worth gluing plasterboard to the ceiling? Perhaps undesirable. When gluing drywall in whole sheets, the adhesive mixture must be applied not to the whole sheet, but in slaps. The glue may not hold up and the sheet may fall off. If you apply glue to the entire surface of the sheet, the sheet will become very heavy, it will be difficult to lift it, and it may bend.
If you still decide to stick gypsum board on the ceiling, then first of all you need to choose the right sheets. All plasterboard sheets are divided into:
- fire resistant;
- ordinary;
- moisture resistant.
For non-residential premises, moisture-resistant ones are used - for the kitchen, bathroom, toilet and hallway, as well as ordinary ones - for other premises. The required sheet thickness for ceiling mounting is 9 mm.
Then you need to determine the horizontalness of the ceiling. As a rule, slabs in typical houses are rarely laid strictly horizontally - they are usually laid at an angle. You need to determine the lowest corner of the ceiling by measuring the distance between the ceiling and the floor at each corner. It is necessary to start installation from the lowest angle, that is, from where the measured distance will be the smallest.
To install drywall on the ceiling, you must use the strongest adhesive. The glue should cover as much of the sheet as possible, but not the entire sheet.
GCL and gypsum fiber
Sometimes it is necessary to glue plasterboard onto sheets of almost the same similar material. Such bases are completely devoid of irregularities, therefore it is permissible to use any compositions in which the seam size is minimal. For example, silicone sealants, liquid nails or acrylic putties are suitable for gluing drywall.
You can replace them with gypsum and cement compounds for gluing, or foam. But when using them, the thickness of the seam increases, and the free space of the room decreases.
What can drywall be glued to - the basis of walls and ceilings
When choosing a mounting adhesive, you need to take into account not only its suitability for working on drywall. A suitable product should not “conflict” with the base material that is supposed to be leveled. As for gypsum plasterboard, choosing an adhesive is not difficult: porous kraft paper or construction cardboard (the top layer of drywall) adheres well to most thick, astringent compounds. Restrictions usually relate to the wall base; attention must be paid to this issue.
Brick, aerated concrete, shell rock
Gypsum plaster has proven itself well for gluing gypsum boards. It is ideal for sealing uneven surfaces with wide joints. Most gypsum-based building mixtures are inexpensive - cost per 1 sq. m of area will be about 50 rubles. The most popular remain Perlfix from Knauf and Volma.
Polyurethane foam is also suitable for brickwork, gas blocks, and foam block bases. Work with it happens quickly, efficiently, and the result in the reliability of fastening the material is excellent. The foam is applied to the sheet in a “snake” pattern, wait a couple of minutes, and apply the gypsum board to the wall. Further expansion of the foam may become a problem, so it is better to additionally use dowel-nail fastening. Instead of foam, you should use special polyurethane glue in cylinders, but its price is much higher.
Concrete
The easiest way is to glue drywall to a concrete wall or ceiling using regular cement tile adhesive. If the wall is monolithic, then its unevenness is insignificant, and the finishing process occurs quickly. Panel partitions may be more curved; in some cases it is better to use the frame method of installing drywall.
In addition to cement mortars, the following are suitable for gluing gypsum boards:
- gypsum mortar or putty,
- polyurethane foam and polyurethane glue,
- acrylic putty.
All these means will ensure excellent adhesion with a small joint thickness, but it is more economically profitable to use cement mixtures with fine grains.
Expanded polystyrene
Often the basis for the installation of gypsum boards is insulation materials - penoplex, polystyrene foam, expanded polystyrene. They protect the room from freezing, but cannot be finished and must be covered with plasterboard. If we take into account that insulation materials already conceal sufficient space in the room, then the use of a metal frame will only aggravate the problem. To glue the sheets, you need to use acrylic putties or special adhesive foams for gypsum boards.
Drywall, GVL
The second layer of plasterboard can be glued to gypsum fiber or drywall using almost any means. The master does not need to smooth out blemishes or wall defects; the base is perfectly flat. Therefore, it is better to choose solutions and adhesives that provide a minimum thickness of the seam - silicone-based sealants, acrylic putties, liquid nails. Foam, gypsum, and cement should not be used, as they will add unnecessary thickness to the joint.
Tile
It happens that sheets of plasterboard are glued directly to the tiles during kitchen or bathroom renovations. If the room is damp, you should use silicone sealants. In case of moderate or inconsistently high humidity, you can get by with moisture-resistant tile adhesive. Such products do not deteriorate due to changes in the microclimate in the room, serve for a long time, and have a high degree of adhesion.
When purchasing tile adhesive or sealant, you need to make sure that it contains an antiseptic and a fungicide - such components will help fight the appearance of mold and mildew. Sealant can also be used to fill cracked tile seams for more reliable fixation of the structure.
Baguette
Acrylic putty is used to glue ceiling plinths to plasterboard walls. It has a thick texture, and the baguette will not move down the wall until the composition finally sets. Also, white putty can be used to beautifully fill the gap between the wall and the finishing material and hide unevenness. Instead of acrylic putty, synthetic adhesives such as Titan, Momenta, and Liquid Nails are also often used.
Tree
Polyurethane adhesive is usually used for cladding wooden walls. There should be a note on the packaging about the possibility of woodworking. Instead, you can buy products based on epoxy resin, but they are difficult to use and quite expensive. Before covering the walls with plasterboard, be sure to treat them with an antiseptic agent, which will protect the material from infection by fungus. Moreover, it is recommended to supplement the gypsum board fastening with dowel nails.
Leveling with unevenness no more than 20 mm
An example for us is a small porch-hallway in a country house. For some reason, the customer did not want to trench the walls for electrical installations and decided to simply plaster over the wires running over the walls. The layer, naturally, was epic - about 6 cm, because there was still “not ice” masonry there.
At first, we still thought about plastering this thing, we even put up beacons. But they quickly realized that this was an extremely unpromising occupation. Both in terms of the ratio of payment to labor intensity, and in terms of material costs. Actually, we didn’t even have Perlfix, let alone Fugen, so we used Rotband as glue. I understand that now all my subscribers will unsubscribe from me, my site will be removed from their bookmarks, and angry letters like “Roman, what are you doing, we thought you were a serious master, but in fact you are a collective farmer here…”
Oh, if you only knew that sometimes you have to fuss when you don’t have the right material, or when deadlines are running out. For example, instead of Betokontakt, I had to mix sand, cement and primer a couple of times... And nothing, everything holds up. So here, rather than wait a week for the required material, it is better to find a replacement for it. Rotband is quite suitable for this purpose. Here, by the way, the layer is not 20 mm, but all 60, but in order to save time (and time is money), I built a ridiculous-looking (although for me it’s stylish), but effective combo - instead of the beacon strips that rely on such layers I made point beacons from GC.
We take a small sheet of drywall, no matter how thick. And we prime it on both sides, after which we give it a few minutes to dry. I took it outside, but you can open the window and put it on the windowsill, or you can do nothing - it will dry out sooner or later anyway.
We chop it with a sharp stationery knife into small squares with sides of 5-7 cm. These will be our beacons. Now you can mix the glue, make the consistency medium - so that it does not slide down, but is easy to work with. And we slap the “buns” over the entire area of the wall, which will be covered with one gypsum board. It’s convenient to place these buns in increments of about 40 cm. And the accuracy will be good, and you can set them quite quickly.
The main requirement is that their horizontal and vertical rows must be located in one line, so that it is easy to then check the plane using the rule. It will look something like this:
Now we sculpt cut pieces of drywall onto each bun:
I felt very comfortable here - there was a ready-made plane and a lighthouse. All that remained was to press each beacon with a rule, and it was done. You may have to set them up in two stages - first the 4 outer ones (it’s better to use self-tapping screws for them - it’s faster), and then the rest along them. That is, you will have to improvise. I will describe my case, and you will adapt all this information for yours.
So, you can guess that I had to not just press the GK beacons with a rule, but recess them inside to the thickness of a sheet of plaster. Therefore, I prepared a small template from plasterboard wall in advance. I inserted it between the main beacon and the rule and pressed:
Moreover, my template was long and allowed me to place 3 small beacons on the plane at once. In about 30 minutes I placed them all on an area of 4.5 sq.m. Of course, I checked them all later and tore out the extra steel beacon profile:
In less than an hour you can glue the sheets to the wall. It is absolutely not necessary to take whole gypsum boards, it will be very difficult. Judge for yourself - a sheet of wall moisture-resistant plasterboard (2500x1200x12.5) has a mass of 29 kg, in addition, it is inconvenient in size. Plus, a mass of assembly glue is added to this mass, and this can be a whole bucket. So it’s easier to cut the sheets in half, believe me.
So, we prepare the glue again, this time more. Be sure to first spread it in solid strips on the corners: between the walls, between the wall and the floor, between the floor and the ceiling. This reduces the risk of cracks and damage to sheets during further installation of skirting boards, for example. The sheet itself, of course, is primed:
I repeat, first we smear all the corners, after which we put solid buns on the sheet itself. The main requirements: the thickness of the buns should be slightly greater than the calculated thickness of the cladding, and they themselves should not fall on our beacons. That is, there should be no solution between the sheet and the beacon squares. Otherwise we will break the plane.
You will probably ask: why not apply the glue directly to the wall, it’s also much easier? I don't have an exact answer, I just have a guess. When applying glue to the wall, compacting the sheet into a plane is for some reason more difficult (not much) than if the glue were applied to the sheet. It may also help the drywall adhere more firmly to it. Knauf manuals recommend applying Perlfix to drywall, not walls. By the way, a link to these manuals will be at the end of the post. There are some good pictures there.
In general, we applied mounting adhesive to the sheet, now we lean it against the wall. All that remains is to set it level and plane. All those tools are used for this: a level, a mallet and a board. GCR should be knocked out only in those places under which beacons are located. If you hit anywhere, it’s very easy to get a hole that can’t be fixed.
You will feel the moment when the sheet touches the GK beacon by a characteristic sound. As soon as you tap the entire area of the sheet in this way, it will have to form a good plane and stand strictly vertical.
Now I recommend adding as much glue as you can fit on top under the plaster.
Again, there is less risk of a crack at the seam, and there are fewer voids. The remaining sheets are mounted in exactly the same way. Don’t forget to cut the non-factory edge of the sheets at 22.5 degrees. If you don’t understand what I mean, be sure to read my article “Do it yourself plasterboard ceiling”, the technology for processing gypsum plasterboard seams is well described there.
Now they say that serpyanka (reinforcing mesh for seams) is already a thing of the last century, now paper tape is in trend. Yes, the effectiveness of serpyanka has always been a big question, but I haven’t used tape yet, to my shame. But knowledgeable people say that it is really more convenient and effective in protecting against cracks. At the first opportunity I will try it too. By the way, here’s what our wall looked like immediately after cladding:
We reinforce and putty all the seams:
All is ready. Let us now consider the most difficult case.
Where to begin
The frameless method involves the use of drywall adhesive, and to securely fasten the gypsum board sheets you will need a reliable surface on which the sheathing can be securely fixed.
Preparing walls for gluing gypsum boards includes the following steps:
- Study of surfaces and assessment of their differences.
- Removing old finishes, preparing walls.
- Wiring layout.
All walls need to be inspected very carefully. Height differences can be assessed using a building level. Particular attention should be paid to areas with fragile finishing or masonry.
Checking the wall level
The wall is cleaned of all unnecessary, old cladding material, decorative elements, and furniture. If there are areas with dilapidated and fragile places, they will definitely need to be restored. If there is plaster on the brickwork, it is completely cleaned off. The wallpaper is completely torn off, removing all the smallest remnants. And the tile, no matter how firmly it holds, will need to be knocked down. The wiring is enclosed in a protective corrugated plastic pipe. Initially, markings are made directly on the wall and grooves are dug to the required depth.
In places where sockets, switches and distribution boxes are installed, you will need to prepare recesses. The laid cable is covered with plaster or simply fixed on brackets. If the differences are very large, it will be possible to lay the wiring directly along the wall, without preliminary grooving. Since the installation technology makes it possible to sheathe load-bearing structures at some distance from the load-bearing surface.
Afterwards, you need to carefully prime the walls with a composition that is selected for the wall material.
The process of priming the wall before gluing drywall
It is best to purchase primer with antiseptic additives and a deep penetration mark. When the surface is completely ready for installation, begin marking.
- Determine the most protruding part on an uneven wall, and make an indent taking into account the thickness of the plasterboard sheet of 12.5 millimeters.
- Having made a mark on the floor, it is transferred to the ceiling. You can make markings along the wall using a cord.
Glue consumption and storage conditions
The consumption per 1 m2 of drywall adhesive depends on the type of material, its composition, and method of application. This indicator is always indicated by the manufacturer on the packaging and depends on various parameters:
- for flat surfaces – from 1 kg/sq.m. m,
- for small defects - 2-3 kg/sq. m,
- for defects of 2 cm - 5-6 kg/sq. m,
- for partitions – 2 kg/sq. m.
All drywall adhesive products must be stored in their original packaging. The remaining glue is tightly closed and stored in a dry, dark place. Construction mixtures should be stored on wooden pallets to avoid the harmful effects of dampness. The shelf life of different adhesives can be 6-12 months.
Completion of work
After the adhesive has completely dried, after 2-3 days, start filling the joints: apply putty for leveling, then press the reinforcing tape into it. Once everything is dry, apply another leveling coat of joint compound to the joints and any protruding nail heads (if used).
Puttying gypsum board joints
For leveling, you can use the same mixture that was used for gluing the plasterboard.
Seal gaps along the floor with caulk. Finishing work can begin only after the joints have completely dried.
Required tools for installation
To mix the glue, you will need a large plastic container (you can take a bucket with a lid), a construction mixer or a drill with a whisk attachment. Manual mixing is also allowed, but the quality of the solution may be lower, and lumps often remain in it. The plasterboard sheets should be glued using a trowel and a notched trowel. You will also need:
- building level,
- knife,
- pencil,
- brush, primer roller,
- if necessary - reinforcing tape, sealant.
Advantages and disadvantages
High-quality adhesives provide very reliable fastening to walls and ceilings, so the frameless method is used quite often. The advantages of using adhesives are undeniable:
- easy, quick installation of drywall,
- no need for special skills,
- lower cost of cladding compared to spending on a metal frame,
- significant space savings,
- the versatility of adhesives - they can be used both for puttying walls and for subsequent gluing of gypsum board sheets.
The glue method also has disadvantages. Such means cannot always be used, because drywall is most often used to hide serious wall defects, and the user will be forced to install a frame or sheathing. Another disadvantage is the long drying time of some adhesives. Many of them make it possible to fully operate and finish the walls only after a week.