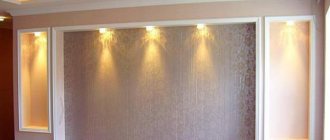
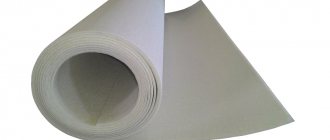
The use of plasterboard to level walls (dry plaster) before wallpapering is becoming increasingly popular (this is especially true for a wooden house, where plastering walls is a very expensive process, both in terms of money and labor costs). The resulting surface is ideal for gluing any type of wallpaper with your own hands, even for a beginner.
For those who are encountering this process for the first time, we recommend watching the work “How to hang wallpaper yourself, quickly and efficiently.” However, here the question arises: “Why do we need material on how to glue wallpaper on drywall?”, if there is already a detailed general article on this topic. It's all about the nuances, if you ignore them, the work will have to be redone, up to and including replacing ready-made plasterboard walls.
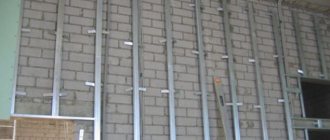
Sealing joints, seams and fastening elements of drywall to the profile
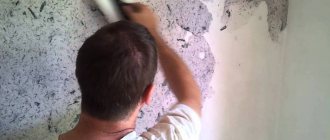
The entire surface of the plasterboard wall is cleaned of dust and the paper covering of the sheet is cut off in those places where it is torn off.
Then the primer is applied to the surface with a roller or brush. At the same time, seams and joints require special attention during processing. The applied primer must be given time to dry completely. Before starting puttying, you need to make sure that all fasteners are recessed into the plasterboard slab. If the screw heads are not deep enough, screw them into the slab with a screwdriver. Having corrected all minor defects, putty all the screws separately.
You can prepare the solution manually or using a drill with a special attachment, or using a ready-made product. If you are using ready-made putty, do not apply all the material at once. Pour it in small portions into another container, and seal the bucket with all the other material with a lid. This is due to the fact that the solution sets quickly in air. When preparing the dry mixture yourself, prepare it in small portions.
Preparing walls for wallpapering.
The next step is to putty the seams and joints. Fill the joints between the slabs with the prepared base mortar using a small spatula. Let the material dry. After setting, remove all imperfections with a spatula.
Place reinforcing tape on top of the prepared surface. To prevent it from sliding off the wall, apply PVA glue to the surface and place the material on top of it. Additionally, you can go over the tape with a brush with glue for reliability. Cover the serpyanka with a layer of putty. Remove all imperfections from the dried mortar with a spatula. Repeat the puttying procedure if necessary.
What does preparation consist of?
Preparing plasterboard walls for wallpapering includes several stages, each of which is required. Otherwise, the creation of a finishing coating may be of poor quality or there may be some difficulty if you want to change the already created interior:
- Often, when performing work indoors, standard plasterboards are used, but during work on attaching glazed balconies or loggias, moisture-resistant plasterboard is considered more suitable. Preparing plasterboard walls for wallpapering requires paying attention to the fact that the side of the sheet protected from moisture has a darker color. This shade may show through the new wallpaper.
- When leveling walls with plasterboard, self-tapping screws are used to secure the sheets. Their caps are susceptible to corrosion, and rust spots appear on the surface of the finish coat. To avoid this, you will need to paint all the elements with white enamel, and then cover them with a thin layer of putty.
- Seams and joints must be puttied and glued with a special reinforcing mesh.
- Before preparing drywall for wallpapering, it must be treated with a primer. The thin film formed after it dries will provide reliable protection against the appearance of fungus and mold.
- The surface of plasterboard walls for wallpaper must be carefully treated with a mesh containing abrasive chips, making it absolutely flat and smooth.
All screw heads must be covered with putty.
Before starting all the listed manipulations related to the preparation, after which the wallpaper will be glued to the drywall, you need to prepare the required tools:
- spatulas of different lengths;
- container for mixing putty and primer;
- priming roller;
- wallpaper knife;
- a wide brush for treating (removing) corners with primer;
- reinforcing tape;
- oil paint or enamel.
The dry mixture for preparing putty should be mixed using an electric drill with a spiral attachment. To reach the most distant top point, you will need a stepladder.
Step-by-step instructions will help you on how to correctly and efficiently complete all the preparatory work for wallpapering drywall.
Putty work, priming
After preparing the joints, the drywall should also be primed before wallpapering and putty. This will improve adhesion. Failure to apply a finishing layer leads to some problems:
- the elevation of the seams above the surface creates unevenness on the canvases after gluing;
- It will not be easy to remove the wallpaper when replacing it: it will come off along with pieces of cardboard and plaster;
- the joint lines of the plasterboard sheets are visible through the thin wallpaper.
Puttying is performed in the following sequence:
- a solution is made from the finishing mixture with the expectation of working for 45 minutes so that it does not set;
- using a wide spatula, apply it evenly to the wall;
- After drying, the applied layer is sanded with sandpaper (grater) until a smooth surface is obtained.
When the sanded surface is ready, some craftsmen may have a question: is it necessary to prime the drywall before gluing the wallpaper directly? Practice shows that this is necessary, as it prevents the rapid absorption of glue and provides better adhesion of materials (wallpaper to the wall). To learn how to finish a gypsum board base, watch this video:
When processing walls, the floor must be covered with polyethylene
To prime a prepared plasterboard surface, it is enough to purchase the composition in a ready-made (canisters from 5 to 10 liters) or concentrated (containers of 1-3 liters in volume) state.
The first can be used to immediately treat the work surface, and the second after dilution according to the specified recipe. The floor should be covered with plastic film to avoid stains.
The fewer defects on the treated surface, the better the wallpaper looks. We must strive for this.
The considered technology for carrying out preparatory work makes it possible to obtain a decorative wallpaper covering for many years without repair. Even a novice in finishing can handle all the work.
Before carrying out work, ensure that the area is well ventilated. Although acrylic primer is not a highly toxic material, it is still not recommended to breathe its fumes for several hours. If a home craftsman does not have experience in performing this type of work, the question quite naturally arises: is it necessary to prime the drywall before puttying. It will be useful to find out the opinion of professionals about in which cases it is necessary to use a primer, and in which cases this procedure can be skipped.
The color of the primer, which will appear from under the thin wallpaper, is of great importance. For light wallpaper, you need to choose a mixture of only white color; for heavy bright or dark materials with embossing, a composition of any shade is suitable. Drywall is one of the most popular and relatively inexpensive materials for leveling walls; it has many valuable characteristics for creating a comfortable environment, among which is lightness in installation, high speed of operation, excellent sound and heat insulation, absence of foreign odors, fire resistance, environmental friendliness. In the process of DIY repairs, the question inevitably arises: is it necessary to prime drywall before wallpapering and how to do it correctly.
Work on finishing the outer corners of a room is the most labor-intensive. This is primarily due to the low strength of these areas. Further processing of plasterboard walls for wallpaper begins with sealing the seams.
This process uses reinforcing tape, and it comes down to a number of actions: As can be seen from the above technology, preparing gypsum plasterboard walls for wallpapering includes a number of procedures, including priming. In this case, the primer is applied before each new layer of finishing: puttying seams, puttying walls, between layers of putty and before wallpapering. Finally, dust is swept away from the walls and they are impregnated with a deep-penetrating acrylic primer. It is necessary for better wallpaper adhesion and saving glue. Serpyanka is a lavsan or fiberglass tape with an adhesive applied to its surface.
Outwardly, it looks like a regular medical bandage. Serpyanka should be glued as tightly as possible to the joints between the sheets, avoiding the appearance of air cushions. If the serpyanka does not stick well, you can add a small amount of PVA glue. Preparing drywall for wallpapering begins with a preliminary inspection of the walls. The joints of the slabs that require preliminary trimming are determined, and the depths of the screw heads are controlled so that they do not interfere with the finishing of the surfaces.
If necessary, defects are eliminated.
Video description
Puttying walls for wallpaper, How to prepare walls for wallpapering.
Standard puttying
It is more convenient to putty plasterboard under wallpaper using a spatula with a wide blade (more than 30 cm). The sharper the tool, the smoother the solution will lie. When working at height, it is better to stand on a table or a construction sawhorse.
Place a portion of putty on the spatula blade. The masses are rubbed into the surface of the plasterboard using wave-like movements. For inexperienced performers, we recommend starting from the far corner. Irregularities and defects in this place are almost invisible. By the time a person reaches the center, skill will appear. Do not take too much solution, otherwise lumps will appear.
Applying the solution to the wall Source vbud.in.ua
Criteria for the suitability of surfaces for wallpapering
Before gluing wallpaper on walls, you should check its surface for suitability to a number of certain requirements, since the quality of the pasted canvases and their service life will depend on compliance with these conditions. At the first stage, an inspection is carried out. During the process, the complexity of the upcoming work will be determined and it will become clear how to treat the walls before the wallpaper. You can check surfaces after removing the old coating from them.
Having completed completely cleaning the walls from the previous finishing material, they must meet a number of the following conditions:
- Presence of a dry surface. Damp walls absorb a minimal amount of water, the basis of which is wallpaper glue. For this reason, the canvases will not adhere fully to the surface, and as the air temperature in the room increases and the dampness disappears, they will begin to lag behind.
- Clean base. Not only old finishing materials should be removed from the walls, but also if there are areas with mold, even where it is just beginning to appear. In any situation, it is not permissible to start wallpapering surfaces if there are any dark stains or other suspicious stains on them, since one day they can cause destruction of the canvases and will certainly appear on their outside. In addition, over time, mold covers more and more space and pollutes the environment with its spores that are harmful to human health. Paper wallpaper is a suitable place for them to suddenly multiply, so they will certainly form under canvases that were applied to an incompletely dried surface.
- There should be no cracks or other damage on the wall, since they can be noticeable after pasting, and if they possibly increase in the future, they can harm the coating itself, contributing to the appearance of tears or folds from warping.
- Evenness, smoothness and uniformity of the finished surfaces. Otherwise, unevenness will be noticeable through the pasted canvases, and if the selected wallpaper is of insignificant thickness and is made in light colors, then a wall of a different color will be visible behind it.
Additional work with corners
Wallpaper is pasted not only on a flat surface, but also in corners, both external and internal. The outer corners are already reinforced, so you need to align them. To ensure that the reinforcing corner is not noticeable under the wallpaper, it is necessary to properly level the putty.
It is necessary to ensure a smooth transition from the edge of the corner along the wall. A level or ruler, which is applied to the wall parallel to the floor, will help here. If there are gaps, then you need to align the corners further.
Also pay special attention to internal corners. To make everything as simple as possible, they are glued with cobwebs (reinforcing tape). Moreover, the web is glued along the inner corner on both sides of the wall. This should be two separate pieces of tape. Then everything is puttied.
It is convenient to make an even angle with a special spatula
To make work easier, you can use a special angled spatula. With its help you can easily make an internal corner. You can go with the classic option, leveling one wall and then the second. As a result, the inner corner will turn out by itself.
First, let's choose a wallpaper
Today, countless factories and factories create for us a huge assortment of wallpaper in the most bizarre colors and prints, which can be three-dimensional, flat, or change color depending on the incidence of sunlight. All these factors in wallpaper design are important when purchasing, because you should take into account the style in which the rooms in your home are, or will be, designed.
But the main difference between wallpapers seems to be their types, which are intended for different purposes.
The following types of wallpaper are common on the modern market: paper, non-woven, vinyl, acrylic, textile, and photo wallpaper.
Among this variety, the cheapest are paper wallpapers, which have a short service life, about three years, low strength, that is, they tear very quickly, and in addition, they cannot be washed. But this wallpaper tempts with its low price, which ranges from 40 to 150 rubles for each roll, and ease of gluing. Another drawback is that the design on them fades due to direct sunlight.
Another type of inexpensive wallpaper is non-woven wallpaper. Essentially, these are the same paper wallpapers, only fabric threads are added to them, which increases their strength, reduces the fear of moisture, and hides minor wall defects, such as scratches and small cracks. A pleasant bonus is the fact that they, like paper wallpaper, have absolutely no effect on human health. They can also allow air to pass through, like paper ones. Service life up to 5 years, with good care. The price range for such wallpaper starts from 550 rubles and ends at about 4,000 rubles. As it turned out, the price of one roll depends on its print, i.e. the more complex the pattern, the more expensive the finishing material. At the lowest prices, the same type of wallpaper with a boring ornament of simple figures is available, while expensive copies are decorated with more complex designs.
Vinyl wallpaper consists of paper with the addition of non-woven fabric. This type of wallpaper has many advantages, among which we should highlight moisture resistance, thanks to which they can be washed as they become dirty, durability, colors that do not fade in the sun, and they can also be repainted. Naturally, they have shortcomings. Perhaps the most significant drawback is airtightness. Service life more than 5 years, with proper care. The price of such almost perfect wallpaper is approximately 950-13,300 rubles. Again, the price depends on the complexity of the design; if you try, you can find copies for 32 thousand rubles. per roll.
Acrylic wallpaper can last up to 5 years, subject to good care. They have good breathability, but less strength. Their price ranges from approximately 300 rubles to several thousand, it depends on the complexity of the design and its relief.
Unique textile wallpapers allow you to decorate your room with special chic, because the front part is made of expensive fabrics, silk, velor, linen, and the back part is made of paper, but more often from non-woven fabric. This wallpaper works as a heat insulating and soundproof barrier. Disadvantages include such factors as the complexity of installation, fragility, i.e. they are afraid of dirt, dust, pets, etc. But the most controversial factor is the price, because it sometimes repels the consumer, and sometimes attracts. This is explained by the fact that textile wallpaper is designer, so the price is so high, but tolerable for a connoisseur. The cheapest ones cost about 5,500 rubles.
And finally, photo wallpaper. Such wallpapers have become popular recently, largely due to the fact that they are able to transport a person inside the picture, because, often, they are glued to the entire area of the wall. Their price depends on the design and its size. So, the cheapest options can cost from 500 rubles, and the most expensive more than 8,000 rubles.
Choosing wallpaper for different rooms
For example, for the kitchen you need to choose wallpaper from which dirt, such as dried oil, can easily come off. In other words, the kitchen needs washable wallpaper. These exist and they are called vinyl wallpaper. As you know, there are many different variations of such wallpaper, meaning their design. For the kitchen, something light is suitable, which creates the mood for cooking.
For the bathroom and toilet, where it is constantly damp and there is water all around, moisture-resistant wallpaper is quite suitable. But this finishing option is extremely rare, because sooner or later both the wallpaper and the plasterboard wall on which this wallpaper was glued will become wet and swell, causing deformation of the entire plasterboard wall, as a result of which repairs to this wall may be required. For this reason, plastic is preferable for the bathroom than drywall, no matter how waterproof it is.
A child's room needs wallpaper that you won't mind throwing away if it gets dirty. This option for arranging a nursery is popular in families with small children. Putting paper wallpaper there is a great idea. Such wallpapers are very cheap, so if they get torn or stained, you can simply throw away this wallpaper with a light heart. Another option for a child's room is the same vinyl wallpaper, which can be cleaned as you use it. But it should be taken into account that such wallpapers are much more expensive than ordinary paper ones, so you can’t just say goodbye to them.
For the living room, which needs to be decorated better than all other rooms, you should use natural or textile wallpaper, because they look very luxurious and rich. But you can choose beautiful vinyl wallpaper, which can be washed if necessary.
Wall putty and gluing
Wallpaper cannot be glued onto an unputtyed surface of a plasterboard wall without complete prior puttying. The mixture is applied using a trowel or wide spatula, which will help to evenly distribute the composition.
By holding a spatula in your hand correctly, you can avoid the appearance of uneven surfaces.
The plasterboard wall is already flat and after the primer dries it is absolutely smooth. The putty applies quite easily to such a surface. For those who already have certain skills in performing such work, it will not be difficult to apply the composition to the walls. The first base layer does not exceed 3 mm. It dries quickly and after 4-5 hours you can start applying 2 layers. Its thickness does not exceed 1 mm, which allows you to completely hide the border between the areas that were putty one by one.
Pasting the walls begins after all the seams and places where putty is applied have been treated with sandpaper, and the entire surface of the walls has been re-primed. In some cases, it is allowed to cover plasterboard walls immediately after the primer has dried. This is possible when using wallpaper:
- vinyl;
- non-woven
If we are talking about paper canvases or silk-screen printing, then you will need to apply 2 layers of putty to the entire surface to be pasted. For the first, you can use a regular mixture, and for the second, a special ready-made finishing composition. Dried, smooth walls are sanded with the finest sandpaper and treated again with a primer. This treatment prevents excessive absorption of moisture from the adhesive solution and ensures excellent adhesion of materials.
Before you start gluing wallpaper, you need to use a building level, with which you beat off the horizontal and vertical, retreating from the far inner corner of at least 5 cm. By covering the seam with a sheet of wallpaper, you can be sure that there will be no rupture or deformation even after a long period of time.
Strength is guaranteed by early and timely fixation with reinforcing tape. All wallpaper sheets are glued with an approach to the ceiling and an overlap to the floor. The excess is cut off with a stationery knife after drying. While working, firmly press the edges of the sheets at the joints. More details on the process in the video
It is possible to properly glue wallpaper onto plasterboard walls only if proper, complete surface preparation has been carried out before gluing.
Technology of applying plaster to drywall
Drywall is a very capricious material, so it is necessary to strictly adhere to the specified technology for plastering it.
Preparatory stage
Before plastering drywall, you will need to prepare the tools and the surface itself.
The tools we will need are:
- Set of spatulas of different sizes;
- Building level;
- Roller and container for priming walls;
- Sandpaper;
- Ladder;
- Vacuum cleaner;
- Protective clothing and respirator.
First of all, you need to carefully remove all dust from the surface of the ceiling or walls, especially in corners and joints. Then a thin layer of putty is applied to the joints and surface imperfections. Work should be carried out carefully, maintaining a putty layer no more than 3 millimeters thick.
Applying putty to joints, corners and imperfections of plasterboard surfaces
When puttingtying corners, you can use a perforated profile in the form of a corner. It is applied to a layer of putty, and the excess composition that came out through the perforated holes is removed with a spatula.
Strengthening the corners of plasterboard structures using perforated elements is done by gluing them to putty
If the cracks in the drywall are significant, use a special mesh called serpyanka. It is applied to a layer of putty and pressed down with a spatula. When the putty dries, you need to go over these areas with sandpaper and sand out minor defects.
Surface priming
The surfaces are primed using a roller. For convenience, it is recommended to use a regular roller and a tool with a long handle. You need to wet the roller well in the primer, but not to the extent that the composition drips off it.
Important! When working in a damp area, use an acrylic-based primer. It will create a film on the surface that will protect the drywall from steam and humidity.
Plasterboard surfaces are primed using a roller with a long handle.
Plastering
The final stage - plastering the surface - is considered the simplest. The plaster is applied to the surface using the same spatula as putty. The composition will help hide minor defects that remain after installing the drywall.
The layer of applied material must be thin - a maximum of 5 millimeters. If it is necessary to cover the surface with a thicker layer, repeated plastering is performed after the previous layer has completely dried.
Plastering drywall with your own hands - in the photo, a home master uses a spatula and a falcon
Sometimes plastering of drywall is carried out along beacons. To do this, metal perforated beacon profiles are attached to the surface on a gypsum mortar strictly according to the level. In this case, you need to choose the minimum size of the beacons - no more than 6 millimeters. Drywall is plastered only at normal humidity in the room and above-zero temperatures. When the planes are leveled and dry, the plastering work can be considered complete.
Drywall is plastered only at normal indoor humidity and above-zero temperatures. When the planes are leveled and dry, the plastering work can be considered complete.
In the following video you can look at the result of similar work that was carried out in a city apartment:
Practical advice
It is not worth diluting the putty in large quantities; it is better to prepare small portions that can be quickly used. When cooked in large quantities, it may harden.
When filling, it is better to use two spatulas, apply the mixture with the narrow one onto the wide one, and apply the wide one onto the surface. After each applied portion, the spatula should be thoroughly cleaned and rinsed. This will avoid the formation of defects as a result of dried pieces.
After application, you need to give everything time to dry. It may be different for different putties, so you must follow the instructions on the packaging.
Stages of preparing walls for wallpaper and features of the work
In the process of preparing walls for wallpapering, it is not enough to simply buy high-quality materials
It is important to correctly perform the preparation technology, adhering to the following steps:. Cleaning the wall of old wall materials;
Cleaning the wall of old wall materials;
- Initial application of primer. The first layer of primer is applied as an impregnation in order to eliminate microcracks and neutralize the surface from moisture. It will give the surface a slight smoothness and will be completely translucent;
- Sealing cracks and defects;
- We carry out the most important stage - finishing and preparing the wall: we fill existing cracks and chips with a gypsum mixture, plaster the surface and putty;
- Leveling the surface using sandpaper or other abrasive material;
- Secondary application of primer. It can act as the best finishing composition for adhesion of the wall to the wallpaper and gluing dust residues.
After the materials have completely dried, the wall will be white.
Old wallpaper or painting must be removed 100%.
Features of wall treatment depending on their material
It should be noted that each type of wall is prepared individually.
Concrete walls. It is almost impossible to paste wallpaper without treating the walls, since concrete strongly absorbs moisture. Here you need to start preparing by cleaning the surface. Then remove any remaining dust and coat with primer.
It is important to pre-finish the wall with putty mixture. This method of wall preparation can also be used on brick walls.
It is important to pre-finish the wall with putty mixture. Plasterboard walls
This base is considered one of the best for wallpapering. However, this is not possible without preparation. The joints between the sheets must be sealed with putty mixture. After cleaning the seams, the surface of the drywall must be coated with a primer in order to give a plastic smooth effect.
Plasterboard walls. This base is considered one of the best for wallpapering. However, this is not possible without preparation. The joints between the sheets must be sealed with putty mixture. After cleaning the seams, the surface of the drywall must be coated with a primer in order to give a plastic smooth effect.
The joints between the sheets must be sealed with putty mixture.
Plywood, chipboard and other wood tiles. The basis of walls made of similar materials is now becoming more common. Of course, you can glue wallpaper onto such a surface without preparation, but experts advise putting putty on the surface to improve adhesion and prevent the appearance of yellowness.
Experts advise puttingtying the surface to improve adhesion and prevent the appearance of yellowness.
The procedure for providing work
The method of preparing walls and ceilings for finishing has also changed. If previously only rough plastering of walls with a sand-cement mixture was known, now the first place is leveling the walls with the help of plasterboard sheets. Such walls represent a perfectly flat surface on which wallpaper of any type and color can be placed without any problems. Preparing plasterboard walls for wallpapering is possible without involving professionals in this process.
Which is better: heated floors or radiators?
Warm floorBatteries
Leveling walls and ceilings using gypsum boards has been known in our country relatively recently, but has already gained well-deserved popularity. The essence of this method is to create a frame from a metal profile and then attach sheets of drywall to it. This method allows you to create almost perfectly smooth walls and ceilings and hide behind them all kinds of pipes, wires, ventilation systems and other objects. In addition, drywall has a number of positive factors, which makes the use of gypsum plasterboard in interior decoration simply irreplaceable.
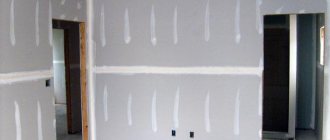
This is what a plasterboard wall looks like before finishing
But covering the walls and ceiling with plasterboard is not enough; you also need to properly prepare them for subsequent wallpapering. Then your wallpaper will hold tight, look beautiful and be easily removed before the next renovation. It is not difficult to cope with this task, because all the materials necessary for the work are available in any construction supermarket. The only thing you need is not to neglect the sequence of doing the work. We will talk below about how to prepare a plasterboard wall for wallpapering.
Required tools and materials
Tools for finishing gypsum boards
The preparation of gypsum plasterboard walls is carried out in several stages. Before priming the drywall before gluing, you will need to carry out a number of important measures.
To carry out this work, you need to prepare tools, devices and purchase the necessary materials. All of them are presented in the table.
| № | Tools and accessories | Working materials |
| 1 | a set of spatulas (3 pieces are enough - 1 narrow and 2 wide) | antifungal solution |
| 2 | construction or stationery knife | putty |
| 3 | roller (preferably with an extension handle), brush (for inner corners, hard-to-reach places) | primer |
| 4 | gloves, respirator | tape for joints (serpyanka) |
| 5 | sandpaper, grout float | glue for her |
Processing process
The primer is applied to the plasterboard surface several times. The first time - on a newly installed structure, before sealing joints and puttingty. A regular acrylic primer is suitable for the job, or you can purchase products that say “for drywall.” Acrylic mixtures are usually presented in the form of an aqueous dispersion, so they are environmentally friendly, hypoallergenic, and therefore applicable indoors.
It is necessary to treat the entire surface of the drywall so that the putty solution adheres better. At the same time, the walls already receive some protection from the formation of fungus. The solution is applied with a nap roller or a wide paint brush. Rub the primer mixture well over the surface.
If the solution is too concentrated, it can be diluted in the proportions specified in the technical specifications. For acrylic primer mixtures, plain water is used as a solvent.
Putty walls are sanded to give the surface a perfect smoothness. After this you need to prime again. Here the primer plays a very important role. Of course, ensuring adhesion of the base with subsequent finishing materials. And another important task is to minimize the absorption of wallpaper glue by the wall. To increase the protective properties, it is necessary to prime in at least two layers.
The work also uses a roller or brush. The solution is thoroughly rubbed over the surface. Before applying the second layer, you need to wait for the previous one to dry.
From this it becomes clear why it is necessary to prime plasterboard walls before installing wallpaper materials. By the way, the primer solution not only improves the quality of wallpapering, but also simplifies their dismantling during subsequent repairs.
Do I need to prime drywall before wallpapering?
In principle, priming any surface is simply necessary. It serves to strengthen the treated surface and increase adhesion to other materials during subsequent finishing. To treat drywall before gluing wallpaper, a penetrating primer is usually chosen, which can not only strengthen the fragile plaster, but also increase its adhesive properties. In addition, many primers prevent the formation of rot and mold, allow air to pass through well, and are not afraid of moisture after drying.
Options for quality primers
Recently, acrylic-based primers have become widespread. Preference is usually given to European companies, whose products are known throughout the world.
Don't try to save on small things. If you want to get high-quality repairs, choose high-quality finishing materials.
Question: How to prime drywall before wallpapering? It is fundamentally unimportant which brand of primer to use, the main thing is to carefully treat the surface. The rest, as they say, is a matter of technique.
The primer is applied very easily, even a child can handle it. To work you will need:
- paint roller;
- a small brush for processing joints;
- bath for the composition.
First, corners, screw heads and joints of plaster sheets are primed. After drying (the drying time is usually written on the packaging), a new layer is applied with a roller to the entire surface of the walls.
The chamfers at the joints of sheets, corners and screw heads are especially carefully processed.
Primer consumption is usually low, but you should not forget about it. The remaining composition can be used again before wallpapering. The principle: “A lot is not a little!” is very suitable here!
How to choose the right primer?
Types of primer:
- Water repellent.
- Fireproof.
- Adhesive.
- Antiseptic.
- Deep penetration.
The ideal option is a universal primer for drywall produced by Knauf, which increases the adhesion of the decorative layer to the walls and has high fire-fighting, water-repellent and antibacterial properties. The high cost of the German brand's products is compensated by the impeccable quality of the treated surfaces, excellent appearance and durability of the repair results. You can find mounting compounds from other well-known global and domestic brands that are not inferior to German ones in quality, but at more reasonable prices.
It is important to read the instructions before purchasing, since compositions for external work differ significantly from primers for internal work with drywall. You cannot treat walls with compounds similar to phenolic, polystyrene, alkyd, perchlorovinyl primers, which contain a large number of toxic compounds that are life-threatening
A mixture with a high silicone content does not have the necessary adhesive properties, and it will be impossible to glue the wallpaper to the walls.
Gluing wallpaper onto drywall without putty - disadvantages
Experts do not recommend gluing wallpaper onto drywall without prior putty. This can further lead to the following problems:
- The surface of the drywall, although it seems smooth, may have manufacturing defects and scratches resulting from installation. Wallpapering will make all these defects visible on the surface of the walls;
- The joints between the plasterboard sheets will be visible on the wallpaper, making the walls appear uneven;
- The fasteners that attach the sheets to the profiles can be visible under the wallpaper, or they can rust, thereby spoiling the appearance of the pasted surfaces;
- If the selected wallpaper is of light shades, then the color of the plasterboard wall may be visible through it;
- During the next renovation, it will not be possible to remove wallpaper strips from the walls without damaging the surface of the drywall. Since the top layer of plasterboard is cardboard, the wallpaper will stick to it very firmly, and if it is torn off, the top layer of the plasterboard sheet will be damaged.
Tips that you must follow when doing wallpapering on drywall with your own hands
If you decide to glue wallpaper onto drywall without prior puttying, you must adhere to the following recommendations:
Before gluing, treat metal parts on drywall with an anti-corrosion agent; It is advisable to putty the joints of the plasterboard sheets; Choose dense wallpaper, possibly bright colors, preferably with a non-uniform texture; Please note that if non-moisture resistant drywall is used, it cannot be treated generously with glue, as it may become wet; The joints of glued wallpaper strips should not coincide with the joints of plasterboard sheets; For long-lasting wallpaper, choose high-quality material so that you don’t have to tear it off in the near future, thereby damaging the walls.
However, if finishing work on drywall is carried out correctly and efficiently, then its surface must be puttied before further processing. When carrying out repairs with your own hands, you need to know how to putty drywall under wallpaper.
Fashionable wallpaper is heavy in weight
Today the fashionable wallpaper is heavy, vinyl, with complex patterns and embossing. What can I say, they look great. The room with them turns into a real fairy-tale palace. But to stick them on, you need absolutely flat walls.
Only drywall can create such a surface. This is the only material that can help out if necessary. That is why our article is dedicated to him.
Finishing walls with plasterboard for wallpaper is not too difficult a job. But it requires patience, diligence, and attention.
First, let's look at the main stages of our activities:
- We seal the seams in the drywall.
- We putty the walls.
- We prime them.
- We paste the wallpaper.
Ready primer
How to hang wallpaper on drywall
To determine how much wallpaper you will need to purchase, you need to know the exact length of all the walls, as well as the height of the ceiling. When this is known, you should subtract the dimensions of the openings for windows and doors from the resulting total area.
When choosing wallpaper, you need to pay attention to the batch numbers that are usually placed on the rolls. They must match
In addition to wallpaper, you need to choose suitable wallpaper glue. To do this, first of all, you should adhere to the recommendations that are indicated in the instructions. Therefore, first you need to choose the wallpaper, and then buy glue for it. This is also true when gluing vinyl wallpaper to drywall.
To prepare the glue, you need to mix the dry mixture with water and leave it like that for a while. If the weight of the wallpaper is large enough for drywall, then it is recommended to use a special adhesive to ensure stronger adhesion. In addition, glue should be applied to both the wallpaper and the wall. Otherwise, the technology for gluing wallpaper on drywall is almost the same as on other surfaces.
When preparing glue, it is important to follow the proportions, which are usually indicated directly on the packaging. When the mixture is ready, it should be left for half an hour
During this time, you can prepare wallpaper for drywall and take the necessary measurements.
The procedure for gluing:
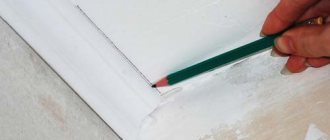
- Before gluing the material, you should take a level or plumb line and use it to draw a vertical line. It is along this that the first sheet will be aligned.
- Then the wallpaper is cut to the required length, leaving a few centimeters at the top and bottom as a margin for trimming. There is no need to cut all the material at once. It's better to do this as needed. The fact is that the line of the ceiling or floor may not be strictly horizontal. Therefore, different areas sometimes require different lengths of material.
- If the wallpaper has a large repeating pattern, which during work needs to be combined with adjacent sheets, then you should buy material with a large supply. The cut fabric must be coated with a continuous layer of glue, especially carefully treating the edges. Then the sheet coated with glue should be folded in half so that it can be thoroughly soaked. This applies to medium and high density material. If the wallpaper is thin (for example, paper), then it is not necessary to fold it in half. In addition, you should glue them immediately, before they become limp and stretched under the influence of moisture.
- When wallpapering, it is advisable to align it along the top line. The canvas is applied to the prepared surface and smoothed in the direction from the middle to the edges. This is best done using a plastic spatula or roller. If everything is done correctly, “bubbles” and “humps” will not form.
- It is advisable to once again apply glue along the edges of the wallpaper. If some areas have had time to dry and have not stuck to the surface, then a small amount of adhesive should be applied to them. Remaining glue should be wiped off with a cloth.
When gluing wallpaper onto drywall, you must not forget that if you cannot match adjacent panels, you can overlap them. When the glued areas have dried, you will need to cut a vertical line under the ruler along the seam line, while taking out the inner and removing the outer cut strip. When this is done, the resulting joint will remain coated with glue and smoothed with a roller.
It is often difficult to match wallpaper in the corner of a room. In this case, you can use the same method that was just described. The walls need to be covered entirely, and when they are dry, it is recommended to make two crossed cuts in the places where switches and sockets should be located. Then the formed corners are carefully bent and using a knife or scissors, the outline is cut out in the shape of a rosette.
Do not forget that indentations for trimming are also made on the side that was glued near the ceiling. In this area, it is best to cut off the excess after the canvas has completely dried. This is usually done as follows: using a wide spatula, the edge is carefully smeared and the excess part is trimmed with a sharp construction knife. In this way you can get a straight ceiling line. Similarly, using this technology, you need to make a cut at the floor line. In this case, you should leave about 6 mm so that you can make a bend onto the plinth strip.
How to putty walls under wallpaper
To smooth out sections of the wall or hide defects, cracks or holes from nails or dowels, use putty.
1. Pour cold water into a small plastic bucket. Add the dry putty mixture there and mix until you get a homogeneous mass.
2. Take a small amount of putty on a spatula and apply it to the wall in strokes. If the depression or crack is deep enough, apply putty in two layers, first waiting until the first layer is completely dry.
3. Wait until the putty is completely dry, then sand it using sandpaper.
External and internal corners
External and internal corners on plasterboard walls and partitions are made using:
- reinforcing paper;
- serpyanka;
- perforated aluminum corners;
- special metal corners Shitrok with paper.
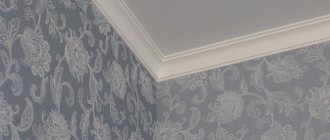
Paper and serpyanka are most often used to decorate internal corners - the junction of walls, as well as walls and ceilings. The technology is similar to seam sealing. A certain amount of putty is applied to the corner, paper or sickle is glued onto it, the reinforcing strip is pressed into the composition with a narrow spatula, and excess putty is removed. After this, they go through the corner again, applying a thin layer of putty on top.
Perforated corners are used to design external corners - slopes, protrusions, etc. First, a piece of the required length is cut. The metal is very thin, it can be cut even with ordinary large scissors, but if you have metal scissors, the work is easier. Edges are cut at an angle of 45° or less, rather than at 90°. So, when puttingtying drywall, the edge will not curl up.
Decorating the outer corners of plasterboard walls using a perforated corner
Putty is applied to the outer corner on both sides in small islands approximately every 10 cm (can be done in a checkerboard pattern). A perforated corner is pressed into the solution, its installation is checked whether it is vertical or horizontal, and adjusted. Use a spatula to pick up excess mortar, aligning the edges in one plane with the surface of the sheet. The installed corner is left for some time until the putty dries, after which it is sanded and puttyed again if necessary.
What is different about the metal corner Sheetrock? Thin strips of metal are applied to a paper base. They are more rigid than simple reinforcing paper, but it is more convenient to work with them than with conventional perforated ones, since due to the presence of paper the transition to plane is smoother.
Puttying plasterboard walls
After finishing work on small areas of the surface, re-treat everything with primer. Now the base is ready for finishing with wallpaper, but you need to know that gluing finishing material onto such a base is undesirable. Sooner or later the question will arise of how to remove old wallpaper without damaging the drywall sheets. Therefore, wall putty is simply necessary.
Apply a finishing layer of putty 2-3 mm thick to the walls. When working, use a large and medium spatula. Apply the solution using sweeping movements. Without waiting for it to set, use a medium spatula to level the surface, forming the desired thickness of the putty layer.
Sand the dried surface using fine-grain sandpaper. During the sanding process, be careful not to remove the applied layer of mortar. Otherwise, you will have to repeat the process of plastering the surface. Then the walls are treated with a primer. After it has dried, you can begin to decorate the surface with wallpaper.
Choosing wallpaper for walls
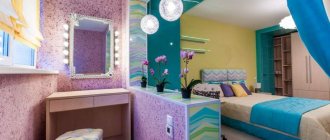
So, all stages of processing plasterboard walls have been completed. The final test is ahead - gluing wallpaper onto drywall. The technology of this process is as old as the world. Only the materials from which this type of interior decoration is made have changed, and the range of colors and patterns has expanded. Washable wallpaper, wallpaper with a relief pattern, fabric and photo wallpaper appeared.
Each type has its own advantages and disadvantages in relation to others. But no matter what wallpaper you choose, it will lie very easily and naturally on the carefully prepared surface of the plasterboard walls. And that means all the work was not in vain. Then you can proceed directly to wallpapering.
Features and Recommendations
The process of gluing wallpaper will not be difficult if you follow the recommendations:
- The plasterboard surface does not have small stones or wave transitions.
- All containers and tools must be clean.
- When working with wallpaper, you need to remove all the shortcomings, otherwise it will be impossible or difficult to do this later.
Tips for working with wallpaper on a plasterboard surface:
- The work of wallpapering a room begins with a doorway or window.
- Wallpaper should be measured and cut on a horizontal, clean surface - a clean floor, a large table.
- During gluing, the canvas is completely free of air bubbles. Do this carefully with a soft rag or rubber spatula.
- Excess glue that comes to the surface of the canvas is removed immediately with a damp sponge.
- If the wallpaper has a large pattern, then the consumption of the pattern at the joint is allowed to be no more than 2 mm.
- Trimming of excess trellises is done strictly along a ruler with a sharp knife.
- During work, windows and doors must be closed.
Having familiarized yourself with the recommendations and tips, the work of gluing a plasterboard surface will not be difficult or time-consuming. To avoid unpleasant consequences, such as dark stains from moisture-resistant drywall on trellises, the surface still needs to be covered with putty and primer. This guarantees the appearance of the room and the durability of the trellis covering.
Types of putties
Before starting puttying, you should check for any self-tapping screws protruding from the wall. To do this, simply run a spatula over the surface and, if the self-tapping screw catches, it must be recessed into the wall 1-2 mm below the level of the front side.
Putties are divided into several types according to composition:
- cement. They are low cost, highly resistant to moisture, but can shrink. Not recommended for leveling drywall;
- plaster. They do not shrink and are easily leveled after puttying. Perfect for leveling drywall. The main disadvantage is that it dries quickly;
- polymer. Quite expensive putties have the best properties. Suitable for any surface, do not shrink, are easy to process, the drying time is higher than that of gypsum, which makes working with them easier.
Putties are also divided according to purpose:
- leveling. They are used for the initial leveling of drywall, the maximum application thickness can reach 20-25 mm;
- finishing. Serve to eliminate small defects, applied in layers of 0.1-0.3 mm. Does not require additional processing;
- universal. Combines the properties of starting and finishing putties. Using the same composition for the starting and finishing finishing simplifies the process of leveling the walls with your own hands;
- special. With the help of additives, the properties necessary for specific work are obtained. The scope of application can be read on the packaging.