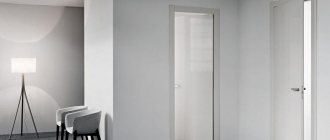
Among the variety of finishing methods, textured plaster remains a popular decor option as before. Modern materials for renovation have raised decorative plastering of walls to a whole new level, providing ample opportunities for creating a unique interior. In this article we will look at what textured plaster is, what its popular types are, and how to apply this coating to walls and ceilings with your own hands.
What is textured plaster
Textured plaster is a type of wall covering used as a finishing touch. The peculiarity of this material lies in the decorative reliefs and variety of color variations.
The relief depth layer can vary from 1 to 7 millimeters. This difference depends on the application technique and the desired result.
- The solution is easy to apply and has particular flexibility when creating a shape.
- The material is used both for facade work and for indoor use.
The plastic solution is applied to the walls and the magical work of creating shapes begins: from wavy to complex geometric. When the solution dries, it becomes possible to add depth of color to it by applying additional shades.
Self-production
Perhaps you are not satisfied with the price of this material. Then you can do it yourself.
You will need:
- Putty;
- Venetian embossed and regular spatulas;
- Sandpaper.
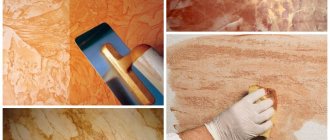
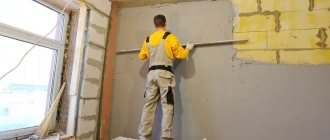
We apply putty to the entire wall and treat it with Venetian putty. Let it dry.
After a few hours, we remove unnecessary fragments with a regular putty and sand it down. Afterwards the wall is treated with primer, paint and varnish.
Advantages and disadvantages of textured plaster
We invite you to familiarize yourself with the positive qualities of the finishing material:
- An attractive interior solution.
- Flexibility and ability to recreate any shapes and patterns.
- "Flexibility" of color. A drop of dye and the new color is ready.
- Durability and ease of care.
- Availability of options in the market for both interior and exterior decoration.
- No loss of color. The plaster is resistant to ultraviolet rays and the color does not fade when exposed to sunlight.
- Increased thermal insulation. The finishing coating increases the percentage of heat retention in the room.
- There is no risk of releasing harsh chemicals. The material is environmentally friendly.
The disadvantages include:
- Fragility. Strong impacts easily cause chips and scratches.
- The embossed surface is finicky in the process of cleaning from dust.
- The need for speed. The mixture must be applied quickly, without waiting for it to dry on the wall.
- Expensive services. Hiring specialists in this area can cost a pretty penny.
- With non-standard patterns and shapes, it is difficult to obtain an identical coating result from several craftsmen.
- A complex process for correcting defects during drying.
It is very important to strictly follow the technology, otherwise peeling, swelling and cracks may occur.
Decorative plaster with primer
Thanks to the primer, the adhesion of the plaster increases and it acquires antiseptic and fungicidal properties.
You will need:
6 kg of putty, primer, 200 g of grout.
Preparation and application:
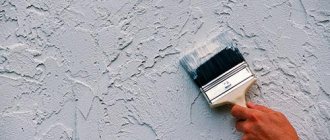
Mix a homogeneous mass of dry putty with a primer until it acquires the consistency of thick sour cream. Use only white primer and add a little grout at the end. Apply with brushes, roller or embossed spatula.
Types of textures
The variety of options on the market can be confusing. Let's look at the basic issues of material types.
Textured plaster is distinguished according to the following characteristics:
- By type of binder (base used as an independent composition for plaster).
- By type of filler (additional materials that allow you to create a relief with a variety of decorative characteristics).
Advantages
As can be seen in the photo of textured plaster, it has the following advantages:
- attractive appearance;
- strength;
- high thermal and sound insulation;
- fire resistance;
- environmental Safety;
- long service life.
Panels made from decorative plaster mixtures are distinguished by their exclusivity, since it is almost impossible to display the same image twice.
Types of textured plaster
Acrylic. The composition, made of acrylic with an admixture of additional components, is elastic, withstands temperature changes and does not lose its visual characteristics when walls shrink in new buildings.
- Sold in a ready-made composition, this saves time and speeds up the work process.
- A wide range of color variations allows you to buy a ready-made composition with the addition of the desired paint pigment.
- This coating dries quickly, retains its properties for up to 15 years of use and is suitable for wet cleaning.
The downside is that the material is flammable and loses its color properties when exposed to direct sunlight.
Mineral plaster
The composition is created from components of mineral origin based on cement, lime, clay and even stone chips. Unlike the acrylic composition, which is sold in liquid form, the mineral composition is presented in a dry format. Before use, the mixture must be mixed with water.
- The low cost, strength, fire resistance and resistance to low temperatures are captivating, which allows the composition to be used not only for interior but also for exterior decoration. Service life: up to 10 years.
- However, such plaster will not please you with a large abundance of color variations. The composition has low elasticity, which means it can only be used on durable, stable surfaces. Before application, it is necessary to properly prime the wall and get rid of all cracks and irregularities as much as possible.
Silicate plaster
The main component of the composition is liquid glass, which instantly brings the composition to first place in strength. Silicate plaster is moisture-resistant, fire-resistant, elastic and ready to serve faithfully for up to 20 years.
Of the minuses: A small selection of shades, the need to use a silicate primer for treating walls and quick drying, which forces you to work at high speed.
Important! The presence of harmful substances in the mixture allows its use only for outdoor work.
Silicone plaster
Silicone resin is used as a base. The high level of elasticity allows you to work on uneven surfaces with imperfections and temperature changes.
The composition is resistant to vibration and moisture.
- This is an ideal option for interior decoration, both due to the wide range of shades and due to the content of antifungal agents in the composition.
- The cladding can be matte, glossy or intermediate (with a slight gloss effect). It is necessary to provide for the degree of gloss when planning repair work.
The only thing that can scare you is the price, which is significantly higher than that of the previously mentioned compositions.
Which is better: mineral, acrylic or silicone?
All four main types of solutions have features determined by their base and other components. Due to poor environmental friendliness, silicate compounds are not used for interior work. Therefore, below we will mainly talk about three types of decorative solutions.
Mineral
The main binding components of the solutions are white cement M500 and lime. These structural compositions do not shrink when hardened, “get along” well with any base (although somewhat worse than silicone and acrylic), “breathe”, are environmentally friendly, fit well and keep their shape. They are not afraid of water, so they are suitable for plastering wet rooms such as bathrooms and basements. They can be washed with soapy water or dishwashing detergents.
Since mineral plasters are quite hard, they are not resistant to vibrations and various movements. When the house shrinks, cracks appear. Therefore, they cannot be used in new buildings until the buildings “nest” - settle down. They are also not used in seismic areas or near railway tracks.
Non-flammable, therefore can be used near sources of open fire. Lime compositions are not susceptible to mold and mildew. When colored clays are present in the composition, they turn out colored. Mostly they are white or colored. Service life 10 years.
Acrylic
The binders of this type of mixture are acrylic synthetic resins. The basis of the solution is a water-dispersed emulsion. In addition to the filler, substances are added to it that impart the necessary properties - biocides, fire retardants, etc. The structural acrylic mixture is supplied ready-made in buckets.
Acrylic mixtures are tenacious, durable, and elastic. No harmful fumes are emitted. However, they hardly “breathe.” Because of this, they are not recommended for use in bedrooms and living rooms. However, they are good for bathrooms. Not resistant to UV radiation, flammable. They accumulate static, so they become dust collectors. Wash and clean with a vacuum cleaner.
Guaranteed durability – 15 years.
Silicone
The binders of structural plaster are polymer resins. It is very elastic. The polymerized dispersion has high strength. It is hydrophobic, but breathes due to micropores. It does not get dirty, it is fire resistant, it is not afraid of UV rays, it does not fade, it can be used for work indoors and outdoors. Wear-resistant. Pre-priming is required. Serves for 25 years. Most expensive. Rich palette. Evaporation during hardening.
Of the three plasters presented, the most tensile is silicone. It requires a silicone primer and is the most expensive. Decorative acrylic and silicone compositions do not require final painting and are sold ready-made. These are relatively recent materials. However, mineral plaster, which is somewhat inferior to them in several individual positions, in general, copes well with the functions of a structural decorative coating and has its advantages.
Therefore, all three types are good in their own way.
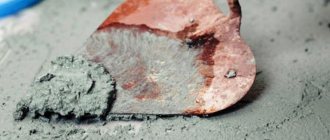
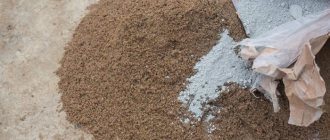
How to make a mineral mixture using regular putty? Take 4 parts of it, add 3 parts of clean sand, mix the mixture and add water to the desired consistency. You will get structural decorative plaster - a mixture that has a structure suitable for creating texture.
Types of reliefs
There are a huge number of coatings for textured plaster on the market. Special elements in the composition allow you to create the most sophisticated and imaginative patterns.
Below are the most popular textures with the effect:
- Tree bark (bark beetle).
- Antique stone.
- Fur coat (this effect is also called “lamb”).
- Brickwork.
- Fuzzy fabric.
- Geometric patterns and abstraction.
- Silks.
- Concrete.
- Tree.
- Cracks.
- Reptile skin.
There are many variations. Choose yours!
Types of textures: examples with photos
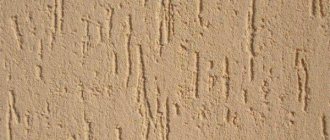
One of the popular methods of façade finishing of a house is under bark beetle , in which a texture similar to wood eaten away by insects is created on the surface. Bark beetle samples:
Bark beetle texture
External walls
In the hall
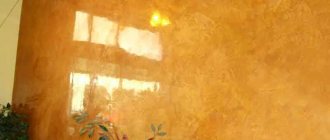
Textured plaster often imitates the texture of wild stone: chips, bedding, veins, etc. By applying appropriate painting, you can achieve a striking resemblance to natural material. This is a good option for decorating a hall, bathroom, kitchen.
Repeating lines and geometric shapes are also often found in modern interiors They can be drawn on the plaster by hand or pressed out with a stamp. This finish is suitable for a bedroom or living room. A few examples of such a texture:
Often, relief rollers, prints or stencils are used to create a three-dimensional pattern on the wall . You can make a tool for impressions yourself, for example, from foam rubber and plastic film. Leaf prints look beautiful: maple, oak, grapes, etc.
Separately, it is worth noting the texture of wood and masonry , which can also be made using a figured roller or stamp.
Textured finishes are not limited to the listed types. There are many more ways to create a unique pattern on the surface. Here are some samples:
Materials and tools for work
Purchasing materials and tools is already 50% of success. Let's figure out what tools we need to create the surface:
- Putty knife. It is better to have several spatulas of different widths.
- Metal and plastic trowel.
- Brushes and rollers.
- Building level.
- Plumb.
- Grater.
- Masking tape.
- Sponges.
- Gloves and respirator.
- Protective film for furniture and floors.
- Containers for compositions.
At the same time, you can always use available materials to create special patterns.
Variety of instruments
Homemade decorative plaster is applied to the wall surface in various ways. And there are quite a lot of tools for this.
The basic tools needed for most plastering finishes are:
- spatulas (narrow or wide, plastic or steel, with a straight or curved blade);
- trowels and graters (also of various configurations and materials);
- rollers (textured - for creating textures, regular - for applying various compositions);
- brushes (top brushes, flute brushes, basting brushes, etc.);
- power tools for mixing solutions (drills with attachments and mixers);
- spray guns and pistols (for mechanical work);
- sponges (soft, dense and abrasive);
- sanding paper,
- level;
- masking tape;
- usually a ruler/tape measure.
Surface preparation before application
The principle of surface preparation for applying textured plaster:
- We clean the surface, remove all fasteners, and cover up cracks and recesses.
- Remove dust using a vacuum cleaner or broom.
- We prime the wall in 2 layers.
- We cover the floor and furniture with protective film.
Important! Application of smooth compounds requires appropriate smooth and even walls. If the condition of the plaster leaves much to be desired: the coating is old or crumbling, then it is necessary to plaster the walls from scratch.
Decorative plaster with PVA glue
By the way, PVA glue can be replaced with grout mixture in the same quantity - the recipe will not change.
You will need:
6 kg of putty, 2 liters of water, 200 ml of PVA.
Preparation and application:
Pour dry putty into a large container, dilute with water and knead the mixture. Add PVA and mix again until smooth. To apply, use a textured roller with a suitable pattern.
Plaster consumption
The consumption of plaster per square meter depends on the thickness of the applied layer. Each manufacturer indicates material consumption in kilograms per square meter. If you plan to apply a simple coating of 1-2 layers, you can trust the consumption indicated on the packaging.
If your idea involves multi-layer, textured work, then the material consumption will be determined only during the work process.
For the ceiling
Fundamentally, the technique of finishing with plaster on the ceiling is no different from decorating the walls. For the ceiling, they usually choose calmer tones and textures that don’t stand out too much. Here are some examples of beautifully plastered ceilings:
How to make a textured ceiling yourself, see the video below.
Applying textured plaster
Let's get acquainted with the main stages of working with decorative plaster:
- Preparation of walls: leveling by sanding or installing drywall, treatment with acrylic plaster in two layers.
- Preparation of plaster: mixing the dry mixture or opening a can of ready-made mortar.
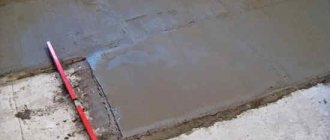
- Applying the base layer: lay the plaster in one layer measuring 2-3 millimeters, wait for it to set. When the wall is dry, you can proceed to the second layer.
- Decoration: apply the same mixture as on the first layer. Place it on the wall with a trowel and level the mortar. Without waiting for it to dry, we create the desired relief effect with the prepared tool. If no additional tools are provided, then we use a trowel or spatula to create a simple pattern, working in a circular, wavy or any other way.
- If desired, you can cover the final layer with decorative wax or varnish. It will strengthen the surface. Wax will add gloss, while varnish can give either a glossy or semi-matte effect.
Also, at the final stage, you can decorate surfaces using bas-reliefs or moldings, apply decorative plaster to them or cover them with gold, copper, brass or silver gold leaf. Fantasy, just fantasy!
There are many techniques for applying textured plaster. The difference in techniques is associated with the properties of certain compositions.
Therefore, we will analyze the application technology of the simplest and most popular methods:
- The “bark beetle” technique, for example, is implemented by grinding the composition with a flat grater. After applying the layer, you need to spread it over the surface with a float. The stone chips in the composition will create depressions and grooves reminiscent of insect footsteps.
- The “lamb” technique is applied by spraying, spraying, using brushes and even brooms. During the application process, it is important not to splash the floors and walls.
To apply decorative plaster you can use:
- Roller. Embossed with patterns or rollers that loosen the mixture on the surface (relevant for the “fur coat” effect). Roll the roller over the composition after 15 minutes from the moment of application. The roller needs to be moistened with water periodically.
- Stencils or stamping products. Stamps are relevant for creating textures, be it the texture of leather, flowers or bricks. Before using the strain, wet it, then gently press it into the surface so that you get an even imprint. Stencils are used to create three-dimensional reliefs. The stencil is attached to the wall, after which decorative plaster is applied. After applying the material, the stencil is removed.
- The trowel allows you to create a variety of textures and even smooth out unevenness after the roller. We draw along the surface with the corners and the general plane of the tool. You can work in a horizontal progression, vertically or circularly.
- In everyday life, the most unexpected materials are used to apply patterns: cutlery, fabrics, combs and even crumpled bags.
Using textured plaster is always an exciting, creative process!
There are no requirements for the type of tool for applying the pattern, so you can give free rein to your imagination. The main task is the result, and by what means you achieve it is your choice.
How to choose the right material
If you take the issue of choosing high-quality plaster seriously, you can achieve a beautiful appearance and durability of the coating. When starting a renovation, each owner decides which design concept to use:
- Wall decoration.
- Ceiling.
- Floor covering.
- Furniture style.
- Choice of accessories.
- Installation of household appliances.
What should the coating look like?
To make a room look beautiful, it is very important to choose the right wall texture. The use of all kinds of ornaments, beautiful designs and patterns allows you to hide the shortcomings of the room and emphasize the existing advantages
If you put a small drawing on the wall, the space visually increases. A large drawing will significantly reduce it. The room will look larger if stripes are painted on the walls in different directions.
When choosing a texture, you must follow several important rules. The classic interior will be decorated with a coating that imitates natural stone or leather. Metal-look material is suitable for creating a modern interior. In a children's room, the surface of the walls can be decorated with a pattern of fruits.
The most popular shades
The appearance of the room depends on the color scheme. Basically, everyone decides for themselves which color of plaster suits them most. However, there are several rules that will help you make the right choice. It is necessary to remember that dark colors make the space narrower. Light shades, on the contrary, expand it significantly.
According to designers, a room looks very beautiful when all the walls are the same color. Those who like to experiment can be advised to make two walls red and the others beige.
For the bedroom, it is better to cover the walls with calm tones. A colorful pattern will look beautiful in a children's room. The work office can be decorated with a “natural wood” texture.
Technological process of applying plaster
To achieve a beautiful appearance of the plastered surface, it is necessary to comply with certain requirements of the technological process.
First, the desired drawing is selected. Then the wall surface is prepared. Old wallpaper is removed, a layer of old plaster is removed.
To prevent fungus from appearing in the future, the surface is treated with an antiseptic. It is an excellent replacement for a regular primer.
To work, mix relief plaster. All work is carried out strictly according to the instructions on the packaging.
When the starting plaster has dried well, it is advisable to apply a second primer layer. It will improve its adhesive ability.
After complete drying, the relief of the future finishing plaster is formed.
Each drawing requires an individual approach. Sometimes it is done immediately after the mixture begins to set, the relief surface is leveled. In other cases, the drawing simply dries without any manipulation.
When the drawing is applied to the surface of the wall, it is covered with a colored tint. When the paint begins to set, remove excess with a damp sponge.
Tools for work
To apply relief plaster with your own hands, you need to prepare several tools in advance, without which such work is simply impossible:
- Sponge. Creates a color tone, the pattern gets a textured bubble.
- Roller.
- Brush.
- Polyethylene film.
- Putty knife.
- Ironing iron.
There is also a special tool that helps create a special, unique relief plaster. For example, a roller with unique attachments that allows you to create an imitation of natural leather.
After creating the relief pattern, it is coated with paint of a certain color. Creating the tone of the entire room depends on it. The best paint coating is considered to be a combination of colors.
Good to know! Existing depressions or protruding parts should be covered with a color that contrasts with the surrounding color scheme. To soften the transition, not completely dry paint is retouched.
Photo of textured plaster walls
Decorative gypsum plaster
A very simple and common option with good adhesion and high covering ability.
You will need:
6 kg of gypsum mixture, 2 liters of water, 200 ml of PVA, color.
Preparation and application:
Mix gypsum with water at room temperature and add PVA. In this case, the glue provides a convenient consistency and acts as an additional binder. At the end you can tint the decorative plaster with color.
Price
The cost of the decorative composition depends on the brand of the incoming components. Buying ready-made textured plaster from well-known manufacturers can be expensive. The price for 1 m2 of treated surface depends on the professionalism of the specialist, the quality and speed of work. If you do everything yourself, then renovations in a house or apartment can be done without spending a lot of money and time.
But you can also buy a ready-made mixture. VGT textured plaster is easy to apply. It is highly viscous and coarsely dispersed. It is distinguished by its versatility, as it can be used to decorate various coatings. In addition to elasticity, the composition is moisture resistant. Suitable for indoor and outdoor use. Preliminary preparation of surfaces is not necessary. All defects are smoothed out using this mixture, which is made on the basis of acrylic binders and marble chips. One container holds 18 kg. 2 kg of mixture is required per 1 m2 (when applied in one layer). This means that one container is enough to treat a wall with an area of 9 m2.
Subscribe
Compound
Usually, mica, gypsum, sand, ground brick particles, and wood fibers are added as inclusions to plaster mixtures.
Textured acrylic plasters also contain acrylic resins. This allows you to give the mixture the necessary plasticity and increases the possibility of setting with bases of all types.
The use of a spectrum of acrylic paints makes acrylic-based plasters the leaders. This finish is durable and durable. But there are also disadvantages. First of all, the flammability of the mixture and the ability to attract dust.
Creating a textured surface without special material
It is clear that textured putty is not cheap and it is beyond the means of most people. Well, if we decide to bring beauty to our own home, we will always find a way out.
In this case, the solution is ridiculously simple - do-it-yourself textured plaster from ordinary putty. So, if a certain section of the wall needs to be treated with this method, then it is covered with masking tape.
If the wall is all over, then, accordingly, masking tape will not be useful. The putty is usually applied with a spatula, spreading evenly over the surface.
The layer of this plaster should be no thicker than 10 mm. The layer should set a little, only in this case do they start decorating.
Decorative plaster with marble chips
The result is a very beautiful surface with a pronounced texture reminiscent of a bark beetle.
You will need:
4 kg of finishing putty, 1 kg of stone chips, water.
Preparation and application:
Mix dry putty with marble chips and dilute with water at room temperature. The mass should be homogeneous and viscous. Then it can be tinted and applied with a regular spatula.
Application in the interior
Decorative wall decoration in the form of textured plaster allows you to emphasize the advantages of various interiors. The presence of Bark Beetle plaster in an apartment or office enhances its modern look and adds practicality to the design.
The matte surface with long grooves applied to it is very similar to wood. Beige, blue or pink shades are chosen for bedrooms, and more saturated colors for hallways.
Kitchen walls coated with a dark composition will look gloomy. Therefore, they plaster with textured mixtures with delicate shades or combine colors.
Textures similar to drops of water, sea foam or snake skin look impressive.