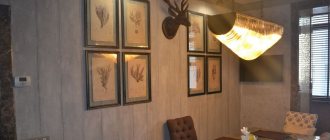
What are stencils for? This is a completely affordable and easy-to-use way to personalize your home. Using a stencil, you can highlight a specific area in the room. It will help to emphasize winning interior details and create a cozy and original atmosphere.
The decor of the walls is not particularly varied: wallpaper or painting, that’s all the choice. A unique pattern that can be applied using a stencil can decorate not only walls. Ceilings, shelves near the fireplace, door panels, furniture - there are no restrictions.
Classification of stencils
According to the type of design, stencil devices for decoration and painting are:
Simple templates. They differ in that the drawing is painted in one color. But if desired, you can make a division when the color of the picture moves from a dark to a lighter tone. It is not possible to include another color in the image.
Multicolor, which consist of several colors. Another name for them is combined. There is not one template used here, but many.
Each of the templates can be painted in a different color. To make it easier to distinguish parts of the drawing from each other, they are marked with marks. When the stencil is fixed on the wall, these marks are aligned with each other.
Reverse pattern. This type of template is made using the reverse principle. The drawing that is superimposed on the wall is what is cut out in a regular stencil.
The part of the wall that is not filled with a stencil is painted over. The drawing itself will remain the original color, and a halo will form around it.
To create a three-dimensional drawing. Special plaster is used as paint in such designs. Such stencils are thicker in thickness.
When making a pattern, the cut out parts of the template are filled with material. After hardening, the stencil is removed. This way a three-dimensional drawing is obtained.
Differences in texture
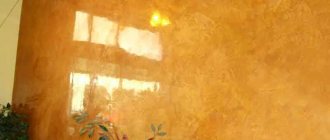
The difference in texture between the templates implies a special paint for application to the walls. With its help, a relief surface and a three-dimensional realistic texture are created. The consistency of this paint is thick, with increased viscosity and density. Texture paint is used on the surface of ceilings, among other things.
Ready-made templates
Already made stencils can be purchased in a store or made to order.
An undoubted advantage is that professionals produce the required template according to the individual preferences of the customer.
It is made from dense, high-quality materials; you can also buy disposable universal layouts for interior use.
DIY stencils
You can also make templates yourself. If you have good artistic skills, they can be drawn on paper and then transferred to durable material. One way to get good drawings is to print them from the Internet. Next, apply the design using graphite onto the walls in successive movements and outline with a thin brush. However, such actions will require a certain artistic talent; it is much easier to buy ready-made products.
With the latter method, it is better to transfer the layouts onto thick and durable cardboard or a metal sheet. Transparent plastic is also suitable for this purpose.
Templates for different rooms
Before you prepare it yourself or buy a pattern for the wall in a store, it is important to decide for which room the pattern is being chosen.
If this is a children's room, then fairy-tale heroes and magical characters would be appropriate. Stars, triangles or individual elements with solid shades are universal for boys and girls.
In the living room, patterns look exclusive in the form of continuations of interior items, for example, a floor lamp or a wall clock.
In the bedroom, a pattern pattern can serve as an excellent addition to a bedspread or curtains.
What does it represent?
Stencils for decorative plaster are special overlays made of thick paper, plastic or silicone with carefully cut out designs or patterns. The dimensions of the pattern depend on the surface area and the selected decor texture. For small flat images, a paper version is suitable; for a three-dimensional wide bas-relief, you need to use a plastic or silicone type of stencil.
There are 2 ways to decorate surfaces - plain and colored. In the first version, the plaster is applied in the same shade as the entire surface, then the ornament is distinguished only by its texture. In the second method, the drawing is done in a contrasting color with or without shades, thanks to which you can create bright accents in a wide variety of styles - from loft, gothic and modern, to romanticism and Provence. In both options, a stencil is required.
Using stencil decoration, you can not only create exclusive areas in the interior, but also hide existing defects on the surface (small cracks, unevenness or small chips).
How to choose a stencil for a room?
You should choose a stencil for decorative wall decoration with your own hands depending on the overall style and purpose of the room. This is entirely a matter of taste for the owners, but general recommendations can be given.
Be as careful as possible with the details: if you overload the space with small elements, a beautiful ornament will look like graffiti.
You shouldn’t combine too many different patterns in one room.
Conciseness looks much better.
In one room, only one type of ornament should be applied to the walls. You should not combine a geometric pattern with butterflies, flowers and trees.
There is no need to depict very small details on the walls. They are not easy to paint over, and from a distance they will look ineffective, resembling paint stains.
There are no clear recommendations on where exactly a certain ornament will be appropriate. Usually the decision to create a pattern on the walls is made depending on one’s own preferences.
Stencils for painting
You can also make stencils for painting at home. With the help of such templates you get an unusual design in the apartment.
To prevent the stencil from slipping and the paint from leaking, you must follow some rules:
- if you choose an opaque material, then it is better to cut out the base on paper, and then on the material that you will use in your work;
- when creating a drawing, it is better to avoid small details - they will look illegible;
- cut carefully so that there are no uneven or torn edges;
- and when painting the walls, fix the template on the wall with special glue so that it does not slip and paint does not flow where it is not needed.
Materials for making templates
Paper is most often used to create templates. This material is accessible and easily attached to any surface. You can cut out any elements from it without much difficulty; all you need to do is have scissors on hand.
For more accurate application of thin lines of the image, it is better to use self-adhesive film
Cardboard is a more reliable material for a template, but it is difficult to cut curves out of it. The advantage is that stencils made from it can be used several times.
Self-adhesive film is great for making a template. It is easily attached to the wall and can be removed after applying the design. It can be washed and used again.
Long-lasting stencils can be made from plastic, but cutting out designs in this material requires special tools and considerable effort.
What to make a stencil for walls from
Stencils for painting are available for several applications and for 1 application. The possibility of using them several times or once depends on the material used in their manufacture. Paper versions can withstand one-time application of paint. To paint the stencil several times, you can choose the following types:
- Made from vinyl film. There are colored and colorless types; they are periodically cleaned during operation;
- Polyvinyl chloride is the standard choice for working with plaster mortar; after drying, the template is removed;
- Cardboard ones, suitable for home making; cutting out drawings from cardboard is easy.
The possibility of using them several times or once depends on the material used in their manufacture.
The main points of creating decor using a stencil
Geometric patterns are considered the basis for creating a template. This is due to the presence of clear boundaries. Such patterns are best suited for beginners in this business. After the final decision on decorating the surface has been made, you need to buy a template in the store. The second option is to do it yourself.
The resulting template is fixed to the selected surface. To apply the design, various paints are used - water-based, acrylic or enamel. A small roller or foam sponge is best suited for this; aerosols are sometimes used. It is better not to use a brush when working with stencils; this is due to paint flowing over the edges of the template. As a result, the drawing turns out spoiled and unclear.
Using a stencil is an economical option for replacing standard wallpaper
The model is removed only when the drawing is completely dry.
Useful advice! Use a small amount of paint for application. This will prevent drips from forming. If the area turns out to be poorly painted, it must be carefully touched up with a brush. If the design involves the use of several colors, then the next tone is applied only after the previous one has completely dried.
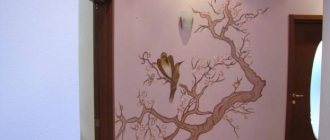
Flower stencil templates for DIY decor
When choosing a design, they most often choose floral arrangements, which is due to the versatility of this image. The colored ornament looks great in the home and office, and various color solutions are suitable for painting. You can easily make stencils of flowers on the wall with your own hands. This ornament is best for beginners to try out.
Flowers can be drawn in a classic design, or you can give them the appearance of a surreal vision. Whatever style the room is designed in, branches and buds will look great in it. This type of ornament in a colorful and monochromatic design is perfect for all rooms in the apartment - living room, bedroom, nursery, kitchen, corridor and bathroom.
Images of flowers are a very popular way to decorate a bedroom interior.
Using a butterfly stencil on a wall
Another popular ornament for decorating rooms are butterflies. They will look great on the wall in the bedroom, and multi-colored butterflies will also delight a child. To add some zest to your kitchen design, place an image of a winged beauty there. It’s very easy to make butterfly stencils for the wall with your own hands.
Interesting compositions are obtained by combining color patterns with butterflies. In this case, it is better and more appropriate to use a combination of several colors. When choosing butterfly stencils for decoration, it is better to focus on simple shapes with a minimum number of lines.
Images of butterflies are suitable for both a children's room and a living room, as they can enliven the interior of the room
Picture of a cat on the wall
A picture of a cat on the wall can set the tone for the entire room. And it doesn’t matter where this fluffy animal is painted: on the wall, shelf or door.
Cat stencil templates for DIY decor are quite easy to make. You can decorate a child's room with an image of this animal. Quite often, a cat is drawn in a secluded corner, creating the effect of surprise. This decor does not set the tone for the entire room, but gives it an unusual twist. The entire animal is not always drawn; quite often only the silhouette or its funny face is applied to the surface.
Helpful advice! The image of a cat requires appropriate decoration of the room. It is best to use it in a children's room or bedroom.
With the help of small drawings made using stencil technique, you can highlight such details of the room as sockets, switches or slopes
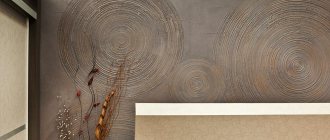
Oriental motifs and geometric patterns
Stencil templates for walls with geometric patterns allow you to create an unusual room design. They are great for both apartments and offices. The interweaving of simple lines will hide the imperfections of the walls, visually expand or narrow the space. Greek and Byzantine motifs are very popular. They can completely cover the entire surface of the walls, replacing wallpaper.
The interweaving of simple lines creates complex patterns, and the resulting effect is striking in its severity and at the same time intricacy. Geometric paper cutting stencils are best for decorating beginners.
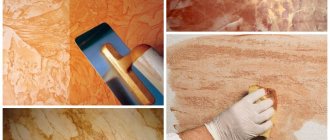
Templates for volumetric decor
An unusual effect can be obtained using volumetric decor. To create it, mixtures based on gypsum and plaster are used. The resulting result will look rich and beautiful. However, creating it requires time, patience and some skills in working with plaster.
An example of beautiful application of decorative putty using a stencil
To obtain a three-dimensional composition, it is not necessary to buy ready-made templates; making stencils for wall decor with your own hands is easier and cheaper.
The process of creating a volumetric composition comes down to the following points:
- choosing a stencil with the appropriate design. Quite often, the material for such a template is thick cardboard. It is fixed to the wall using self-tapping screws;
- The prepared mixture is applied to the stencil with a spatula. It is necessary to carefully coat the pattern to obtain a uniform surface, without voids and irregularities;
- when the solution has hardened, it is necessary to remove the stencil. Now you should begin to form the required thickness. This is done by gradually applying the solution with shaped spatulas;
- when the finished relief has completely frozen, it is necessary to round the edges of the surface. To do this, the bas-relief is processed with sandpaper;
- The final step is painting the finished decor. To avoid staining the surface around it, it is recommended to use the same stencil. If the bas-relief is made on a colored surface, it can be left white.
Unlike painting, volumetric decor requires time and patience to create, but the resulting effect is worth the effort.
To apply decorative plaster or putty, it is better to use stencils made of plastic or thick cardboard
Stencils for furniture and mirrors
Today it is popular to decorate the surfaces of furniture, household appliances or mirrors with various images. This makes the item unusual and immediately sets it apart from others. The paints used allow you to apply decor to any surface: brick, concrete, glass, wood, fabric, etc.
When choosing templates, for example, flower stencils for decoration, for decorating a mirror, you should give preference to those that have a self-adhesive backing. This will avoid shifting the pattern and make it possible to obtain clear and beautiful contours. Stencils are used to decorate the corner of a mirror or its entire perimeter. After applying the image to the surface of the furniture, to preserve it, it is recommended to apply a protective layer of varnish on top.
Imagination and patience allow you to create real works of art, giving ordinary things an unusual appearance.
Using stencils and acrylic paint you can give old furniture a new look
Border templates
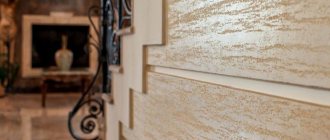
Quite often, a border is used in the design of a bathroom or other rooms. It consists of a repeating section of the ornament. The result is a continuous pattern that encircles the room. Images of flowers, plants, and dolphins are great for these purposes. The resulting drawing is laconic and restrained. Photos of stencils for wall decor will help you decide on the choice of pattern for the bathroom. If you want to save time and effort, you can simply buy a ready-made template at the nearest finishing materials store.
Graffiti
Youth art of painting on the wall is not complete without a stencil. This type of art requires a clear drawing. And to make it you need to know the following instructions:
- Create a sketch of the desired design on paper.
- Circle and paint over those areas that will be cut out later. If the drawing consists of several colors, then there will be as many templates as the number of colors used. Then cut out each template to match the color scheme.
- Using the finished template, make jumpers so that the drawing looks intact.
- Painting large areas will look better than small details. Therefore, it is better to choose a simple drawing.
- Transfer the finished sketch to the prepared material: cardboard or film.
- Cut out the template without any irregularities.
This method can also be used when applying a pattern to fabric. It looks stylish and creative.
How to choose a stencil for decorating different rooms in the house
Each room in the house is most often decorated in an individual style, so it is recommended to use specially designed ornaments. Each specific room welcomes its own unique design options. Versatility is rarely practiced.
The hanger stencil emphasizes the function of the area in which it was created PHOTO: pinme.ru
Hallway and living room
You can't do without a mirror in the hallway. This is the room in which the owners of the house prepare to go out into the world. Therefore, she should not only pleasantly greet, but also see off. For proper design, it is better to use stencil designs that will visually extend the room. It is better to start decorative design directly from the place where it will be fully reflected in the mirror.
It is better to avoid complex patterns with small details altogether. From a distance they seem like an absurd spot PHOTO: yellowhome.ru
As for the living room, pleasant motifs are welcome here. Floral decoration can be in one or several colors. The trend remains the decision to create a decorative wall in the TV area.
PHOTO: yellowhome.ru
Bedroom and children's room
In these rooms, comfort is valued above all. Therefore, all drawings should be neutral and calm. Butterflies or floristry in delicate tones are suitable for decorating a sleeping area in a bedroom for adults.
Thematic decoration of the wall at the head of the bed PHOTO: yandex.ru
To decorate a children's room, templates with cartoon characters and any characters will be useful. Of course, it is necessary to distinguish boys' hobbies from girls' hobbies. Be sure to consider the opinions of teenagers when choosing templates for creating drawings.
PHOTO: yandex.ru
Kitchen and bathroom
In dining rooms or small apartment kitchens, decor will become a relevant option for decorating thematic images. For example, on a wall free of furniture, it is advisable to depict cutlery, dishes and other similar images.
It’s not a sin to spend a pleasant evening at such a table after a hard day at work PHOTO: dekoriko.ru
When decorating a bathroom, it is better to give preference to a marine theme. These include various images of dolphins, algae or other marine life.
This design can be done in any shade. The main thing is that it matches the overall style of the room PHOTO: stroypomochnik.ru
Loggia and balcony
The balcony part of the living space has always been considered individual. There are no restrictions on the design and cladding of the walls. However, techniques such as decoration using stencils are considered popular. Here you can use templates for drawing animals, unusual natural motifs and ornaments.
Excellent design for a large loggia with high ceilings PHOTO: interiorsroom.ru
A plain version of the pattern is suitable for open and glazed balconies PHOTO: tr.aliexpress.com
How to make drawings on walls using a stencil?
Prepare a stencil for painting walls, glue for it, a roller or brush. Spray or acrylic paint will work.
Prepare the surface for painting. Clean it from dust, dirt, wash it if necessary. Apply markings to the cleaned surface. If possible, use a level: this way there is less danger of distorting the design or applying it incorrectly. Mark the outermost points for the stencil with a pencil, so that you can then fix it evenly on the surface.
Paint can be applied to the stencil using a piece of foam.
Practice a little before you start. To do this, you can use a piece of wallpaper or find an inconspicuous section of the wall. Preliminary work helps to practice a little in terms of application technique and choose the desired color of the ornament. Experienced craftsmen try to create several designs in different shades to see what best reflects the idea on the wall surface.
To fix the stencil on the wall, it is better to use a special aerosol glue. There will be no sloppy marks left after the stencil is removed. Neither wallpaper nor paint will come off the wall. The glue is sprayed in an even layer onto the made stencil, and then pressed to the surface. To be on the safe side, you can additionally use tape. It must be kept in mind that glue will not prevent paint from getting under the stencil.
When painting through a stencil, remember that high-quality wall painting does not tolerate fussiness. To do this, it is better to choose acrylic-based paint: it will dry faster and is suitable for any surface. You can apply paint using a sponge, brush or roller. When working, add the coloring matter little by little (this eliminates the risk of smudges).
When working with small stencils, it is recommended to use a brush to apply paint.
When working with a brush, you need to hold it perpendicular to the surface of the wall. Apply the paint using the padding method, so that neither lint nor the coloring matter gets beyond the edge of the product. When painting with a sponge, the first impressions must be made on a separate sheet of wallpaper. This will remove excess paint. When using a roller, make sure that the paint distribution is as even as possible. Particular care must be taken when handling corners and small details of the stencil. The roller is best used for products with large patterns.
To paint using an aerosol paint mixture, try to hold the can at a distance of 30 cm from the wall. Sometimes the wall needs to be protected from paint smearing over the edges of the stencil.
The drawing is saturated with color in several stages. If you get not very distinct boundaries, you need to draw them with a thin brush.
To create a three-dimensional pattern on the wall, acrylic putty is suitable. It must be applied using a spatula. This is done layer by layer until the required thickness is achieved. To create a three-dimensional pattern it is 1-3 mm. The putty sets 2-3 minutes after application, but does not completely harden yet. At this time, the stencil must be carefully removed so that the ornament is not damaged. A not entirely even layer, after the putty has dried, can be leveled using fine-grained sandpaper. The resulting pattern can be painted or tinted.
After finishing the work, the stencil must be washed and dried. In most cases, it can be reused several times.
When working with a stencil, mistakes are sometimes made that need not be made. For example, this is a displacement of the product or smudges of dye. To avoid this, you must first securely fasten the stencil. Use only a small amount of paint and use gentle movements when painting.
Options for multi-color designs
If you are planning a picture of two or more colors, then you need to think in advance about how to make a stencil for the walls in such a way that everything works out perfectly. In this case, it is worth printing as many images as there are colors in it. That is, each printout will be responsible for a specific color when applied to the surface.
For convenience, it is worth painting over the areas that need to be cut out. Then we make stencils using the blanks. When they are cut out, you need to fold them into a pattern and pierce them through with an awl. Then we apply them to the surface on which the image will be applied, and mark these holes on the wall. In the future, you just need to connect the marks and paint over each layer in turn.
Surface preparation and stencil attachment
Before you start decorating the surface, it must be prepared so that no problems arise during the painting process. The walls should be as clean as after painting. They should be free of greasy stains and dust.
After wet cleaning, you need to let them dry thoroughly. If the wall is dusty, you need to go through it with a vacuum cleaner.
In addition, you need to pay attention to the ceiling so that there is no dust or cobwebs on it, which could settle on the fresh paint.
It is inconvenient to hold large and combined stencils with your hands, so they need to be fixed with something. Masking tape or special glue that is applied to the back of the stencil is perfect for this. It does not damage the surface and comes off easily.
Painting tape also has the same property (just don’t confuse it with ordinary stationery tape - it is completely unsuitable for plastered surfaces).
What materials to use to make your own exclusive stencil?
For those who still want to create drawings on their own, let's look at how to make a stencil with your own hands, and what we will need for this. First of all, you need to choose a material that does not lose its shape when wet. If you plan to use the stencil only once, then a simple sheet of Whatman paper will do. It is quite dense, so it will be convenient to work with. If you plan to use the stencil repeatedly, then you should choose special cardboard or laminated cardboard; tracing paper or wax paper are also perfect. More reliable options are made from film, but it must be dense. Also a good material is rolled PCB, it can be used many times, the main thing is to carefully wipe off the paint from it after work.
Methods of applying paints
Paint can be applied in several ways:
- using a brush;
- sponge;
- from a cylinder;
- roller;
- using a sprayer.
When working with a can or sprayer, it is recommended to try how the paint is sprayed at different distances, and then use the appropriate option. This method is suitable for using external stencils.
Choosing paint for applying a pattern to the surface
We figured out how to make a stencil for painting. As you can see, it's not very difficult. Now all that remains is to choose the right paint. Each surface has a specific type. Acrylic dyes are great for home use. They dry quickly, in 4-8 hours, in addition, their color is always rich and does not fade. Acrylic is ideal for surfaces with a matte and smooth finish, as well as for wallpaper.
If you need to make a drawing from the street side, then for this you need to choose facade paints. Aerosols for metal or plastic are also well suited for this type of work. It is not recommended to use such dyes in poorly ventilated areas because they are toxic. For the same reason, enamels and car paints should not be used inside the house.
Features of working with large stencils
In this case, the template is divided into several parts, so it will be more convenient to mount it on the wall. If you need to create a whole pattern without a seam, you should use a joint or glue two templates, one next to the other. Help from a second person will make the task easier.
The material for the sketch is selected more durable. As a rule, manufacturers choose reusable hard plastic.
If it is not possible to cut the layout into pieces, it is better to secure it with tape in several places. Matte masking tape is the best solution. Fastening is carried out not only on four sides (top and bottom corners), but also in the middle of the stencil.
Creating a multicolor picture
For a multi-color image, you also need several stencils, which must be attached according to the marks. Before work, you need to decide which color is closer and which is further away. Since shadows are always further away than light, we apply paint first to the background of the composition, then to the shadow parts, and finish with highlights and the most illuminated elements. This order is necessary because the topmost layer will stand out more than the others. The image created in this sequence will be much more lively and believable. When artists paint a picture, they first create a distant background, and then objects that are closer, and at the very end they draw the main element of the composition so that it looks like it’s alive.
Having thought about the sequence, you need to number what goes after what. This is done to ensure that there are no errors during operation. We glue the first stencil, after which we immediately mark the hole marks on the wall with a pencil. All other parts of the image will be drawn on them. Then we start painting. When absolutely the entire surface is covered evenly, you can remove the stencil. We wait until this part dries. Then you can continue creating the picture. After each applied layer, the paint must dry completely. Only after this proceed to the next stage.
In the smallest places that are hard to reach for a roller, it is better to work with a brush or a piece of foam rubber. Stencils must be removed immediately after painting, without waiting for the layer to dry.
Here, in principle, is everything you need to know about how to make a stencil with your own hands, as well as how to use it to apply a design to walls, ceilings, furniture and fabric. The technology considered is suitable for creating an image on any object or surface.
This practice of interior decoration is simple, which allows anyone to use it. The result is amazing, you just have to use your imagination. This decor won’t put a big dent in your wallet, because all you need to buy is paint and a roller. And everything else can be easily made from what anyone can find at home. The main thing is to try and experiment.
Volumetric stencils: features of work
In fact, there is not much difference in the use of conventional stencils and volumetric ones. The only difference is that textured paint, putty, decorative plaster, liquid wallpaper, etc. are used to create geometric and other types of patterns. There are also special formulations, but they are quite expensive. In any case, the choice of materials falls on the shoulders of the owner himself.
It is easy to work with such finishing materials due to the fact that they have a paste-like consistency. However, they are not intended for application with a roller or brush. In such cases, use a small spatula, preferably plastic or rubber. For these purposes, a regular piece of plastic panel is suitable.
Application of the solution
Before applying the composition, it should first be scooped up with a spatula, after which the voids in the stencil are filled with this mixture. Excess finishing material should be removed immediately. It is very important that the applied layer is even and thoroughly filled to avoid the appearance of air bubbles. If you have the skills to work with putty or plaster, then there should not be any special problems.
Before removing the stencil, you need to wait some time for the composition to “set” and be strong enough, but you should not expect complete drying. After removing the stencil, you may find that the edges of the design are uneven. In this case, you should not be upset, but you just need to wait until the drawing hardens completely. After this, you need to pick up sandpaper of a suitable grain size and smooth out all the irregularities. Finally, the resulting and perfected design can be painted or colored as desired in any color or colors.
Stencil for the wall or... The secret is how to use it
Types of stencils
But the template can be of varying complexity and made on different materials. Let's look at what types of stencils there are.
Plain. The simplest stencil, where the design is applied in one color.
Multicolor stencil. It can be made from several simple patterns and comes in different colors. And if you are just starting to work with stencils, then professionals advise beginners not to use a multi-color template.Volume. This stencil is made with putty using a spatula. The result is a stylish and velvety pattern with a thickness of one to three millimeters.
Anti-stencil. The difference between this type is that the paint is applied to the outside of the design, creating a glowing effect.
How to properly place a stencil on the wall
Even people who are not trained as designers can find the most advantageous place for a stencil.
For example, a bedroom would be a good choice. If a large bed is located against the wall, a sakura branch, flowers or fancy multi-colored patterns will look very good above it. Why not apply a stencil to the ceiling so that you can admire the wonderful garden before going to bed, for example? Children's room - standard decor rules do not apply in this room; you can give full rein to your imagination. Images of your favorite cartoon characters will appeal to both boys and girls.
If the room is decorated in a nautical style, a starry sky, a ship, or a compass would look appropriate on the wall. Delicate winged fairies in pink tones will perfectly complement the decor for a young princess: paint them in pastel colors on bedspreads and curtains.
Choosing a location for the stencil
Usually, a drawing is used to fill an empty area on the wall. It can make a statement in a room. Narrow patterns along windows and walls look good. You can apply a pattern to the ceiling. Switches are highlighted with suitable images. Color drawings are made taking into account the overall interior color scheme.
Usually, a drawing is used to fill an empty area on the wall.
How to make stencils for drawings on the wall yourself: several options
- You need to decide on a drawing. Do it yourself using the Internet or a graphic editor.
- Select the material to transfer the design. It can be hard cardboard, plastic, metal. The drawing is transferred using carbon paper. It can also be cut out and then secured with tape.
- Cut out the transferred design using a special stationery knife.
Step 1: Materials
You will need, at a minimum: • Translucent sheets (or cards) of Mylar to cut out your template • A craft knife with a fresh blade • Tape and thumbtacks to hold the image in place • A minimum number of cans of spray paint • A cutting surface, perhaps a mat
It would be nice to have: • A printer to print the finished image • Gloves to protect your hands from paint
I cut everything on my kitchen table (meat cutting block), but with a good cutting mat your results will be better. I used 177 micron mylar, but 76 micron or 127 micron may be a better choice depending on how many times you want to use it. This type of stencil material is available from Grafix. Cardboard is very easy to cut and great for one or two uses. It becomes slightly more durable with each use, but will warp if not stored perfectly flat. If you use cardboard, you will have to place the image on top of it (since you won't be able to see through). It's a little more complicated, but quite possible.
Step 2: Select an image
Making stencils is an art: by making a stencil, you rid the image of small details. The details go away and you are left with something clean and simple. Choose images that are well styled. If you see that the image is created by a lot of small details, it may not be very suitable for a stencil. Here are a few options that I like:
- Persons
- Simple single images (a car or other object without a background)
- Logos
- Icons
- Simple slogans
- Combinations of the above.
Professional images work best because they have good separation of light, shadow and midtones. I found one on Shutterstock.
Crop the image to preserve the single central element; background details won't be reproduced well, so it's best to trim as much of it as possible. You can use any image processing tools for cropping. I use EasyCrop for Mac.
Step 3: Break the image down by color with bridges on each layer
There are many different ways to do this, including Adobe Illustrator, Corel Draw, and Inkscape. Each of them gives a different result. I'm using a web service created specifically for this purpose:
Bay Stencil (or Stencilizer)
How to do it:
1. Upload a cropped image you took
2. Receive an email with nine stencil options in a few minutes
3. Choose the best option
4. On the next page, request a layer stencil for this (best) option
5. Receive a response by email (this will again take a few minutes)
6. Add bridges to the resulting image (the site may have a picture with a higher resolution than in the letter. Click on the link to go there)
We will use the bridged images in the next step.
What I love about this stencil service is that it not only separates the colors for you, but also bridges the stencil islands. (none of the desktop applications will do this for you!). You don't have to use all the bridges, but if you use them all, your stencil will be more durable (even if it looks a little mesh).
Step 4: Print the image
We print images with bridges for a stencil. Choose a size that matches the size of the stencil you need. You need to print all layers at this size. I wanted to make the stencil a little larger than 21.5cm x 28cm, so I printed the left and right halves of the image separately and joined them in the next step. There are several online services where you can split an image into parts. I used the Picasa desktop app.
If you don't have a printer, you can trace the image onto paper from your computer or laptop screen and use the result in the next step.
Step 5: Lay out the printout for cutting
Place the printouts from the last step on the cutting surface and secure them. You'll be cutting for at least half an hour or so, so make sure the stencils are positioned so that you can move around them.
I like to place them on a small butcher block in the kitchen (a cutting mat would be better) because I can go around three sides of it. This makes it easier to achieve the desired angle of inclination to cut the stencil with constant pressure (without cutting the bridges).
Step 6: Cut out the stencil
Attach the stencil material to the cutting surface, making sure that the edges of the paper are underneath. You don't want the stencil to move relative to the print while you're cutting.
Mylar is clear so you can see what you're cutting underneath. If you use cardstock instead of clear mylar, you place your image on top of it instead of underneath.
When you work on cutting, start with the most important thing - the center parts. For this face stencil I started with the eyes and spent most of my time on these important details. The details of the hair are less important, but even here it is better to pay attention to each line.
After finishing the work, you will realize that some parts and bridges can be removed. More than once I tested spraying on stencils that were not completely cut out and the result was beautiful without adding detail to the edges. The simplest lines connected into an image are the best! If you're unsure whether a detail is important, you can keep the original image nearby to compare the stencil to.
Time it and don't rush at the end. If you have a very thin pattern, the stencil is more likely to break as you cut.
Step 7: Checking the stencil print
In a well-ventilated area, place the stencil on your test surface. You can temporarily secure it with glue, or in some cases, simply press it down with your hand or glove. You can use one color for a test spray as shown. For clear coats, simply apply a thin layer of paint from a greater distance.
I like to position the surface of the stencil almost vertically when I spray paint (as if it were a mountain or a wall) because spray cans work better vertically (if you spray too much from top to bottom, the nozzle can clog).
You can change the amount of paint at different points on the stencil. For example, you apply a thick layer of paint around the eyes in the center of the stencil, and let it thin out near the edges.
How to make it yourself
Stencils can be bought or ordered in a store. But if you don’t want to spend extra money or couldn’t find a template with the desired pattern on sale, then you’ll have to prepare the basis for decorative plaster with your own hands from materials you can find at home:
- Plastic plates (even old X-rays will do)
- Whatman paper or cardboard
- Silicone (both silicone sheets and special hot-melt adhesive are used)
- Scotch tape for painting (to create a pattern similar to brickwork)
The key characteristic when selecting a material is its density. However, if you do not have suitable materials at hand, it is possible, although not recommended, to use softer materials.
Made of plastic
To create a template, almost any plastic with a thickness of 0.2 millimeters is suitable, for example, the cover of a stationery folder. To transfer a drawing printed on paper onto a plastic base, place the image under the plastic and trace around the outline with a thin felt-tip pen. Then carefully cut and process the edges from irregularities and burrs.
Made from silicone
To make a silicone stencil, a sheet of thin paper is placed over the printed image and secured. The top layer is treated with vegetable oil to make the paper translucent. After this, silicone glue is applied along the translucent contours of the design. When the silicone stencil dries, it can be easily separated from the paper base.
From paper
A paper stencil, as already mentioned, does not combine well with water, so you can only use such a template once. Because of this, this method will not be effective in cases where it is planned to create a pattern from a large number of identical elements. To create a paper stencil, whatman paper is best suited. Creating a stencil begins with placing a sheet of paper with a printed design on glass, and placing a sheet of Whatman paper on top of it. Then a lamp is placed under the glass. After this, the drawing is outlined and cut out.
Useful tips
If you can’t or don’t know how to make stencil templates for decoration, then entrust this task to someone who can do it for sure.
As for the whole process, experts recommend paying attention to some nuances:
- When painting, you don't need to put a lot of paint on the brush. It can flow down and get under the stencil.
- When working with a brush, do not rush and make only smooth strokes so that the paint has time to settle evenly on the surface.
- After dismantling, the template must be carefully processed without leaving paint.
When using a roller, it is better to go over the wall one more time, slightly wet it and wring out the tool, rather than try to remove excess paint later, thereby ruining the appearance.
Stencil material
Alphabetic and digital models can be disposable or reusable - it all depends on the blank material. A paper, cardboard or film template becomes unusable after the first use. The Internet is full of options on how to make it out of paper. In general, you just need to print the finished template and cut it out, leaving the jumpers.
Stencil material: PVC film
What else can you make a blank from? It depends on what size the image will be and what it will be applied to, because the friendship between a paper template and a wet street wall is unlikely to be long. The material for production can be:
- office paper;
- drawing paper (whatman paper);
- cardboard;
- x-rays;
- thick film;
- covers for books or binders;
- PVC film with a thickness of 1 mm;
- duralumin.