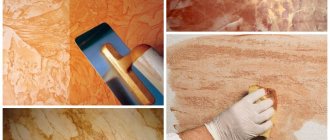
Create, invent, try - this is the main motto of the wall painting artist. This type of art is considered monumental and requires a lot of paint and tools. When starting work, you need to remember that:
“The most important tool of an artist, which is formed through constant training, is faith in one’s ability to create miracles when needed.” (Julien Grune)
To paint the walls in an apartment, you really need to work miracles, because home is dear to us in the literal and figurative sense. Therefore, armed with the main tools - skill and luck, we get to work.
Immediately evaluate the amount of work: priming a wall, as opposed to priming a canvas, are two very different things. A wall painter will have to deal with the following materials for building craftsmanship
:
- wall base;
- layer of plaster;
- finishing putty;
- acrylic primer;
- pictorial layer;
- varnish to fix the design.
The tools needed for the job once again prove that the professions of a builder and an artist are related:
Finishing, wall priming
Primer
- this is strengthening the surface of the walls for further finishing
- The first application penetrates the surface and fills cracks and large crevices.
- Formation of a thin film on the wall using priming.
- After applying each new layer of putty, prime with special compounds, a strengthening primer.
Materials: type of primer required for work, depending on the type of wall:
- anti-corrosion primers;
- insulating primers;
- water-repellent primers;
- strengthening primers;
The primer is selected depending on the goals set before carrying out construction or repair work.
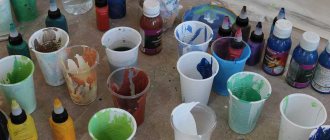
Color palette of paints
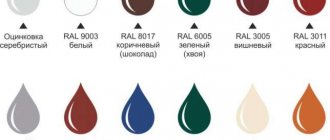
The variety of paint colors depends on the chosen paint material. Since acrylic dyes are most often used, it is worth taking their palette as a basis. To carry out high-quality wall painting in the house, you will need basic colors such as red, yellow and blue. It is also advisable to have a purple color, as when mixing red and blue, you often get a dirty tint.
For variety, green and orange shades are added to the painting. Pastel shades are obtained by adding white to the main color. If the drawing requires additional shades, then you need to purchase the corresponding shades of color that each wall paint palette has.
Preparing the wall for painting
Paints for wall painting
The wall should be smooth and whitish before applying paint. The paint will look worse on a dark primed wall.
Water-based paints, watercolors and gouache are considered the most harmless.
The leaders among the paints that are used for painting walls are acrylic water-dispersion paints.
Tempera and oil are also suitable for the artist's work. Oil paint and alkyd enamel are diluted with solvents. Accordingly, these are toxic paints.
Luminescent and fluorescent compounds are very difficult to work with, and specialists can work with them.
The list is completed by new products from manufacturers: slate and magnetic paints.
Main production stages
So, first of all, you need to decide on the following aspects:
- where the painting will be located, where it will look most appropriate;
- the master must clearly set himself the goal of highlighting or emphasizing this or that spatial zone (for example, a good option could be to disguise some kind of construction defect with the help of this artistic technique, or, on the contrary, to draw attention to a striking architectural device);
- selection of the source image from which the painting will be made;
- preparation of consumables, in particular the choice of paint and brushes;
- background organization.
It is important to take these points into account, since the correctness of their implementation will affect the final result, which will be very difficult to change later.
Airbrush for wall painting
Finally, about one more tool to help the artist: the airbrush. The new is the well-forgotten old; the airbrush was invented back in 1893 by the English watercolorist Charles L. Burdick. Thanks to this artist, the expression “Mitsubishi with a penguin” does not refer to the driver of the car at all, but to the painting in the form of a penguin on the body of the car.
Airbrush
is a mini spray gun that applies liquid or powder dye using compressed air. The miniature airbrush nozzle allows you to paint the wall down to the details. At first, it will be difficult for amateurs to master this tool so as not to make any mistakes. However, as Eugene Delacroix said, “Every artist was at first an amateur.”
Good luck to everyone!
Author: Angelina Sorokina
Summing up
Beautiful premises are not a luxury today, but the norm! Standing out from the crowd, attracting with your uniqueness and not being afraid to challenge the gray mass is the lot of leaders, which is why many modern people in their homes and offices prefer to decorate their plastered walls with bright colors.
With a little imagination, you can transform your walls yourself.
There are many techniques for working with wood and plaster; there are many master classes that will help you figure out which techniques to choose and how to realize your wildest creative fantasies using acrylic paints. Artistic fiction is a method of self-realization, and it doesn’t matter what you choose: a golden door pattern or a multi-colored, rainbow rain in the central part of the house... In any case, you will end up with something bright, extraordinary and very modern!
Review of famous painting paints
The assortment offered by construction stores is quite wide, so choosing a high-quality composition can be quite difficult.
Painting paint made in Italy by the Maimeri company is very popular among buyers. This composition is suitable for any surface, is resistant to mechanical damage and has excellent hiding power. The paint comes in a wide variety of shades.
The French paint brand Raphael is no less popular. It combines affordable cost and high quality. The brand is presented only in pastel shades.
Do not forget domestic products, these include Ladoga brand paint for painting on walls. It belongs to the budget segment, but this does not harm the quality. Long-term use by consumers indicates decent properties of the product. Available in tubes, which usually consist of basic shades, and in jars, where the color range is wider.
Advice from professionals
A drawing on the wall is a work of art that attracts attention.
To create a positive atmosphere in the room, you should take a responsible approach to the choice of shades, giving preference to stylistically correct design options. Tips from professionals to help you create a masterpiece on the wall: Using drawings to decorate the interior is not a new trend. However, since the advent of photo wallpaper and wallpaper for walls, this design option was forgotten for some time. Today, the trend is returning again, and decorating a room with exclusive drawings allows you to express your creative ambitions and show an individual view of everyday things.
Help for a beginner: stencils and blanks
It is easier to use prepared stencils with patterns and designs.
All you need is paint, a template, tape and time. Even a person without artistic talent can cope with the task. Apply the base color evenly, creating a working surface. Circle the side parts with masking tape. Fix the stencil in the four corners or stick it on the wall if it is self-adhesive. If the surface of the work is large, use a roller with thick but short fur; if there are individual elements, use a brush.
After applying the design, wait for the paint to dry and remove first the tape and then the stencil. It is important to wait until it dries completely, otherwise the paint will run or streak around the edges.
Correct use of paints for painting
Usually painted on plaster or wooden surfaces, less often used on metal, stone and plastic.
No matter what material is chosen, you always need to know the secrets of using paints to achieve the best result.
For example, when painting a wooden surface with acrylic paints, you should first prepare the base and remove the remnants of the previous layer, varnish or other coating.
And also sand and prime, thereby preparing for painting.
You need to apply a pattern or design exclusively to a clean surface and do not forget to fix it with transparent varnish or a specialized composition for wood.
Before painting the plaster, it should be degreased and dried thoroughly, soaking up excess moisture with a sponge.
Mask all unevenness, chips, cracks with putty and apply a primer on top. Allow the surface to dry and cover the gray areas that appear after drying with white enamel.
Only after completing all the preparatory stages can you begin to paint the room.
“Don’t forget to protect nearby objects and surfaces by covering them with polyethylene or special construction film.”
If the decoration involves doors and doorways, then the smooth flow of a golden design or pattern from the wall to the door will look more impressive, thereby creating a single stylistic ensemble, without additional decoration.
Paints for painting walls
There are many types of paints used for wall painting. They are divided into categories:
- Acrylics containing polymer resins. They dry quickly, forming a protective layer on the wall, are not afraid of fading, and with high-quality painting, the colors will remain bright for 10-15 years;
- Oil paints. Due to the complexity of mixtures and the skills required to apply them, they are becoming a thing of the past. Their main ingredient is oil. The advantage is the long drying time, which allows the painter to correct defects. They work well on wooden surfaces, but if applied to a plaster wall, a yellow color may appear over time (due to the harmful effects of lime and salts contained in the partition material);
- Tempera. When applied in several layers it can have a three-dimensional effect. Varnish protection is recommended.
Artistic wall painting "by hand"
In order for a beautiful image to appear on the wall of your room, try to adhere to the following procedure.
Step 1. Select an image and decide on the size of the future drawing. It is assumed that at this point you already know exactly which part of the room this picture will be in and why it will be there. There is a huge selection of different images on the Internet, but try to choose something simpler for the first time, and the sketch will be easier to create. You’ll draw luxurious castles in the flaming distance later.
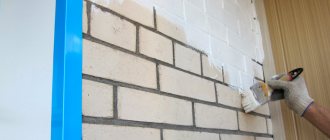
Step 2: Prepare the wall. Professionals really like to paint on a freshly painted smooth surface, so it is necessary to putty and paint in a color that matches the background of the painting. If the drawing is intended to make up for the mistakes made during the recent renovation, then you will have to draw according to what is there.
laying tiles on the floor
What colors are used to paint on the walls?
Step 3. We purchase all consumables: paints, brushes, etc. All experts recommend only water-based acrylic matte paints. They are easy to mix and apply; after drying, they are not erased with a slight movement of the shoulder, like gouache. True, some people cover the drawing with a couple of layers of façade matte acrylic varnish to be completely sure. To achieve the desired shade, the paints are diluted with white acrylic paint. To obtain the required liquid (the ideal consistency is similar to sour cream with 15% fat content), add water. Just don’t get carried away, otherwise when the too liquid paint dries, unpleasant stains will remain on the wall. You need to take two types of brushes: for large strokes, wide, large and flat ones (synthetic and bristles) are suitable, and for contours and small details - small round core ones. Professional decorators also use a foam roller to draw flower petals with dotted movements. Also prepare containers for washing brushes and mixing colors. If you don’t want to sacrifice dishes, buy a set of disposable ones.
Step 4. Print out 5-10 images in black and white to make it look like a sketch. Now you need to apply a background identical to the color of the wall, because the same shade looks different on a white and green wall. After drying, apply the contours until you reach automaticity. Now you need to choose such shades so that the whole picture “plays out”. If there are a lot of similar parts in the drawing (petals or leaves), it is better to prepare simple stencils. Only after this can you proceed to painting the wall.
Step 5. Now you need to apply a rough pencil drawing to the wall. Never use a black pencil; it is difficult to erase and leaves dirty marks. It is better to use soft colored pencils. All bad lines can be easily removed with a large and soft eraser. First, the boundaries of the drawing are indicated by a line, then the largest parts are drawn. Only after this do you move on to detailing and more careful drawing. Constantly step aside to immediately see imbalances in proportions and correct them. The better you draw the image, the easier it will be to apply the paint. For those who have problems with scale and spatial orientation, the cell marking method will help. The entire area of the drawing is divided into squares, which you then draw on, just like in a school notebook. Markings can be made either with a pencil or using pieces of string attached to the wall.
Step 6. Start painting with acrylic paints. The paint must be diluted and mixed immediately before application, because... acrylic dries very quickly. Paint in several strokes to achieve volume and naturalness of the drawing, just wait until the previous layer dries. Hold the brush perpendicular to the wall. Correct any imperfections with a thin brush. To achieve smooth movements and increase enthusiasm, play your favorite music. Take a break after you've finished drawing and filling in the basic outlines. Then, with renewed vigor, proceed to small details, and, if necessary, shade the edges of the image. At the very end, we work out all the smallest contours with a thin brush, achieving volume, glare from the Sun, etc.
If, after reading this, you realized that you are absolutely not an artist, then use another method.
How to paint a wall with your own hands: detailed instructions for non-artists
We all dream of a beautiful and not boring interior. And it seems like there is a great idea - to paint the wall with your own hands, and the desire and creative idea have been formed. But there are no skills, and the services of professional artists and designers are not cheap. As a result, we give up on our dreams and glue the most ordinary wallpaper, because it’s so easy. Or maybe we can still paint the wall?
A wall is not a sketchbook. A drawing cannot appear here just because you wanted to draw. Choosing an image is a task almost as difficult as painting. The picture should suit the interior style of the room, correspond to the functional purpose of the area and express certain emotions. It can also perform some additional functions, such as distracting attention from a low ceiling or an uneven wall. Most often, artistic painting is found in children's rooms, because it brings so much happiness to kids. Especially if it depicts his favorite cartoon characters or various animals.
Even if you are not an artist, there are still chances to paint a wall with your own hands. There are two options for this.
Possible drawing options
At the moment, there are many techniques for applying a pattern to the surface of a wall. Mostly a brush or an airbrush is used as a tool; if experience allows, the tools can be combined.
Important! When creating a drawing with an airbrush, the image turns out to be similar to a photograph due to high-quality transitions between colors. A brush can't do that.
In order to create a large picture on the wall you need to work according to a certain algorithm:
- Draw a sketch of the desired image.
- Divide the entire area of the drawing into squares.
- Display the entire breakdown on the wall, indicating the squares. A laser level will help simplify this process.
- Transfer the previously completed sketch to the wall in accordance with the layout.
- The outlines of the drawing are painted with the selected color.
- Once the outlines are ready, color spots are applied to the elements of the design. The last image is given volume. The final stage is detailing.
- The finished drawing is coated with acrylic-based varnish. Usually they use a matte variety. It is used to protect the image from external influences.
This step-by-step approach will allow you to capture the image in its entirety and immediately remove any shortcomings that arise in the process.
If skill is not enough for professional painting, then a wide variety of templates will come to the rescue, which are now easy to find in any hardware store. They are also often made independently. To do this, the desired figure is depicted on thick cardboard or paper and then compacted. Afterwards the figure is cut out and becomes ready for use.
Important! To make a large-area drawing, you can use those stencils that are sold in stores or have them made to order from the appropriate company.
