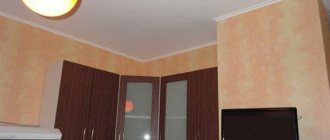
General provisions
Any paint is classified according to the type of material, gloss and washability. Depending on the reflective properties of the surface, painting materials can be glossy or matte. Glossy painted ceilings are characterized by the presence of shine and high decorative characteristics. However, to apply such a coating it is necessary to carry out careful preparatory work to eliminate the slightest irregularities and defects.
As for matte paint, due to its lower reflectivity, it is able to mask minor flaws in the base base. This reduces the time and effort required for plastering or putty by an order of magnitude. An intermediate option is also available for sale - the so-called. “semi-gloss” paints: they are able to impart a certain shine to the ceiling surface, simultaneously masking minor defects and irregularities.
Depending on their ability to withstand wet cleaning, paints are either washable or non-washable. The selection of a specific option depends on the operating conditions. For rooms with a low level of pollution (bedrooms, children's rooms, living rooms), inexpensive non-washable options are quite suitable. It is better to paint a kitchen, hallway or bathroom with a washable material that can withstand regular wet cleaning with a sponge, rag and detergents without loss of decorative characteristics.
Water-dispersed paint and varnish compositions
Water-dispersed paints (WDC) are dispersions of solid synthetic polymers produced in the form of a flowing paste. To use, this composition is diluted with water to the desired consistency, obtaining a translucent or opaque liquid. After applying paint to the surface, the water evaporates from it, and the dispersion layer turns into a solid polymer coating.
VDK should be diluted to the desired consistency only with water; organic solvents cannot be used - coagulation (curdling) of the polymers will occur and the paint will thicken.
Depending on the type, the composition of water-dispersion paint can contain up to 40 components belonging to the following groups:
- Film formers are astringent substances that form a protective polymer coating after evaporation of water from the VDC; the adhesion and strength of the paint layer depends on their individual characteristics.
- Fillers (marble dust, talc, synthetic materials) – to form a certain surface texture and eliminate transparency;
- Coloring pigments;
- Process additives are a large group of special components (plasticizers, emulsifiers, thickeners).
Advantages of water-dispersion paints:
- Non-toxic during operation and harmless after drying, due to the absence of organic solvents and non-volatile components harmful to humans in the VDC composition.
- Fire safety of the solution.
- Ease of application compared to other types of coatings.
- High degree of adhesion to concrete, metal, wood, including over layers of other paints and varnishes.
- Dries quickly - after an hour and a half, the coating loses its stickiness.
- Abrasion resistance – the ability to use brushes for cleaning.
- Preservation of surface texture and resistance to fading under sunlight.
- Good vapor permeability.
- Possibility to select paintwork materials with the desired degree of moisture resistance.
- Suitable for tinting in any color.
- The durability of coatings is up to 20 years.
Disadvantages of water-dispersion paints:
- The need for storage at positive temperatures - paint that has thawed after freezing is not suitable for use;
- The humidity in the room being finished should be below 80% - otherwise the paint will take many times longer to dry than indicated in the instructions;
- Drying paintwork at elevated temperatures is fraught with the appearance of brush marks;
- Increased requirements for the smoothness of the painted base - coatings made from VDC are thinner than those made from paints based on organic solvents.
Features of water-based paints
The main option for painting the ceiling in an apartment is water-based compositions. In another way they are also called water-dispersed. Plain water is used as a solvent here. Among the ingredients there are also film-forming materials - pigments that impart covering properties to the substance. To give the paint the necessary performance properties, special additives are introduced into its composition.
The result is a liquid suspension consisting of solid components (base, pigments and additives) suspended in the liquid. A very important point is that these particles do not dissolve and do not mix with water. As a result of application to the base to be decorated, water evaporates, after which only the polymer layer of the desired color remains.
Water-dispersed paints have a number of strengths, which makes it possible to decorate not only ceilings, but also walls indoors for various purposes:
- High adhesion
. This allows the material to fit well on almost any base, forming a reliable “adhesion” with it. If the surface preparation technology is carried out correctly, there is no need to worry about peeling or swelling in the future. - High drying speed
. Usually after 2-3 hours the painted surface can be used. - No unpleasant smell
. This makes the work much easier, because... there is no need to use personal respiratory protection. This is especially appreciated when finishing large areas. The absence of harmful toxins makes the material environmentally friendly. It can be used without restrictions in any room. - Easy to apply
. Working with water-based paint usually does not cause difficulties even for a person without painting experience.
Compositions of this type also have some disadvantages:
- Temperature requirements
. Water-dispersed paints must not be used in unheated rooms where the air temperature can drop below +5 degrees. Otherwise, small cracks will appear on the finishing surface. - Humidity restrictions
. If the humidity level in the room is high, then water-based paint simply will not be able to dry: the water in its composition will have nowhere to evaporate. - Requirements for the quality of foundation preparation
. It needs to be well leveled and sanded, because... Painting this type of slope will further highlight any imperfections in the surface.
Water-based paints are acrylic, silicate, silicone, mineral and polyvinyl acetate.
Which paint is best to use for the ceiling: types and nuances
Of all the variety of paint and varnish products presented on the modern market, it is advisable to use water-based paints for the ceiling. Below we will look at them, and there are several reasons for this:
- The basis for such paints is ordinary water, which means they contain practically no substances harmful to health, when painting there will be no unpleasant odor in the room, and inhalation of solvent vapors will not lead to dizziness or poisoning.
- Water-based paints dry quickly. They are inferior in this ability only to some types of nitro paint. Thus, the ceiling will be completely ready the very next day after applying the material.
Water-based paints are an emulsion: that is, polymer pigment in the form of beads is mixed with water and a binder base, but not dissolved in it, and after drying the particles form a dense film. The properties of the base ultimately determine the properties of the paint.
Silicate
Paints based on liquid glass. The cheapest and least quality base option. Such paints, of course, can be used; they are permeable to steam, fit well on the walls of rooms with high humidity, but have poor wear resistance and are easily washed off with water. Therefore, a ceiling painted with silicate paint cannot be washed.
Mineral
These are paints with a base of cement or slaked lime. This coating is short-lived, plus its only low cost. In essence, this is an ordinary whitewash.
PVA based paints
Loved by domestic manufacturers, foreign companies prefer not to use this component.
It is worth noting some nuances:
- Such paints are of little use for walls due to their instability, but they can be considered as an option for ceilings.
- The ingress of moisture leaves stains on the surface painted with it; cleaning such a ceiling should be carried out with caution.
- Due to some of their features, tinting of these paints is possible only in light colors. However, this is quite appropriate when painting the ceiling in order to visually make it higher.
In addition, shades of PVA-based paints are selected only by hand; for other types, digital tinting machines can be used.
Acrylic paints
They are much more expensive than the previous options, but have a number of advantages over them:
- Acrylic is suitable for damp rooms, but it is not advisable to wet a ceiling painted with such paint.
- You can use a wet cloth to remove dirt, as the paint is quite resistant to abrasion.
The surface covered with this paint is matte. Each manufacturer has several types of acrylic paint in its line, differing in the ratio of base and color, which affects its coverage, density and durability.
Latex based paints
Suitable for almost any surface, be it embossed wallpaper or textured plaster. A ceiling coated with latex paint can be washed, and its appearance will remain for a long time.
Recommended articles on this topic:
- Arrangement of a small apartment
- Stages of renovation in an apartment
- Turnkey cosmetic repairs
The coating can be glossy or matte, as indicated by the numbers in the name of the paint: the higher the number, the more glossy the ceiling painted with it will be.
When choosing latex paint for the ceiling in an apartment or house, you should consider some of its features:
- The glossier the surface, the more visible any defects are, while matte will help hide them.
- They withstand wet cleaning of paint with a glossy effect better.
Paints with silicone additives
Silicone paints have better wear resistance and are not afraid of wet cleaning; you can even use a brush. This type of paint is the most durable, but its price is much higher.
Often in paints you can find a combination of different binding components, for example latex and acrylic. The combination of acrylic and silicone gives the best result - quality and resistance to external influences.
Acrylic paints for ceilings
Compositions of this type are made on the basis of acrylic resins: it is they, together with various additives, that form a decorative film on the surface of the ceiling. Among other options for painting the ceiling in a room, acrylic paint is the most popular. With its help you can decorate concrete, wood, polymer, steel, glass and plaster bases. The material dries very quickly, without emitting unpleasant odors or toxic substances.
Acrylic compounds are known for their durability. Once applied to the ceiling, they can last a long time without losing their decorative qualities. Such a surface is not afraid of sunlight, abrasion, peeling and crumbling. The created layer of paint allows steam to pass through, which is very convenient when decorating rooms with high humidity levels. The high adhesion of the material should be taken into account: once applied, it will not be easy to remove. Therefore, you need to decide in advance for what time this finishing is designed. In the process of preparing the base, it is recommended to use special antiseptic impregnations.
A special type of acrylic paint stands out - acrylate. Along with the standard set of components, latex was introduced into its composition. This makes it possible to impart additional unpretentiousness and durability to the material. Acrylate compounds adhere very well and adhere to the surface, masking various minor flaws in the form of cracks, crevices and base defects.
To enhance this effect, it is recommended to apply the material in two layers. In the future, the finished finish can be washed using delicate detergents. According to the manufacturers of acrylate paints, the base decorated with their help is able to withstand many washing cycles, with full preservation of the original decorative characteristics. The high performance characteristics of acrylate paints are expressed in the fairly high cost of this type of material.
Paint application procedure
Water-based paints and varnishes quickly dry out on the ceiling at the time of application, therefore, in order to ensure high-quality coverage, they work quickly with a brush or roller, trying to apply a layer of paint to the entire surface in one go, without interruptions. The composition is well shaded so that the boundaries between the passes are not visible.
Work begins from the wall opposite the window and makes the first pass parallel to it. To control the quality of application, it is recommended to illuminate the surface with an electric lamp - this way the areas with and without the applied composition will be more visible. The second pass is made after the first layer has completely dried in a direction perpendicular to the window.
How to paint a ceiling with a roller
How to paint the ceiling with a roller was discussed above. Let us only add that it is convenient to paint with a tool located on the telescopic handle. You can hold it with both hands and ensure the correct angle of inclination of the roller, its tight pressure, and quickly roll the liquid over the surface. This eliminates the need to use a stepladder, which also speeds up the work.
The technology of applying decor with a roller consists of taking dye from a tray, rolling it along the ribbed surface of the container, and then rolling the paint across the ceiling. They begin to apply a new strip not right next to the previous one, but next to it, and gradually combine them into one layer.
How to paint with a brush
If you don’t have a roller or spray gun, you can paint with a brush. For this work, take a tool with split bristles and apply paint in two layers. As a rule, a brush is used to paint the space between the wall and the ceiling, in places that are difficult to reach with a roller.
How to paint with a spray gun
Using an electric spray gun you can get an ideal ceiling surface. The liquid flying out of its nozzle flows smoothly, without gaps or streaks.
- Before starting work, select the diameter of the nozzle, set the position of the torch (horizontal or vertical), dilute the paint to the required viscosity (entire volume).
- They do a test paint job and start painting.
- Turn on the spray gun, set the optimal distance to the surface and spread the jet over it.
- They try to make the same movements so that the same amount of paintwork material gets onto the base in an even and dense layer.
Silicate
The basis of silicate paint is a mixture of liquid glass, talc and chalk. After application, a very hard and durable coating is formed on the surface, the service life of which reaches 15-20 years, even in the presence of unfavorable external conditions. Indoors, where there is virtually no aggressive impact on the finish, silicate paints can last an order of magnitude longer.
An important advantage of this finishing material is its high vapor permeability. As a result, water molecules can circulate freely in any direction, providing a microclimate that is favorable for humans indoors. In addition, the decorative layer will not peel off or become damp. It is still not recommended to use silicate paints in very damp rooms. But when choosing which paint is best to paint the ceiling in a room for water procedures or cooking, you need to pay special attention to silicate paints.
However, the specificity of liquid glass is such that due to its low elasticity, silicate paint is prone to cracking. This must be taken into account when looking for an option on what paint to paint the ceiling in an apartment in houses where walls and ceilings tend to shrink. Before applying this type of material, it is necessary to very carefully remove all traces of previous paint from the base (primarily this applies to organic finishes). In terms of moisture resistance, silicate paint is very similar to acrylate paint: it can be washed with a damp sponge and household chemicals.
How to paint - choose a tool
Choosing a paint composition, taking into account the purpose of the room and the base material, is half the battle. Then the question arises, how to properly paint the ceiling so that the surface is pleasing to the eye? The answer is obvious - you need to stock up on tools for applying paints and materials and prepare the surface well. In construction stores, tools are presented for every taste and budget. Our recommendations will help you choose worthy products for high-quality painting.
How to choose a roller
In an apartment or small office space, it is best to paint the ceiling with a roller . It is important to choose a tool with which you can get a good result with the least loss of paintwork materials. When choosing, consider the following points.
1. Roller dimensions (drum and handle size). Drums are from 50 to 250 mm in length, of different diameters, with a proportionally arranged handle from 150 to 500 mm in length. The diameter and length of the drum affect the speed of painting the object. It should be borne in mind that large drums become heavy when the coloring material is collected - only a strong person can paint with them quickly and for a long time. True, when the handle is lengthened, it becomes easier to work with such a roller.
2. What material is the roller made of (velor and foam rollers are not suitable for painting the ceiling - they often have to be dipped into the composition, they form a lot of splashes and leave smudges). To work with water-based paints, tool coats made of: polyamide, polyacrylic, polyester, thread pile, natural six are suitable. The best option for upholstery is sheepskin.
3. Length of the pile (with a short pile, you have to dip the roller into the tray more often; the paint flows down the handle less; with a long pile, more material is held on the tool, which makes it heavier). A roller with medium nap length is best.
4. Density of the fur coat - the denser it is, the better the quality of the paintwork on the base.
5. The presence of a seam. When purchasing a roller, check that the seam is well hidden, as sticking it out will cause unwanted streaks on the surface.
6. Pile strength. Check the quality of the roller - the lint should not fall out, otherwise lint will stick to the ceiling during painting.
How to choose a brush
A brush as a tool for painting ceilings is only suitable for treating areas that are difficult to reach with a roller, as well as for processing the joints of walls and ceilings. Any brush, even a high-quality one, will leave streaks on the surface. However, you need to buy brushes with split bristles, which are elastic and can always return to their place during work.
How to choose a spray gun
Painting the ceiling with a spray gun will provide excellent coverage. Of course, such a result can be obtained provided that the tool is of high quality and the painter has sufficient experience working with it. To carry out the work, there are electric spray guns on sale with a lower tank for paint and with a fence from a bucket. Let’s make a reservation that the latter are not suitable for high-quality painting in an apartment. The bucket intake does not provide a uniform stream of material.
Electric spray guns with a bottom tank do not have this drawback, but they often have to be filled with a new portion of material, and this puts forward new requirements for the uniformity of the paint composition.
When choosing a spray gun, it is necessary to take into account the following points: it is preferable to buy the body of the product from an alloy of aluminum and nickel, the nozzle from brass, and the sealing gaskets from Teflon. A high-quality spray gun cannot be cheap. There are also inexpensive products on sale, but it is not recommended to buy them for the intended purpose.
Silicone ceiling paints
This type of paint became freely available relatively recently. Silicone resins are used as the main binder here. As a result, the resulting composition managed to combine two very unusual characteristics - hydrophobicity and vapor permeability. After drying, the decorative layer created on the ceiling will allow moisture vapor to pass through well, without causing the formation of a damp, stuffy atmosphere. In this case, excess moisture will not affect the ceiling material or thermal insulation.
Silicone compounds are superior to their silicate counterparts in terms of elasticity. At the same time, the finish continues to be durable and resistant to ultraviolet radiation. The good elasticity of the film formed on the ceiling allows you to protect the finish from the appearance of cracks in the event of shrinkage processes. In addition, the material smoothes out small cracks or defects in the base well, filling them flush with the surface. Silicone paint fits perfectly over the old finishing layer. The ceiling finished in this way can be periodically repainted, refreshing or changing the color of the finish.
Like other types of water-based paints, this material demonstrates excellent characteristics in terms of durability, environmental safety, fire resistance, antiseptic characteristics, drying speed and the complete absence of unpleasant odor. Among the disadvantages of silicone paints, one can highlight their high cost, which imposes additional responsibility on calculating the required amount of material.
Is it possible to prime a ceiling over old paint?
Painting the ceiling with water-based paint over old paint is allowed if the paint holds up well and there are no swelling, cracks or unevenness. In this case, the ceiling is cleaned of dirt and dust, primed - and can be repainted after the primer has dried.
Interesting materials:
How to make a zip archive from a folder? How to turn pink into red? How to make an isotonic drink for training? How to take a high-quality Google map screenshot? How to take a high-quality screenshot of your desktop? How to make tiles shiny? How to calibrate the battery on Android? How to make a camera on Skype? How to make channels in order? How to make a picture as a background in a 2007 presentation?
Mineral and polyvinyl acetate
These compositions are made on the basis of cement (slaked lime) and polyvinyl acetate (this is the well-known PVA glue). Mineral paints are usually used to decorate ceilings made of concrete panels: the service life of such a coating is not very long. The scope of use of PVA-based materials is dry rooms, because... The decorative layer created with their help is not hydrophobic.
Choosing the right paint for the kitchen and bedroom
There is no universal composition. For each room you need to choose your own type of covering. There are several criteria for choosing the right ceiling covering for any room.
- Operational stability - the paint should not crumble or lose its attractiveness over a long period of time.
- Resistance to dry and wet cleaning - the finish must retain its aesthetic appeal after cleaning.
- Easy and uniform application helps to mask small defects in the base and is economical in consumption.
- Waterproofness and light resistance are especially important in rooms with high humidity or located on the sunny side.
- An acceptable price plays an important role in the renovation budget. Sometimes the use of expensive materials is not justified, or it is quite possible to find a budget replacement.
- Appearance - paint improves the appearance of the ceiling, making it more aesthetically attractive.
When looking through the options for the desired coating for the kitchen and bathroom, there are additional factors that require attention. In such rooms there is a constant high level of humidity, even with the presence of exhaust ventilation. Temperature changes occur, especially in winter, due to cooking and ventilation.
Soot and grease deposits accumulate on the walls and ceiling. In the bathroom, soap solution residues and dust particles can accumulate on the ceiling. In such places with high humidity and warmer air, mold and fungal outbreaks often form.
For rooms with special conditions, latex, silicone, and silicate emulsions are suitable. Especially with additional antifungal additives.
In a bedroom or living room located on the sunny side, it is better not to apply latex compounds that are not resistant to the sun. Affordable acrylic materials with a wide range of colors are suitable.
The best manufacturers offer many different options for painting ceilings. Decide on the specific room where the renovation will be carried out, its functionality and choose the right composition based on the capabilities of your wallet.
We have prepared an overview of the characteristics of the ten best coatings based on customer reviews. It discusses in detail important criteria, features, and contains tips and recommendations on where to use a particular brand.
| CHARACTERISTICS | MARSHALL Ceiling | Five Masters acrylic paint | Tikkurila Euro White paint for children's matte | DULUX BINDO 7 | Tikkurila Euro Power 7 |
| COMPOUND | styrene-acrylic copolymer | acrylic copolymer | acrylic copolymer | latex | latex |
| CONSUMPTION(PER M²/L) | 9 | 5 — 7 | 7 — 12 | up to 14 | 7 — 12 |
| DRYING TIME(H) | 2 — 4 | 1(touch) | 2 | 2 — 4 | 2 |
| QUANTITY | 2.5 l | 13 kg | 2.7 l | 0.9 l | 0.9 l |
| AVERAGE PRICE (RUB) | 330 | 490 | 1099 | 490 | 400 |
Oil and enamels
Along with water-based compositions, ceilings are sometimes decorated with oil paints and alkyd enamels. In the first of them, the role of a binding component is played by organic oil or drying oil. The latter contain alkyd varnishes and organic solvents. It should be said that materials of this type are gradually being forced out of the market for compositions for painting ceilings in a room.
The reasons for this process are as follows:
- The ceiling coating created using alkyd enamel is characterized by strength and durability, but during application it is necessary to overcome a number of difficulties. We are talking about long-term drying and the presence of an unpleasant noxious odor. The enamel layer formed after drying does not allow steam to pass through easily, which leads to the effect of blocking the room. As a result, in the bathroom or kitchen this is fraught with condensation on the ceiling.
- Oil paints have even lower performance properties. In addition to slow drying, unpleasant odor and lack of vapor permeability, the resulting finish is fragile and weakly elastic. This often leads to the appearance of cracks on the surface. The only advantage of oil paint is its low cost.
What paint to use for the bathroom ceiling
Painting with oil enamels is becoming a thing of the past, giving way to finishing with new materials that are not afraid of high humidity and sudden changes in temperature, are non-toxic, and maintain a presentable appearance for a long time.
To choose which paint to use for the bathroom ceiling, you just need to pay attention to the labels on the packaging: for the convenience of buyers, manufacturers indicate the purpose of the paint directly on the can. If you see the label “for the bathroom,” you can safely purchase such paint; it will undoubtedly suit your purposes.
In addition, you should take a closer look at paints marked “washable” or “super washable.” They can also be used to paint the ceiling in the bathroom; the differences lie in the type of base, color, price and manufacturer.
Cooperating with is reliable and prestigious. The specialists working here are professionals of the highest level. operates throughout Moscow and the Moscow region.
Adhesive compositions
These materials also fall into the budget category. They are an aqueous mixture of chalk, pigment and glue.
There is the following recipe for making it yourself:
- Dry mix chalk and pigment in a ratio of 1000:35. It is important to achieve complete homogeneity of the dry mixture.
- Pour water into the dry powder (3 liters of water per 1 kilogram of mixture). It is better to do this gradually, mixing the ingredients well. The result should be a viscous liquid, reminiscent of sour cream in consistency.
- Add glue in a ratio of 80 g of wood glue per 1 kg of chalk. Starch paste can be used as an additive.
- Strain the finished mass through a metal sieve, adding the required amount of water.
It should be understood that the quality of homemade material will be quite low: in this case you cannot count on long-term operation. Still, the best option is to purchase a factory-made version of paint for the ceiling in the room.
Benefits of painting
Ceiling finishing isn't just about whitewashing or painting, there are many good ways to make your ceiling as attractive as possible. Firstly, this is ceiling wallpaper, of which there is now a huge amount. With such an assortment, choosing the desired pattern and texture is not at all difficult. Secondly, you can use decorative plaster, thanks to which the ceiling will acquire an attractive, sophisticated look. Stretch ceilings are particularly beautiful - other materials do not have such a variety of shades and decor.
All these methods are good and effective, but not all are available. Some options are too expensive, so they are not suitable for a limited budget, while others require a lot of effort, which is also not always justified. The most economical, convenient and least labor-intensive option here is to paint the ceiling. This method has the most advantages:
- ceilings can be painted in any room;
- staining is done quickly and does not require bulky equipment;
- the range of paints is very wide, so the ceiling can be made of any color or shade;
- Caring for painted ceilings is very easy.
If you need to quickly and economically tidy up the ceilings in your house, and do it yourself, then painting will be the most justified.
Materials and tools
The quality of finishing the ceiling with paint largely depends on properly prepared tools and materials.
To work you will need the following:
- Roller
. It is the main tool for applying paint to the ceiling. If the area of the ceiling to be finished is small, a lightweight model will do just fine. In other situations, it is recommended to arm yourself with a wide roller, which will require some skill when handling. These tools often come with telescopic extensions that allow finishing work to be done directly from the floor. For applying acrylic and oil paints, foam or plush rollers are more convenient; for synthetic paints, mohair rollers are more convenient. - Set of paint brushes
. They help paint hard-to-reach areas, giving the surface to be decorated a decorated look. The stiffness of the bristles is selected depending on the required thickness of paint application: the higher the stiffness, the thicker the layer.
- Plastic tray
. Paint is poured into it from a can or bucket before application. Such trays have dimensions convenient for soaking the roller and a special rolling surface. - Masking tape
. It allows you to separate sections of the ceiling of different colors or patterns from each other. - Step ladder or sawhorse
. The second option is more convenient. Instead of a sawhorse, you can use an old kitchen table or the already mentioned telescopic extension that fits onto the handle of the roller. - Set of spatulas and scrapers
. They are necessary to prepare the base. - Painting sandpaper
. It is used to treat putty surfaces before painting. - Protective clothing
. Plastering and painting work is accompanied by a lot of dirt, so you should prepare special clothing for the work. These can be old things that can protect your head and body from paint and dust. It is also advisable to purchase safety glasses and a respirator.
Painting equipment - prepare a set of brushes and materials
When painting a ceiling, in addition to high-quality paint, the choice of painting tool is of no small importance. The main working tool is a roller. We recommend painting the ceiling with a fluffy roller with a “fur coat”, which ensures maximum adhesion of the paint to the surface. A roller with a long pile will create a rough surface with the effect of an orange peel, and a roller with a short one will create a smooth and glossy base. We do not recommend using velor or foam rollers. The former form air bubbles during application, while the latter do not allow a sufficient amount of paint to be collected, resulting in an uneven layer. Along with the roller, purchase a telescopic handle for ease of use.
To obtain a good result, the correct and high-quality equipment is important.
To select a nap roller, lightly pull the nap. If it does not crumble, the material is of high quality, you can buy it. Otherwise, the fluff will stick to the painted surface.
Along with the roller, you will need a set of flat brushes (wide and narrow) with soft bristles. We will paint the main surface of the ceiling with a roller, and for hard-to-reach places, raised areas and ceiling plinths we will use brushes of different widths. Additionally, to paint the ceiling you will need a tray with a mesh for rolling paint, a spatula for applying putty, and fine-grained sandpaper. In order not to get our clothes dirty, we buy overalls or wear old unnecessary things. To protect your eyes and throat mucosa, you will need goggles and a respirator. We cover the floor, radiator and furniture with film, and seal the joints with masking tape. Lay down newspapers if necessary.
Preparing the base
Before painting the ceiling in an apartment with your own hands, it is important to prepare the rough base as thoroughly as possible.
Operating procedure:
- Investigation of the condition of the ceiling
. Determine the scope of future work by visual inspection. On a concrete floor, it is important to notice all the gaps, cracks and joints between the slabs. Wooden ceilings must be sanded and primed, plasterboard ceilings must be sealed. - Cleaning the base from old finish
. The floor slab must be completely cleaned of the previous finish. If it is whitewash, it is washed off with water; if it is old putty or paint, it is removed with a strong spatula. It is advisable to pre-wet the wallpaper and then remove it with a spatula. Any traces of glue found must also be removed. - Priming
. For this, deep penetration impregnation is used to increase adhesion and create a waterproof film. A good option is acrylic primers. - Sealing cracks, joints and cracks
. You will need a starting putty or mortar for laying tiles: the adhesive it contains will make the seam stronger. - Continuous alignment
. If the base is more or less even, you can putty immediately. If there are defects and differences, a leveling layer of the starting mixture is laid. Putty is usually applied in 2-3 layers, which makes it possible to obtain a smooth surface. - Grinding
. The purpose of this procedure is to remove all sagging and small scratches on the putty layer. The tool used is a grater and painting sandpaper No. 120. It is better to protect the respiratory organs with a mask or fabric bandage. - Final priming
. For this, an antiseptic composition is usually used to create protection against mold and mildew.
What paint to use for ceiling wallpaper
Textured ceiling is the basis of many modern interior styles. There are different ways to create a textured design, for example, applying plaster with special tools, but making such a ceiling will take a very long time and is not cheap. Therefore, usually for such finishing you can use the so-called matting - wallpaper made of fiberglass or textured non-woven wallpaper. After gluing, this wallpaper can be painted in the desired color.
If you are deciding what paint to use for a ceiling covered with textured wallpaper, you need to choose from two types, into which modern water-based paints are divided:
- glossy;
- matte.
Help: the choice of paint type depends directly on how smooth the surface of the ceiling you are going to paint is. A glossy coating will highlight all the defects; even a large wallpaper texture will not save it. Therefore, for a ceiling that is not too flat, matte paint is preferable. Glossy can only be used on absolutely flat surfaces.
To cover non-woven or paper-based wallpaper, either basic white water-dispersion paint is usually used, or it is added with the addition of a color of the desired shade. Like any type of finish, water-based paint has its pros and cons. The negative point is that it is applied in 2-3 layers for sufficient color saturation. In addition, the paint dries quite quickly, so you need to be quick so that the junction of the previously applied and fresh material is not visible.
The advantages of water-based paint are its low price and a variety of shades, using which you can make the color you want.
Note: when painting ceiling wallpaper with water-based paint, you should roll an even strip from one wall to another, then, trying not to go into the already painted area, roll the same strip next to it. Alternatively, you can divide the ceiling area into equal squares by eye and paint the surface in sections.
Painting the ceiling in the apartment
You can proceed to applying the paint composition only after the ceiling has completely dried:
- Prepare the paint
. This must be done in strict accordance with the instructions on the bucket. As a rule, for the first layer the material is diluted with water in an amount of 10-20%. For convenience, part of the diluted paint is poured into a painting tray that has recesses along the width of the roller. - Application
. It is recommended to start from the corner in the room farthest from the door. First, areas along the ceiling friezes and corners are painted, for which it is better to use a brush. Next comes the roller: after soaking, it must be rolled out to remove excess paint. If this is not done, it will spill onto the floor. It is most convenient to work from a construction sawhorse or an old table. So, step by step, the entire room is gradually painted. - It is recommended to apply the first layer perpendicular to the light
. In places where one area transitions to another, you need to carefully roll out the paint border so that no sagging remains. Each time you move the goat to a new place, you need to inspect the painted area from several angles. If a leak or gap is detected, it must be promptly eliminated before the paint sets. - The second layer is applied only after the first has completely dried
. Usually this takes 3-4 hours, but it’s better to take a longer break. During the second application, the roller should move perpendicular to the direction of the first layer.
How to paint a ceiling with your own hands: preparation for work
First you need to prepare the materials and tools that you will need for your work:
- dye;
- rollers. They are selected taking into account the structure of the surface to be painted. The denser the pile, the better the paint layer will adhere;
- brushes of different sizes for painting hard-to-reach areas;
- container for paint.
Before painting the ceiling, you should carefully prepare the surface. Not all paints require high-quality cleaning of the base, but at a minimum, dust, dirt and loose plaster must be removed. It is also important to seal cracks and screw holes with putty and, if necessary, level the surface. All furniture is first removed from the room, and the remaining interior items, doors and window sills are covered with film.
After completing the preparatory work, you can proceed to the main process.
How to prepare a ceiling for painting
First you need to decide what paint the surface will be coated with.
In order to paint the ceiling with matte paint, it is primed twice, puttied and cleaned. Professional builders recommend applying 3 layers of putty. Only after this paint is applied. In some cases, in order to insure against the appearance of microcracks, fiberglass or non-woven smooth wallpaper is additionally glued to the ceiling.
If you plan to paint with a composition with a glossy effect, you must additionally sand the last layer with a fine abrasive mesh or a special sander.