When choosing a coloring composition for any surface for an apartment or house, you should take into account not only the style and colors of the interior, but also the purpose of the room. The durability of the coating, ease of maintenance and the beauty of the room depend on the choice of suitable paint. You should be especially careful when choosing a composition for painting the ceiling in the kitchen, because the peculiarities of the processes taking place in this room significantly affect the beauty and quality of the coating. If you need paint for the ceiling in the kitchen, which is better, we will tell you in our article.
Kitchen and its features
The kitchen is fundamentally different from other rooms in the house. It has special requirements:
- Humidity is associated with constant cooking and evaporation. Using gas, a double boiler or a microwave does not reduce air humidity. Thanks to ventilation, humidity circulates throughout the day.
- Temperature fluctuations – the temperature difference in the kitchen area is significantly higher than the temperature in other rooms. For example, when ventilating a kitchen in winter, the walls and ceiling, when cooling, reach a temperature of zero degrees - this is a low range. The high range is achieved by cooking on gas burners - this is about 50 degrees. It is worth noting that the hood above the stove reduces the heating of the ceiling and the overall kitchen temperature during cooking. This in turn affects excess humidity.
- Grease stains and soot settle on all horizontal surfaces, including the ceiling. Cooking food on gas will also add large soot stains to the fat. The paint for the kitchen ceiling should be able to easily withstand frequent wet cleaning of the room.
- The risk of flooding is a fairly important problem with kitchen ceilings. The fact is that the sewers and water pipes of the neighbors on the upper floors are located above it. Therefore there is a risk of flooding. This situation is of a force majeure nature and no one will be pleased to do an unscheduled kitchen renovation.
No. 3. How to determine what was used for whitewashing?
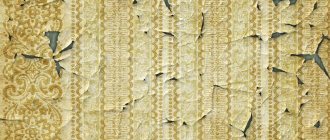
Probably everyone has heard at least once in their life that different whitewashes cannot be mixed. If lime whitewash was applied to the ceiling or wall, then when installing chalk whitewash on top, you will soon be able to see unsightly stains. When preparing a room for finishing and assessing the condition of surfaces, it is very important to determine what whitewashing was done before.
The check is very simple. It is enough to wet a small fragment of the finish with water and observe the reaction. Wet lime will darken a little, and if you rub the surface with your finger, there will be no white marks left on your hands.
Kitchen ceiling paint
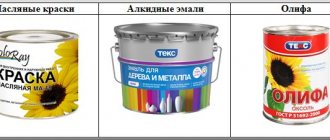
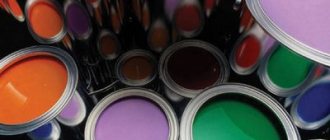
To get a detailed look at the available materials, let’s consider the main types of coatings – their advantages and disadvantages:
- Lime
was used several centuries ago to paint ceilings, but has not lost its position to this day. Lime is far from the worst choice for the kitchen, because it does not emit harmful substances. Moreover, it absorbs them from the air, thereby purifying it as much as possible. - Whitewash
- one of the cheapest methods of painting the ceiling. Costs will include the purchase of quicklime and a brush (roller). Lime is usually laid in a dense layer, and it, in turn, masks small defects in the ceiling. Thus, the term “whiten” appeared, i.e. hide cracks and minor irregularities. It is logical that in addition to its positive characteristics, lime also has negative properties. For example, several layers of whitewash applied subsequently form uneven surfaces. They can only be removed together with the plaster. At the same time, the ceiling looks standard and even dull. In other words, designer delights are clearly not for whitewashing. In addition, the whitewash on the ceiling cannot be washed away from ingrained grease or soot. To give the ceiling a snow-white look again, you need to whitewash it again. - Water-based paints
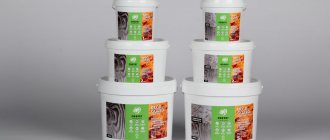
are a common type of liquid to be painted. And if you are thinking about how to paint the ceiling in the kitchen, choose this substance. Water-based paint does not emit harmful substances or strong odors into the air. In terms of paint cost, this solution is not much inferior to lime. A ceiling already coated with water-based paint can be wiped with a damp cloth without any problems. In this case, no damage will occur during dusting. However, this is far from a detergent coating. Wooden floors with this paint do not create obstacles to the natural filtration of water vapor. Therefore, such a kitchen will not be too stuffy. The coating with water-based paint is very thin - this is its difference from lime. That is why you will not notice any sagging of old paint. - Acrylic paints
are one of the best of their kind, according to many experts (read: “Paint for ceilings: which is better”). Its advantages include all the characteristics of water-based paint. At the same time, the main drawback is eliminated - the acrylic ceiling can be safely washed. Read the article: “How and with what to paint the ceiling: what paint to choose.”
Tip: Frequent use of caustic liquids and abrasives is not recommended. The acrylic coating can still become unusable. Regular warm water and laundry soap will be enough to clean the kitchen ceiling.
Painting the ceiling in the kitchen, watch the video:
No. 1. Benefits of whitewashing
Whitewashing ceilings and walls is not the most modern way of finishing, and far from the most fashionable. What makes thousands and tens of thousands of people across the country still whitewash in the old fashioned way? Whitewashing has enough advantages:
- low price is the main argument in favor of this type of finishing. When the budget is limited and the room needs to be tidied up, the choice falls on whitewashing. For this reason, hospitals, schools and other government institutions still actively use gypsum and chalk to decorate ceilings and walls;
- ease of application. A person without special training can handle whitewashing - no special skills, abilities or tools are needed;
- neat appearance . Of course, in terms of intricacy and decorativeness, a whitewashed ceiling is inferior to a tension system, and whitewashed walls are inferior to those finished with Venetian plaster, but if you apply whitewash correctly, you can end up with a fresh white surface with an even matte color. If desired, dye can be added to the whitewash solution;
- harmlessness, environmental friendliness , ability to pass moisture and air. Conventional whitewashing in this regard is far ahead of vinyl wallpaper and polystyrene foam ceiling tiles, so in some cases it will be even more preferable;
- Lime whitewash has bactericidal properties , so it will provide additional protection against mold and mildew.
Among the disadvantages are low durability (1-3 years), uncomplicated appearance and dirt during application.
Painting the ceiling in the kitchen: instructions
As an option, renew the old lime and water-based emulsion by applying a new layer. But most often you want your kitchen ceiling to look aesthetically pleasing and last as long as possible.
Our instructions show you how to paint the ceiling in the kitchen step by step:
- Removing many years of paint, whitewash and almost destroyed plaster. A hammer drill or steel spatula will help you clean the ceiling. Even before painting the ceiling, it is important to always use a respirator. It is also necessary to close the doors to the room. Otherwise, all the dust will spread throughout the house. The main task is to strip the floor down to concrete. If strong areas of plaster are found, they can be left.
- Brown spots can be found under the removed plaster. This is mold and one of the reasons for the complete protection of old plaster. To combat mold, you can use an antimicrobial primer - Ceresit ST 99. In addition to destroying mold, it will create prevention to prevent the next appearance of microbacteria. An alternative to primer is a cleaning agent with chlorine, for example, the domestic “Belizna”.
- Surface primer - necessary for fixing plaster on bare concrete or sealing heating risers with cement mortar. The primer will also strengthen areas with old plaster. Experts recommend using Ceresit ST17.
- Leveling the surface. To eliminate irregularities of 1 cm or more, a building mixture is usually used. Irregularities less than 1 cm are sealed with polymer cement putty.
- After waiting for the plaster and the initial putty to dry, putty the ceiling in a second circle with gypsum putty. This way you will eliminate minor irregularities. Six hours after applying the gypsum putty, the ceiling is sanded. For this, coarse and fine sandpaper is usually used. A steel meter or straight rod will help you check that there are no irregularities. Note that the matte surface does not clearly display differences and irregularities to the eye.
- New ceiling primer with penetrating primer. You can also use diluted water with 10% paint for the kitchen ceiling.
- After waiting for the primer to dry completely, you can apply the selected kitchen paint. It is recommended to apply it in two layers. The first coat should always dry before a new coat is applied.
Additional recommendations
When painting the ceiling, it is recommended to hang an energy-saving light bulb of maximum brightness in the room. The light it emits will help you see all, even small, defects and correct them in a timely manner.
The results of labor should be viewed from different angles, determining the quality and density of coloring.
The main thing in this matter is to do everything systematically, without long breaks (apart from waiting for the materials to dry), but also without unnecessary haste - and you will achieve the desired result.
How to paint the ceiling in the kitchen - tips
Our article provides some useful tips regarding painting, surface preparation, etc.
- They start painting the ceiling from the window. This ensures uniformity of the painted surface. This can be clearly seen in photo and video materials on this topic.
- Rule: one coat of paint - one application. Otherwise, streaks will be visible at the junction of the dried and newly applied areas.
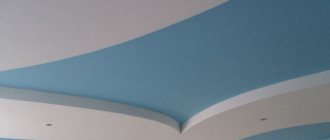
- For the ceiling, it is recommended to use matte paint to mask possible surface irregularities. A glossy coating, on the contrary, will only aggravate and emphasize them. Despite the beautiful appearance of glossy stretch ceilings, it is achieved due to a perfectly flat surface (read: “How to paint a stretch ceiling - recommendations”).
- It is preferable to use materials from the same brand. The reason is to check them for compatibility. But what effect will happen when combining primer and paint from different manufacturers is unknown in advance.
- Do not ignore the instructions on the packaging. When instructed to dilute a kilogram of a substance and half a liter of water, do so. It is not recommended to use the consistency by eye, in order to avoid troubles (read: “What paint to paint the ceiling: a review of prices and quality”).
- Consider how to dispose of liquid waste. Do not use the toilet for this - it is absolutely not suitable. The building mixture frozen in it will render the plumbing unusable. This will also have a negative impact on the risers.
Before you think about how to paint the ceiling in the kitchen, make your final decision. Perhaps the best option would be to use slatted ceilings or PVC panels. They are preferable both financially and physically.
Theory is one thing, practice is always more difficult. So you can always entrust the painting work to specialists in your field. They will make your kitchen ceiling look new in no time. The main thing is to decide on the primer and paint. You shouldn’t save money, because the best composition is presented by branded manufacturers. This means the effect will be much better.
Happy renovation!
Latex composition
Latex ceiling paint, as in the photo, is an excellent option for applying to the ceiling, but the demand is not too high due to the high cost of the product. However, the price is quite justified, because the end result is a durable, practical coating with a beautiful appearance and vapor-tight properties.
The paint does not harm human health, which allows it to be used even in unventilated rooms. In addition, the composition dries as quickly as possible, about 30 minutes.
The coating is smooth, but the composition also has disadvantages:
- not resistant to ultraviolet radiation, so the surface fades quite quickly in the sun;
- negatively tolerates temperature changes, which is why the surface of the ceiling becomes covered with cracks, and with prolonged drops in temperature conditions it peels off completely, quickly failing.
Whatever paint you choose for the ceiling surface, consider not only the advantages, but also, of course, the possible errors indicated on the product label.
No. 5. Preparing a solution for whitewashing
Since lime is used more often, we’ll start with it. The process of preparing the material is simple, but it still requires care. So, how to dilute lime for whitewashing?
- First you need to prepare all the necessary ingredients in the required quantities. We will need 10 liters of water, 2-3 kg of slaked lime, 150-200 g of aluminum alum, 50-100 g of coarse salt, which is pre-soaked, and a teaspoon of blue (if whitewash is needed) or 400-500 g of dye;
- dissolve all components in a small amount of warm water (about 1 l), then bring the volume of the solution to 10 l and mix thoroughly;
- if you are preparing a solution of colored whitewash , then it is better to immediately prepare the amount required to finish the entire surface. Otherwise, it will be almost impossible to repeat the shade, no matter how accurately you measure all the ingredients;
- quicklime at your disposal , then you can extinguish it at home. It is enough to mix it with water in equal proportions and stir thoroughly for 15-25 minutes. It is advisable to then leave the lime for 15 days in a closed container - this way it will lie on the surface as evenly as possible;
- consumption of lime whitewash solution depends on the type of tool used for application and the characteristics of the material. Average consumption is 0.5 liters of solution per 1 m2 of surface.
Now let's look at how to dilute chalk-based whitewash:
- 30 g of wood glue, 3 kg of sifted chalk, 15-20 g of blue to enhance whiteness are dissolved in 5 liters of warm water. This amount of solution is enough for approximately 10 m2 of surface;
- The consistency of the solution can be checked with a knife. If you dip the blade and pull it out, the solution should not completely drain from it. If it drains, completely exposing the blade, then you can add a little more chalk, and it is better to do this in small portions.
Note that ready-made dry mixtures are also available for sale, where lime or chalk has already been mixed in the required proportions with other components - you just need to add the required amount of water. Such mixtures are more expensive if you take all the ingredients separately, but the difference is small.
Plastic panels
Plastic panels are mounted on a frame, which can be iron or wood. A frame made of wood is worse than an iron one, since it can lead and this material dries out.
The panels are screwed with washer screws using a drill. Using a level, the profile guides are fixed along the perimeter of the ceiling. No matter how light PVC panels are, you should not neglect hangers and profile guides to avoid sagging of the panels.
This profile will also serve as a mount for the lamp. Moldings are attached to the ends. When purchasing panels, keep in mind that different packages may have different shades.
Instead of plastic panels, you can use vinyl chloride lining. The installation technology is the same.
The hole in the panel for mounting the lamp must be strictly in the center. Before installing the panel, it is advisable to wipe it down, since when the protective film is removed, the panel begins to become highly electrified and attract debris, sawdust and construction dust.
Lime
Lime has been used for painting ceilings for decades, usually in rural areas. Its advantages include:
- complete safety;
- obvious cheapness;
- the ability to hide unevenness and small cracks under a thick layer of material.
Lime is an already outdated method, plus it is not without its drawbacks. In particular, after applying several layers of lime, such a ceiling turns out to be uneven, which can be seen with the naked eye.
It can only be removed together with a layer of plaster. Such ceilings cannot be washed. The color can only be white, which limits the design imagination.
No. 6. How to whitewash the ceiling and walls: brush, roller or spray?
Theoretically, whitewash can be applied using the following tools:
- brush;
- roller;
- spray gun;
- vacuum cleaner with air blowing function.
Let us immediately note that the first two options are more applicable - using a vacuum cleaner and a spray gun makes sense when there is a large surface area that needs to be whitened.
A brush for whitewashing is taken with a special one, made of natural bristles, 15-20 cm wide. After work, the brush can be washed and used again later. To whitewash a brick wall, you can use a brush with natural bristles. It is advisable to soak it in water several hours before use. In this case, the wooden handle swells a little and holds the bristles well, which will not fall out during the whitewashing process.
Before applying the mixture, it is important to mix it well again to ensure an even shade. The first layer is applied perpendicular to the window, the second – parallel to the frames. In this case, the streaks from the brush will be minimally noticeable. Experts recommend slightly moistening the surface of the ceiling and walls before applying the mixture.
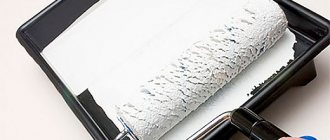
It is better not to use a whitewash roller. When there is only one layer, this tool will still work, but when applying the second layer, the dried first one may fall off. If you act carefully, you can get a beautiful matte surface.
A sprayer and a vacuum cleaner are used only when there is a large surface to be finished. The consumption of the solution increases, it is applied in a thicker layer, but it will be possible to mask small defects. If you have a sprayer at your disposal, then no questions arise.
You can also apply whitewash with a vacuum cleaner if it has an air blowing function. Among the numerous attachments in such models there should be a polyethylene lid with tubes. This cap is the sprayer. It must be put on the can and connected with a hose to the outlet in the vacuum cleaner. It turns out that when you blow out air with a vacuum cleaner, the air enters the sprayer, draws the solution from the can and sprays it through the nozzle. As a rule, there is a special hole on the sprayer, covering which you can obtain the required solution supply pressure. It is better to apply the solution in a circular motion, spraying at a distance of 70-100 cm.
Lining
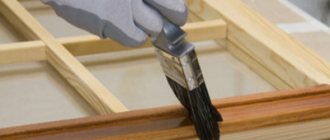
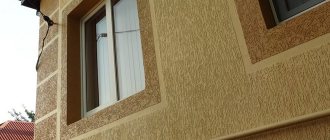
Separately, there is the finishing of the ceiling with wood and subsequent painting. Typically, lining is used when covering the ceiling, but kitchen owners should think carefully before taking such a step. Wood is sensitive to changes in temperature and humidity. Although, of course, the clapboard ceiling looks original and organic. The boards must be planed and well dried. When priming and painting boards, you should remember the following rule - the boards are first processed and then assembled into a frame. If you do the opposite, that is, cover the ceiling with clapboard and then cover it with paint, then later, in the joints that are “walking” due to temperature and humidity, unpainted strips of wood will be visible.
Thus, choosing paint for a kitchen ceiling is by no means an easy decision. It is necessary to clearly understand that the kitchen is a kind of concentrator of aggressive conditions that exist in a modern apartment. At the same time, it should have a certain aesthetics and comfort - in it we not only prepare food and set the table for guests, but also spend most of our active lives. Often, solutions that are cheap and accessible at first glance will lead to the fact that the kitchen will simply be uncomfortable. And even when choosing an expensive coating and by no means cheap paints that will create the ideal interior, subsequent problems can instantly cancel out all the efforts expended.
Polystyrene tiles
In case of uneven differences in the ceiling, you need to make markings using a level or laser tape measure. First, mechanically remove all peeling and peeling from the ceiling, if any, then moisten it with a primer with additives against mold, wait a day until it dries.
- Kitchen renovation in Khrushchev: 60 of the most stylish interiors with real photos, design rules
- How to choose floor tiles for the kitchen
How to choose wallpaper for a small kitchen, tips and tricks
To glue foam tiles, a gun and assembly adhesive are used. Roundings and irregularities will make the work a little more difficult for those who decide to independently renovate the kitchen area with foam tiles. If the tiles have a pattern, then at the same time as gluing, you need to ensure that the pattern and seams match.
A very important moment is cutting out a place for the chandelier. Adhesive tiles are light in weight, easy to work with and are the best way to hide ceiling flaws.
If the apartment is on the top floor and the ceiling is in contact with the roof, then polystyrene tiles are chosen as insulation so that the ceiling area is evenly ventilated and heated. Has good noise absorption and sound insulation.