Decorative brick-like plaster is very popular during renovation and decoration of premises in residential buildings. This solution allows you to create an imitation of brickwork inside the rooms, and the method of creating such decor is quite simple. Today in the article we will talk about how to choose a method for creating decorative plaster, and also consider the key features of this interior design option.
Advantages and features of brick imitation plaster
Any type of decorative coating has its own distinctive features and advantages. Imitation of brickwork has the following advantages:
- It is quite easy to create a brick imitation with your own hands, so it is possible to save money on the work.
- Decorative bricks have increased strength; such a coating will reduce the degree of wear and tear on the walls.
- Brickwork weighs quite a lot, but decorative imitation has little weight.
- The use of decorative coating is suitable not only for decorating the facade of a building, but also for interior decoration of room walls.
Pros and cons of finishing
Let us list the main advantages of such coatings:
- unlike bare stone walls, up close the surface looks very neat and even elegant;
- small thickness: the space of the premises does not decrease after finishing, because to obtain voluminous bricks a plaster layer of 10-30 cm is sufficient;
- minimum weight: it is much less than that of natural brickwork; Even old houses with wooden floor beams can be finished with such plaster;
- the ability to imitate any type of brick or stone;
- less work required than when laying brick walls;
- high strength of surfaces: when using high-quality mixtures, they do not crack or wear out;
- When using polymer-based coatings, the walls can be easily wiped or washed with a regular rag.
Flaws:
- the need for preliminary surface preparation: cleaning of old plaster and paint, as well as leveling;
- any textured surfaces collect dust faster, so such walls need periodic cleaning;
- the ability to work with solutions only at positive temperatures.
Tips and tricks before coating
Before you begin work on creating a decorative plaster coating, you should prepare. To do this, it is recommended to watch training videos, as well as prepare all the tools and materials in advance. For convenience, we recommend using our selection tips:
- For indoor use, you should choose an environmentally friendly composition.
- In buildings with high humidity, it is recommended to use moisture-resistant materials with antifungal coating.
- It is better to create a facade from mixtures with increased strength.
- It is better to choose a quality option, even if it is more expensive.
- The color scheme should fit harmoniously into the interior.
Using a spatula, brush or broom you can create texture on the bricks
Advantages of the method
The main advantage of this method of surface finishing is the ease of its implementation. This work can be done using special stencils, which significantly reduces labor costs. Cost is another plus, as plaster is quite cheap. This material has high environmental performance, so it will not harm the health of residents.
It is also worth saying that this finish has a small thickness, so you should not worry that the free area of the room will be greatly reduced. You can make an imitation of masonry yourself, without having special construction knowledge and skills.
Interesting: Getting rid of mold on the walls in the apartment
What tools will you need?
Any work begins with the preparation of tools and materials with which the room will be decorated. In this case, you will need to purchase the following set:
- A solution suitable for a specific type of wall to create an imitation of brickwork.
- A container for preparing the mixture, as well as a construction mixer for mixing the material.
- Several spatulas of various shapes and sizes for applying the material.
- To level the coating you will need a level.
- To create seams, prepare masking tape or string.
- If you want to add color, you should purchase color or paint.
Depending on the chosen method of work and type of material, the set of tools may differ slightly; select those tools that will be convenient for you to work with.
You can use brushes or rollers instead of a spatula, and use adhesive tape instead of tape. It is also worth providing yourself with personal protective equipment so as not to get dirty while decorating.
Creating a drawing
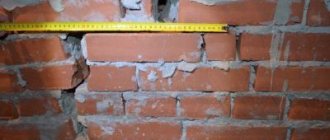
Before starting work, it is recommended to pay attention to the dimensions of real bricks. This will allow you to select the desired size of the picture. Beginners are advised to make simulated masonry according to the standard that has been established over the past few years.
You can use a ruler to draw a picture on the wall. In this case, the lines will be perfectly straight. If desired, you can draw free lines by hand. It is important to remember that this work is done before the plaster dries. It is recommended to draw lines gradually, applying them one by one to individual sections of the wall.
While drawing the lines, excess solution will form. It must be removed in time, otherwise the edges of the bricks will turn out uneven. After completing the work, you should wait a while for the plaster to dry.
To form a pattern, you can use masking tape or electrical tape. Its thickness should be 15 mm. Using electrical tape, you can make straight lines that imitate masonry.
The jumpers are glued to the lines with an overlap. Experienced craftsmen recommend leaving small tails along the edges so that the tape can be easily removed after the facing material has hardened. If you wish, you can simplify the work by purchasing a ready-made mesh that acts as a form.
Selecting a material to create an imitation
The range of materials for creating decorative coverings is limited only by the imagination of the residents, but there are several tips for choosing the right one. You can purchase a regular mixture or a composition with additional properties that increase the strength of the coating and its resistance to mechanical damage.
Bricks made from ordinary putty
The simplest version of the mixture from which an imitation of brick is created is ordinary acrylic putty in combination with sand. This composition will ensure the strength and good adhesion of the coating used. If desired, you can purchase a mixture based on silicate and silicone polymers, which provide antifungal properties and increased moisture resistance of the material.
Gypsum plaster bricks
If you want to create an imitation of white bricks, you should purchase a gypsum-based mixture. The key criterion for choosing a material in this case is good adhesion (adhesion strength to the surface), so you should not buy the cheapest version of the mixture. If desired, plaster can be painted in any color using a painter, and its structure can also be changed using a spatula and stencils.
Application of rusticated plaster
Previously, there was a fashion to decorate buildings with large stones in the form of masonry with rustications (seams between individual elements), but over time, such design lost its relevance. Now special types of rusticated plaster are used, which are applied to the facade of a building to create an imitation of stone or brick. At the same time, the wall seems more massive and majestic, so this design is suitable for large houses and large buildings.
Formation of individual bricks
While applying the mixture, you can do separate work with the bricks. If you want to give them a rough surface, then after spreading the putty you need to use a special texturing roller. You can also add roughness with a simple sponge.
If a high-quality stencil was used, then there will be no need to shape the bricks in any way. The masonry will form on its own when the template is peeled off. When using adhesive tape, certain disadvantages may arise. If somewhere you get a weak seam, you can refine it using a regular scraper.
Preparing the wall for work
In order for the decorative brick plaster to lay evenly on the wall, you should prepare the surface in advance; for this you need to perform the following manipulations:
- It is necessary to remove the old layer of coating, and you should completely get rid of wallpaper, paint and decorative elements.
- Using sandpaper you can clean the surface.
- To ensure that the future brick layer stays securely on the wall, the coating should be treated with a primer.
- A layer of plaster will hide some surface imperfections, but it is better to repair large chips and cracks before decorating.
Difficulties during the work process
Among the most difficult stages of work are:
- preparing the base for coating;
- drawing the boundaries of the seams of the future imitation;
- painting bricks.
Preparation can take quite a lot of time.
It is worth noting that if the base is level, the procedure will take place without any difficulties. Deep leveling of surfaces is required only for pronounced defects that are visible to the naked eye. Small irregularities and cracks do not need to be repaired, as they will be disguised by decorative elements.
The work can be done alone. The help of professional builders is necessary if the wall is in poor condition. To gain the necessary skills, it is recommended to practice, for example, on the balcony.
How to make a drawing of brickwork
There are several technologies and methods for creating imitation brickwork. The choice of the method used depends on the interior of the building, the design of the walls, as well as their strength. In addition, the creation of a pattern depends on what size (meaning the size of the bricks) you choose for decoration.
You can apply the material in any convenient way, but you should take into account the size of the masonry so that it matches the actual size of the bricks.
Wall marking
In order for the decoration to be successful, the wall is initially marked. For marking, a level or rule is used; with its help, lines parallel to the floor are drawn. After this, vertical lines are drawn. It is important to follow three rules:
- The brick size is 250 by 65 mm.
- The thickness of the seams between individual bricks is 10 mm.
- The bricks in the top layer should move relative to the bottom layer.
The final appearance of the wall and the similarity of the coating to real brick will depend on how correctly the markings are chosen. Various methods can be used to perform marking and application.
Imitating a wall, using masking tape to create a grid
The imitation brickwork is formed with ordinary masking tape; adhesive tape can also be used instead. Tape is applied to the pre-prepared wall along the marking lines. Then the coating is applied; it is enough to use a layer 4-6 mm thick. When the entire surface is covered with decorative plaster, you need to peel off the tape. At the places where it is attached there will be lines corresponding to the masonry seams.
Drawing seams with a scraper
A mesh that imitates seams from the joints of bricks is excellent when working with scrapers. To do this, you need to prepare the lines on the wall, check with a level that the lines are drawn correctly, and then apply the plaster to the wall. After this, use a scraper to remove part of the mortar in the places where the seams should be.
Using a stencil
For convenience, special stencils are used to imitate brickwork. Initially, a layer no more than 5 mm thick is applied to the wall. After this, the stencil is moistened with a small amount of water and applied to the wall. After a few seconds, the stencil is smoothly removed, after which the procedure is repeated (this time the stencil is deepened into the wall to create a grid). After removing the stencil, the finishing is done and the wall is covered with paint and varnish.
Formation of individual bricks
Brick plaster can be made by cutting bricks into the mixture:
- When using this method, it is necessary to apply the material evenly (5 mm thick) to the wall.
- A grid with markings should be placed on top of the applied mortar to form bricks.
- After the mixture has dried, use a narrow chisel or scraper to remove the material from the places where the seams should be.
- If desired, you can create bricks along the entire wall, or you can leave some areas intact to create the effect of unfinished brickwork.
- The material must be removed using a level to create an even mesh. Sandpaper is used to remove excess coating and smooth corners.
Using a special roller
The formation of a decorative pattern is easily carried out using a special roller. The material that is applied to the wall should be moistened with a small amount of water from a spray bottle before creating seams. In addition, each subsequent layer must be shifted relative to the previous level.
Making a roller at home + video
It is quite easy to make a roller for decorative plaster with your own hands; the manufacturing process consists of several simple steps:
- Remove the upper part (lining) from the roller, leaving only the main cylinder.
- The surface of the roller must be covered with a layer of sealant. After applying the sealant, use your fingers dipped in soapy water to remove any uneven surfaces.
- On top of the first layer, it is necessary to apply strips of sealant around the axis of the cylinder. One strip should be outlined in the middle and two more should be applied along the edges of the cylinder.
- Then between the resulting rings it is also necessary to draw lines of sealant. One line is drawn between the left and central rings along the axis, the other line is drawn diametrically opposite between the central and right rings.
- After the material has dried, the roller can be used for its intended purpose.
Marking
Before marking, you need to decide on the size of the brick and seams. Typically the size of the bricks is 65x250 mm and the seams between them are 10-15 mm wide. For quick marking, it is better to prepare a template from cardboard with outlined contours of the brick and seams. The marking must be done efficiently.
First, horizontal lines are drawn, then vertical ones. The width of the seams is determined by the purchased masking tape. Optimally it should be 10-15 mm.
After marking the wall surface, it is necessary to apply Knauf primer or any other deep penetration primer. You can use a paint roller for this purpose. The primer will not harm the marking in any way; the pencil will still be visible. After the soil has dried, you can begin sealing all seams with masking tape.
In this case, all horizontal seams are glued first, then vertical ones. How to paint a house made of foam blocks from the outside without plaster? Horizontal strips are glued so that the ends extend onto adjacent walls .
Which is better: heated floors or radiators?
Warm floorBatteries
And the vertical ones are glued on top of the horizontal strips of tape. How to properly paint an aluminum boat? After gluing the entire area, you can begin applying Rotband plaster.
Apply tape along the markings
Important note. On top, at the junction of the wall and ceiling, there should be a horizontal strip of tape, and all the brickwork is marked from it.
Finishing
At the final stage, the finishing of the walls is carried out, which consists of the following points:
- When the coating has dried, sand the edges of the bricks using sandpaper.
- Dust generated during sanding can be removed with a brush.
- After this, they begin to paint the coating, decorating is carried out in any way you like.
- An additional decoration that imitates real bricks can be the addition of chips and small cracks in the coating.
- The final stage of finishing is to coat the wall with varnish to increase the moisture resistance of the material.
Creating a brick wall using 3D plaster plates
There are quite a few offers on the Internet for the sale of ready-made gypsum plates that imitate brick. There are plates that cover a fairly large area, reaching up to 600... 800 sq.dm. But there are also offers for the sale of piece “bricks”. If you are pressed for time and have available funds, you can take advantage of such offers and buy finished products.
Gypsum mold for making a piece simulator of gypsum brick
However, most craftsmen want to make these imitation records themselves. For this purpose it is enough to purchase ready-made forms. They are made of silicone and have a small depth, approximately 20...25 mm.
To make your own set of plaster plates you will need plaster (alabaster) and a little patience. For each filling of the forms, you need to prepare your own portion of the solution. To work you will need:
- half a rubber ball, it is most convenient to dilute the gypsum solution in it. Then it’s easy to clean off the residue;
- a couple of spatulas for mixing the solution and placing it in molds;
- a place for drying panels, there will be quite a lot of them;
- container for water to make it more convenient to dose it when preparing the solution.
The work process is simple.
- The solution is mixed. Usually take two parts of gypsum to 1 part water (the amount is specified for a specific brand; the mixture should be similar to thick sour cream).
- The mold is wetted and excess water is removed. In the wetted form, the gypsum spreads evenly, and shells do not form.
- Within 3...4 minutes, fill the form with the solution. Level the surface as it will be glued to the wall.
- After 5...8 minutes (depending on the type of plaster), remove the finished plate and place it to dry.
- Remove any remaining plaster from the mold.
- Remove the remaining plaster from half the ball, then knead a new portion.
Attention! To improve the filling of the mold with the solution, it is recommended to use a vibrating table. As a last resort, lift the form several times and sharply lower it down.
Having produced the required number of plates, they are painted in the desired color. You can paint in different ways: with a brush, roller, dipping. Fill in the texture with a sponge. Here the scope for creativity is unlimited.
After the “bricks” dry, they are glued to the wall. It is best to use Liquid Nails assembly adhesive. Each element is glued individually. When the wall is ready, it is again treated with gypsum mortar. It is applied between the elements, and then the seams are unstitched. Here the builders have adopted the following sequence. First, embroider the horizontal seam, and then the vertical sections.
Wall finished with plaster plates
To imitate a seam, you can use white silicone. The spout of the tube is cut so that the diameter is approximately 1 cm. The mass is squeezed out. After polymerization, it will look like real joints filled with cement mortar.
Painting plaster bricks
The painting process is also a creative process, but there is a certain algorithm of actions:
- Initially, you need to cover the entire wall with one continuous layer of paint.
- After the first layer has dried, use a brush to paint the bricks separately. Using a thin brush, draw the seams between the artificial masonry bricks. To make the applied mixture more reminiscent of brick, it is worth using red shades; in addition, you can create differences in color between decorative elements.
- At the final stage, a varnish to fix and increase the moisture resistance of the coating is applied over the final layer of paint.
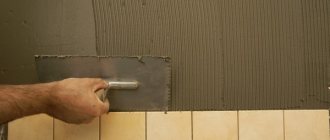
Preparing the base
If the base is level, and in the future it is planned to apply a thin layer of putty, then the first step should be a thorough primer. Due to this, it is possible to increase the adhesion (cohesion) of the layers. This way the putty will adhere much better. Priming is carried out in several layers.
The primer is applied with a roller
To level a very crooked concrete wall, plaster will be required. Typically, alignment is performed using beacons. The plaster dries within a few days. After preparing the rough surface, priming and marking are performed.
How much will decoration cost?
If you want to make a decoration with imitation brickwork with your own hands, you will probably be interested to know about the cost of this idea.
Since the main cost will be plaster, you should calculate the approximate cost of the material that will be needed to cover the wall. The average cost of a pack weighing 30 kg is 400-500 rubles (good quality material), while the consumption will be approximately 5 kg per 1 square meter. In this case, it is easy to calculate the cost of purchasing the material. Additionally, it is worth adding the cost of purchasing other materials and tools (roller, spatula, tape...).
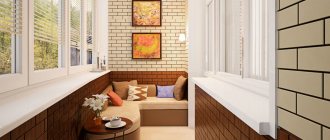
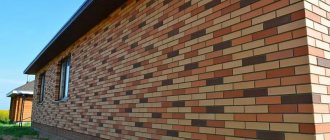
Brickwork in a modern interior
The pattern created by using decorative bricks fits harmoniously into almost any interior. Decorative brick will decorate the design of the kitchen and living room, creating a cozy and unusual atmosphere of warmth in the house. For clarity, we suggest looking at photos of successful wall decoration options.
Tyutyunnikov Dmitry
Article verified by a decorative finishing specialist
Interior brick: color options
Most often, brickwork and its imitation in natural shades are used in the interior, but since this material is easy to paint, more unusual options are also found. As a rule, the following colors are used in decor:
A combination of several types of bricks in the living room interior
- red (from almost orange to dark burgundy) - a natural shade of untreated baked clay, the most popular option;
Red brick wall in the interior of an apartment
Red clay bricks for wall decoration
- white (both natural and dyed) is a universal color that is appropriate in almost any style;
White brickwork in the bedroom interior
White brick in the interior of the kitchen-living room
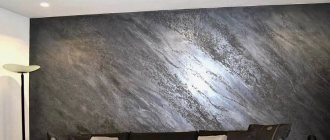
- gray (from light smoky to dark graphite) is a popular solution in modern, laconic interiors;
Light gray decorative brickwork
Decorative gray brick wall in the interior
- black - often found in loft rooms made in dark colors;
Black brick wall as the main accent of the room
Black brickwork in the interior
- creative shades (blue, green, yellow) - used in doses as a bright accent.
Blue brick wall in the kitchen interior
Green painted brick wall in a room interior
Brick and some materials that imitate it (plaster, flexible tiles) are easy to paint, but it is almost impossible to remove the paint from it: changing the shade can only be done by applying a new color coating over the old one.
Yellow brickwork in the bedroom design