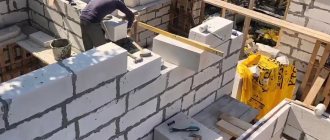
Tile is an environmentally friendly material with many other advantages, and its demand for home decoration is consistently high. Since a wide variety of tiles have been available to consumers for decades, many home craftsmen have learned to do without the services of professionals and lay them decently on their own.
For those who are just mastering this popular cladding method, let's look at how to correctly select the thickness of the adhesive layer when laying tiles.
What determines the thickness of the glue layer?
Adhesives used today for laying ceramic tiles are divided into 4 groups based on their composition: cement, dispersion, polyurethane (one- and two-component) and epoxy.
There are many manufacturers of such adhesive mixtures, and even more types of mixtures, so each package contains instructions containing, among other things, recommendations on the minimum and maximum thicknesses of the layer used. The presence of these boundaries suggests that the layer can be varied, and to what extent depends on the range of thicknesses.
In this case, the thickness of the adhesive layer from the range recommended by the manufacturer is selected taking into account the following factors:
- tile characteristics - format, thickness, weight, density, ceramic composition;
- place of flooring (floor, wall);
- properties of the base being coated - degree of evenness and relief, porosity.
In addition to those listed, there is also a human factor, which is relevant when the performer is insufficiently qualified. Such a master can choose the layer thickness at which he can lay the tiles best.
Minimum and maximum values
With the correct layer thickness, good adhesion of the adhesive mixture to the base occurs. Insufficient and excessive volume of the mixture leads to a number of problems when facing: the layer may not dry well, crack or delaminate. It happens that after some time the facing material completely moves away from the base.
The maximum thickness of the adhesive when finishing the floor is 1.5 cm. It is recommended to apply no more than 1 cm to the walls. A thicker application can lead to an unpredictable result and defects over the entire area of the cladding.
The maximum cannot be exceeded due to a decrease in the degree of adhesion of the solution. This is due to the increase in his weight. With a large layer thickness, severe shrinkage occurs. Because of this, the tile may burst.
The minimum adhesive layer for small tiles is about 1.5-2 mm, and for large-format tiles - 4-5 mm. It is not recommended to apply a smaller volume of solution, because there will be no adhesion of the tiles to the base.
The calculation of the required amount of composition should be made based on its layer. To do this, the consumption per 1 mm is multiplied by the thickness of the solution. And all the necessary information on applying the glue can be found on its packaging.
Place the tiles on a layer of adhesive of the correct thickness
For adhesives of all groups except the first, the recommended layer thicknesses are measured in several millimeters, so the substrates to be finished must be fairly even - level differences, depending on the type of adhesive mixture, should not exceed 2-3 mm. The instructions for such compounds indicate the method of applying the mixture, and, if it is a notched trowel, there is its number or the size of the teeth. For example, when gluing tiles thicker than 3 mm with Ceresit R 710 two-component polyurethane adhesive, “combs” B1, B2, B3 or C1 are used, and for laying smooth sheets of rubber or PVC thinner than 3 mm, A2 is used.
The table will help to convert the letter designations into tooth sizes when choosing a spatula for such relatively liquid compositions:
The most expensive and rarely used adhesives for laying tiles are epoxy - two-component compositions for indoor and outdoor use, requiring the performer to have skills in working with them. The exclusive advantages of these mixtures are super strength, high adhesion even to complex substrates (metal, plastic, glass, glaze, wood), waterproofness of the layer, resistance to vibration, lack of shrinkage and cracking.
When gluing tiles, such compounds are also applied in a layer of several millimeters. Theoretically, they are also suitable for preliminary leveling of the base, for example, a horizontal surface by pouring, but the use of epoxy mixtures for this purpose does not allow their high cost - only a sticker of 1 sq. m. tiles cost 1-1.5 thousand rubles, sometimes this is higher than the cost of tiles.
Laying with dispersion adhesives is half as expensive, but still sensitive - 600-800 rubles. per 1 sq. m. The rather high price of such adhesives is due to their high flexibility after curing, which makes it possible to tile non-static, sagging surfaces - chipboard, plywood, gypsum board, gypsum fiber board.
Dispersion compounds are sold ready-to-use and are produced in 2 types at the place of application: for interior use and universal. The compositions have proven themselves well on painted surfaces, as they have thixotropic properties - they do not allow freshly laid tiles to slide off the wall, and they set quickly. They are not recommended for use on porous stone substrates - plaster made from DSP mortar, concrete, brick.
Using dispersion adhesives, it is impossible to exceed the layer thickness recommended by the manufacturer even if you want to - their consistency is such that the excess composition will be squeezed out from under the tile when it is pressed to the base. When laying tiles on such a compound, it is important not to underestimate the thickness of the layer - not to make it less than the recommended minimum.
Correct layer thickness of cementitious tile adhesives
Today, in 95% of cases, ceramic tiles are laid on cement-based dry adhesive mixtures specially designed for tiles. Given the very decent quality of these compounds, their use costs only 60-90 rubles. per 1 sq. m. tiles, which is 10 times cheaper than using dispersed mixtures, and 20 times cheaper than using epoxy mixtures.
The range of recommended thicknesses for most cement adhesives is several centimeters - this is what makes it possible to choose the optimal value for the existing situation, but you have to choose it yourself.
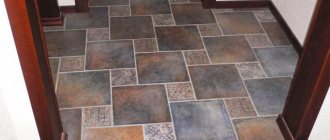
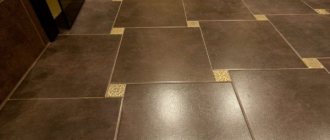
Dependence of the adhesive layer on the tile format
GOST 13996-2019 “Ceramic Tiles” states that the thickness of ceramic tiles is “determined by the manufacturer.” This material is available on the market in thicknesses from 0.3 to 2.5 cm. The 3 mm cladding is a recent development, kerlite, that is, large-format porcelain stoneware, the cutting of which is possible only with water-abrasive equipment.
Floor tiles always experience more loads than wall cladding, so the thickness of floor tiles should not be less than 8 mm. As a rule, this is quite heavy, hard, high-density ceramics - monocottura, metlakh tiles, porcelain stoneware, clinker, cotto, natural and artificial stone. Knowing this, craftsmen use not the weight, but the dimensions of the tile to determine the thickness of the adhesive layer, making small adjustments depending on the type of ceramic and the characteristics of the base. When using cement mixtures, such a correction is 1-3 mm upward; for an uneven floor, increasing the thickness by the same amount will not be critical.
Depending on the size of the tile, the layer of cement adhesive should be as follows:
- for tiles with a side up to 10 cm - 2-3 mm;
- 10-15 cm – 3-4 mm;
- 15-25 cm – 4-6 mm;
- 25-30 cm – 6-8 mm;
- from 40 cm – 8-10 mm.
What else affects the thickness of the tile adhesive layer?
1. When finishing vertical surfaces, apply as little adhesive as possible to the tiles - firstly, to reduce the load on the base, and secondly, to prevent the tiles from slipping before the compound sets. With floor covering the situation is simpler - a few millimeters to the optimal thickness of the mortar layer is not critical.
2. How thick the glue layer will be depends on the presence of level differences on the surface to be finished. To take this into account, the value of the maximum difference is added to the minimum thickness of the solution layer, otherwise the most protruding section will not be able to be brought into a common plane. This applies to both floors and walls.
3. In addition to uneven ones, there are also raised bases, for example, low-quality brickwork with many protruding fragments. Individual large protrusions are cut down, and the rest of the relief has to be taken into account in the thickness of the tile adhesive.
4. The thickness of the adhesive layer is increased not only to level the base, but also vice versa - when it is necessary to make a slope on the floor, or to join a new coating with the existing one without forming a threshold. It should be taken into account that on a large area, instead of a significant increase in the thickness of the tile adhesive, it is better to make a rough screed from the DSP solution - this will cost much less.
5. Heavy tiles - porcelain stoneware, brooms, natural stone are laid on a thicker layer of mortar than terracotta. In turn, it should be taken into account that bicottura and monoporosa are more porous types of terracotta than monocottura. Since the porous base of the tile absorbs part of the dissolved binder, the layer of adhesive on such a tile is made a little larger, especially if the flooring is done the old fashioned way - using a DSP solution, when the tile is even soaked with this in mind. It is necessary to take into account the porosity of not only the cladding, but also the base.
6. It is not uncommon for tiles purchased at a low price to have geometry defects - convex, concave, or “propeller-shaped”. In such cases, in order for the tile to be glued to the base with its entire surface, the layer of the adhesive mixture also has to be increased.
7. Spreading the adhesive with rectangular and V-shaped spatulas after pressing the tiles to the base gives different results. With the second option, the tile sits lower, so the thickness of the adhesive layer when working with such a spatula must first be tested.
Maximum thickness for applying tile adhesive: 10 mm for walls, 20 mm for floors.
Type of base used
Each type of tile adhesive is designed for specific types of substrates. To accurately find out the area of use of a particular solution and the rate of its consumption, you should carefully study the operating instructions.
- If it is necessary to cover plasterboard with facing tiles, the layer of adhesive substance should be no more than five millimeters thick.
- If medium format tiles are placed on such a base, then the glue should have a thickness of 3 to 4 mm.
- If the master is dealing with concrete, plaster or screed, then more glue can be applied.
It is worth keeping in mind that for cladding walls and floors it is necessary to spend different amounts of the mixture. For the floor, use less glue, otherwise the tile will quickly separate from the base surface.
Briefly about the main thing
Before purchasing ceramic tiles, you need to calculate the required amount of material so that it is enough for the entire area of the room. This can be done in two ways: manually and using an online calculator.
The amount of ceramics required for renovation is influenced by the area of the room, the dimensions of the doors, windows and bathroom, the type of installation, the number of colors of the finishing material and other factors.
To calculate floor tiles, 5 methods are used: methods based on the area of the room and the number of rows, counting when laying diagonally and the piece method, combined calculation.
If you do not want to carry out the calculations yourself, when purchasing material, you can contact the store manager. It will help you calculate the required amount of materials for the room. To do this, you will need to first take measurements of the room.
How to choose porcelain tiles for the floor by thickness
Porcelain stoneware with a thickness of 8–10 mm is suitable for residential premises. For the bathroom and toilet, choose 8 mm thick slabs, because they contain little heavy furniture and a low risk of falling solid heavy objects. For the kitchen, corridor, hallways and living rooms, choose porcelain tiles with a thickness of 10 mm. It will withstand the fall of a frying pan and static pressure from furniture on legs.
For shops and places with high traffic, choose porcelain stoneware slabs with a thickness of 10–12 mm. For shopping centers, business centers and office buildings, 10 mm slabs will be sufficient. They will withstand even if several thousand people a day pass through them and the pressure of not too heavy racks of goods or office furniture. For construction stores, car showrooms and hypermarkets with a large number of goods on shelves, choose 12 mm thick porcelain tiles.
For industrial and warehouse premises, choose porcelain tiles for the floor with a thickness of 10–14 mm. Such tiles are suitable for warehouses with high and heavy shelving, car showrooms, carpentry workshops, and service stations.
The cost of porcelain stoneware per square meter depends on its thickness, so we do not recommend choosing excessively thick slabs for rooms with a small load on the coating. Since the thinner the porcelain tile, the less its weight, you will save not only on the purchase of material, but also on its delivery.
Materials to perform the necessary work
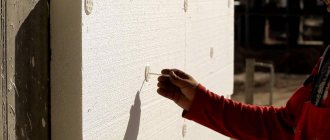
Most often, plasterboard is used in construction for the purpose of constructing lightweight partitions, false walls, fitting niches for various purposes, and for installing arches and other openings of complex shapes. The choice of the type of plasterboard sheets depends on where exactly these structures are located and in what conditions they will be used.
It could be:
- GKL - ordinary plasterboard sheet, can be used in residential or office premises where there is no excess humidity;
- GKLO is a fire-resistant sheet, often used in industrial premises without excess humidity, but with a high risk of fire;
- GKLV is a waterproof plasterboard, mainly used in rooms with high humidity, such as a bathroom, toilet or kitchen.
Therefore, before buying sheets, decide where exactly they will be used. If they are intended for leveling walls in a damp room or creating niches where water pipes are located, then it is worth purchasing gypsum boards as the most moisture-resistant material. These sheets are usually green in color, so it's hard to go wrong.
Drywall is usually attached to a frame made of wooden blocks or special profiles. If we are talking about a damp room, then only a steel profile should be used as a frame, since wood, even specially treated, can quickly deteriorate in the presence of moisture.
Any tile can be used for cladding structures, but it is desirable that it meets two conditions: it is not too large - preferably no more than 30 * 30 cm, this will optimally distribute the load on the plasterboard base; and it was not too thick, and therefore heavy - after all, gypsum board cannot be compared in strength to a full-fledged wall or partition.
The layers must be mounted so that the seams in them do not coincide.
To increase the load-bearing capacity of a structure of a more or less large area, the distance between the frame posts must be reduced from the usual 600 mm to 400 or even less. You can also use not only vertical posts in the frame, but also omit horizontal elements, especially if the weight of the cladding is quite impressive. All these measures will make the partition more powerful and will allow the weight of the tiles to be better distributed over its surface.
As for tile adhesive, the following options are possible:
- Special adhesive for plasterboard cladding is the best option, especially if work needs to be done on a large surface.
- Regular cement-based tile adhesive can be used for small amounts of work, but it is better to choose a mixture with increased elasticity.
- Putty also provides good adhesion between tiles and drywall. But for wet rooms you should use only moisture-resistant acrylic or cement putties.
- Bustilate is rarely used for such purposes, since it flows strongly and shrinks strongly, which does not allow it to compensate for unevenness of the base. But in this case it can be considered, since the base has a smooth surface and there is no need to fill in uneven areas.
- Liquid nails are not suitable for use in large volumes - they are too expensive. Most often used for gluing individual cladding elements.
Reasons for use
First, the glue is applied to the tile or wall with a regular spatula, and then the excess is removed with a comb. This allows you to leave a certain amount of glue on the surface, which will be evenly distributed. After pressing the tile, the glue will be evenly distributed and fill the entire space. It is quite reliable enough to avoid getting holes when the pan falls, but the enamel will most likely get chipped.
This achieves:
- Quality of installation. Since the layer of glue will be the same, the tile will automatically lie flat (if you have a flat base).
- Speed of work. There will be no need to squeeze out or remove excess glue.
- Connection strength. If there is an excess, it gets worse.
- Economical. The amount of glue recommended by the manufacturer will be applied, and there will be no need to overpay for overuse.
It is more convenient to work with a toothed comb with a handle in which two sides are serrated and the other two are smooth. You don't have to constantly change between a regular spatula and a serrated one.
Calculation of the required quantity
In order to determine the thickness of tile adhesive, for example, for porcelain tiles and the mass of the required mixture, it is necessary, based on the available data, to make calculations in several stages:
- Determine the dimensions of your tile and select the appropriate mortar thickness for it, taking into account the quality of the surface being tiled.
- The pack with the mixture for the solution should indicate how many kilograms of material are used per 1 square meter with a layer thickness of 1 millimeter.
- Multiply these two numbers and you will get an intermediate result - how much mixture is needed to cover 1 square meter of area.
- Then calculate the total dimensions of the area to be covered.
- Multiply the first result by the total number of square meters.
- In order for you to always have a supply of mixture in case of an error in calculations or force majeure during the installation process, multiply the last result by 1.1. Thus, you will add 10 reserve percent to the calculated amount of the mixture.
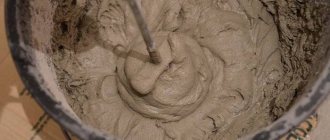
Solution
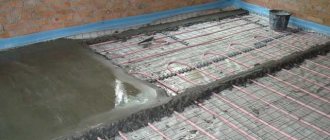
For external tiling work in the cold season, weber.vetonit ultra fix winter adhesive should be used. Work can be carried out at temperatures down to -10 ° C. Before use, the dry mixture, facing materials and base must have a temperature above 0 °C, the water for preparing the solution must be 7–20 °C. Do not use hot water (t≥35 °C)
Make sure that the base is not icy, frosted or covered with snow. Clean it from dust, dirt, old paint or plaster. Do not carry out work in strong wind, snow or rain.
Pour 5 liters of clean water into a container and add 25 kg of weber-vetonit ultra fix winter. Stir, leave for 5 minutes. and mix again. If the mixture thickens quickly, stir periodically with a trowel or spatula. Do not add water to the prepared solution
Apply the adhesive to the base with the even edge of a trowel, and then level it with a notched trowel, the larger the tile, the larger the tile. When working on the facade, it is recommended to use double coating: apply glue both to the entire surface of the back side of the tile and to the base.
Leave a gap between the tiles to compensate for linear deformations of at least 2 mm. The glue should not fill the seam more than halfway.
When steady heat sets in, grout the joints.
Notched trowel: how to choose the right comb for laying tiles
You can often hear questions from people who are not familiar with facing work about the advisability of using a comb when laying. Like, you can spread it with a regular layer, it will be even better, because the contact area will increase. This article will discuss the need to use and select a notched trowel for tiles.
Quick navigation through the article