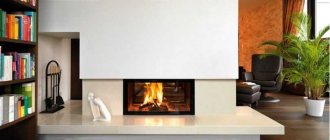
Do you want to line the partitions in your apartment with plasterboard, but it’s a pity to lose precious centimeters that are already missing? Install drywall on unframed walls. This method is even simpler - you don’t have to bother with installing the profile. It will save space and create equally ideal surfaces. Even without extensive experience in repairs, you can cope with this task on your own.
Advantages of leveling gypsum board walls without a frame
This method of installing a gypsum board sheet:
- Economical in materials.
- Takes less time.
- Produces less debris and dirt.
- Installation and finishing are completely done by yourself, so you can feel like a pro.
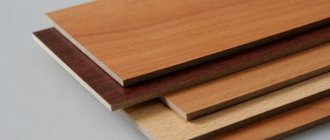
Using gypsum board (plasterboard sheet) you can level any wall: brick, concrete, wood.
To install gypsum board sheets on the wall, you need to purchase special adhesives. The most popular of them are the Knauf and Volma mixtures. You can also mix gypsum putty with a small amount of PVA glue.
The essence of the frameless method of fastening a gypsum board sheet
Installation of drywall on walls without a frame is carried out using a special compound. They glue the sheet onto the base surface. The joints are puttied and reinforced with tape. After priming, the wall is ready for finishing - wallpaper, decorative panels are glued to it, or painting is done at your discretion.
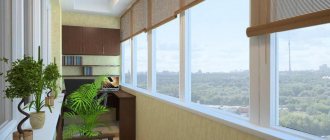
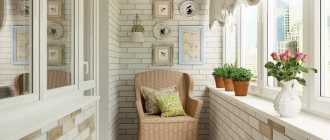
Since the sheets themselves are small in thickness, the overall area of the room is almost not affected. They are convenient to use when leveling the walls of small rooms: bathroom, storage room, loggia, and in other places where every centimeter of space is important.
Painting works
Gypsum craton wall cladding without a frame is suitable for any necessary finishing work.
©Gipsokart.ru.
Other articles in the section: Plasterboard structures
- Architectural terms
- Types of wall cladding on a metal frame
- Soundproofing tape
- How to cover a curved wall with plasterboard
- How to connect drywall profiles
- Frame made of metal profiles for plasterboard
- Plasterboard structures in wet areas
Preparing walls for gluing plasterboard sheets
Before you begin installing drywall without a frame, you need to clean the wall of the old finish.
- It is easier to remove wallpaper with a spatula, after wetting it with water using a sponge or spray bottle. An excellent soaking effect is obtained when using a steam generator.
It is difficult to remove paint from a concrete wall, but it is necessary, otherwise the composition for gluing gypsum boards will either not stick to it or will tear it off from the base. As a result, the sheet will not hold.
- Old plaster is tapped to detect hidden delaminations. Remove damaged and suspicious parts to a solid base.
USEFUL INFORMATION: Floating plasterboard ceiling with lighting: design options (9 photos)
If the layer of plaster is thick over the entire wall, it makes sense to remove it entirely using a hammer drill or a hammer and chisel. This will help save additional centimeters of usable space.
Interaction of fire-resistant drywall with open fire
The material in question belongs to the non-combustible category (G1) - i.e. it does not spread fire and does not support combustion. The main property is the fire resistance limit of drywall - this indicator may differ for sheets from different manufacturers, but is usually within 45-60 minutes. This means that for a specified period of time the product can withstand continuous exposure to an open flame, after which it will begin to collapse. But in practice, everything depends on the intensity of the fire and other factors.
Photo 8. GKLO test to resist open fire
At the same time, keep in mind that the cardboard shell will burn under the influence of an open flame in any case, and the gypsum core will crack, but this will happen much later than in the case of conventional plasterboard. The following video shows the actual fire resistance test result of standard (not heat-resistant) drywall - even it can withstand 20 minutes of continuous flame exposure before breaking:
The only thing that can be said with certainty is that for 45 minutes after the start of a fire, fire-resistant gypsum board will maintain its integrity and load-bearing capacity, and therefore will not allow the fire to spread to other building structures.
Photo 9. Use of fire-resistant gypsum board in finishing
Additional wall treatment
Proper wall treatment before attaching drywall sheets to an unframed wall is extremely important.
- Inspect the wall itself - repair cracks, fill in holes from old communications, and apply mortar to the places where large pieces of plaster have fallen out.
- If necessary, make recesses for sockets, switches and wiring. Wires and junction boxes must be installed.
The latest generation of wire insulation means you don’t have to pack them in fireproof corrugation, so you just need to attach them to the wall with clamps.
- Remove debris, use a brush or vacuum cleaner to collect dust from the walls and floor.
- To ensure that the glue adheres firmly to the surface of the wall, it is primed evenly. In areas with fresh plaster, the primer is absorbed more strongly, so here it is applied in two or even three layers.
When installed under the gypsum board sheets, a poorly ventilated air gap remains. In rooms with high humidity, optimal conditions are created for the development of various types of rot and fungus. Treating the base wall with an antiseptic will help avoid this danger.
- Since the gypsum board sheet has large dimensions (2500 x 1200 mm), clear a suitable flat area on the floor for working with it.
GCR can be installed only when the wall is completely dry, after all the procedures have been carried out.
Questions and answers
Is it possible to put a layer of mineral wool under a sheet of drywall if I plan to install it on foam?
Mineral wool is usually laid during frame installation, as it has a certain thickness. When using foam fixation, it will be impossible to achieve perfect adhesion of the sheet to the wall.
Is it possible to use gypsum putty as an adhesive base? Their compositions are almost the same, but the prices vary so much
It is not recommended to use putty, much less replace the adhesive composition with it. This is due to a number of reasons that will negatively affect the operation of the wall in the future.
I have an almost flat wall, but it’s covered in paint, and I don’t want to remove it. Is it possible to install drywall with self-tapping screws?
It is possible, but only if the wall is dry and there will be no dampness under the sheet of drywall.
Technology of frameless installation of plasterboard sheets
Before gluing drywall to the wall, you need to set the general level. Using the installation rule and a plumb line, vertical surface deviations are measured. The length of the wall alignment line is marked on the floor and ceiling.
A sheet of gypsum board is cut out onto the entire wall at once. To reduce the amount of work, it is better to buy sheets the height of the room or larger. Then you won’t have to adjust and putty the horizontal joints.
USEFUL INFORMATION: Selection of colors in the interior of the apartment
GCR can be attached to walls in two ways.
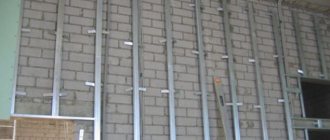
Stand made of two profiles
The simplest method of strengthening a plasterboard partition is to make a frame from reinforced rack profiles, but very often this cannot be used due to the fact that the structure will be too bulky and massive, and the apartment may not be very large in any case. The use of a reinforced profile, the width of which is 100 mm, will increase the gap between the real wall and the false wall or, if it is a partition, significantly increase its thickness. This will affect the area of the room. Therefore, in small rooms and apartments it would be advisable to use another method - creating a rack from two profiles. Two profiles will withstand a greater load than one. They are connected to each other with self-tapping screws, the distance between the screws is 150-200 mm.
This method is not very common, since the profile is not intended for such work, and the design is not so practical, but it is quite suitable as one of the options.
Attaching the sheet with glue
The fastening technology will differ slightly depending on the degree of curvature of the walls.
If the differences on the wall are less than 4 mm, then the adhesive composition is evenly applied to the perimeter of the gypsum board sheet using a notched trowel. The sheet is placed in the chosen place, pressed and leveled by applying a rule to the surface and tapping it with a rubber hammer, not forgetting to check with a building level.
Important! The adhesive solution sets quickly. Find out experimentally what volume needs to be diluted in order to have time to produce it in one go.
A wall with a level difference of up to 2 cm will require thicker glue. It is applied to the surface of a sheet of drywall in cakes about 5 cm high at a distance of 30 cm from each other. Installation is carried out similarly to the method described above.
If the wall has differences of 4 cm or more, additional work remains. In the recesses it is necessary to glue additional beacons from gypsum board scraps. There is another method: fill the desired area with polyurethane foam, and after it dries, cut it at a general level.
Subsequently, the adhesive composition is applied to the dried beacons and directly to the wall. The sheet is pressed against the glue and aligned in all directions.
Important points
Next, I will talk about those little things on which you can “stumble” and ruin your work.
- How to cut drywall
- Mark the sheet.
- Place a ruler on the marked line, as in the photo below (you can take a rule or a level) and cut several times with a sharp knife. Your task is to cut the paper shirt and go a little deeper into the plaster.
- Place the sheet on the edge of the table and press lightly; it should break along the cut line.
- Lift the sheet, bend it slightly along the break line and cut the paper shirt from the back with a knife.
Step-by-step instructions on how to cut drywall
- To install the cladding, it is advisable to use specialized adhesive for gypsum boards, for example Perlfix from Knauf. Theoretically, it can be glued to ordinary plaster, but when it hardens, it shrinks, and accordingly the plane will move in a wave.
- The average glue consumption is about 5 kg per 1 m2, about 15 kg per sheet.
- Below, along the baseboard, you need to form a continuous bead of construction adhesive, this will make it easier to attach the baseboard later and less likely to break the sheet.
- When installing gypsum boards on self-tapping screws or beacons, glue beads can be thrown both onto the wall and onto the sheet itself, but the work is easier if you throw the composition on the wall.
- Do not mix a lot of glue, remember that the active life of the composition is about 30 minutes, then it hardens and it will not be possible to soak it by adding water.
- When sealing seams, use a professional finishing putty. There are many options, the most famous are Fugenfüller, ABS, Eurogips. Regular plaster shrinks, after which the groove will have to be puttied again.
- Any drywall at the finish MUST be puttied over the entire area . If you paste wallpaper or paint the bare gypsum board shirt, then during the next repair this coating will be removed along with the shirt, resulting in a one-time repair.
- I have seen advice to use polyurethane foam instead of construction glue; an amateur should not do this; when it hardens, the foam will expand and tear the cladding.
Scheme for plastering plasterboard walls
Fastening the sheet to the wall using polyurethane foam
Covering walls with this method is more labor-intensive, but it will provide greater reliability of fastening, regardless of the curvature of the surface.
- The gypsum board sheet is pressed against the wall. In its corners, and in another 4–6 places, holes are drilled in the wall, making marks. The sheet is moved to the side, and the resulting marks are drilled out and dowels driven into them.
- On the sheet, stepping back from the holes by 10–15 centimeters, glue pieces of the shock absorber (foam rubber, foam rubber). This distance is necessary for free expansion of the foam. The thickness of the sponge depends on the differences on the wall. Ideally they should be the same.
- The sheet is placed against the wall. Screws with wide heads or an attached washer are screwed into the dowels. They also regulate the level, creating a flat surface. The remaining sheets are installed in the same way.
- After checking the rule, a hole is drilled near each self-tapping screw. The tube for pumping polyurethane foam should fit into it without effort. Foam is pumped into the cavity through the hole. It should form a cushion between the wall and the sheet. The amount of foam is determined experimentally in advance. After the foam has hardened, the screws are removed.
USEFUL INFORMATION: Is it necessary to prime the walls before puttying?
Regardless of how the gypsum boards were attached, the holes and joints are filled with putty. After drying, all roughness is smoothed out with sandpaper, bringing the wall to perfect condition.
Take your time to start decorating the wall with decorative materials. The adhesive base sets quickly, but it will take at least a day to dry completely.
A few words about safety precautions
Working with gypsum boards generates quite a lot of dust. Inhaling it will not add health to anyone, so it is better to protect yourself with a respirator. You should also ensure that dust does not penetrate into living spaces by curtaining the openings with a damp cloth.
As you can see, gluing drywall to a wall with your own hands is not such a difficult task. To do this, it is not necessary to invite a specialist of the appropriate profile. Just be patient and have a little experience, and you will succeed.