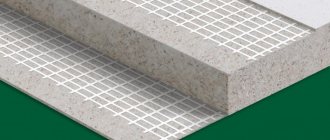
Drywall sheets are one of the most versatile materials. It will be an excellent option for decorating the ceiling in a room. Many people refuse plasterboard in favor of a suspended ceiling due to the fact that the frame is considered necessary. In fact, modern technologies make it possible to perform installation without a frame. A plasterboard ceiling looks aesthetically pleasing and extraordinary, allowing you to create a beautiful interior design. How to attach plasterboard to a ceiling without a frame can be found in this article.
Pros and cons of technology
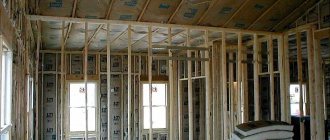
Metal or wooden sheathing facilitates the installation of building and finishing materials on a horizontal surface. Leveling ceilings using gypsum boards is painless for spaces whose walls are higher than 2.6 m. In small-sized housing, the parameters often do not exceed 2.5 m. After installing drywall on the box, the room becomes uncomfortable and cramped.
Frameless technology is a suitable option for tiny rooms. GKL is not attached to the sheathing, but directly to the ceiling. This design takes up no more than 2 cm of usable space overhead. The height will drop by the thickness of the construction and finishing sheet and fasteners (screws, mortar). After installation, the surface is covered with putty, painted or wallpaper is glued.
How to avoid cracks
There is a time-tested method to almost completely eliminate the possibility of such defects.
Its essence lies in changing the design of the frame base. If you do everything exactly according to the instructions, then most likely you will be able to avoid deformation of the ceiling covering.
The structure itself will remain almost the same, but some changes will allow the entire assembled ceiling to move slightly relative to the existing ceiling, which ensures the safety of the outer covering.
This mobility appears due to the fact that in a wooden house, the frame of the future ceiling is not attached to the walls. This cannot be done. It is the rigid fixation on the walls that causes the entire structure to “walk,” which causes cracks to form.
Preparatory work
Before gluing drywall to the ceiling, you need to carefully prepare the space. If you fix construction and finishing sheets onto an old surface with glue, the base will not last long. The solution quickly becomes covered with cracks, which destroy the composition. Over time, parts will begin to sag or fall off.
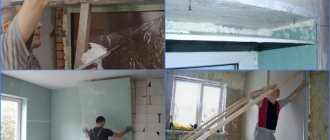
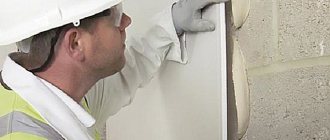
The surface is cleaned of old finishes, peelings and dust. The gaps, cracks and joints between the slabs are carefully puttied and leveled. Rotten boards in wooden structures are removed, and all material is coated with an antiseptic. If there are fungal (mold) lesions, the space will have to be treated with antimicrobial impregnation.
Ceiling cleaning Source akvilon.ua
If the concrete coating is too smooth, then additional notches are made at the points of contact. A slight roughness will ensure a tight fit between the drywall and the partition. Priming is a mandatory procedure that enhances the adhesion of dissimilar materials. When working with gypsum plasterboard, the ceiling is coated twice with the base solution. There is a drying period between each layer, otherwise everything will come off.
During installation, you need both whole sheets of drywall and small parts. Construction and finishing raw materials are marked with a pencil and cut into pieces. The procedure is easier to carry out using a hacksaw for metal with rare teeth. The material is broken, the edges are smoothed with sandpaper or a grinding machine.
Preparatory procedures Source mrgipsokarton.ru
Markings are applied to the walls of the room. During work, be sure to take into account the thickness of the sheet and the height of the ceiling. It is more convenient to start the process from the bottom corner on the floor. Correctly check with a water level or horizontal level. To control deviations in the partition, we recommend tightening the twine. Thanks to the rope, any distortion is immediately noticeable.
Possible problems when attaching drywall to a ceiling without a frame
Despite the apparent simplicity of frameless fastening of drywall, this technique has its pitfalls.
So, during your work you may encounter the following problems:
- If the base is poorly prepared, the coating may fall off over time. This will happen if the old coating has not been completely removed, the surface is not primed, or the wrong adhesive is used.
- The same can happen if, during the setting of the adhesive mixture, additional support for the sheet from below was not provided.
- When fixing with self-tapping screws, carefully select the length of the fasteners. Consider the thickness of the sheet, the possible gap between the surfaces and the depth of screwing into the concrete. Do not bury the fastener heads into the sheet.
As you can see, frameless plasterboard covering is a fairly simple technique that will ensure you level the surface and maintain the height of the room. It is only important to follow the installation rules in order to obtain a high-quality and durable coating.
Installation methods
When installing construction and finishing sheets, they adhere to the requirements of the technology they chose. There are 4 ways to attach drywall to a ceiling without a frame. The choice of method often depends on the characteristics of the base, the size of the room and the qualifications of the performer.
For mastic
The technology involves gluing gypsum boards to the ceiling using a special compound. Installation does not require lathing, so the procedure is much faster than with the frame method. The only requirement is to carefully prepare the work surface.
The mortar for gypsum plasterboard consists of paste, lime and alabaster. Sometimes on sale you can find substances based on slow-drying putty and PVA. Homemade options are created from:
- swollen bone glue;
- gypsum;
- clean liquid.
Pour the dry ingredients into a container, add cold water and stir thoroughly, removing air bubbles. The finished mass should resemble plaster in consistency. The mastic is applied along the perimeter of the drywall in a wide strip (10 cm). Large portions are placed in the center of the sheet, leaving a space of 30 cm between them.
Fastening with screws and mounting foam - option two
You can install a plasterboard ceiling without a frame on the surface using screws and polyurethane foam. As an alternative to mastic, these fastening elements will seem to many to be a more reliable option.
Just as in the first case, they begin the process by preparing the ceiling. To do this, it is cleaned of dust and contaminants, primed and puttied with mandatory degreasing of the surface.
To finally level the ceiling with plasterboard, they work according to the following algorithm:
- Apply the prepared sheet to the ceiling, drill about 10 holes for reference.
- Insert choppers or dowels into the holes.
- Glue foam rubber to the sheet to adjust the tension with a run of 10 cm.
- Place the sheets on the ceiling and secure them with screws.
- Holes with a diameter of up to 5 cm are drilled near the screws and filled with foam for better fixation of the structure.
- After the foam has dried, unscrew the screws and putty the surface.
The finished ceiling, fixed in this way, is finished with putty mixtures, paint or decorative plaster.
Video description
How to fix drywall without profiles.
For wooden ceiling
Wood is a mobile material. When installing without a frame, there is a risk of cracking of natural raw materials. During installation, it is important to select self-tapping screws of the appropriate length with a small margin. The bolts are carefully screwed in, and not pressed into the construction and finishing sheet, trying not to recess the caps.
The ceiling in a house made of wood often has protruding crossbars and a top board made of boards. Drywall is screwed to such a surface with self-tapping screws to the beams and in the spaces between structures. Construction and finishing sheets are tightly joined.
Working with natural coating Source lifehacker.org.ua
If the ceiling is wooden with rough boards, then installation is carried out along the surface of the coating. Special wood fasteners must penetrate the gypsum board and reach the base. To prevent screws from being pressed into a soft sheet, washers are used.
Area above the head made of plaster Source velum.com.ua
Mastic as the main type of fastening
Another possible method of fastening is the use of mastic. It eliminates the need to create a frame and saves money. This technique is not popular because it does not allow you to create a ceiling with several levels. However, in certain situations it becomes the best option.
There are some guidelines to follow when using this material. The mastic should be applied in small portions, spreading from the edges to the center. The sheets themselves need to be cut into 2-4 parts depending on the interior design. It is also worth remembering that the reliability of fastening depends on the quality of the preparatory work.
Applying glue when installing a plasterboard ceiling
Choosing plasterboard is a simple and convenient solution for the ceiling. The result will be an aesthetically pleasing and attractive design that will suit your requirements. The material itself is reliable, resistant to damage and has a long service life. If you wish, you can pay attention to the reviews of other people who have already installed a similar ceiling in their home. Installation is simple and can be done with your own hands. Watching the video will help with this. It demonstrates all stages of this process.
How to attach drywall to a ceiling depends on whether you intend to attach it to a frame or not. Above we looked at the frameless option. It has both its pros and cons, so the final decision is yours. This is a good way to answer the question of how to level a ceiling with plasterboard.
And finally, some useful advice. If you are installing drywall on a wooden ceiling, the main thing is not to overtighten the screws, so as not to push through the material, which will subsequently lead to its damage. Be careful!
Cutting plasterboard sheets to the required size
Since gypsum boards are produced in large sizes, they will almost certainly need to be cut. This process consists of the following operations:
- First, the sheet is marked using a tape measure and a pencil;
- Connect the given marks by applying a rule to them;
By the way! Do not make markings with a marker or pen, marks that will be difficult to hide during finishing
- .Next, set the rule along the drawn lines and draw along them with a stationery knife with slight pressure. The convenience of using the rule when cutting plasterboard sheets is that its guide bar prevents the blade from leaving the line;
- you will need to place the plasterboard on a wooden block or on the edge of the table so that the cut is in the air, now lightly hit the hanging part, press and break along the cut.
- after that all that remains is to turn the sheet over to the other side, cut through the cardboard and separate the fragments;
- It is advisable to clean the cuts with sandpaper or a plane.
Attention! For those who doubt their “breaking” abilities, the craftsmen advise cutting the cardboard on both sides, driving the knife blade as deep as possible and only then, gently tapping it to break the sheet. This is how very small pieces are cut.