When installing a suspended ceiling made of gypsum plasterboard, it becomes necessary to correctly determine how much material is required for the work. There are different calculation methods, and meticulous craftsmen combine several calculation methods at once. In order not to get confused, to avoid mistakes and to test yourself, it makes sense to use special calculators for calculating the amount of drywall for the ceiling, which are presented for free on our website.
UD profile
The length of this profile corresponds to the length of the perimeter of the room in which the ceiling is installed. In this case, if the result is not a whole number, it is necessary to round up. The number of profile elements is calculated from the total length and the length of each individual profile. There are both 3- and 4-meter UD profiles. The specific choice depends on the size of the room. So, for example, it is quite obvious that with a room length of 3.8 meters, it is much more convenient to trim a four-meter profile than to add the missing 80 cm to a three-meter profile.
Calculating area and calculating components are different tasks
Moisture-resistant plasterboard ceiling
Some may laugh at this offer of assistance with settlements. We can understand them, since this task seems trivial.
Once, twice, I measured the perimeter of the room, calculated the area and purchased the required amount of plasterboard sheet. Yes, but not so.
The fact is that calculating plasterboard and a suspended ceiling made from it are completely different things. After all, no one will argue that when installing a suspended ceiling made of plasterboard, nothing other than the latter will be required?
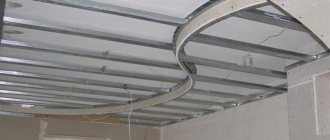
CD profile
The ceiling profile can be mounted according to two principles:
- A continuous mesh lathing is made in increments of 60 cm. In this case, the joint of the plasterboard sheets falls on one profile. If you missed a little, then it will be enough to place a small section of profile under such a seam.
- The profile is laid in only one direction - along the length of the sheets. In this case, the pitch is reduced to 40 cm, and the transverse profile is placed only at the joints. Moreover, it can be attached both to the frame and only to the sheets.
How does this affect the calculation of plasterboard on the ceiling? In the first case, the length of the profile is determined by the formula: a*(b/0.6-1) + b*(a/0.6-1), where a is the length of the room, b is the width.
So, for example, if we have a room of 4*5 m, then the number of profiles will be: 4*(5/0.6-1) + 5*(4/0.6-1)= 57 meters. Yes, of course, we will eventually receive a certain amount of scraps, so the profile is purchased from a stock of 20%. Thus, for a 4*5 room you need about 70 m of profile.
In the second case, the profile will have a length equal to: a*(b/0.4-1). But do not forget that several profiles will be used to form joints between the sheets. For our case, the profile length will be 5*(4/0.4-1) = 45 meters.
As you can see, the calculations are not very complicated. But it is always worth remembering the optimal use of profiles. So, for example, with a profile length of 4 meters, it is much more correct to mount them across the room. In this case, there is no need to trim or, conversely, splice profiles. Thanks to this approach, it is possible to reduce the margin for profile trimming.
But do not forget that in this case a transverse profile 2.5 meters long will be added. Our room will be divided exactly in half, and therefore only one joint will be needed. Thus, the number of profiles will be 45 +5 = 50 meters. In terms of the number of planks, this will be 13 pieces.
In order to get a minimum of scraps, it is necessary that the joint of the sheets on the narrow sides falls exactly on the transverse profile.
It should be understood that the above example is very conditional, and it is intended to show the basic calculation methodology. The pitch of 0.6 and 0.4 meters was chosen for a reason, since these values are multiples of the width of the sheet and this allows you to organize the seams exactly above the middle of the profile strip.
Calculator of components for gypsum board ceilings
Please note: we have labeled the components with numbers so that you can find them on the diagram.
We did not indicate the number of pieces of the profile due to the fact that there are at least 3 types of profiles in stores: 3 meters, 3.5 meters and 4 meters. Knowing the total length, it is not difficult to divide it by the length of the profile and get the number of strips.
Suspensions
The distance between the hangers is 60 cm. If the dimensions of the room are not divided by 60 cm, then it is better to simply divide its area into equal segments close to this value. In this case, you don’t have to calculate with an accuracy strictly to the millimeter.
So, in the case of using the second method of fastening profiles, in order to calculate the number of hangers, we need to divide the total length of the transverse profiles by 0.6. At the same time, pendants are purchased with a reserve.
How to calculate drywall for the ceiling
Many people use plasterboard when decorating the residential part of a house or apartment. At first glance, it may seem that it is not difficult to make the calculation; calculate the perimeter and buy a plasterboard sheet in the required quantity. Let's take one of the simple cases - a rectangular room. Using the formula, we find the perimeter of the room, calculate it using the most common formula P = (a+b)*2, where a and b are the length and width of the ceiling.
Let's take a= 520 cm, b= 310 cm, P=(520+310)*2=1660 cm. Now let's calculate how many components are needed. There are two types of profile: guide (UD-27) and for frame (CD-60).
Where to put the leftovers? It was their turn. We have 9 pieces of 90 cm each. We will cut 5 of them. 53.5 cm each and 4 pcs. 56.5 cm each. We will need 31 more pieces. 53.5 cm each.
Let's do the calculation: The distance between the profiles is 60 cm. We use CD-60, subtract 3 cm from the bottom and top and get 54 cm. Minus another 0.5 cm for easier assembly and get 53.5 cm. Now let's calculate the amount of the frame profile.
For this we need the dimensions of the drywall. The size of the ceiling material is 120 X 250 X 0.95 cm. In our case, we will fix the gypsum board along the width of the room, this way we will reduce the amount of waste. The width of the plasterboard is 120 cm, CD - 60 must be mounted along the edges and in the middle, i.e. 3 pieces, i.e. the step will be 60 cm.
We make the calculation: 520/60 = 8.9, almost 9 pieces. 9*60=540 cm turns out to be 10 cm larger, you will have to cut off the last profile.
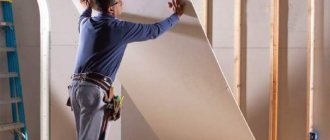
Drywall
Calculating drywall for the ceiling is not at all difficult. It is important to consider several points:
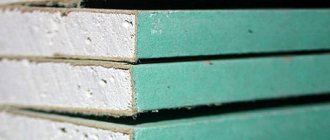
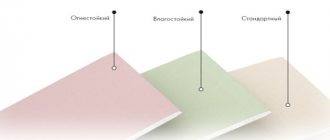
- The dimensions of a standard sheet are 1.2 * 2.5 meters. But some manufacturers produce both larger and smaller sheets. Exact information can be found in the price lists. At the same time, non-standard sheets can make it possible to calculate a plasterboard ceiling much easier and with less waste.
- If the room is small in size, then you can sketch a sketch on paper and calculate the required number of sheets of material. For our example room, you will need 8 sheets, with most of the last couple of elements being cut off.
- If the shape of the ceiling is complex or the room is large enough, then you can take the total area of the room with an increase of 10-15%. The resulting number is simply divided by the area of the drywall sheet (in the standard version - 3 m).
Formulas for calculating the amount of materials for the ceiling
The drywall calculator relies on the following formulas.
Drywall calculator - number of plasterboard sheets
The number of drywall sheets is calculated based on the area of one sheet. Sl= 1.2x2.5 = 3 m2
Therefore, the number of sheets will be equal to Sк / Sл, where Sк is the area of the room, Sл is the area of the sheet.
Drywall calculator - number of guide profiles
The number of pieces of a ceiling guide profile can be easily calculated by dividing the perimeter by the length of one unit.
PN = P/3
Drywall calculator – PP ceiling profile
Calculation of the number of ceiling profiles. The ceiling profile must be calculated based on the calculation of 2.9 m per 1 m2, that is
PP = S/2.9, where S is the area of the room.
To calculate the number of crab connectors. First you need to calculate the area of the room.
Number of crab connectors: K= S*1.7, where K is the number of connectors, and S is the area of the suspended ceiling.
Calculation of the number of hangers
The number of hangers is also easy to calculate using the formula:
P= S*0.7, where P is the number of hangers, and S is the ceiling area.
Calculation of the number of screws
Since we will need screws for various purposes, we will make calculations according to the types of their use.
Self-tapping screws for fastening drywall sheets can be calculated in two ways.
C=S*23, where C is the number of screws, and S is the ceiling area. Or C=L*100, where C is the number of screws, and L is the number of whole sheets of drywall.
Calculation of dowel-nails for fastening hangers
we calculate using the formula:
D= S*0.7*2,
where D is the number of dowels and nails, and S is the area of the ceiling.
To put it simply, it takes 2 dowel nails to attach one suspension.
Calculation of dowels required for fastening the guide profile. Since the guide profile is attached in increments of 500mm, we calculate the quantity using the formula:
D= P*2,
where D is the number of dowels, and P is the perimeter of the room being repaired.
Calculation of the amount of serpyanka tape
Since serpyanka tape is glued to the joints of drywall sheets, its quantity is calculated using the formula:
L=P*K,
where L is the length of the tape, and P is the perimeter of the drywall sheet, and K is the number of whole sheets.
Screws and dowels
The total number of these elements is also easy to calculate. The UD profile is attached to the wall at intervals of 0.4 meters. To fix the suspension to the ceiling, 2 screws are required. In the case of a solid reinforced concrete floor, one is enough. Thus, we simply count the number of attachment points and get the required number of dowels and screws.
Calculation of drywall, watch the video:
Conclusion
Now you know how to calculate drywall for the ceiling and, as it turns out, it’s not at all difficult. All you need is a little patience and spatial imagination. If it is difficult for you to mentally imagine how the profiles and sheets will be located, then make a rough sketch. This way, you can compare two options for installing profiles and choose the one that is more suitable for your case.
Having learned to calculate the design of a single-level ceiling, you can begin to develop more complex systems. So, you can create a curved two-level ceiling structure, with hidden lighting along its perimeter. We wish you success in your repairs and hope that our portal will become reliable assistants in your endeavors.
Consumption of putty and primer for drywall
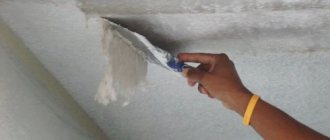
The main purpose of applying a primer to a ceiling or wall surface is to increase the strength of the base and improve adhesion for better adhesion of the finishing material to the plasterboard surface. As a rule, drywall is treated with an alkyd-type primer. About 100 milliliters of substance are consumed per 1 square meter of surface. If the primer is applied over putty, then it is advisable to use façade primer, the consumption rate of which is 130-150 milliliters per 1 square meter.
The consumption of putty largely depends on the thickness of the layer applied during operation. As a rule, the average consumption level per 1 square meter is at the level of 1 kilogram of material. So, if you are treating a suspended ceiling in a room without high humidity, you will have to spend 1.15 kilograms per square meter. When filling cracks and other minor defects, you can use a gypsum-based material, which will require 850 grams per square meter. At the final stage, adhesive-type putty is often used, the consumption of which is 500 grams per “square”.
Often, plasterboard manufacturers themselves supply the market with special materials intended for finishing it. As a rule, the consumption of putty and primer for drywall produced under one brand is slightly lower than when using materials from other companies.
C 112
C 112
| Indicators | Values |
| Weight 1 sq. m | about 49 kg. |
| Maximum partition height | up to 9 m* |
| Partition thickness | 100 – 150 mm |
| Sound insulation index, Rw | Up to 58 dB |
| Fire resistance limit | EI 90 |
*Depending on the standard size of the frame profiles and the pitch of the racks.
Characteristics
The complete KNAUF C 112 system is a complete set of specially selected materials necessary to create a partition with two-layer sheathing from KNAUF plasterboard sheets (GKL) on a single metal frame.
Element-by-element partitions covered with KNAUF plasterboard sheets (GKL) are non-load-bearing structures.
Main building elements of the partition:
- plasterboard KNAUF sheet (GKL);
- metal profiles guide PN and rack PS.
The full composition of the complete system and the required amount of materials per 1 sq. meter of ceiling, see the “Technical Specifications” section.
Distinctive features of this system: it consists of a profile metal frame, sheathed on both sides with KNAUF plasterboard sheets (GKL) in two layers. The perimeter frame is attached to the building structures and is the supporting part for plasterboard sheets, which in turn are attached to the frame with screws, forming a rigid structure.
In addition to the main elements, the complete system includes the technical solutions necessary to solve a specific construction problem, recommendations for the work, as well as tools and devices.
All elements of the complete system C 112 are manufactured using modern technologies, undergo strict quality control, are functionally oriented and, as part of a complete system, ensure the reliability of the entire structure during long-term operation.
Composition of the complete system
| Pos. | Name | Unit of measurement | Quantity per m2 |
| 1 | KNAUF sheet (GKL, GKLV, GKLO) | m2 | 4,0 |
| 2 | KNAUF profile PN 50/40 (75/40, 100/40) | linear m | 0,7 |
| 3 | KNAUF profile PS 50/50 (75/50, 100/50) | linear m | 2,0 |
| 4a | Screw TN 25 | PC. | 13 [14] |
| 4b | Screw TN 35 | PC. | 29 [30] |
| 5 | Putty KNAUF-Fugen (Fugenfüller) | kg | 1,0 [1,5] |
| 6 | Reinforcing tape | linear m | 1,5 [2,2] |
| 7 | Dowel K 6/35 | PC. | 1,6 |
| 8 | Sealing tape | linear m | 1,2 |
| 9 | Primer KNAUF-Tiefengrund | l | 0,2 |
| 10 | Mineral wool plate | m2 | 1,0 |
| 11 | KNAUF-profile PU | PC. | ** |
** according to customer needs. [ ] values in parentheses are given for the case when the height of the partition exceeds the length of the plasterboard sheet.
Application area
Application area
It is used as internal enclosing structures in premises of various types, with dry and normal humidity conditions according to SNiP 23-02-2003, residential, civil and industrial buildings of all degrees of fire resistance and constructed in any areas, including seismic ones.
It is used both in reconstruction and in new construction.
The most universal design providing high performance, including special requirements for fire resistance and sound insulation.
If there are requirements for thermal, sound and fireproof insulation, the cavity of the partition between the plasterboard sheets is filled with insulating material made from mineral fibers.
The surface is intended for subsequent final finishing, for example, wallpapering, painting, tiling, etc.
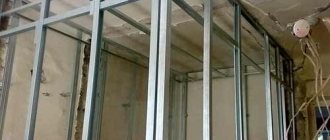
The installation process includes the following stages of work.
- Marking the design position of the partition along the floor, ceiling and base walls.
- Installation of partition frame C 112.
- Installation of electrical wiring and embedded parts for fastening stationary equipment inside the frame.
- Installation and fastening of vertically oriented KNAUF plasterboard sheets (GKL) on one side of the frame.
- Sealing seams between KNAUF plasterboard sheets (GKL).
- Installation and fastening of the second layer of vertically oriented KNAUF plasterboard sheets (GKL) to the frame.
- Sealing seams between KNAUF plasterboard sheets (GKL).
- Fixing insulating material in the space between the posts, if provided for by the design.
- Installation and fastening of KNAUF plasterboard sheets (GKL) on the other side of the frame.
- Sealing seams between KNAUF plasterboard sheets (GKL).
- Installation and fastening of the second layer of KNAUF plasterboard sheets (GKL) on the other side of the frame.
- Sealing seams between KNAUF plasterboard sheets (GKL) and priming the surface for decorative finishing.
- Decorative finishing of the partition after installing the finished floor.
Recommendations
Installation of partitions should be carried out during the finishing work (in winter with heating connected), before the installation of clean floors, when all “wet processes are completed and the wiring of electrical and plumbing systems has been completed, under dry and normal humidity conditions in accordance with SNiP 23-02-2003 “Thermal protection of buildings.” In this case, the room temperature should not be lower than 10°C.
In conditions of high humidity (bathrooms, kitchens, bathrooms), it is recommended to use moisture-resistant KNAUF plasterboard sheets (GKLV), while it must be taken into account that in places where water directly hits the walls (bathrooms), the surface of the sheets should be covered with KNAUF-Flechendicht waterproofing.
The location of electrical wiring in the space of the partition frame should exclude the possibility of damage to them by sharp edges of frame elements or screws during fastening of KNAUF plasterboard sheets (GKL).
General installation procedure
Mark the location points on the ceiling. Then, according to the markings, drill holes for mounting to the ceiling. After this, installation begins. Fasten with dowels or anchor connections. It is better to use the latter, since they meet fire safety requirements - the ceiling will not collapse even if the plastic cup of the dowel burns out. After fixing the supporting profiles to the antennae, check the plane of the ceiling using a level. After adjustment, the profiles are attached to the hangers with self-tapping screws, and the excess parts of the “antennae” are bent, pressed and fixed to the profile also with self-tapping screws.
Adjustable suspension
Installation of adjustable ones is approximately the same. First, install the top link. Attach to the ceiling with anchors. After the profiles are installed, the hangers are simply put on the rod and inserted into the profile, some are clamped. Then the length of the wire is adjusted to ensure the required height and even surface of the drywall. After this, everything is fixed with self-tapping screws.
Material consumption for plasterboard structures
Drywall and components for assembling frames allow you to perform a number of rather labor-intensive tasks in construction:
- sewing niches, cavities
— installation of volumetric structures
- installation of partitions and walls
— installation of suspended ceilings
— increase in the linear dimensions of the bases.
Engineers have developed standard schemes for the construction of structures made of plasterboard and gypsum fiber boards, which are distinguished by the simplicity, reliability and durability of all components.
The wide range of products somewhat complicates the selection and calculation of the necessary material resources; below are the main components for the construction of the most popular design solutions.
Tips for choosing and using drywall tools
If working with drywall is new to you, you may find the following tips useful:
- For high-quality cutting of drywall, the stationery and mounting knife must be very sharp so that the cut is deep, even and without burrs.
- A hacksaw is used to cut out shaped parts: a corner near a window or door, a U-shaped cutout for a beam or pipe. Any will do. The main condition is that it must be narrow.
- A drill is used to cut round holes in a sheet of drywall for sockets and spotlights. It will come in handy before using a jigsaw or hacksaw.
- The maximum length of a plasterboard sheet is 4.8 meters. We select the tape measure so that this distance can be measured in one step, which means it must be at least 5 meters.
- The cut lines must be clear and clearly visible. Take a soft pencil, marker or felt-tip pen in a contrasting color.
- A ruler is needed for more than just marking lines. It is applied to the line, making a cut with a knife. The longer it is, the more convenient it will be to work with. You can replace the purchased ruler with a profile onto which the drywall is attached. It is convenient to use a gauge or a rule for plastering work.
- You can use a jigsaw or grinder with a “dry cutter” disc. But it should be borne in mind that their use generates a lot of dust and noise.
USEFUL INFORMATION: Is it possible to paint drywall without prior putty?
Wall frame
These types of foundations can be divided into two types - the actual wall itself along the load-bearing surfaces of the house and interior partitions. To ensure that the frame is firmly fixed, the most common U-shaped straight suspension of the required length is used. At the top it is fixed to a strong load-bearing wall with dowels and nails, and the frame stand is inserted into the free ends and secured using “fleas” or press washers.
An example of attaching hangers to a wall According to generally accepted standards, it is believed that straight hangers should be located on the frame post in increments of 700–800 millimeters. Usually this is 3-4 pieces per rack.
Diagram with dimensions for mounting the suspension
Scheme for attaching the suspension to the wall
Some craftsmen can add another fifth suspension, that is, the step between them in such a frame will be about 500–600 millimeters. To create a strong and reliable structure, it is enough to maintain the distance between straight hangers as in the first option (70 cm).
This option is used when constructing wall foundations. The same principle is observed when assembling siding frames on the wall. But if heavier metal siding is installed on the façade, the step between direct hangers can be increased to 500–600 mm.
Recommendations from experts
Despite the fact that installation is not considered an extremely difficult task, not every user can perform installation work efficiently. During the installation process, great attention must be paid to such criteria as the mass and thickness of the material. According to available information, make a choice of products for fastening. Experts strongly advise paying attention to the following points:
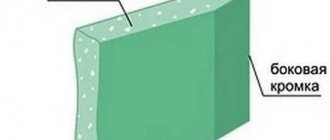
- Before installing the fasteners, it is necessary to mark the fastening points on the surface. At the same time, they should be as close as possible to the profile joints; ideally, the distance between wall hangers made of plasterboard sheets should be 0.7 meters. When fastening plasterboard sheets, it is required that there be small gaps between the plasterboard sheets of the building material.
To ensure maximum density of the leads and guides, a special spacer tape can be glued between them.
- The supporting profiles should not be too close to the surface, and the self-tapping caps should not be left lower than the level of the drywall.
- The simplest method of checking a structure for the strength of fasteners is to pull it with little force. If all the components remain in place, this will mean that the fixation is as strong as possible and the fastening is done correctly.
- To secure the structure, galvanized fasteners must be used. They help prevent the formation of corrosion, but also increase the fire resistance of the structure. Nylon-coated dowels are best used for attaching guides to wall surfaces.
It is also important to determine in advance the places where lamps, decorative elements and wall cabinets will be. This makes it possible to avoid further partial destruction of the plasterboard coating.
Recommendations for location and screwing
Before calculating how many self-tapping screws will be needed for a structure, it is logical to familiarize yourself with the norms and rules for their placement. The following nuances are taken into account:
- The distance between adjacent screws must be more than 10 cm, otherwise the plaster of the sheet will begin to crumble when screwed in.
- When leveling walls or installing partitions, a step of 25–35 cm is taken between the fastening points. It is reduced to 15–20 cm if in the future it is planned to cover the surface with heavy material, such as ceramic tiles.
- More hardware is used for the ceiling sheathing, since they are attached more often: the step is 15–20 cm. The rule works here: the thicker and heavier the drywall, the smaller the distance between the attachment points.
- When installing in two layers, the first one is attached less frequently - every 45–60 cm. The screws that secure the second layer are 10 cm longer. When screwed in, they additionally secure the first one. This reduces the consumption of hardware and eliminates unnecessary costs.
- The number of required attachment points increases when constructing curved structures. Here the pitch between the screws is chosen so as to fix the desired surface shape.