Important elements of the siding finishing process are additional elements or, as they are also called, accessories. The finishing of windows and doors with siding is carried out using additional components - near-window strips and platbands. These components allow you to easily sheathe difficult areas such as corners, the space around windows and doors. In addition, additional elements include special joints and connecting elements for different planes. The use of accessories and their quantity will depend on the size of the building and the nature of its facade.
IMPORTANT: The colors of all Alta-Profile planks fully match the colors of the siding!
| Initial strip (3.66 m long) – used as the initial element for finishing the surface with siding; installed with the top edge on the originally applied chalk line and nailed along this line; then the bottom edge of the first vinyl "siding" panel is inserted into the starting strip and the top edge is nailed to the wall; |
| Hinged strip (3.66 m long) - installed above the upper window opening or at the junction of vinyl siding and the base of the building to protect against water flows; |
| Connecting strip (3.05 m long) – designed to connect “siding” panels to each other and cover the seams; |
| Window strip (3.05 m long) and J-Trim strip (3.66 m long) - used for finishing window and door openings, installed along the perimeter of door and window openings; |
| Near-window wide strip - used for finishing window and door openings whose width is more than 14 cm; |
| Platband (3.66 m long) – designed for edging door and other openings; |
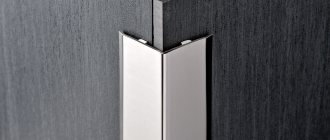
| The outer corner (3.05 m long) is installed at the existing junction of two walls; |
| Internal corner |
| The finishing strip (3.66 m long) is the final element of fastening the “siding” panels under the eaves; installed before mounting the last row of panels; |
| J-chamfer (3.66 m long) – used for finishing roof eaves; |
| J-trim (3.66 m long) – used for finishing window and door openings, installed around the perimeter of door and window openings; |
| Wide platband is used when edging door or other openings; |
| A corner radius strip is an outer corner, only rounded, installed at the junction of two walls (used both together with a wide platband, forming a compound angle to the siding, and separately); |
| Additional strip - used for finishing window and door niches whose width is more than 23 cm. |
| Soffit (3 m long and 0.23 m wide) – designed to provide ventilation for facades and roofs of buildings. Soffits are usually used to trim roof gables. There are three versions of vinyl soffit available: without perforation, with partial perforation and fully perforated |
As practice shows, buying siding and additional elements for it is still half the battle. Carefully think through the installation process and strictly follow the instructions - here is a complete list of prerequisites for giving your home a new look. Attention, finishing windows with siding will require you to have basic construction skills. By purchasing Alta-Profile siding and accessories, you receive high-quality finishing materials that are easy to install, including yourself.
Types of additional elements
There are several main types of siding accessories that are used at different stages of installation:
Before installing the panels, secure the starting profile for the siding. The initial strip is attached to the frame with nails or screwed with self-tapping screws. The first panel is mounted to it.
Window strips for siding are mounted around the perimeter of door and window openings. This siding profile can also be used to cover small recesses.
To close the panel from the side, use a J-trim strip.
To join the siding along the length, use a connecting strip.
To secure the soffits, use an f-profile for siding.
The range of components for vinyl siding is in many ways similar to those additional elements that are used for installing other types of cladding panels. But there are also some differences. For basement siding, for example, a wider starting strip is used, as well as a corner element. Components for metal siding can be produced to order, up to 6 meters long.
Fastening H-profiles
The length of the panels can be increased in different ways. Overlapping alignment, then the overlap is at least 25 mm. The joints of the panels cannot go one above the other; it is important to move them horizontally. The last attachment point should be 100 mm from the edge.
You can create a joint using an H-profile. It is installed on the sheathing. The panel is placed in the H-profile, leaving a distance of 5-6 mm in the summer season, 9-10 mm in the winter. The installation procedure is similar to attaching corners.
Lathing devices for siding installation
Even if the wall of the building is absolutely flat, it is advisable to install the siding on a metal profile. This is a simpler and more reliable option than making a frame from wooden beams. The galvanized profile for siding does not require antiseptic and hydrophobic protection. Thanks to this you will save money and time. In addition, the metal siding profile can withstand heavy loads, so it is well suited for the installation of basement and metal facade panels.
Advice from siding experts
In order for finishing a house with panels to be as successful as possible, you need to know certain subtleties of performing such work. There is a list of general recommendations for any siding, as well as specific tips for panels made from a specific material.
General Tips
- We drive/screw the fasteners strictly into the center of the factory holes.
- We do not press the fastener caps too tightly against the panels - you need to leave a gap in case of temperature deformation of the material.
- We attach the trim from left to right and from bottom to top. We place the panels horizontally.
- We fasten metal and vinyl siding with a small gap - these materials are subject to temperature deformation. In principle, experts recommend fastening panels made of other materials with a slight gap.
- We attach vinyl siding exclusively through the holes intended for this purpose. You cannot pierce the panel itself - this will have a bad effect on its service life. There is only one exception, and it was discussed above. The same recommendations remain relevant for panels made of other materials.
- We fasten wooden siding only with galvanized products, otherwise the wood will very soon begin to rot.
- We carry out the cladding of a log house only after the building material shrinks, i.e. no earlier than six months after completion of the construction of the building. Otherwise, when the wood shrinks, the entire finish may be damaged.
For different materials
Now you can carry out siding installation at the highest level yourself.
Siding installation completed
| Name (model) | Benefits | Length x width x thickness, mm | Quantity per package, pcs. |
| Vinyl Siding "Canada Plus" | 1. Coloring in dark colors is performed using the “Cool Color” method (heat absorption), which involves the use of masterbatches. 2. Excellent appearance remains unchanged even when exposed to high and low temperatures, the range of which ranges from -50°C to +60°C. 3. Retains shock resistance, even if the ambient temperature drops to -20 to 60°C. 4. Not susceptible to microbiological corrosion (fungi, mold). | 3660 x 230 x 1.1 | 20 |
| Acrylic Siding "Canada Plus" | Among other useful qualities of acrylic siding “Kanada Plus” it is worth highlighting: • Increased resistance to direct ultraviolet rays; • Excellent tolerance to acidic and alkaline solutions, as well as to various fats; • Good tolerance to washing with chemical detergents; • High degree of deformation resistance (perfectly tolerates temperatures up to 75°-80° C). | 3660 x 230 x 1.1 | 20 |
| "Alta-Siding" - Vinyl Siding | "Alta-siding" is: • one of the safest finishing materials on the Russian market; • frost resistance and the ability to maintain strength even at very low temperatures (from -20 to -60°C); • resistance to significant temperature changes and environmental influences; • durability: the service life of Alta-siding is up to 30 years; • resistance to aggressive substances (detergents can be used to clean siding); • non-susceptibility to infection by mold fungi. | 3660 x 230 x 1.1 | 20 |
| Facade metal siding INSI | INSI siding is made of galvanized steel coated with a layer of polymer composition, which means it inherits all the advantages of this material: • resistance to temperature changes (-50°C - +80°C) and mechanical damage; • long service life with preservation of original properties (about 50 years); • environmental friendliness; • non-flammability; • possibility of installation both horizontally and vertically; • protection of the building from overheating (in a ventilated facade system); • and when choosing one of two new colors (alder or rosewood) – a complete imitation of the appearance. | Length up to 6000, width up to 200, thickness 0.5 | — |
Good luck!
How to attach a profile under siding?
You can easily find the answer to this question on construction sites and forums or with the help of the video instruction “Installing a profile for siding.”
Basic recommendations for installing a profile frame for siding:
- It is advisable to choose a profile for lathing under siding with a cross-section of at least 2.7x6 cm. It has a special flange that gives it additional rigidity.
- To attach the siding profile to wood, self-tapping screws are sufficient. When attaching to reinforced concrete or brick, dowels must be used.
- The greater the weight of the finishing material, the smaller the step for attaching the metal profile under the siding should be. Please note that plinth and metal panels weigh more than vinyl. Therefore, in the video instructions for installing a profile under siding, it is recommended to maintain a distance between the planks of 0.6 meters for vinyl and 0.4 m for vinyl siding and metal siding.
- Installation of profiles under siding is done perpendicular to the direction of installation of decorative panels. In most cases, the frame is mounted vertically. The exception is the installation of sheathing for vertical siding.
- Lathing from a siding profile makes it possible to visually align the walls and install additional heat and waterproofing for the house.
Careful reading and careful adherence to the installation instructions is a guarantee of correct installation of sheathing and siding in full accordance with technology.
Siding is formatted panels that are fixed to the facade using special technology. Panels can be wood, metal, vinyl. When installing them, a number of additional elements are used, with the help of which the cladding acquires a complete appearance. These additional elements are used when decorating corners, window and door openings, and so on. And it won’t be possible to install the siding itself without them.
Video description
Brief but very clear instructions for installing a G-profile around openings are presented in the video:
Gable installation
The gables of pitched roofs are often lined with siding, and the most problematic and unsightly place is the cut line of the panels under the roof overhang. The easiest way to cover it is with a universal end profile, securing it along this line before starting cladding work.
The installation itself is simple; the extension is simply fixed with self-tapping screws or nails into the holes of the nail strip. It is more difficult to “catch” the angle of joining of two parts under the ridge and accurately cut the facing panels so that the cut is completely hidden in the grooves of the profile. To cut parts accurately and without errors, it is recommended to first make templates from scrap material, as shown in the diagram.
Scheme for making templates for cladding the pediment with siding Source recn.ru
If the pediment is high, the length of one profile may not be enough. To build it up, you will need to trim one of the elements.
When fixing profiles, the topmost self-tapping screw under the ridge is screwed into the uppermost point of the mounting hole, the rest, as usual, into the center. The pitch between the screws is 25-30 cm.
Installation of spotlights with G-profile
The main purpose of the j profile in siding and where to install it is to line the eaves with soffits. If in other places you can use special additional elements, then only this one will do.
One row is attached along the wall, to which a horizontal wooden beam is nailed or screwed with self-tapping screws. The profile is fixed on its lower plane, lengthening it if necessary, as shown in the previous diagram.
On the opposite side of the cornice, the second row is fixed parallel to the first. Their grooves should face each other.
Then measure the width of the resulting cornice between the inner walls of the profiles and cut the soffits to size, subtracting 12 mm from the obtained value. This is necessary to provide clearance for thermal expansion of the panels.
Why are components needed?
Finishing the facade with siding has been known for a long time. Initially, it was used only as a protective cover that protected the facade from exposure to atmospheric factors. Thanks to such protection, the service life of the building increased significantly, which is especially important for houses made of wood, because wood deteriorates from negative natural factors much faster than other building materials.
Note: today manufacturers offer a wide selection of siding designed for cladding facades - made of vinyl, metal, wood and other materials. Thanks to modern manufacturing and processing technologies, all types of siding last for quite a long time - for several decades.
In order for the siding installation process to be quick and correct, and for the finished cladding to look beautiful and neat, it is imperative to use the components. These include different types of planks and profiles for decorating various parts of the building: corners, openings, roof overhangs, and so on. The components perform not only a decorative function, but also a technical one.
Rules for performing work
The outer corner for siding is covered with additional elements. You need to immediately calculate them and only then purchase them.
Attention: It is necessary to pay special attention to the length of the surfaces; the amount of waste will depend on this, and there will definitely be some.
Finishing the corners of a house with siding can be done in several ways:
- External corner for siding;
- Internal corner for siding;
- Corners for siding with slopes;
- Corners for siding with a radius.
Now let's look at each type of finish separately.
Types of components
Based on the structural features of the building, certain types of components are selected for the façade cladding. They are usually divided into two types: decorative and load-bearing.
- Decorative ones include: end strip, soffits, trims, flashings, J-profile, near-window profile, moldings.
- Load-bearing structures are divided into two subtypes: visible from the outside and hidden. These include regular and arched J-profiles, starting strips, external and internal corner profiles, connecting strips.
We install external corner profiles
Attaching the external corner siding profile
First step. We mark the soffits. We need to see where the edges of these elements will be located in the future.
Second step. We apply the guide to the corner of the frame. We do this with a 3mm gap to the soffit or roof. We fasten the profile with self-tapping screws.
Place the bottom border of the element 0.6 cm below the edge of the starting profile.
Third step. Checking the vertical installation. If there are no deviations, we fix the bottom, and then the remaining places. Experts do not recommend placing fasteners in corner elements too often.
The principle of increasing the length of a corner profile
If the house is higher than 300 cm, the profiles will need to be placed one on top of the other. To do this, we trim the top profile. As a result, there should be a 9 mm gap between the planks of the joining elements. When laying the elements, maintain an overlap of 2.5 cm.
Electric saw for cutting sidingTo cut vinyl siding panels, use tin snips, a hacksaw, a cutter knife, or a hand-held power saw with an abrasive wheel.
If the base has a protruding structure, shorten the profile so that there is a 6 mm gap between it and the base.
Using two starting J-profiles of siding instead of a corner one
Brief description of all types of components
To better understand the purpose of certain components, we offer a brief description of them.
- J-profile. Load bearing element. It is used when processing window and door openings, areas where the roof meets the pediment. It is fixed before installation of the siding begins, since the edges of the siding panels are installed directly into this profile. Sometimes the J-profile is also used as a decorative and protective element when processing corners. In this case, two profiles are attached close to each other on both sides of the corner, closing it.
- Starting/starting bar. Load bearing element. It is used at the very beginning of installation - the first siding panel is attached to it to facilitate the entire cladding process. The initial bar is set in strict accordance with the level, since if it is installed unevenly, the position of all other elements will also be distorted.
- Connecting H-profile. Load bearing element. Used to join two adjacent panels of the same row. Available in two types - standard and extended. The latter option allows you not only to connect the panels, but also to place emphasis on the joining point according to the design idea.
- J-profile arched. Load bearing element. Used to design window and door openings with an arched bend. There are notches on the profile, thanks to which it takes the required shape.
- Corner profile - internal and external. Load bearing element. It is used to decorate the corners of a building both outside and inside. The profile is equipped with grooves into which plastic panels are inserted.
- End bar. Decorative element. It is mounted at the top of the cladding in order to hide the edge of the last panel and give the facade a completed appearance.
- Soffit. Decorative element. It is used to treat the roof overhang of a building. Available in solid fabric and with perforations - holes to provide ventilation.
- Platband. Decorative element. It is used for finishing window and door openings to give them a neat appearance. Platbands are used if the openings are located on the same level as the facade walls.
- J-bevel - wind board. Decorative element. It is used to trim the edges of the roof.
- Window strip. Decorative element. It is used instead of platbands if window and door openings are recessed into the wall, that is, they have slopes.
- Molding. Decorative element. Used when decorating the internal corners of a building.
- Low tide. Decorative element. Used to drain rain and melt water from the facade and foundation.
Note: You will not be able to install siding without additional elements - at a minimum, you must use the starting strip. You can discard the remaining elements, but then the cladding will look as if it is unfinished.
Purpose and characteristics of corner elements
The use of products is determined by the selected variety. All products are divided into groups that differ in their functions.
Simple and complex corner siding elements
Simple
The main purpose is to create the desired decorative look. The parts also play a protective role, preventing the penetration of precipitation and wind. They have a regular shape with an angle of 90 degrees. Exhibited after completion of the main work.
Thanks to its design, the strip completely covers the butt joints, creating a smooth transition. Although the color range of elements can be very diverse, most often there are options on sale in light and dark versions.
The size range depends on the manufacturer, the most popular parameters are: width – 50*50 mm and 65*65, length – from 2 to 4 m.
The dimensions of the corner fittings differ in different siding models
On a note! As an alternative, components of other finishing materials of appropriate shape can be used.
Complex
The most preferred variety, which performs several functions:
- Simplified installation and increased reliability. The elements have a place for fixing the edge of the siding, identical in appearance to the J-profile.
If there is no corner element, it can be replaced with two J-profile strips
- Improving decorativeness. The detail covers the unattractive junction of two sections of façade cladding. To create an additional visual effect, smooth, textured or embossed products can be used.
- Increasing the protective parameters of the finish. Demarcating the area where the panels are located, the corner tightly covers the junction of the two walls of the house. This protects the base from moisture and other environmental influences.
The dimensions of complex elements also depend on the manufacturer. The most common options:
- External detail: width of side sections – 65*65 and 100*100 (110*110) mm, installation width – 80 and 120 mm, length – from 200 to 360 cm.
- Internal corner (with one visible plane): the width is most often 80 mm, the length is similar to the previous option.
Dimensions of outer corner of complex shape for VOX siding
Basement
These products are often classified as a separate group, but they can also be used for finishing façade areas. The elements are considered complex, although they have an appearance that imitates brick or stone cladding. The length of the parts is 42–47 cm, the width of the sides is 9–16 cm.
Calculation of components
It is better to calculate the required number of additional elements before starting work. This can be done along with calculating the required number of siding panels. This calculation is especially important for buildings of non-standard geometry.
The easiest way is to calculate how many starting and ending strips you will need. In total, their length is equal to the total length of the walls that you are going to cover. Just measure them with a tape measure and get the desired result. And the number of planks is determined by dividing the total length by the length of one panel. Please note that waste is inevitable during any construction work, so purchase planks with a reserve.
There should also be no problems with calculating the corner profile. Measure the height of the inner and outer corners, add the values, and then divide by the height of one corner. It is necessary to take into account that it is better to sheathe corners with a solid profile or with a minimum number of joints. For this reason, professionals recommend counting the number of corner profiles for each corner separately.
The J-profile and near-window profile are calculated along the perimeter of window and door openings using the same methodology as for the elements described above.
Recommendations
To do the job correctly, you can use simple tips:
- Selecting components of the same brand as the selected siding will eliminate problems with fitting.
- Trimming is done using a grinder, metal scissors or an electric jigsaw.
- Be sure to create gaps between the installation profiles and fasteners.
- It is better to refuse products that are too cheap. Due to thermal expansion, it can become deformed and will pull the entire wall cladding along with it.
If you choose the right material and do the work correctly, the decoration of your house will last for many years.
Right choice
You must select additional elements for cladding responsibly. First of all, pay attention to their quality. It is advisable to buy components from the same manufacturer as the siding panels themselves. Otherwise, they may not fit well or not fit at all.
Attention: Select all elements strictly according to the parameters so that they fit together without gaps.
The color of the components can be chosen either to match the siding panels or vice versa - in contrast to them, if this option was intended by the designer. Please note that light-colored elements heat up and fade less under the sun than dark ones.
Note: elements with a matte surface are more practical than glossy ones, since, again, they heat up less under the sun's rays. An even more practical option is elements with a laminated surface.
Storage and transportation of vinyl panels:
The most important thing is compliance with temperature and humidity conditions. It is allowed to transport and store the material at a temperature of -35° to +50° and a relative air humidity of at least 40-60%. Covered vehicles are used for transportation. The vehicle body must be larger than or equal to the size of the siding package. All products are shipped in original packaging and must be transported in it. It is recommended to avoid direct exposure to sunlight. In the car body, siding packages must be secured to prevent them from moving and deforming.
Additional elements are always placed on top of packages with panels. It is not recommended to place more than 5 packs in height.
Storage of the material is permitted only in the original packaging, avoiding exposure to sunlight and proximity to heating devices.
Installation
Before installing panels and additional elements, you must carefully read the instructions from the manufacturer. Otherwise, you may make mistakes that are then difficult or impossible to correct. If you strictly follow the instructions, there will be no problems with installation.
In the first stage of work, install the initial strip to which you will directly attach the siding itself. The initial strip is fixed to the sheathing or to the facade wall using self-tapping screws, which are screwed strictly in the center of the special mounting holes. Then the J-profile, arched profiles (if necessary), corner profiles are installed, and the joints are processed. After this work is completed, proceed to the installation of the siding itself.
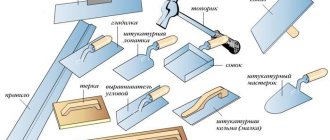
To get the job done quickly and successfully, you will need the following tools:
- Measuring tape and ruler;
- Carpentry corner;
- Screwdriver and hammer;
- Construction level, better authentic;
- Twine rope, chalk and pencil;
- Scissors for working with metal products.
Installation Rules
In order for the finish to be installed firmly and reliably, you must strictly follow the installation rules. Each manufacturer provides instructions for their materials. But now let’s take a closer look at installing the corner profile.
The first thing you need to do is secure the starting bar. It extends to the corner by a distance that is equal to the full length of one side of the corner profile (including the perforated edge) with the addition of a gap for linear expansion (about 6 mm).
Now let's start processing the corners with siding:
- The element adjusted to the required size is applied to the wall so that the bottom edge is 3 mm above the bottom of the starting strip. The upper border should not reach the cornice by 3 mm.
- First, the part is fixed in the uppermost hole of the perforated edge. It is on this mount that the corner element will be held.
- To attach the bottom edge, you need to check that the corners of the siding are vertical. To do this, use a plumb line or a building level.
- The fastener is installed in the center of the outer perforated hole, but is not tightened all the way. This avoids deformation of parts due to thermal expansion.
- After this, you need to screw the part along its entire length, every 20–30 cm. In this case, be sure to leave a gap of 2 mm between the fastening and the corner.
Lathing for siding
The sheathing for siding can also, in some way, be called a component element. Experts advise using it even if the panels are installed on a perfectly flat façade. This is necessary in order to give the structure high strength, since it must cope well with heavy loads. This is especially important when arranging the basement of a building and using metal siding.
It is advisable to make the lathing from a metal profile with a cross-section of at least 2.7x6 cm, then it will be durable. The distance between the slats depends on the type of siding: for metal panels - at least 0.40 m, for vinyl - 0.60 m. And the interval between fasteners depends on the weight of the panels - the heavier they are, the smaller the interval. The sheathing is made perpendicular to the location of the panels: if the panels are installed horizontally, then the sheathing slats are installed vertically, and vice versa.
Types of galvanized profiles
In order to make a durable frame for siding from profiles, the following types of material are used:
- Rack-mounted – installed vertically. Made from galvanized steel. To eliminate unevenness on the wall surface, brackets with height adjustment are used together with the profile. Instead of a bracket, you can use a U-shaped metal suspension. The part has less strength and may not withstand the load.
- Ceiling-mounted is chosen to replace rack-mounted ones. Can be installed vertically or horizontally as a spacer, which gives the structure strength.
- I also use the guide profile to install spacers, but unlike the ceiling profile, it has a shelf for fixing with fasteners (screws, nails or dowels).
A more reliable frame for profile siding is the rack-mount option. Select materials with a metal thickness of 0.4 mm. Suitable for installing lighter vinyl panels. A more durable profile for metal siding is needed. Therefore, parts with a metal thickness of 0.5 mm or more are suitable.
Installation of soffit panels
Let's look at the process of installing siding soffits. To install them you will need an H-profile, a J-profile, and 3x5 cm wooden slats.
- -Make marks on the surface of the wall, along which you will then attach the slats. The length of the slats should reach the end of the roof overhang.
- The slats are attached to the façade wall using special pegs, which are used for quick installation.
- In addition, the slats are secured along the entire perimeter of the roof overhang.
- Next, additional supporting elements from the slats are mounted perpendicular to those that were installed previously. In the middle of the transverse elements, you can additionally install another strip so that the soffit holds more firmly.
- The finishing strip is fixed to the rail, which is installed along the perimeter of the walls. Such strips are used wherever soffits will be installed.
- Note: to make it easier to join the planks, cut off a piece on one of them, on which the mounting holes are located, and insert one plank into the other.
- If necessary, the soffits are trimmed to take into account thermal expansion.
- Then the soffits are simply inserted into the finishing strips until a characteristic click is heard, which means that the connection is made correctly.
- Next, proceed to installing the corners using corner strips. They are inserted into the structure at the corners. Then, using a level and a corner, the outline of the facade is copied onto the plank and the excess is cut off.
- The cut strip is fixed to the corner located inside. Then they cut it from the outside in a similar way and install it.
- The panels in this section of the structure are installed as follows: one of them is fixed to the previous one using a locking mechanism, then the corner is marked and other corner panels are installed.
- Note: soffits can be installed in two ways: herringbone or straight. In the second case, the H-profile is installed parallel to the soffits.
Installation of spotlights and components is quite simple, and if you carefully understand its principles, you will probably be able to cope with the work yourself. By doing this, you will save a decent amount of money, since the work of professional installers is not cheap.
Return to list
Application of j-profile
According to its main purpose, the j profile is an end strip that covers the cut of the wall panels. Open ends not only spoil the appearance of the cladding, they completely defeat the purpose of protecting the walls from moisture. Precipitation and atmospheric moisture easily penetrate under the skin in such places, causing rot and corrosion. Vinyl G-plank, as well as a similar profile for metal siding, can easily solve this problem in a variety of places.
j-profile for metal siding Source aliance.online
Where and how such an accessory can be installed depends on its type.
Types of end profile
In total, there are 3 types of j profiles for fastening siding, or even 4 if you include a chamfered profile in this list.
- A regular profile has standard width and height dimensions, which may vary from manufacturer to manufacturer.
Profile for siding Döcke LUX BERGART Source roofos.ru
- A flexible profile, often called arched, with the same dimensions, differs from the usual one by the presence of notches on the rear shelf, along which it is easily cut and bent to the desired radius.
Flexible profile for framing radius openings Source azbuka-rem82.ru
- The wide profile has the same width as a regular one, but has an increased height, which allows you to cover the ends of the siding with a large gap between it and the wall.
A wide profile is usually used as a platband Source marketudachi.ru
See also: Catalog of companies that specialize in finishing materials and related work
In addition to the standard j-profile for siding, an additional element very similar to it, called a j-plank, a wind strip or a j-profile with a chamfer, is also used. It is used to cover and decorate the edge of the roof - a wind board, or a deep window opening.
G-bar for roofing edge Source lesovik76.ru
Methods of use
The universal profile is installed in a variety of cladding units.
- In the upper part of the wall under the cornice - instead of a finishing strip.
- On the side inclined lines of the pediment to fix its cladding and give it a complete look.
- On the edges of horizontal eaves for attaching soffits - perforated siding panels.
- At the end of the wall when combining siding with other facing materials.
- At the corners of the house, you can also install two j profiles instead of special elements.
Replacing the corner profile with universal ones does not guarantee the tightness of the skin, but reduces its cost Source infradom.ru
- At the top and bottom ends of the corner profile for a decorative effect.
There are also places in the cladding where it is better to use special additional elements without replacing them with a G-profile. This is the line of fastening of the first siding panel, along which the starting strip is installed, and the line of joint of the panels along the length, which is best covered with a connecting H-shaped profile. If you install two universal profiles instead, the joint will still remain, and moisture and dust will get into it.
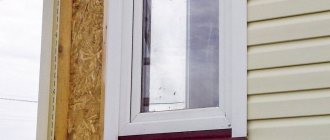
Installation on window openings
To frame window openings, take a wide j profile for siding, the dimensions of which allow it to be used as a platband. Installation is carried out on the frame before installing the wall panels, the edges of which are then inserted into the grooves of the profile. This method of finishing openings is used when they are not recessed into the wall and do not require the installation of slopes.
Installation of panels in the installed frame Source montazh-saidinga.ru