Features of using finishing putty
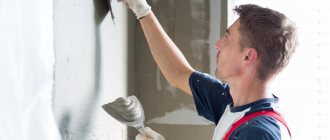
Before finishing the walls with putty, they need to be prepared, that is, made smooth, all cracks covered, and all the wall material finally secured.
It is on a relatively flat surface that putty is applied, which makes the walls ideal. After this, you can paint them or glue wallpaper on them.
The main stages of wall preparation before applying decorative finishing:
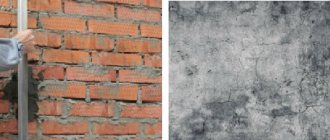
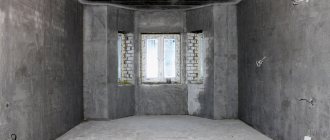
- Visual alignment of walls. To do this, two main operations are performed: a spatula or hand is carried along the wall in order to check protrusions, screws and other irregularities, and they also control the level of the walls with a large level. If there are any protrusions, they are covered with primer or concrete. All parts or parts of the old coating that may fall off or hold unreliably must be eliminated. Screws in plasterboard walls are tightened deeper, and unevenness is also primed. The unevenness of the wall relative to the ground surface is leveled using a primer at a further stage.
- Repairing cracks. If cracks appear in the walls, they must be covered with a primer. It is important to let the putty dry; for large cracks, this will require applying several layers.
- Primer of walls. Before applying putty, the wall must be primed. The primer will eliminate small cracks or holes, porosity of the concrete slab, roughness of the seams of plasterboard joints, and other irregularities. Also at this stage the walls are leveled.
- Wall putty. At the very last stage, before applying the finishing coating, the walls are puttied. It perfectly levels the coating and also provides good adhesion between paint, wallpaper and primer.
Important! Putty and primer are different layers that are applied using different compositions and have different purposes. Primer – fills small cracks, irregularities and glues microparticles of building materials and slabs.
This composition has a rougher texture than putty. But at the same time it ensures high-quality adhesion of the putty and the wall. The primer is applied with wide brushes or a roller.
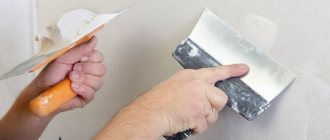
The putty has a finely dispersed structure and provides an even coating. But if it is applied directly to the wall, then small particles will be absorbed into the unevenness of the wall and will not be able to provide an even layer or high-quality adhesion between the slab and the decorative coating.
The putty is applied with spatulas of different widths and lengths, and it is leveled to an ideal state with the same metal plates.
Starting, finishing and universal putty
Putties are divided into three groups:
- starting;
- finishing;
- universal.
Starting
This name of the material corresponds to its purpose. The starting viscous mixture has increased granularity. This property gives the product such a quality as increased filling of the volume of the putty layer. They are made on a gypsum, cement and polymer basis.
The surface of the walls is puttied with a starting mixture in those places where surface curvature, cracks and through holes predominate. The leveling mixture has increased adhesion.
Apply the starting mixture with large spatulas.
Before diluting the dry mixture with water, you should read the instructions on the package. The instructions indicate the time during which you need to use a certain amount of the prepared solution.
Timely production of the mixture will avoid losses in the form of frozen solution residue.
Apply the solution with spatulas of different sizes. For large areas, use wide spatulas. Small cracks and small surface defects are covered with putty using a narrow tool.
Finish
The finishing mixture is less durable than the starting mixture.
It is applied before the final coating of the walls and ceilings of the premises. It is the finishing putty that forms a perfectly flat and smooth surface of enclosing structures.
Typically the topcoat is applied with a thickness of 0.5 to 2 mm. Although there are exceptions, and the coating can be about 4 mm thick.
The finishing coat has much less strength than the starting putty. The finished processed surface can be easily sanded with abrasive materials.
Universal
This product, in accordance with its name, is used to level surfaces both as a starting and as a finishing coating.
The universal putty is applied in one layer, forming the final leveling layer.
Let's present the qualities of these three types of putty in the table:
| № | Name of putty type | Application | Flaws |
| 1 | Starting | Deep unevenness | Forms a porous surface |
| 2 | Finish | Final smooth surface | Gives more shrinkage |
| 3 | Universal | Used as a starting and finishing coating | High price |
Selection of material and tools
For high-quality application of putty, you need to choose not only the material itself, but also the tools.
To putty the walls you will need:
- Set of spatulas of different widths and lengths
- Laser or water level
- Sandpaper index 240
- Container for composition
- Construction mixer or drill with a similar attachment.
You will also need the putty itself, which comes in three types:
- Cement. This material is the most moisture-resistant; it should be chosen for rooms where high humidity or temperature changes are possible, for example, an external wall of a house or a wall adjacent to a common staircase. However, this putty shrinks after drying. Therefore, it must be applied in several layers and wait quite a long time to dry. Cement compositions are an ideal option for the exterior coating of a house.
- Polymer. Comparable to cement putty in moisture resistance, does not shrink and levels well. This material has a high price.
- Plaster. It is the easiest to level, the most plastic, but least resistant to moisture.
If necessary, you can combine 2 types of putties - first apply cement and then gypsum. Some manufacturers produce cerium series of materials that combine well with each other.
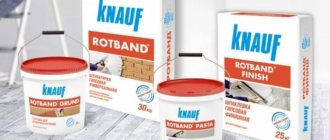
For example, Vetonit finishing putty is produced in a whole series and has in the line: cement composition, gypsum or lime materials. Vetonit is available both in the form of dry mixtures and as a ready-made paste in buckets.
Another well-known brand, Knauf, which is also popular among builders, also produces ready-made putty in the form of dry mixtures and ready-made paste. The German finishing putty Knauf is offered in three versions: starting, finishing and universal.
The universal option can be laid on the wall in just two layers. The materials of this brand are better suited for finishing concrete slabs and drywall in interior spaces.
Technique for applying leveling solutions
To apply the finished solution, use a spatula. Spatulas come in plastic, metal and rubber. Also, the working surface of the tool can be narrow or wide. Watch all about the technology for proper wall alignment in this video:
Use a narrow spatula to distribute the mixture over a wide spatula.
The thickness of the leveling layer depends on the angle of inclination of the working plane of the spatula. If you do not have experience with the tool, then you should first practice on small areas of the surface being processed.
When performing work, use two spatulas. Using a narrow spatula, scoop up the finished mixture and apply it to the working tool, distributing it evenly across the width of the spatula.
The greater the angle of inclination of the spatula in relation to the working surface, the thinner the layer of putty will be. Accordingly, a low blade angle will create a thicker coating.
Preparing putty
Most mixtures are sold in two versions: paste and dry. Ready-made finishing putties in the form of a paste are more convenient to use. They can be applied immediately.
Important! Ready-made putties shrink when dry, so their layer should be 1-2 mm thinner than the layer of regular mortar.
In a dry powder that must be diluted with water. The diluted mixture must be applied to the wall within 2 hours, otherwise it will begin to harden in the container. To dilute the dry mixture you need a special mixer or drill with an attachment. It is impossible to thoroughly mix the putty with your hands using a stick or other object.
Example of puttying plasterboard walls
Seal the fastening points with starting putty.
Coating walls lined with plasterboard with putty is carried out in several stages:
- Walls lined with plasterboard sheets are not primed. The paper surface may be damaged by the applied primer. Check the cleanliness of the wall surface. If necessary, wipe with a slightly damp, clean cloth.
- All places where plasterboard sheets are attached with self-tapping screws are sealed with starting putty.
- Seams and junctions with room openings are covered with a polymer mesh. The starting solution is applied to the mesh with a spatula. Then the mesh is pressed at the joint and the solution is smoothed.
- After the starting mixture has dried, the surfaces are sanded with abrasive (sandpaper).
- Cover the entire drywall with the finishing solution with a large spatula with a working surface ranging from 200 to 400 mm wide.
- Use a spatula to make semicircular movements from top to bottom. Use a narrow tool to finish hard-to-reach areas.
- The quality of the resulting surface directly depends on the qualifications of the worker. Professional work does not require additional finishing of the treated surface. Otherwise, the flaws are sanded with sandpaper. For instructions on how to putty drywall, watch this video:
In some cases, drywall surfaces are treated with liquid finishing or universal putty. The liquid solution is sprayed evenly using a spray gun and pump.
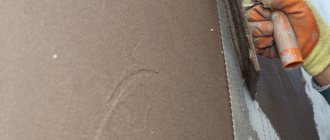
Applying the finishing layer
After applying the primer and drying all layers, you can begin the final leveling of the walls.
The procedure for applying putty is as follows:
- Apply the starting layer with a wide spatula to the seams and other irregularities. Also, the wall is finally leveled. A special sickle tape is glued to the fresh mortar at the seams and corners. The material must be pressed into the putty.
- Another layer of starting putty is applied on top. The solution dries out in 3-4 hours. After this, you need to walk along the wall with sandpaper and a float to polish the surface.
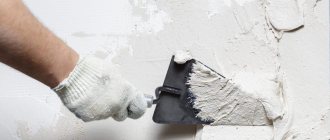
- After the starting layer, the finishing layers are applied. This will require two spatulas. A small solution is scooped out of the container and applied along the length of the main instrument.
- It is with this main spatula that the solution is applied to the wall. The spatula should be held at an angle of 20-30 degrees to the wall and moved diagonally. Each movement is done in a cross direction.
- The layer of the finishing solution should be no more than 2-4 mm. In this case, marks from the edges of the spatula must be immediately carefully leveled.
- After drying, the layer must be sanded. Sandpaper with a grater.
- Then apply a 1mm thick layer again, let it dry and sand gently. To do this, you can use a flashlight to illuminate the wall at an angle. The backlight will reveal the slightest irregularities.
This completes the main work with putty.
Under the wallpaper
Before gluing the wallpaper, the finishing putty must be completely dry. Wallpaper can be glued directly to this surface. In this case, the wall does not require additional priming or gluing of the rough layer.
- Applying putty under paper wallpaper should be as careful as possible.
- Vinyl and non-woven wallpaper have a thicker layer, which also evens out the smallest irregularities in the walls.
- Thanks to this, the walls will look perfect.
For painting
Before painting, the finishing putty must be primed with a special solution. This way the paint will not be absorbed into the putty.
The primer will also ensure maximum adhesion to this material.
- You need to sand the walls before painting as carefully as possible.
- Since paint does not have leveling properties, unlike wallpaper.
- Therefore, you need to walk along the wall several times with a sandpaper and a flashlight.
This simple instruction will help you make the walls even on your own and prepare them for the main coating.
How to distinguish the finishing mixture from the usual one
Putty mixtures contain various fillers. Depending on the size and nature, the material is used for preliminary or final leveling.
Thus, the starting mixture can be applied in a relatively thicker layer, the surface becomes rough, and small scratches and pores are often present. It is almost impossible to cover such defects with paint, but the coating is considered suitable for wallpaper. If necessary, multi-layer application using a reinforcing mesh with cells up to 5*5 mm is permissible.
Putty finish is applied in a single layer to the base composition after sanding and priming. Here the surface is smooth, the coating thickness does not exceed 1 mm due to components with a fraction of up to 0.5-0.7 mm according to standards. The mesh is unacceptable as it will show through. Professionals often reinforce the base with fiberglass wallpaper of the “spider web” type.
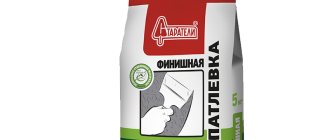
Photo of finishing putty
Features of the material
One of the most important factors for a good result is not only the cost of wall putty, but also the speed. The prepared mixture does not tolerate being left the next day and changes its properties quite quickly, so you should always use all the prepared material at once, trying to avoid the formation of joints in visible places.
If you have to postpone work in the middle, the edge of the treated surface is moistened with water to improve adhesion to the fresh layer.
The easiest option for puttingtying walls with your own hands is plasterboard. It does not require lengthy preparation, being smooth and homogeneous in itself. All that is required is a layer of primer before finishing, as well as alignment of the joints between the sheets.
Popular brands and consumption
Leading manufacturers of finishing mixtures are SheetRock, Ceresit, Knauf, Weber and others. Ceresit 225 ST is applied only over the starting putty and is used as a final finishing layer due to the smooth and snow-white surface it creates. It is frost-resistant, made on the basis of cement with modifying additives - reinforced with reinforcing microfibers, does not absorb moisture. Consumption – 1.8 kg/m2.
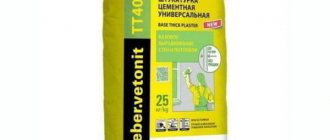
The Weber company produces cement plaster Vetonit series B, VX, KR and T, designed for rooms with different levels of humidity, and polymer series LR and LR+ for interior and exterior use. The manufacturer's product list includes premium Vetonit VH plaster based on limestone and white cement, which is applied by spraying. Material consumption is 1.2 kg/m2.
Rating of the TOP 15 best putties for walls under wallpaper for 2022
| Place | Name | Price |
| TOP 3 best putties for walls under wallpaper by price/quality for 2022 | ||
| 1 | KNAUF Rotband Pasta Pro | Find out the price |
| 2 | PUFAS Full+Finish | Find out the price |
| 3 | Weber LR+ | Find out the price |
| TOP 3 best gypsum putties for walls under wallpaper | ||
| 1 | KNAUF Uniflot | Find out the price |
| 2 | Unis Blik | Find out the price |
| 3 | Volma Shov | Find out the price |
| TOP 3 best latex putties for walls under wallpaper | ||
| 1 | TEX latex Pro | Find out the price |
| 2 | DANOGIPS Dano Box 1 | Find out the price |
| 3 | TEX finishing Pro | Find out the price |
| TOP 3 best putties for walls on concrete under wallpaper | ||
| 1 | DANOGIPS SuperFinish | Find out the price |
| 2 | Weber VH | Find out the price |
| 3 | Prospectors Finish Plus | Find out the price |
| TOP 3 best putties for walls on drywall under wallpaper | ||
| 1 | Ceresit IN 95 | Find out the price |
| 2 | Tikkurila Euro Filler | Find out the price |
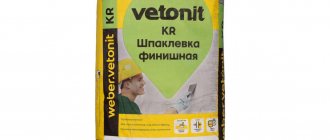
| 3 | Weber KR | Find out the price |
The final stage
The drying of the surface is determined by the absence of dark spots of moisture on the putty. After making sure that everything is dry, you can prime the wall again and mix the finishing composition. For this, beacons are no longer needed, the solution is simply applied with a thickness of no more than 2 mm, this is enough.
An experienced craftsman can complete the final finish faster, but beginners have to add another step of sanding the surface after drying for a smooth finish. This is usually done with a diamond mesh; the work is dusty, but the result is worth it.
Types of putty mixtures and their comparative characteristics
There are 3 types of putty mixtures for finishing:
- Polymer – divided into acrylic and latex;
- Cement;
- Plaster.
Acrylic putty is suitable for covering any kind of surface, including wood. When dry, it produces a smooth, glossy surface, ready for further processing. It is odorless, plastic, durable, highly wear-resistant and cost-effective. Putty is used for external and internal work.
Latex putty is produced on the basis of synthetic resins, which, when mixed with water, form a durable, vapor-tight surface with a high level of resistance to moisture. It reduces the consumption of paint and varnish products, which are used as the top layer, and is used only indoors.
Dry composition for wall treatment
A common feature for finishing polymer mixtures is high plasticity, uniform drying and resistance to shrinkage. To make cement finishing putty, a mixture of purified river sand, solvent and cement is used, which shrinks during the setting process, which increases consumption. It is moisture resistant and does not react to temperature changes.
Latex putty Tex
TOP 3 best putties for walls on drywall under wallpaper
If your apartment or house has plasterboard structures that you plan to decorate with paint or wallpaper, you should apply a special putty designed specifically for such material.
Ceresit IN 95
This putty from a time-tested brand is intended for finishing rooms for further painting
or wallpapering. The composition of the mixture is suitable only for dry rooms, since at high humidity the putty layer may begin to collapse.
The product is completely ready for use, so you can start finishing work immediately after purchase. The putty comes in a large bucket with an airtight lid so the mixture will not thicken during storage.
The mixture is elastic, and this property is retained even after the layer of product has dried. As a result, the finished coating does not crack and has increased vapor permeability so that the wall covering can “breathe.”
All these properties make the putty suitable for leveling plasterboard sheets and masking the seams between them, but, if necessary, the product can be used for leveling and finishing concrete and plaster walls.
Specifications:
- base - polymer;
- type - finishing;
- dries in 4.5 hours;
- material: concrete, plasterboard.
pros
- easy to apply;
- a completely ready-to-use mixture;
- retains elasticity even after complete drying;
- does not crack;
- reasonable price.
Minuses
- dries too quickly;
- not intended for long-term storage.
Tikkurila Euro Filler
A distinctive feature of this mixture is that it has increased resistance to moisture, so it can be used
for processing and leveling walls not only in living rooms, but also in rooms with high humidity.
If the surface on which the putty will be applied is made of a porous material, it will have to be pre-treated with a primer of the same brand.
The putty is supplied fully prepared, so the user does not have to waste time preparing a working solution. The thick paste-like consistency perfectly hides wall defects, and the dried coating protects the wall from moisture, the spread of fungi and mold.
Specifications:
- base - acrylic;
- type - finishing;
- dries in 24 hours;
- material: concrete, plasterboard, wood.
pros
- suitable for wet areas;
- perfectly hides minor defects;
- easy to apply;
- the putty is completely ready for use;
- is resistant to cracking.
Minuses
- high price;
- not always on sale.
Weber KR
This putty is based on a binding component of organic origin, so the finished coating has not only
high quality, but also absolute safety for human health and the environment.
The putty is available in dry form, so the user will have to prepare the working solution themselves, using the instructions on the package. Another advantage of the product is its economical consumption, so one package of dry mixture is enough for large-scale finishing work.
Since the putty has excellent adhesion and covering properties, the user does not have to apply a finishing layer, and the finished coating dries quickly and does not crack.
Specifications:
- base - adhesive;
- type - finishing;
- dries in 24 hours;
- material: concrete, plasterboard.
pros
- economical consumption of dry mixture;
- large volume of packaging;
- easy to prepare working solution;
- the finished coating is easily sanded;
- lays down evenly and perfectly hides cracks and other defects.
Minuses
- there is an unpleasant odor;
- not always available for sale.
Preparation of the solution
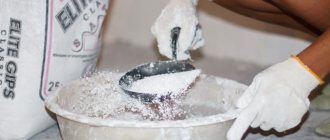
If you choose a mixture in powder form, it is important to mix it correctly first. A rubberized or plastic bucket and a construction mixer will do. Mixing the composition with a mixer is carried out at low speeds to avoid splashing and the formation of bubbles.
The container is filled with water about a third, and then the powder is poured in at a ratio of 1/1. After whipping, the mixture is allowed to stand for a couple of minutes and the process is repeated.
Insulators ShF-20G- Production of plastic for finishing
How and how to caulk a timber house with your own hands: materials and step-by-step instructions
The quantity is calculated from the forecast of costs by the master within no more than half an hour. Then the mixture loses its properties and a new one needs to be prepared. Therefore, the price of wall putty will ultimately greatly depend on how economically the solution was used.