Plastering the surface is the most effective way to prepare the base for the finishing coat, as well as one of the decorative finishing options. To give the plaster layer the desired texture, it must be processed, in other words, grouted. The grouting process itself is simple, but it has its own subtleties and secrets, without which a high-quality result cannot be achieved.
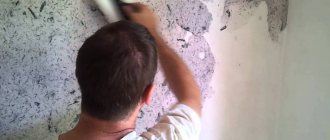
Grouting plaster - photo
Grouting plaster
Plastering the surface is the most effective way to prepare the base for the finishing coat, as well as one of the decorative finishing options. To give the plaster layer the desired texture, it must be processed, in other words, grouted. The grouting process itself is simple, but it has its own subtleties and secrets, without which a high-quality result cannot be achieved.
Grouting plaster - photo
What is grout?
Grouting is the final stage of plastering work, which consists of eliminating the smallest errors, leveling and smoothing the surface by rubbing the dried mortar with a special tool. When using decorative plaster, the main purpose of the grout is to form a certain relief of the working plane.
Applying a finishing layer of fine leveling plaster
Before grouting, a “covering” is applied to the base - the finishing layer of plaster mortar. The base layer, or primer, is very durable and therefore difficult to process, while the covering ensures uniform filling of uneven surfaces and maximum smoothness when grouting. Rub the plaster after the mortar has set, but before it dries completely.
Application of Trowel
Having chosen a mechanized smoothing method, slightly moisten the surface. Work on the dried mortar layer, two to four hours after its application.
After moistening the surface, work it around the unit, smoothing the screeds in several passes. If the uneven areas are large, apply a covering solution to them. For the final pass, use a felt circle.
The vertical surface is smoothed, like the screed. Uneven places are filled with solution, the surface is moistened.
To sand cement-sand plaster, it is recommended to use felt and felt circles, although you will have to frequently remove the stuck mortar from them.
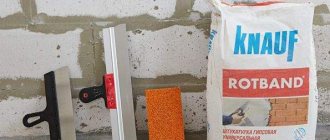
Tools for work
In principle, only one tool is used to grout plaster - a grater, which is a rectangular blade with a handle. Graters differ in size and material of manufacture, and depending on this they are used for a certain type of work.
| Types of graters | Characteristics |
| A wooden grater is suitable for cement and gypsum plaster; it makes it possible to smooth the surface as much as possible and eliminate minor irregularities. You can make it yourself from an ordinary block. At the same time, it has significant disadvantages - the wood is saturated with moisture, which complicates the work, the lower part is quickly erased, and after drying the canvas can become deformed | |
| As a rule, plastic floats are used to distribute the plaster mixture in small areas, followed by the formation of a smooth or embossed surface texture. Their use requires certain skills in plastering | |
| Easy to use, lightweight and durable. Features low abrasion, suitable for all types of plasters | |
| Affordable, easy to use and lightweight grater, but very short-lived. Mainly used for final sanding of plaster layers. | |
| The working surface of such graters is made of sponge of varying densities, as well as latex and rubber. Used to form a decorative texture on the surface, finishing smoothing | |
| Metal floats are designed to compact the plaster layer, forming a perfectly smooth base for painting. |
Wooden trowel for plaster
Plastering tools
Prices for different types of plaster floats
Necessary equipment
To grout the walls yourself you will need:
Graters:
- made of wood - a cheap tool with a long service life, the blade does not wear out for a long time. Unfortunately, it is quite heavy, and fatigue quickly sets in when working;
- made of foam plastic - a modern model of a grater, the shape and working techniques have not changed, but the work is made easier due to the light weight of the tool. The working life leaves much to be desired - the foam wears out quickly, but its cost is so low that you can easily purchase a new tool;
- sponge - with its help you will not only wash off the applied layer, but also treat each tile seam after cladding;
- trowel - the same grater, for the manufacture of which polished stainless metal is used. The sole of the tool is smooth, and this gives some specificity to working with it - the metal does not grind, but smoothes. This tool is recommended for smoothing semi-liquid putty mixtures and covering solutions.
- putty spatula - the width of the working area should be at least forty centimeters; it is used to grout gypsum plaster.
You will need auxiliary devices to speed up the work process:
- spray bottle - it is necessary to moisten the sole of the trowel tool and the surface to be treated with water, because the upper layers of plaster dry out quickly;
- a lamp or spotlight with directional light - a good luminous flux will highlight all defective areas, making it easier to eliminate them.
How to grout surfaces with large areas? Experts advise using special mechanisms or grouting machines. The cost of such tools is high, but the work process is significantly easier and faster. There are two groups of devices operating:
- vertically - the weight of the machine is small, because it has to be held in your hands. It uses an electric motor with a low vibration level;
- horizontally - weighted and dimensional devices, which are better to work with on an almost dry surface.
Preparing the coating solution
Preparing the coating solution
The coating solution is mixed in the same proportions as for the base layer:
Table - Solution proportions
The only difference is that the finest sand is used for covering, with a grain size of no more than 1.5 mm.
Coarse sand is allowed only if the base is plastered under the tiles. For high-quality grouting, the solution must have normal fat content: thin mixtures do not have sufficient strength and crumble when processing the surface, and excessively fatty ones are poorly leveled and leave streaks.
The solution should slightly stick to the spatula and be plastic
Advice. It is not difficult to determine the fat content of a plaster mortar: if it sticks heavily to the trowel, it is a greasy mortar, and you need to add sand; if it does not stick at all, it is a skinny mortar that does not have enough cement. A normal solution mixes easily, has a uniform consistency, and leaves an even thin mark on the trowel.
The sand is sifted through a sieve with a mesh size of no more than 1.5x1.5 mm.
Sow sand for mortar
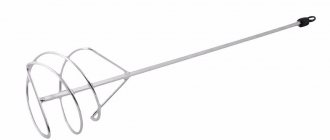
Pour cement into the mixing container, add sifted sand and mix dry. Next, add water in small portions to achieve the desired consistency.
When mixing cement-lime mortar, the lime dough should also be strained through a sieve. The presence of even small grains will lead to the formation of marks on the surface, and it will not be possible to achieve perfect smoothness.
Strained lime dough
Prices for different types of cement
Procedure for grouting
Applying the coating
Step 1. The plastered surface is moistened using a sprayer. This increases the adhesion of the cover to the primer layer. It should be moistened evenly, without gaps and not too much so that water does not flow from the wall in rivulets. This should be done 15-20 minutes before applying the solution. If the working area is large, you should divide it into squares and wet only the area that will be processed.
You can wet the surface with a brush, dipping it in water and splashing it on the wall.
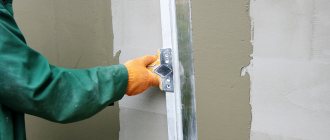
Step 2. To apply the coating you will need a trowel and a metal rule, or a wide spatula.
Rule for plaster
The solution is poured in small portions onto the wall, starting from the top, after which it is distributed as a rule over the entire plane. The rule must be pressed well with your hands so that the solution is more tightly packed into the slightest irregularities. Excess mixture should be removed. The thickness of this finishing layer should not exceed 2 mm.
Step 3. When the covering has set slightly, take a grater and begin to rub the surface. Some plasterers prefer to grout at the same time as applying the mortar.
Rubbing the wall with a float
There is no fundamental difference here, and this does not affect the result in any way, the main thing is to thoroughly rub the composition along the plane to eliminate unevenness. Let's take a closer look at both options.
Dry grout
So, if you decide to wait for the plaster to set, the grouting process is performed as follows: take a polyurethane or metal grater, moisten it with water, press it to the surface and smooth the plaster in a circular motion. There is no need to press hard on the grater - this can rip off the fresh solution and you will have to repair the scratches, but there is no point in rubbing too lightly.
Perform movements with equal effort, slowly moving along the plane from top to bottom or horizontally. At the joints of the walls, apply the trowel cloth parallel to the corners and rub with vertical movements, and not in a circle. Where elevations are noticeable, the tool is pressed harder; on depressions, on the contrary, the pressure is reduced. During operation, solution accumulates on the side of the grater, so it must be cleaned off periodically.
Using a metal grater
When grouting a large area, the cover can dry out quickly, making it more difficult to work with. To soften the coating, it is periodically moistened with water. You can use a spray bottle or place a bucket of water next to it and prepare a wide brush with long bristles. The same brush is convenient for removing excess solution from the grater.
Grout with mortar
If grouting is carried out with the application of a mortar, the procedure will be as follows: make the mortar a little thinner than the plaster mixture, scoop a little directly onto a grater, apply the tool to the wall and, with pressure, distribute the composition over the plane. The grater must be held at an angle to the surface. Having smeared the solution, press the float blade against the wall and thoroughly rub everything in a circular or arcuate motion. Try to rub intensively, applying even efforts, then smoothing will occur faster and with better quality.
Grout with mortar
This type of application requires very little solution, but grouting takes a lot of time, and it is better to do the mixing in small portions to avoid hardening. When processing one plane, the intervals between grouting adjacent areas should be minimal - take a break only to prepare the solution. While moistening each subsequent square, slightly moisten the already rubbed edges - this will increase the adhesion of the solution and transitions will not be visible at the border of adjacent areas.
Grouting "round" and "running"
Treating the surface with circular movements is called “circular” grouting. This method allows you to compact the plaster layer well and get rid of all the bumps and depressions. But it still does not provide ideal smoothness, since the circular movements of the grater leave noticeable arc-shaped marks. Of course, such a base is quite suitable for tiles or textured paint, but under ordinary paint these irregularities are clearly visible. Where the smoothest possible surface is required, it is necessary to perform grouting using another method - “running”.
Grouting “in a circle” must be carried out on wet plaster and immediately after grouting “in a circle”. Only if these conditions are met can you achieve excellent results. There is no need for a solution here, and moistening is performed only when necessary. Another important point is that the grater must be absolutely clean, even, with rounded edges. If the tool is not cleaned of the solution, the hardened crumbs will leave scratches on the surface, as well as sharp edges of the blade.
Grouting plaster - methods
For convenience, the surface is treated in small areas - about 1 m2. The grater is pressed against the wall and moved up and down along the plane with measured, precise movements. While grouting, try not to lift the tool from the plaster, and maintain the same pressure all the time. Horizontal or circular movements are not allowed here - only vertical ones.
Smoothing the surface
Smoothing plaster mortar
Smoothing is the final, but optional, stage of surface troweling. Some master plasterers replace grout with it, but only if high-quality factory-made plaster mixtures are used. For smoothing, use a grater covered with felt or rubber, or metal. In general, the process is reminiscent of grouting, only the surface is processed twice: the first time the movements are performed strictly vertically from top to bottom, the second circle is horizontal.
The process of smoothing the cover with trowels
Basic methods
Surface treatment is performed in several ways. The master chooses the one that is most correct for him. Next we will tell you how to grout plaster.
Using the dry method
Important! You need to put a lamp with strong light so that the irregularities are clearly visible.
To complete the work, do the following:
- When performing processing, you need to go through the entire wall from top to bottom. To improve quality, it is recommended to divide the wall into sections and process them one by one.
- Leveling is done using circular movements. At the same time, do not press too hard so that the grout layer is not completely erased. When processing joints, the float is held parallel to the corners. In these places, movements are made in the vertical direction. The use of circular movements will be difficult to justify.
- You can check the smoothness by running your hand over the surface. Sandpaper is used to process hard-to-reach places.
When preparing for wallpaper, minor scratches are allowed. If painting is intended, the surface must be perfectly flat.
“Catch-up” method
This method of work is used while the wall is still wet. It is usually used after round-the-clock processing. Leveling is done with uniform up and down movements. It is not recommended to change the pressure force.
Important! During the work process, additional moistening of the surface is required. For work use a clean tool. It should have rounded edges so that they do not leave marks.
Wet grout
In this case, the wall is first wiped with a dampened sponge. The wet surface must be rubbed using a spatula. During work, some of the water will flow down, forming puddles. What the surface turned out to be can be assessed after complete drying.
Grouting decorative plaster
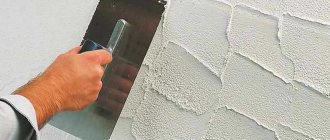
The pattern of decorative plaster is formed in two ways - during application and after the solution has set. In the first case, smooth trowels are used for grouting, which make it possible to remove sharp protrusions on the surface and soften the relief of the pattern; in the second, both smooth and textured trowels can be used, depending on the composition of the plaster.
1 way.
The solution is applied to the prepared base with a spatula or trowel, making strokes in a certain order or randomly. There is no need to level or smooth anything, the main thing is that the layer of plaster is laid in approximately the same layer over the entire area, and there are no missing areas. After application, you need to wait 20 minutes until the solution sets so as not to stick to the instrument. Next, take a grater, moisten it with water, apply the cloth to the surface and, with light pressure, very carefully perform movements in one direction.
Perform movements in one direction
If you press too hard, the plaster will smooth out and the pattern will be blurry. And this way only the sharp protrusions will be smoothed out, the indentations will take on a slightly more rounded shape. Periodically, the grater needs to be moistened for easier gliding.
Method 2.
Grouting decorative plaster
The plaster is applied in a layer of 2-3 mm and carefully distributed over the plane with a metal spatula or rule. The surface should be as smooth as possible, without traces of a spatula, transitions or other defects. Allow the solution to dry a little (15-20 minutes) and begin grouting. It is more convenient to use a plastic grater here. Grouting is done in strips no more than 1.5 m wide.
Movements can be circular, vertical, horizontal, oblique and even zigzag, but always in one direction. This is the only way a clear pattern will appear on the surface.
Perform movements in one direction
Be sure to moisten the grater, and while working, periodically clean it from adhering plaster - its particles fall into the recesses and smear the pattern. Perform movements carefully, trying not to touch areas that have already been covered. After processing one strip, immediately begin rubbing the next one. To prevent transitions between the stripes from being visible, moisten the joints well with water. Do not allow interruptions in work, as the plaster dries quickly and it will be impossible to form the desired pattern.
After finishing the grouting, you should wait until the surface is completely dry and treat the walls with a foam float. Such grinding will give the coating smoothness, remove excess particles of the solution, and at the same time will not damage the design at all.
Prices for various types of decorative plaster
Video - Grouting plaster
Source
Advantages
- All gypsum-based plasters are environmentally friendly materials. Accordingly, they do not emit any harmful elements and do not harm human health;
- This mixture has excellent thermal insulation properties, which makes it possible to save on heating;
- Gypsum plaster is a fire-retardant material;
- Does not allow noise into the room;
- Thanks to its porous structure, the coating is able to regulate the microclimate. This function works inside heated rooms. If there is poor air circulation and high humidity in the apartment, the gypsum coating absorbs excess moisture. If the temperature rises, it returns moisture;
- I would like to note another big advantage of gypsum plaster. If your roof is leaking or your neighbors are flooded, don’t despair. After a few days, the wet spots will dry and leave no traces;
- Finishing made from this material will serve you for many years. Its porosity will prevent the attack of mold and mildew. The surface covered with gypsum mixture will look like new for a long time.
By using gypsum-based plaster, you can achieve high quality work. At the same time, the plastered surface can be left without additional putty.
The walls and ceiling treated with gypsum dough are ready for application of the decorative finish of your choice. The mixture provides excellent adhesion to the coating material.
For concrete walls, primer mixtures are used before applying the gypsum mass. In this case, you do not need to apply a plaster mesh.
After applying the mixture to the surface, it can be easily leveled. As a result, the wall can be made perfectly smooth.
How to grout plaster correctly
In what cases is grouting of plaster necessary, as well as how to properly grout the laid plaster solution. Several significant properties of a plaster finish are determined by such qualities of its surface as evenness and smoothness. To achieve evenness, various leveling methods are used, for example, plastering using the beacon rule. Smoothness, which determines the appearance of the surface, paint consumption during painting and other parameters of the plaster coating, is achieved by grouting and smoothing.
Let's sum it up
Grouting plaster is a very useful skill that is indispensable when carrying out finishing work both inside and outside the house. If you still have questions about leveling plaster surfaces, ask them in the comments to this article.
Did you like the article? Subscribe to our Yandex.Zen channel
May 17, 2022
Plastering and puttying of walls
If you want to express gratitude, add a clarification or objection, or ask the author something, add a comment or say thank you!
What is grout?
We applied the main layer of mantle (primer) and leveled it with a wide spatula or rule. But the surface, even in the ideal case of execution, remains rough, gaping with pores of different sizes and protruding large grains of sand.
Usually, perfect leveling is not possible, and therefore, when lit from the side, tool marks, stuck lumps of plaster mixture, waves of bumps and depressions are visible on the plane. If you leave the finish in this form, a lot of dust will collect on the wall, unpainted pores will help absorb odors, lumps will stick out the wallpaper paper or scratch the skin when you run your hand along the wall.
To bring the surface to perfection after the soil begins to set and stops staining your fingers, the surface is rubbed down. This is done simultaneously with applying a dry covering or with a small amount of additional solution, either with your own hands or with the help of a mechanical assistant, in a circular or sweeping manner.
The result is an almost smooth surface that can be painted without additional putty. Smoothing is slightly different from grouting in terms of results. The main difference is in the method of execution.
Grouting may not be necessary if the work was done in a utility room, where it is enough to scrape off the dried pellets with a wide spatula (for example, when plastering a basement). It is also not needed when finishing with ceramic tiles or other applied sheet materials.
Types of finishing layer.
There are several types:
- Cement-sand.
Basically this is a primary coating of 3-4 layers. It is used for major renovations of a building. The main difference between cement-sand cladding is the presence of two layers of soil. It is applied directly to the base, which is pre-primed. It has large particles in its structure, so the finishing stage of grouting is special; we will discuss how to properly grout cement plaster below.
- Simple.
A two-layer type of finish that is applied “by eye”. The main purpose is to seal all holes and cracks. Simple is used in sheds, cellars, basements and other utility rooms.
- Improved.
Differs in three facing layers. At the beginning of the work, the walls must be hung and equipped with beacons, and at the end the corners are checked. When irregularities are detected, they are smoothed out using a rule. The order of layers in improved plaster is as follows:
The bottom layer is called spray. It is applied by spreading a 3-10 mm layer, and the consistency resembles sour cream.
The next row is dirt. Its optimal thickness is no more than 2 cm. When applying, two methods can be used: throwing and spreading. This is the main layer of plaster, designed to fill defects and level the surface.
The final layer is called the covering layer. It is for rubbing that a plaster trowel is used. Before application, it is necessary to moisten the soil generously with water. Let's look at how to grout plaster below.
How to grout plaster - technology
The words “rub”, grater, friction and grout are related. Grouting plaster is an operation performed using a wooden trowel with a flat or concave/convex (for curved planes of columns or walls) working platform. The grater is applied to the surface of the plaster and “ironed” it, as if with an iron, adjusting the pressure. You can rub it in different ways.
Applying the coating
To make the surface less rough without using putty, apply another layer of plaster - a covering. The solution is made from the same components as the soil, but the filler (sand) is taken with a minimum fraction (grain diameter). Being at least an order of magnitude smaller than grains of soil sand, the grains of the covering easily fit into the spaces between them and also fill the pores.
The covering is applied after the base has been moistened. To moisten, use a wide brush or sprayer. It is recommended to moisten 12-20 minutes before applying the covering layer so that the moisture is distributed evenly. There is no need to wet the entire wall at once, just a section or two that will be rubbed down first. If the grout solution turns out to be a bit dry, additional moistening of the grouted area is allowed.
Apply the coating mixture with any tool convenient for application, for example, a spatula or a falcon. Movements can be linear or arcuate. After spreading, the mixture is leveled with a rule or a wide spatula. The maximum thickness of the covering is 2-3 mm, the minimum is the diameter of the sand grain. Some plasterers apply the mixture to areas of about a square meter and immediately begin to grout.
Dry grout
When the coating layer has set, mashing is performed “dry”.
The wall is wetted, a grater is applied and sliding movements along the wall are performed with pressure:
When rubbing, protruding plaster gel and lumps collect on the edge of the grater. Part of this mixture will go into unfilled pores; part (excess) is removed with a spatula. The movement of the grater also smoothes out the marks left by the spatula.
Grout with mortar
If there are a lot of surface pores, then the plaster is grouted with an additional solution, which is applied with a spatula not to the wall, but to the trowel’s working area in small portions. Apply the trowel to the wall as you would when applying mortar with a trowel. Having spread the solution, the grater is carried out flat.
This technique requires little solution. The rubbing procedure takes longer than normal application. To prevent the mixed mixture from setting in the container before it is ready, it is diluted little by little.
With this treatment, the wall is also pre-sprayed with a brush. They also do this during the mashing process if the area dries out. When spraying, part of the surface of adjacent areas is also wetted. Then the transitional places will not stand out and be seen as the border of the areas.
Grouting in a circular and continuous manner
The direction of movement used to grout the walls is not random, as it gives slightly different results. The main, and sometimes the only, movement is a circular movement performed counterclockwise. However, this direction is not due to the effect produced, but rather to the ability to better see how the area is being processed when the grater is held with the right hand. The main thing is that the grater moves in a circle.
Areas adjacent to the corners cannot be fully processed in this way. Therefore, the grater is moved along the corner.
In addition to grouting in a circle, grouting is used. The movement of the tool is cyclic-rectilinear: up and down. It is performed immediately after the circular one in order to eliminate traces from the passage of the grater. The pressure on the tool is constant. With a high ceiling height and working from a scaffold, there should be only one grout joint: first, the upper part of the wall is smoothly rubbed, then the lower part.
When grouting, no additional solution is applied, and the wall is moistened only if necessary. Use a clean grater; the rubbing surface is periodically wiped with a damp cloth.
Smoothing the surface
Another technique that is not always mandatory. If high-quality fine-grained mixtures were used for plastering, then smoothing can replace rubbing. The tool for this operation differs from the float used for grouting plaster. Smoothers come with a metal, rubber or felt working surface. The ironing surface itself can be flat or convex, the latter is used if the wall is curved. For example, when plastering columns.
Smoothing plaster is similar to smooth grouting, with the difference that it is done without pressure using one of the existing methods.
When a metal smoothing iron is used for smoothing, the smoothed plane acquires the quality of an iron surface. Such walls are covered with oil paints. After using a felt or rubber trowel, the surface is similar to fine sand. It is suitable for adhesive painting.
Preparing the coating solution
Grouting of the walls after plastering is carried out to obtain (without puttying) the surface of the required quality (for finishing). Putty is a composition with a filler, the grains of which are smaller than those of the sand of the ground plaster mortar. To obtain a structure close to putty, the coating composition is made on fine sand. During the work, small grains of sand are packed more densely. The remaining components of the solution are the same as those of the soil.
The mortar for the top layer of wall plaster is made less viscous than the soil.
Technique for preparing the coating mixture:
If you prepare it yourself, then:
The important thing for covering is to get an even mixture. If part of the mixture is oily and the other is thin, you will not be able to obtain good quality grout. The mixture should have normal fat content.
If the walls are plastered with gypsum or lime-gypsum composition, then for leveling you can use sandless solutions, the components of which are gypsum and lime in the following ratios:
For these mixtures, retarders are not used, but small quantities are mixed. To mix, take lime dough (proportions are indicated in volumetric parts), passed through a sieve with holes up to 1x1 mm. The gypsum powder is filtered through a sieve with the same mesh. A sandless finish should create a smooth surface suitable for paint. The operation is performed with a wide spatula, alternating horizontal and vertical movements.
Wall surface requirements
Leveling walls is a long and quite labor-intensive process that requires some skill. Before starting work, you need to decide on the choice of future finishing - will it be painting or wallpapering. This is necessary to give the walls certain characteristics during the leveling process, which consists of the following steps:
- before starting work, the walls are cleaned of dust, dirt and old finishes;
- applying a deep penetration primer with an antiseptic to the entire surface of the cleaned wall to prevent the appearance of mold and mildew;
- if necessary, install reinforcing mesh;
- applying plaster solution and leveling using beacons and rules;
- primer of a dried plastered wall;
- puttying;
- grinding and smoothing out surface irregularities;
- primer before painting or wallpapering.
Tools for work
Since the coating (as a material) is a plaster composition, plastering tools are used to apply and level it:
A little more about mashing tools.
Graters can be made of wood, plastic, foam, stainless steel, or sponge. The working plane can be upholstered with felt or covered with rubber. Depending on the material, both the service life and the quality of the surface treated are different. For example, sponge graters are convenient for wet leveling.
Sprayers are often used for wetting. Among other auxiliary devices, it is useful to have a lamp or spotlight for installing side lighting. Side light will help identify even minor defects. We advise you to provide a safe mount for hanging the lamp in any place necessary for work.
Grouting decorative plaster
Grouting the surface of decorative plasters is exciting. Thanks to it, you can achieve various decorative effects. Such work has its own difficulties, because the surface of decorative plasters can be embossed. For example, to grout a “bark beetle” finish, you need to wait until the mixture dries and the stone grains harden in place. Grouting is done with floats with an abrasive mesh, without applying much force. Afterwards the dust is removed.
Moroccan plaster is not rubbed down, but polished with a special stone. The stone is placed on the surface and the hardened layer is smoothed out using circular movements of a small radius. Work continues until shine appears. The second sign that the finishing is ready is the appearance of a “stone sound”.
Smoothing with a spatula or trowel is also performed for the Venetian. This operation is called ironing. The tool is used only from stainless steel. After ironing, the surface becomes smooth and shiny, like a mirror.
The effect of a mirror surface also appears in acrylic mixtures. They are smoothed with a wide spatula in one or two passes.
Decorative travertine plaster is also leveled 15-20 minutes after the formation of the relief. For smoothing, use a clean, moistened trowel. The surface is slightly “pressed” by moving the flatly applied tool in different directions.
If the decorative plaster has a deep relief, then rubbing can be done with a damp sponge.
Glossing of walls
Glossing walls is the most labor-intensive method of plastering and requires long-term painstaking work on the surface. This method consists of ideally smoothing the entire surface of the plastered wall, as a result of which it can be given gloss and uniformity. This method of grouting walls without the use of sanding tools saves time and allows you to achieve an ideal surface for painting and wallpapering. The smoothest surface is achieved by using very wide 70-100 cm spatulas with a thick and hard blade about 5 mm thick.
Basic requirements for the quality of wall surfaces for glossing:
- Walls intended for leveling must be thoroughly cleaned of dust, dirt and grease.
- All cracks that appear after the plaster has dried must be opened, puttied to a depth of more than 0.2 cm and rubbed.
A smooth surface can be achieved by glossing only when using gypsum plaster. It is impossible to level a cement-sand coating in this way. This is due to the elastic properties of gypsum, which does not shrink and lies more easily on the surface. Gypsum mortar does not contain sand, so this surface lends itself better to glossing.
Work order:
- To perform glossing, you need a wide metal spatula, a sprayer and a sponge grater.
- After the layer of plaster is applied and leveled using the rule, you need to wait for 15 - 20 minutes for it to set.
- Then you need to generously moisten the wall with water using a sponge, spray bottle, or sprayer.
- Using a sponge grater, thoroughly rub the entire surface in a circular motion. Then, using a wide spatula, smooth the top layer and level it until a glossy shine appears.
