Plaster is most often one of the mandatory types of finishing work during the construction of various buildings. Is it possible to glue wallpaper onto plaster? You can, because this is the optimal basis for strong adhesion of the paper base of the wallpaper to it. However, there is plaster, which is an independent element of interior design, for example, decorative plaster. It is completely unsuitable for wallpapering.
Scheme for gluing wallpaper onto plaster.
In any case, the surface of the walls must be pre-prepared. The strength and beauty of decorating a room with wallpaper depends on how well it is done.
To work you need:
- plumb and level;
- measuring tape;
- knife and scissors;
- roller, brushes, spray gun;
- spray bottle with water;
- sandpaper;
- sponges, pieces of fabric;
- glue bucket.
Is it possible or not?
Basically, the construction team rents out their projects that do not have putty. Plastered walls - rough finish. Is it possible to glue wallpaper on them?
To answer this question, we need to consider the quality of the plaster used, as well as the satisfaction of the work. If the plaster is cement-based, you should not glue wallpaper without treatment. Coarse grain will interfere with the tight fit of the canvas, no matter how tight it is.
Gypsum plaster is also an incomplete base for wallpaper. There are reasons for this:
- The rough base absorbs moisture. The glue applied will not hold the canvas for long and it will soon fall off.
- The color of the plaster can show through the finishing material, thereby spoiling the appearance with dark spots.
- In most cases, cracks appear on the rough foundation. They are different in nature, but the consequences are the same: the wallpaper either tears in these places or comes off.
After such reasons, you can thoroughly answer the question - no. However, there are cases when you can glue wallpaper onto plaster without putty. You can also do this by doing some preparatory work.
When can you glue
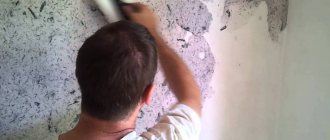
When replacing an old decorative coating with a new one. That is, the old trellises must be removed from the surface. The surface is wetted, and then carefully, without damaging the rough base, removed with a spatula.
Old canvases are removed without residue. There are pieces left, they are moistened with water, left for 5-10 minutes, and they come off freely.
After this, the room is well dried and ventilated. Examine for the presence of cracks. When found, they are expanded, treated with a primer and covered with sickle tape. It will not give further discrepancy.
If there are metal objects (screws, nails) in the surface, they need to be processed. This is done with regular paint so that no rust remains.
After the solution has dried on the cracks, paint and all dust are swept away with a dry cloth or soft brush. The surface is coated with a deep penetration primer. It's better to do this twice.
After the work has been done, you can begin the gluing process.
When not to
In new buildings (apartments, houses), the walls and ceilings are often plastered with cement mortar.
Wallpaper should not be glued to “bare” untreated cement.
The cement, when applying glue, will absorb all the moisture. Wallpaper will not stick to the surface. And if you wait for some time, gray spots will appear on the decorative finish and spoil the appearance.
Therefore, before starting the main process, it is necessary to carry out a number of works.
- Clean the base. Seal holes and cracks. Clean from dust.
- Coat metal objects with rust protection and the entire surface with primer.
- After which the walls are puttied.
- The last preparatory step is re-priming.
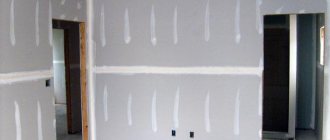
Often, cement walls are leveled with “dry plaster” - plasterboard. But, a number of works also need to be done with it in order to prepare it for gluing the canvases.
Repair work
Below are step-by-step instructions that will help you re-hang the wallpaper. That is, the finishing is already there, but it is old and needs to be replaced.
To work you need the following materials and tools:
- putty;
- plaster;
- deep-penetrating primer;
- wallpaper adhesive mixture;
- level or plumb line;
- container for kneading the mixture;
- an industrial mixer or a regular electric drill with a mixing attachment;
- a set of spatulas – small and large wide;
- roller or paint brushes;
- grater (sandpaper attached to the holder).
Surface preparation
- Removing old wallpaper or other covering. You need to wet it well with water, spraying liquid from a spray bottle, or treating it with a wet washcloth. Next, wait a quarter of an hour until the wallpaper is well saturated and soaked. Afterwards, removing the coating will not be difficult. The wallpaper will peel off in large pieces. Pry up the canvas with a spatula, then rip it off. It is important to remove everything without exception. Even small pieces left behind can cause bubbles on the new coating. The tiles are removed mechanically using a chisel and hammer. Oil paint can be removed with a spatula after heat treatment with a construction hairdryer, or with detergents.
- Detection of weak areas of the coating. Lightly tapping the hammer over the entire wall, especially over visible flaws. Unstable, weakly adhering elements are removed. The resulting cavity inside is coated with primer and wait until the composition dries. Then the missing pieces are covered up.
- The wall is cleaned of dust and dirt. Grease stains are removed with solvents.
- Previously installed metal parts (nails, screws, dowels, etc.) are completely removed and the cracks are sealed. You can also hammer the elements inside flush with the surface. Or cut it with a grinder. It is advisable to additionally paint all metal objects with regular paint. Painting is done to prevent corrosion processes.
- If the wall as a whole is very curved, then it is recommended to make an alignment. An excellent option would be to use the Rotband brand.
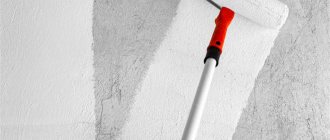
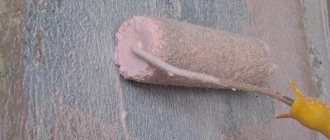
- After completing the above steps, the surface is ready for priming. The primer is applied in two layers, each of which is possible only after the previous one has completely dried. To reduce the amount of glue absorbed into the surface in the future, you can add a small amount of PVA to the primer. An alternative to primer can be diluted wallpaper glue.
Puttying
- As indicated in the instructions, prepare the plaster mixture.
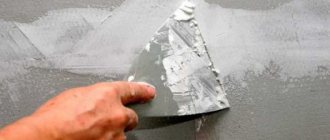
- Using a narrow spatula, the plaster is scooped out of the container and applied to a wide one. You can also immediately place the mixture on the wall.
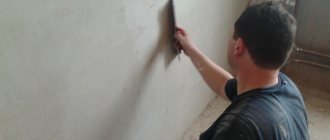
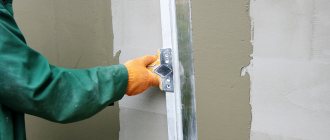
- Using a wide spatula, moving from bottom to top, the solution is distributed over the wall in an even thin layer. The surface is not touched until it hardens.
- The wall is given perfect evenness. Processing is carried out with sandpaper, which is fixed on a block, or with a special construction float.
Requirements for the surface before wallpapering
Before gluing wallpaper, the wall must meet the requirements that allow this work to be done efficiently and for a long time.
- There should be no cracks, crevices or holes on the surface. They are reinforced and plastered.
- If there are metal objects that cannot be removed, they are coated with protection (regular paint) to prevent rusting.
- Primer coating is a must. This will protect the surface from moisture and provide good adhesion.
- In most cases, the surface is covered with putty. This protects the walls and ceiling from moisture and cracks. And dark spots do not appear on the wallpaper. The coverage has a long warranty period.
- Before gluing wallpaper, be sure to choose a suitable adhesive. Each type of trellis has an adhesive label on it.
Before gluing, the rough base is covered with putty mixtures. After grouting, a primer is used, only after that the finishing is carried out.
Walls
When buying an apartment in a new building, as a rule, its walls are pre-finished, thereby allowing the owners to make the necessary repairs themselves. The same applies to new houses, whose walls are almost always plastered, whether they are made of plasterboard or brickwork. Even during repairs, it is recommended to completely clean the old cladding down to the plaster layer. But if the surface is not prepared correctly, there is a chance that the wallpaper will begin to peel off. This article will discuss how to properly glue wallpaper onto plaster.
- Stages of gluing liquid wallpaper
Preparing the wall surface
Walls are the background of the entire room and the design that is implemented in it. The overall impression of the entire room depends on how well their cladding is done. No beautiful furniture or interior items can add sophistication to a room if its walls are uneven.
Often, by choosing a variegated pattern or a pronounced texture of wallpaper, owners hope to disguise unevenness without additional and labor-intensive work to level them. But this opinion is wrong. Most often, all the shortcomings appear when the lighting changes, for example, what is invisible during the day becomes obvious under artificial lighting from a chandelier and vice versa.
To apply wallpaper to plaster, you will need the following tools:
- tape measure, level and plumb line;
- stationery knife or scissors;
- a spray bottle or sponge moistened with water;
- sandpaper and spatula.
Stages of work
- If repairs are being carried out, then the old wallpaper must be removed completely, right down to the plaster. If even small fragments remain, when pasting new wallpaper they will get wet and move away from the wall. Swelling and unevenness will form in this place.
- First, the wall needs to be well moistened with a spray bottle or sponge. The paper should be completely wet.
- Using a spatula by the edge, carefully tear off a piece of wallpaper from bottom to top. As a rule, wallpaper that was pasted many years ago does not come off easily and many small fragments remain on the walls. They must be additionally moistened and try to be completely cleaned. The surface in these places is subsequently cleaned with coarse sandpaper.
- When carrying out renovations in an old house, the plaster loses its quality over time and begins to crumble. It may come off in small pieces along with the wallpaper when removed. Therefore, it must be tapped in all places where cracks are found, and cleaned with a sharp object. Coat these areas with primer and level with gypsum plaster.
- Be sure to remove all nails or dowels that were driven into the walls. In their places, depressions are formed, which are also sealed with plaster. If you cannot remove them, then you need to try to drive them as deep as possible.
- Sometimes these preparatory works are enough to begin applying the decorative layer. But if there are large irregularities or blockages upward, complete leveling with starting putty is required. Therefore, you can glue wallpaper onto plaster without putty only if the walls are smooth enough so that flaws are not noticeable in the future.
- Having leveled the wall with putty and applied a layer of finishing plaster on top, it’s time to prime the surface. There is a wide variety of primer compositions that vary greatly in price. There is no need to choose the cheapest ones, even if you apply light paper wallpaper. Such compositions are very liquid and do not greatly improve the adhesion of wallpaper with plaster. They are applied in 2 layers, the drying time of each does not exceed 2-3 hours.
Advice: if the wall has old plaster that is highly porous, it is recommended to add a little PVA glue to the primer. This will prevent moisture from being absorbed from the wallpaper paste too quickly.
Plastering walls under wallpaper
- It doesn’t matter what material the walls are made of, brick, foam block or drywall, before wallpapering they must be leveled with plaster. Depending on the degree of unevenness, work is carried out in the form of a thin layer of finishing plaster or with leveling along the beacon using starting putty and subsequent finishing with a finishing composition.
- It is most convenient to use gypsum plaster on drywall. It dries quickly and has a white color, which is especially important when gluing thin wallpaper. The composition is applied in a thin layer and leveled with a wide metal spatula. Everything must be done quickly, since the gypsum-based composition sets instantly.
- When leveling, do not allow the formation of sagging, as it is almost impossible to remove them later.
- When the plaster is completely dry, it is sanded with a special grater with a metal mesh. This mesh quickly becomes clogged and dull, so you need to have a few in stock.
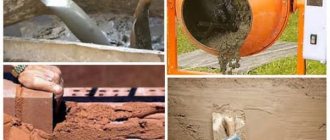
- Uneven brickwork is first leveled with a thick layer of cement plaster along the beacons. The composition has a granular structure, and when dried it forms a gray surface. This is not suitable for wallpapering, therefore, as in the case of plasterboard, it is necessary to apply a finishing coating with a gypsum compound.
- To achieve a glossier evenness, moisten the still dry composition (literally 10 minutes after application) and smooth it with a spatula.
- The resulting surface is smooth and has low adhesive characteristics. This means that without treatment with a primer, the wallpaper will not adhere well to it.
- You can prime with special solutions or PVA glue diluted to the consistency of milk.
How to glue wallpaper on plaster
- If the house is new, then there is a high probability of “walking” on the walls. Therefore, it is better to start gluing wallpaper from the corner of the room, so that there is a junction of two canvases. If you pass a corner with a single piece of cloth, within a year it will develop a distortion.
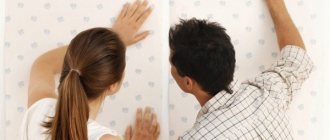
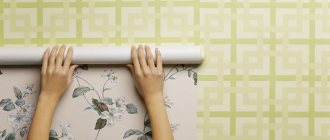
- It is more convenient to carry out the work together. First, measure the desired size of the canvas. To do this, one stands on a stepladder and holds the end of the roll near the ceiling. At this time, the second one measures the required length at the bottom, making a crease or incision at one edge. After this, the wallpaper is carefully laid on the floor. For an even cut at the bottom, the roll is rolled out a little and placed on the piece to be cut so that the edges match exactly. As a result, an even fold is formed, and it is along this fold that the cut is made with a sharp stationery knife.
- Wallpaper glue is sold dry. It is absolutely harmless, as it is made on the basis of starch. By the way, expensive and cheap glue have the same composition, so you shouldn’t pay extra money. It is diluted in water, stirring continuously until it thickens. After kneading, let it brew for 5-10 minutes, depending on the manufacturer’s recommendations.
- For better fixation, apply the glue with a thick brush to the wall and wallpaper. All edges and corners must be thoroughly coated. After application, the wallpaper is folded in half, with glue inside, and so it lies for 5 minutes. If the wallpaper is paper, then you don’t have to wait this time, but immediately stick it to the wall. If it is heavy non-woven or natural, then it is better to wait at least 10-15 minutes.
- The wallpaper is carefully unfolded and glued, starting from the corner. If there is doubt about its evenness, check the vertical with a plumb line. Press with a dry white cloth (colored fabric can fade from the glue and ruin the wallpaper) first on the left edge and top. After making sure that the canvas is positioned vertically, you can begin to glue it completely. First, press it in the middle along its entire length, and smooth it with a rag using movements from the center to the edges, expelling all air bubbles.
- Most modern wallpaper is glued end to end, so overlapping of the pieces is unacceptable. All subsequent segments are aligned to the edge of the previous one.
Advice: if you can’t make it exactly at the joint, you can resort to tricks. To do this, the canvases are glued with an overlap of 2-3 cm and immediately, while they are wet, an incision is made in the middle with a stationery knife. It must be done evenly, pressing it against a ruler or rule. Then the excess pieces from the top and bottom are removed, resulting in a perfectly fitted seam.
- If bubbles form that cannot be removed, you will have to make an incision. If the wallpaper is colorful, then in the future it will be completely invisible. If blisters form on plain wallpaper, it is better to re-glue this area, of course, if the stock of wallpaper allows it.
Adviсe
When wondering whether it is possible to glue wallpaper onto plaster, it is recommended to study several nuances and useful tips that will make the task feasible.
- The plaster has a smooth surface, so you should wait until the wallpaper glue completely sets to the wall (2-3 days). Until this time, drafts should not be allowed, which means that windows should be kept closed and doors should be opened as little as possible. Otherwise they will simply come off.
- Also, the peeling of wallpaper from the plaster is affected by too dry and hot air from the radiators. If it is not possible to reduce their temperature, you should try to carry out repairs before the start of the heating season.
- It is important to check the quality of the plaster layer to ensure there are no cracks or blisters. It is also important to make sure that the plaster layer does not crumble over time.
Glue liquid wallpaper onto plaster
- This modern type of wallpaper is becoming increasingly popular due to its sophisticated appearance and the ability to do the work yourself. In addition, they are easy to repair, which is especially important for those who have small children or animals in the house.
- They are a thick mass based on cellulose and water, which forms a relief and three-dimensional pattern. But this should not be misleading that in this way it is possible not to repair the unevenness of the walls. Preparation of the base for liquid wallpaper is carried out carefully, in compliance with all technological stages.
- Ideally, the wall should be plastered in an even layer. This means you will need to remove old wallpaper or clean off paint. If mold is present, it must be removed and then an antiseptic primer should be selected for all walls.
- If new plasterboard walls were installed under this type of wallpaper, then it will not be enough to just seal the seams and screw heads; it is recommended to plaster the entire surface. Otherwise, when the liquid wallpaper dries, the plaster will show through against the background of the gray color of the plasterboard.
- Another nuance is that the plaster is quite hygroscopic and can get wet from strong humidity. Therefore, before applying the raw composition of liquid wallpaper, the plastered wall must be painted with waterproof emulsion paint. Or, as a second option, it is to add PVA glue to the composition of the gypsum plaster itself in a ratio of 3:1, as a result of which its moisture-resistant properties will improve.
Stages of gluing liquid wallpaper
- First, prepare the solution itself. To do this, pour warm water into a clean, small container. Starting to stir with a drill at medium speed, gradually add dry wallpaper powder. The consistency of the mixture should resemble thick, viscous sour cream.
Tip: it can be difficult to stir the entire volume and there are solid lumps left in it. During the process of applying wallpaper to the wall, they will interfere and spoil the result, so they must be immediately removed from the container.
- At the end of the mixing, the finished solution is infused for 15 minutes, after which it is mixed again and started to work.
Tip: the mixture in different packs may differ slightly in the shade or saturation of decorative additives (Lurex or inclusions of gold or silver threads). Therefore, first you need to mix dry wallpaper from all the packages in one container, and then take it from it for mixing.
- Liquid wallpaper is applied to the entire wall at one time. The layer should not be too thick and even. It must be taken into account that when it dries, its size will remain unchanged. To apply a large volume, a special gun is sold, but in this case the layer will take at least 3 days to dry.
- To create a relief, you can buy a special roller with a printed outline of the pattern. Pressing it, they pass from top to bottom along the still damp wallpaper.
- Using a dry mixture of a different color, you can create a three-dimensional pattern. If you don’t have artistic talent, then simply print out a stencil and cut it out, leaving only the outlines. First, make background wallpaper all over the wall and let it dry completely. And only after that, a stencil is applied on top and the drawing is laid out.
Wallpaper for plaster
- When the walls are plastered, but require repair, the choice becomes what to prefer, wallpaper or decorative plaster.
- Both of these coatings require wall preparation, or rather their leveling. In terms of labor costs, they are practically similar with the only difference being that it is faster to paste wallpaper than to apply decorative plaster.
- In this case, you need to start solely from the design of the room in which the renovation is being done. Sometimes, to create the necessary coziness, you can’t do without beautiful wallpaper on a natural or fabric basis.
- Otherwise, for a classic style or for an “antique” stylization, it is better to plaster the walls.
- An alternative could be modern wallpaper with decorative plaster. They not only resemble natural material in appearance, but also have texture and relief. Their cost is quite high compared to conventional ones, but incomparably lower than applying real plaster. In addition, they are sold in a huge range of styles: from modern in the loft style to classic ones with imitation of various patterns of stone chips.
To summarize, we can say that wallpaper can only be glued onto gypsum plaster, which creates a smooth finish. But before gluing, be sure to treat the walls with a deep penetration primer or diluted PVA glue. It is not recommended to glue wallpaper onto cement plaster because of its granular surface, which impairs the adhesion of the wallpaper to the wall. Just like wallpaper without plaster is also not the best option.
What happens if you glue it to plaster without decorative putty?
Paste the wallpaper onto a cement base. This has consequences:
- the water from the glue will be absorbed into the base - the wallpaper will not last long and will fall off;
- When cement absorbs water it turns dark gray. Then heights appear on it - they will appear on the trellises. The appearance will be spoiled;
- Old plaster often has chips and cracks. If a finishing coat is applied to them, after drying the trellises will tear or there will be emptiness in these places, visible on the surface.
Due to these factors, the surface is covered with putty and primer. Only after that the finishing coating is glued.
Is it worth priming?
The primer protects the surface and finish.
Firstly, it is protection against mold, mildew, and various insects.
Secondly, the mixture provides strong protection against moisture penetration into the rough base. So the adhesive composition remains unchanged.
Thirdly, the glue applies evenly to the base coated with the mixture and does not flow down. The primer promotes good adhesion.
Before you apply the mixture, you need to select it. There are many types with antiseptics. This option is applicable for the first priming - getting rid of fungus and midges. And also a deep penetration primer that protects the rough base from negative influences.
Under the trellises, during the second priming, they use Pufas - white, as well as “Moment”, “Knauf Tiefengrund”, “Ceresit CT 17”.
The base should be primed carefully, not missing any spots, and not leaving dry corners. If the roller is not enough, use a brush.
Ceiling nuances
Yunis Teplon gypsum plaster (white color) is applied to the ceiling with some specific nuances. The process proceeds in the same way as when working with walls, but the maximum layer of mortar is allowed no more than three centimeters. It is also important to very accurately monitor the evenness of the coating: on the ceiling, the slightest irregularities are especially noticeable. Using such a solution for finishing ceilings allows you to:
- improve thermal insulation;
- reduce the load on the entire structure by using fairly lightweight material;
- carry out the work very quickly and easily;
- get a durable layer.
What glue to use
How well the glue for finishing the surface is chosen depends on the service life of the glued trellises. Each adhesive solution is intended for a separate type of trellis.
If the coating is light, paper, use methylcellulose-based glue. Heavy trellises are glued with PVA glue.
The fiberglass finishing coating is glued with a composition intended specifically for this purpose. Its composition is designed for such coatings. This glue can only be removed with a solvent.
The adhesive composition is produced in dry form. According to the instructions, it is diluted with water and left for a certain time to swell.
The car comes to the rescue
An important advantage of using Eunice Teplon plaster is that it can be applied using a special machine. To do this, you need to purchase a mixture intended specifically for machine application. It is a little more expensive than the composition that is used for manual work.
Gypsum plaster "Unis (unis) Teplon" in a thirty-kilogram bag will cost about seven to eight dollars. The consumption of Unis Teplon plaster in the machine version will be slightly different from how much mixture is spent when applied manually. However, in the end, the costs are justified by reducing the time required to arrange the plaster layer.
What is the best wallpaper to use?
The answer to the question depends on the choice: can they be glued to plaster. In most cases, choose one of three options:
- Paper web - quick erasing and fading. It is difficult to glue because they swell quickly. There is one advantage - their low cost. They do not glue to the plaster stand, even when using a primer. Only temporarily, before gluing a more durable coating.
- Non-woven fabrics – composition: cellulose and polymers. They are dense, so if the base is made of gypsum plaster, coated with a primer, then they can be glued.
- Vinyl - two-layer fabric. Heavy, dense trellises. Glue to a surface coated with putty and primer.
There are other types of canvases on the construction market that are not used so often, but make the interior of the room unique: 3D wallpaper, liquid trellises, photo canvas, canvases with diode elements.
Each type has its own requirements for the rough foundation. To fix them, you need to study the instructions for use, the base for gluing, glue, special primer, and room humidity.
Liquid wallpaper is a mixture of cellulose and water. To fix them, you need to prepare the surface. This is one of the types of trellises that are glued to unplastered walls, but do not reflect unevenness.
Glowing wallpaper - there are different types. From the use of phosphorus and powder to the insertion of diodes. The surface must meet all requirements. It can be plastered and coated with a primer, but for other types the base must be perfectly flat and smooth.
Calculation of the required amount of mixture
The consumption of gypsum plaster before carrying out repair work can be calculated independently in order to protect yourself from wasting money and trying to deceive you.
Let's make a calculation for 10 sq.m of load-bearing surface:
- requirements – 5 cm ;
- the beacons are installed with deviations of 2, 4, 6 cm at three points - we add up these indicators and get 12, divide the sum by 3 (the number of beacons) - we get 4 - the average permissible thickness for one layer of plaster;
- look on the back of the package to see how much mixture will be used per 1 cm layer for 1 sq.m - this is approximately 8.5 kg;
- in order to find out how much plaster is needed for a layer 4 cm thick, multiply 4 by 8.5 (the number specified by the manufacturer), resulting in 34 kg for 1 sq.m of surface ;
- for a wall with an area of 10 sq.m, 340 kg of mixture will be required - this is 10 (area) multiplied by 34 (amount for 1 sq.m);
- Yunis Teplon gypsum plaster is produced in packages of 30 kg. Therefore, for 10 square meters of surface, 4 cm thick, you will need 11-12 packages of the mixture .
Now you know the technical characteristics of Teplon plaster, its advantages and disadvantages, application features, as well as a way to calculate the required amount of mixture - this is enough to competently prepare for the start of repair work and bring it to its logical end with benefit for you.
Tips and tricks
When asking the question about what surface you can glue trellises on, experts recommend that you familiarize yourself with the tips and recommendations:
- When gluing the canvas onto plaster coated with a primer, drafts, open windows and doors are not allowed.
- Dry and hot air from the heater causes the trellises to fall off. Therefore, while the surface is drying, it is necessary to limit the use of heaters.
- Plaster has many negative aspects, so the base should be carefully prepared before applying glue.
Knowing these simple rules, trellises on plaster will last longer than usual.
Pasting the rough base without puttying is possible. It is only necessary to carry out a series of preparatory work for strength and durability.
