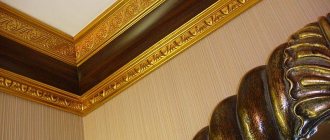
Any customer of repair and construction work is interested in good repairs.
Nobody wants to look at crooked walls, doors that won’t close, and swollen linoleum.
To avoid negative emotions, three things are enough - highly qualified specialists, high-quality materials and strict adherence to the technological process of repair work.
On almost all packages of consumable components for repair, you can read instructions on use, installation, assembly or gluing. But standard instructions do not always fully answer questions about the compatibility of certain materials.
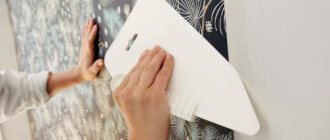
What wallpaper can be glued without preparing the walls?
What kind of wallpaper can be glued without
wall
putty ?
Craftsmen recommend giving preference to denser non-woven and vinyl models. Fashionable today, liquid wallpaper
is one of the types of material that adheres perfectly to any surface, including
a wall
.
Interesting materials:
Is it possible to get vaccinated against rotavirus after a year? Is it possible to vaccinate a dog while changing teeth? Is it possible to take x-rays with lenses? Is it possible to do Happiness for hair immediately after coloring? Is it possible to do sugaring for a 12 year old girl? Is it possible to do sugaring for teenagers? Is it possible to do sugaring at 16 years old? Is it possible to do Smas lifting after Botox? Is it possible to make the mixture using regular water? Is it possible to douche with soda?
Deformed joints
Even a smooth surface can present unpleasant surprises after wallpapering. We are talking about “opened” joints.
Defective batches of wallpaper are quite rare. Therefore, deformed joints are most often a result of non-compliance with the technology of gluing panels and improper preparation of the surface of walls and ceilings.
The glue on the edges of the sheets already located at the gluing site dries faster than in the center. In combination with the high hygroscopicity of the putty layer, this causes rejection of the edges of the canvases.
The absorbent characteristics of the putty can be improved by using a two-layer coating with deep penetration primers.
Another way is to generously lubricate the joints of the sheets with wallpaper glue.
When and how can you stick wallpaper on plaster?
Some manufacturers of building materials indicate in the description of mixtures that their plasters do not require further putty. This statement is partly true. But still, the plaster coating is not a finishing layer, so it is advisable to use putty before gluing.
If you do not need to obtain a perfect finish, then you can hang wallpaper without putty. The result will not be durable or visually perfect. But the finishing will be able to hold out for a certain time.
To stick canvases onto plaster, follow the algorithm below:
- Level the surface as thoroughly as possible. Attach coarse-grain sandpaper to a special holder or block. Start sanding until the surface is as smooth as it was originally.
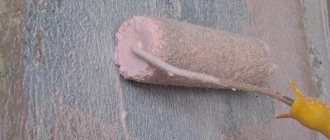
- Treat the wall with a deep penetration primer to fill existing pores and strengthen it. Wait for the mixture to dry completely. Sometimes it may be recommended to do several primings. But as practice shows, there is no significant improvement from repeated impregnation of the base. But the consumption of the mixture, and therefore the cost of soil, also increases.
- Mix wallpaper glue and apply to the wall. Wait until it dries, then you can stick it on.
Advantages and disadvantages of gluing on plaster
- No need to spend money on buying putty.
- Reducing repair time due to the absence of the puttying stage, but the need to have a high-quality surface is important.
- There may be visual defects in the rough finish, so it is advisable to prepare the wall and not choose thin, light, transparent wallpaper for hanging. The best option would be textured thick dark materials.
- The plastered wall must initially be smooth, otherwise there is a need for additional smoothing.
- You will have to use a lot of primer to reduce absorption.
Repair work
Below are step-by-step instructions that will help you re-hang the wallpaper. That is, the finishing is already there, but it is old and needs to be replaced.
To work you need the following materials and tools:
- putty;
- plaster;
- deep-penetrating primer;
- wallpaper adhesive mixture;
- level or plumb line;
- container for kneading the mixture;
- an industrial mixer or a regular electric drill with a mixing attachment;
- a set of spatulas – small and large wide;
- roller or paint brushes;
- grater (sandpaper attached to the holder).
Surface preparation
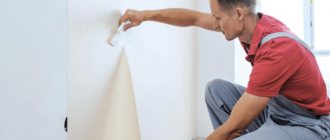
- Removing old wallpaper or other covering. You need to wet it well with water, spraying liquid from a spray bottle, or treating it with a wet washcloth. Next, wait a quarter of an hour until the wallpaper is well saturated and soaked. Afterwards, removing the coating will not be difficult. The wallpaper will peel off in large pieces. Pry up the canvas with a spatula, then rip it off. It is important to remove everything without exception. Even small pieces left behind can cause bubbles on the new coating. The tiles are removed mechanically using a chisel and hammer. Oil paint can be removed with a spatula after heat treatment with a construction hairdryer, or with detergents.
- Detection of weak areas of the coating. Lightly tapping the hammer over the entire wall, especially over visible flaws. Unstable, weakly adhering elements are removed. The resulting cavity inside is coated with primer and wait until the composition dries. Then the missing pieces are covered up.
- The wall is cleaned of dust and dirt. Grease stains are removed with solvents.
- Previously installed metal parts (nails, screws, dowels, etc.) are completely removed and the cracks are sealed. You can also hammer the elements inside flush with the surface. Or cut it with a grinder. It is advisable to additionally paint all metal objects with regular paint. Painting is done to prevent corrosion processes.
- If the wall as a whole is very curved, then it is recommended to make an alignment. An excellent option would be to use the Rotband brand.
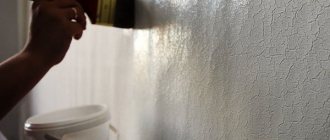
- After completing the above steps, the surface is ready for priming. The primer is applied in two layers, each of which is possible only after the previous one has completely dried. To reduce the amount of glue absorbed into the surface in the future, you can add a small amount of PVA to the primer. An alternative to primer can be diluted wallpaper glue.
Is plaster suitable for gluing?
- Cement plaster. The diluted material has a heterogeneous granular structure. After application and hardening, the plaster acquires a rough, bumpy surface. If you attach wallpaper without putty, especially thin wallpaper, then all the imperfections of the uneven base will be visible through it. In addition, the mixture is dark in color. Because of this, the appearance of the wallpaper may deteriorate. The plaster mixture will simply be visible through thin wallpaper, especially if the wallpaper is translucent. Cement mixtures are also capable of absorbing moisture. When applying wallpaper glue, moisture from it can quickly be absorbed into the plaster, which will lead to poor quality of gluing. After getting wet, the plaster darkens unevenly, becoming stained throughout the wet area. This type of mixture is often used in new buildings.
- Gypsum plaster. The solution also has moisture absorption properties. Therefore, the wallpaper will not stick to the surface in the best way. And after a while they will begin to peel off completely and disappear completely. Often the surface of the gypsum is even and close to smooth. Therefore, there is no need to particularly level the surface. You just need to treat the gypsum base with a primer.
- Decorative plaster. The material is intended to create a finishing coating. Not intended for mounting on top of other finishes. You should not even try to glue trellises if the decorative mixture forms a relief surface after drying. Thick wallpaper on a non-woven or vinyl base will not be able to hide the relief of the finish.
Obviously, it’s better not to start gluing wallpaper without putty if the result is to get a perfectly smooth, predictable finish.
Otherwise, without puttying, the following problems may arise:
- Plaster tends to crack over time. Voids are formed, which lead to peeling of the canvases and even ruptures if the discrepancies are large.
- Thin canvases will show the rough material through, which will distort the overall appearance of the finish.
The most suitable plaster in this case is considered to be gypsum. After treatment, the surface turns out to be smooth, and in order for the wallpaper to stick firmly and for a long time, the hardened plaster will need to be primed. This achieves a reduction in liquid absorption.
Materials and tools
To prepare the walls and apply wallpaper you will need the following tools and materials:
- metal spatula - narrow and wide;
- long ruler;
- sharp knife;
- scissors;
- pencil for marking;
- roulette;
- wallpaper;
- wallpaper glue;
- plaster;
- putty;
- primer;
- paint roller and container for glue;
- rubber roller - for wallpaper;
- clean light rags;
- level;
- sandpaper or mesh.
If we summarize the conversation about whether it is possible to glue wallpaper on plaster, we can conclude the following: this technology has the right to life, but only under certain conditions. In other cases, you always need to pre-prime and putty the walls.
Initial finishing
If the apartment is new, only rough finishing has been done, then the situation is a little different. There is no need to get rid of the old finish, but you will still have to prepare the wall.
There are two possible options:
- Described above, implies puttying. Then follow the instructions above, but exclude the items that describe the process of removing the existing trim.
- Disclosed in the second paragraph of the article, it is performed without putty. The method is acceptable, but when analyzing the advantages along with the disadvantages, it is better to focus on the first option.
Source
Useful tips
Some useful tips to help you properly putty walls under wallpaper.
1. For uneven walls, with cracks and other flaws, it is necessary to add a primer to the puttying process. First, the starting putty is applied, then the primer, then the finishing putty, and finally the last layer of primer.
2. It is not recommended to take long breaks during the process of puttying surfaces. The transition from one wall to another should not take more than five minutes.
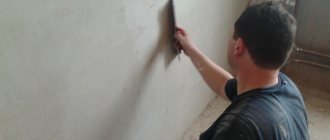
3. Scoop the putty out of the container using a small spatula. Then a wide spatula is leaned against the wall at an angle of 90° and the mixture is thrown onto it. After this, a layer of the required thickness is spread over the surface.
4. Apply putty to the walls from the corner and then move horizontally.
Conclusion. Don't be afraid to do putty work, even if you're doing a renovation for the first time. The main thing is to choose the right material and strictly follow the instructions. At the puttying stage before the mass hardens, any flaws can be corrected.
Putty: types, differences, application methods
Gypsum putty: composition, properties, application
conclusions
Puttying walls for wallpapering is a slightly labor-intensive process in terms of physical costs; requires attention and a small amount of pedantry. But technologically this procedure is not at all complicated, and defects can be easily corrected before final finishing. In addition to significant cost savings, plastering walls with your own hands will give the novice master initial construction skills. The desire to apply the knowledge gained in this article is the most important thing. And then the process will definitely captivate you!
Also searched for with this material: Wallpaper for the living room and Design of combined wallpaper for the bedroom.