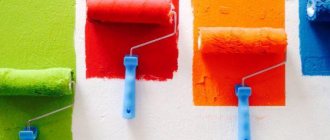
Cosmetic renovations in an apartment often involve wallpapering the walls: despite the variety of modern wall coverings, rolled-up canvases with a printed pattern remain just as popular and are actively used in the design of low-budget interiors.
Indeed, using wallpaper to cover internal surfaces is the easiest way, because you don’t need any special skills for this. Particular attention should be paid to the preparation of the walls: canvases made of paper, vinyl and non-woven fabric will hold up much better if the surface is well plastered, puttied, and most importantly, primed. You have completed all the steps, but you have doubts. How long before you can glue wallpaper after priming, can you start gluing? Let's figure out how long it takes to glue wallpaper after priming.
What determines drying time?
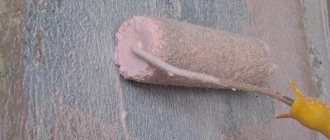
Do not neglect the stage of priming the walls.
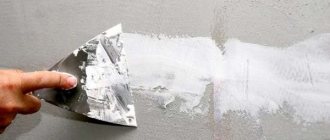
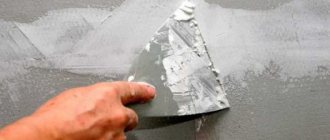
After priming, you can glue the wallpaper. Priming the walls is a prerequisite for quality repairs. The properties that the composition imparts to the coating make it possible to make the finishing coating strong and durable. However, many are in a hurry and allow too little time to dry the primer layer. And this is fraught with serious consequences.
Complete penetration of the primer into the walls and final polymerization directly depend on exposure to air. When the oxygen supply to the surface is cut off, the drying process stops.
If you glue wallpaper onto a wet surface, it may become deformed, and the bottom layer of the canvas will simply peel off.
The minimum drying time for walls after applying primer is 24 hours
In construction stores you can find various types of primers, which will differ in manufacturer, composition, and, accordingly, performance characteristics.
For example, some types of primers contain antiseptics, which is an excellent protection against fungal damage. The drying time of the product after application may depend on the type of components.
Regardless of the manufacturer's recommendations, it is better to play it safe and leave the work surface to dry for a day after treatment.
How to choose the right primer is described in this video.
Drying time is affected not only by the composition, but also by certain external factors. Thus, the main indicators are identified that should be taken into account when deciding how many hours after priming the wallpaper can be glued.
The main ones:
- Temperature conditions. Optimal conditions for high-quality drying are from 20 to 25°C. In a cool room, the primer takes much longer to dry.
- Humidity. For quick and uniform drying, this figure should not be higher than 60%.
- Layer thickness. The more primer you apply to the wall, the longer it will take to dry. It is better to apply the composition in several thin layers. It will be more efficient and faster.
- Primer composition. Oil-based solutions will take longer to polymerize.
- Foundation quality. The period of its polymerization depends on the penetration of the primer into the base. A more porous surface will take longer to dry.
Manufacturers indicate the average drying time on the packaging.
To find out exactly how long it takes after applying the primer to glue the wallpaper, you need to conduct a small test. Attach a piece of polyethylene to the wall. If condensation appears on the inside, then the wall has not yet dried.
How to remove old wallpaper from walls
Today, so-called removable wallpaper is available for sale, which can later be easily removed without the use of water or special products. You can determine them as follows: run a spatula along the seam at the bottom of the wall, pick up the canvas and pull it. If the entire tape can be easily removed, then you have removable wallpaper and removing it will not be difficult.
Removal with water
To do this you will need a liquid wallpaper remover. Dilute it with hot water in the proportions indicated on the package. Using a wide sponge or sprayer, apply the product to the canvas from the ceiling to the floor. Do not apply the product to the entire surface at once, otherwise while you are tearing off one section, all the rest will have time to dry. Wait a few minutes for the product to absorb, then use a spatula to remove the old wallpaper.
If you notice that the paper is not completely saturated with moisture, take sandpaper and run it over the surface. After the wallpaper is completely saturated with water, apply the product again and leave for 30 minutes.
What affects the drying of the primed layer?
Basic rules for working with a primed base:
- Wallpaper should only be glued to a completely dry surface.
- Applying putty or plaster to a wet base is strictly prohibited. Otherwise, the entire finish will peel off.
In the manufacturers' recommendations you can find information on how to reduce the drying time of the primer. One way is thermal exposure.
But if you use this drying option, you need to know some subtleties:
- Do not dry the surface in parts at a heat flow temperature above 300°C.
- The air pressure of the heat gun should be low.
- The heat source should not be too close to the treated wall.
- The room in which drying is carried out using a heat gun must be ventilated.
If this drying method is not suitable, then you can initially choose special quick-drying solutions as a primer. But they have their drawbacks:
- Pungent and unpleasant odor.
- Reduced adhesive properties.
Rules for applying primer for effective drying:
- The composition should be applied in a thin layer.
- The mixture must be applied in accordance with the manufacturer's recommendations. According to the instructions, you need to prepare the surface in a special way before applying the primer.
- The composition should be distributed evenly over the surface.
- If it is necessary to apply several layers, each layer must dry thoroughly before the next one.
Recommendations for proper primer can be found in this video.
Application methods - basic recommendations
It is no coincidence that the question of how long it takes for the primer layer to dry is of interest to novice craftsmen. The planning of the work cycle completely depends on the drying speed of the applied material. Proper organization of repairs saves the technician’s time and ensures high quality results. Let us list what polymerization depends on:
- The primer is applied in a thin, even layer. After high-quality application, there are no smudges, drops or other unattractive errors left on the working surface;
- deep penetrating compositions are applied in strict order if several layers of primer solution need to be applied simultaneously. After application, you must wait the time recommended by the manufacturer so that the previous layer has time to dry completely.
The listed requirements are indicated by the manufacturer on the label of the building material. Therefore, before repair work, it is strongly recommended that you read the information provided in the instructions in advance.
Compositions of primers and their setting period
Primers are used to reduce the consumption of building materials, for example, wallpaper glue.
Without a primer, it will be absorbed into the wall, so the amount of solution will be noticeably greater. In addition, the primer allows you to hide small defects in the wall and protect the surface from fungal formations.
Depending on the composition, primer materials have different setting periods, therefore they are divided into the following categories:
- Quick drying. They are used mainly for outdoor work, because... have an unpleasant odor. Manufacturers indicate the drying time of such compositions is 1-2 hours.
- Medium dryness. You can start hanging wallpaper after applying the primer within 12 hours.
- Long-drying. These are mainly oil-based primers. Complete polymerization will require at least 24 hours.
When choosing any composition, it is better to leave the walls to dry for the time recommended by the manufacturer, with an increase of 2-3 hours
Curing times for various mixtures
All primers differ in composition, so the drying time for them will vary.
You can find quartz composition on sale. The main component of the primer is quartz sand. Depending on the additional components, it is divided into three types, which dry differently:
- With synthetic resins. Used on smooth surfaces and applied in a thin layer. Drying time is 6 hours at a temperature range of 20 to 23°C.
- With the addition of acrylic and latex. Dries in 2 hours at 20°C.
- With silicate addition. Can be used at low temperatures, because... the mixture is frost-resistant. Drying time even at +5°C is 12 hours.
Action plan
To prepare the walls you need:
- remove old finishes from walls
- repair the walls
- level the surface with plaster
- putty and primer for wallpaper
Removing Old Finish
It is not allowed to glue wallpaper over old wallpaper or onto painted walls, therefore, the old wall covering must be removed, as well as dirt and stains removed. If the walls have been painted, all paint must be removed from the walls. Otherwise, the pasted wallpaper may begin to “come off” over time along with the paint layer.
Wall repair (removal of cracks, chips)
If there are unevenness, chips, cracks and other defects on the wall, they must be corrected. Our wallpaper is of medium density, but, like most modern wallpaper, it will not be able to hide even minor wall defects.
Defects that are not eliminated at the stage of wall preparation can affect the quality of the pasting (possible “bubbles” on the wallpaper sheets, divergence of the wallpaper joints, peeling of the wallpaper sheets, etc.).
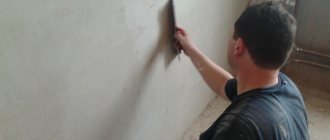
Leveling walls with plaster
The surface to be glued (including sheets of drywall) must be leveled with plaster, for example, KNAUF Rotband). Then treat the leveled surface with a deep penetration acrylic primer, for example, Tikkurila Euro Primer. If you are using another primer that does not contain an antiseptic, we recommend additionally treating the surface with an antiseptic - this will help prevent the formation of mold and mildew.
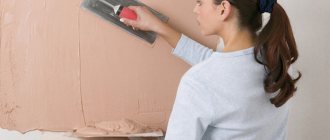
Finishing layer (putty)
The final leveling of the walls under the wallpaper is done with a fine-grained finishing putty, for example, SEMIN finishing putty or Sheetrock Danogips Superfinish.
Primer
The primer is made with deep penetration primer, for example Tikkurila Euro Primer, KNAUF Tiefengrund or Ceresit.
How long does it take for soil to dry?
The primer is selected taking into account the type of surface being treated. The drying time of the composition depends on which wall the primer is applied to.
On a concrete wall
Concrete pavement is porous, so it absorbs mixtures very quickly. To treat such a wall, at least five layers of primer are required.
The polymerization time depends on the type of primer mixture:
- acrylic dries in 6 hours (humidity should be no more than 50%);
- Vinyl-based primer - in an hour.
The degree of drying can be checked by touching the coating (the sticky wall is not yet ready for pasting)
On brick with plaster
The primer on wet plaster will take a very long time to dry. If the dry plastering method was used, the primer will dry in 12 hours.
On a lime base, drying time reaches 4 hours. If an acrylic primer is used, 3 hours of drying will be sufficient.
On wooden walls
To treat wooden walls, it is necessary to use alkyd, oil or alcohol-containing mixtures.
Types of primers
The compositions differ according to the focus of the work: external or internal finishing. Depending on the type of building material, not only the drying time of the surface depends, but also the performance characteristics, as well as the degree of protection from negative influences.
Universal
Suitable for all types of work. Ideally suited for wallpaper. It is also used for processing facades and flooring. Can be used for various types of surface.
Promotes strong adhesion to any materials
Acrylic
Mainly used for home repairs. It has no specific odor and is absolutely harmless to the human body. It dries quickly and is suitable for all types of walls.
Has many advantages:
- masks wall defects;
- extends the service life of the finishing coating;
- can be diluted with water;
- Helps reduce wallpaper glue consumption.
You can start hanging wallpaper in just a few hours.
Alkyd
For use on metal and wood only. It has excellent protective properties, but is quite specific in application. Depending on the composition of the specific mixture, drying time may vary. The drying period varies from one hour to a day.
Shellac
It is used for untreated wood, because this mixture prevents the development of resin. The base includes alcohol and resins. If you follow the manufacturer's recommendations, it dries within 12 hours.
Mineral
When using a mineral-based composition, microclimate conditions must be observed. This primer penetrates up to 3 mm inside the wall and dries in about 12 hours.
When can you glue wallpaper after priming?
It is important to know when you can glue the wallpaper after priming, that is, after how long you can glue the wallpaper on the walls and they will be completely ready for this treatment. Otherwise, the finish will be ruined.
The durability of the repair may be at risk. But in many cases, poor-quality surface treatment leads to a spoiled appearance of the finish.
Beginners should listen to the advice of professionals
Despite the fact that the desire to complete repairs faster is quite strong not only among professional craftsmen, but also among homeowners, the quality of construction work should not suffer.
The article discussed in detail the following questions: is it possible to glue wallpaper immediately after priming, and is it possible to do without a primer in principle? Only if all the described conditions are met can high-quality finishing of the room be achieved.
To achieve the best result, it is necessary to take into account the characteristics of the surface being treated, the composition of the primer and its compatibility with the base material, as well as the manufacturer’s recommendations. If all conditions for selecting the composition and its application are met, unnecessary hassle in redoing the repair can be avoided.
Common mistakes when wallpapering incorrectly
Wallpaper gluing is one of the simplest types of repair and finishing work, which does not require any special education or exceptional skill. However, people who undertake to glue wallpaper themselves often make mistakes that lead to very disappointing results. Glued wallpaper peels off, swelling, greasy spots, distortions, and sometimes tears appear on it. And all this can be avoided if you adhere to simple but very important rules.
Final pattern mismatch
Perhaps the most common mistake when gluing wallpaper yourself. It is very easy to avoid it; you just need to correctly match the drawing immediately before cutting. Naturally, you should not cut the entire roll ahead of time. Maximum two or three lanes.
Distortion leading to mismatched seams of cut strips
The second most common mistake is misalignment. When the strip is already glued to the wall, correcting this error by tightening it is not the best idea, as this may cause the material to tear. In such cases, it is better to remove the strip of wallpaper and paste it again, and in order to avoid such mistakes in the future, you need to use a vertical line or a plumb line, the role of which can be played by an ordinary weight on a thin thread.
Spots, folds and blisters
As a rule, the cause of these unpleasant phenomena is non-compliance with the temperature regime, as well as the instructions when preparing the glue. Bubbles form when air gets under the wallpaper. To prevent their appearance, immediately after sticking the strip on the wall, it must be carefully smoothed with a soft, clean rag, moving it from the center to the edges.