What parameters should you pay attention to?
The consumption of the fugue is influenced by several factors:
- Density: depends on the formulation of the composition and its manufacturing technology. Manufacturers indicate this characteristic on the packaging container.
- The overall dimensions of the tile: its length, width and thickness determine the parameters of the seam.
- Seam width: recommendations for tiling work indicate the minimum allowable gaps between tiles. But designers often make them wider - up to 2-3 cm. The grout manufacturer must indicate in the instructions what width of joints this product is intended for.
- Seam depth: this parameter depends on the total thickness of the tile and the adhesive layer.
The grout not only holds it together, but also decorates the cladding. Depending on the chosen color and structure of the fugue, you can emphasize the contours of the styling pattern or make the seams invisible.
How to calculate averages
Manufacturers print grout consumption on the packaging. In their recommendations, Ceresit, Prospectors and Litokol often indicate minimum parameters that are not universal. To calculate the volume of building material, you need to select the right indicators.
Tile size
Before starting work, be sure to measure the parameters of the tile. Information about cladding can be found on the label or the manufacturer's website. Professionals recommend manually double-checking the length and width using a ruler. On average, the figures vary from 10*10 to 60*60 cm. The thickness of the material starts from 6 to 12 mm.
Parameters of facing raw materialsSource groteskstroy.ru
Seam characteristics
The parameter depends on the size of the tile. Standard gaps between tiles in width range from 2-10 mm. In individual cases, designers recommend using options that occupy from 20 to 35 mm. Large seams allow you to correct cladding defects or create a visual effect.
Characteristics of gap spaceSource plitkahelp.com
Ceramics are installed on prepared walls or floors. Before installing the tiles, the material is laid out on a flat horizontal surface. The technology helps to identify flaws and weak points in the finish, and it is possible to foresee possible defects.
Approximate calculation
In online calculators, the initial data is entered in millimeters, and the automation itself carries out all the actions. If you don’t have access to the Internet, you can do the calculations yourself. When performing operations, the parameters of the tile and the gap are indicated, the mass density is marked in kg/m2. A special formula will help determine the amount of grout used for a joint:
- (width + length)/(length * width)*thickness*seam width*1.6+10% = raw material consumption;
- (100+100)/(100*100)*6*3*1.6+10%=0.64 kg/m2 or 640 g.
As a result, we get the weight of the building material that will be needed when processing gaps. The parameters are the sum of the multiplied characteristics of the tiles and joints. A coefficient with a fractional value is the density of the raw material indicated on the packaging. For epoxy and polymer options – 1.6, for cement – up to 2.1.
How to correctly calculate consumptionSource kakprosto.ru
An additional amendment allows you to take the grout with a small margin. For professionals, a 10% gap is enough for quality work, taking into account defects. For beginning masters, it is better to increase the percentage coefficient by 15 units.
Features of the calculation formulaSource dekormyhome.ru
The larger the tile, the less material consumption. When laying mosaics, more raw materials are spent than when tiling floors or walls. When calculating independently, adding color is not taken into account. Depending on the intensity of the color, the coloring components increase the weight of the mass from 0.3 to 3%, which is worth remembering before using the substance.
Length, width and thickness of tiles
According to overall dimensions, facing tiles are divided into:
- classic – with a side of 100-500 mm;
- small-sized - this group includes small chips (50x50 mm) used to create mosaic compositions;
- large-sized - with a side from 500 to 1200 mm.
Applying grout
Wall decoration, in most cases, is made with rectangular tiles with dimensions of 200x250 or 200x300 mm. But products with sides of 120x240, 150x200 and 150x150 mm are also often used.
The dimensions of the tiles are chosen to be a multiple of the dimensions of the surface to be finished. This method will reduce the amount of waste and reduce the labor intensity of cladding.
Correct calculation of tiles
Construction stores now have various types of tiles on sale. They differ not only in texture and color, but also in size - there are tiles both large and small. Among all the variety, there is sure to be an option that will suit the apartment owner both in appearance and in quality. But it is not enough just to choose a tile in accordance with its decorative characteristics; you also need to correctly calculate the quantity required for finishing a particular room.
Types of tiles, prices
Previously, tiles were often bought for future use, since the material was quite scarce. Now you can safely buy only the quantity that is needed at the moment. This allows you to save money and spend it on some other types of materials that may be useful during repairs. Moreover, you can even count the number of tiles with an accuracy of one piece.
Tiles need to be purchased with a small margin
Covering walls with wallpaper and decorating floors with laminate or self-leveling floors is much easier than laying ceramic tiles. Therefore, the main advice for a beginner is that you need to purchase tiles with a small margin. Firstly, the reason for this is that the material is fragile and can easily be broken with one careless movement. Secondly, tiles, even in the same batch, may differ in color or texture, or have a somewhat non-standard shape.
The correct calculation of the number of tiles is the determination of the required number of elements for finishing a specific place in the house, subject to a minimum error or rounding the required number up. It is in this case that it will be possible to avoid the fact that there is not enough material and you will have to go to the store again in search of the missing elements. The number of tiles is never determined by eye.
Calculating ceramic tiles for the floor
Despite the fact that doing the calculations seems to be a fairly simple procedure, there are also some subtleties here.
For example, it is important to consider the size of the room where the renovation is being carried out, the chosen type of tile installation, as well as the shape and dimensions. It is also worth remembering that some elements will have to be trimmed, that is, not used whole
Laying ceramic tiles on the floor
Seam width
The optimal dimensions of a tile joint are:
- for wall cladding – 1-2 mm;
- for floor tiles – 2-3 mm.
On large floors, seams with a width of 4-5 mm look organic.
In practice, the gaps between the tiles depend on the quality of the tile, its type and dimensions. Inexpensive products made from cheap raw materials cannot boast of precise geometry. Deviations from the nominal dimensions reach several millimeters. In such cases, you can determine the width of the seam by laying out at least five pieces on a flat surface. The more pronounced the broken joint line is, the larger the gap will have to be provided when laying the tiles.
In addition, the width of the seam is affected by:
- age of construction: new buildings are prone to shrinkage, so the gaps in the cladding will have to be increased;
- seismic conditions of the region;
- soil features.
Under unfavorable conditions, the seams are deliberately enlarged so that they can take on part of the load during deformation. This way the tiles are protected from cracking.
Types of grout
There are three types of grout that are readily available.
- Cement
- Epoxy
- Silicone
Each grout is suitable and irreplaceable for a specific circumstance. Next, we will analyze which grout is suitable for your task.
Cement grout
This is a cement-based grout for tile joints with additives of dyes and various components that improve the quality of cement. The grout mixture becomes more elastic, absorbency decreases, and strength increases. Cement grout is not expensive compared to epoxy grout, the difference is approximately 10 times.
The downside is that this grout, without additional treatment, absorbs moisture very well, gets dirty, and fungus likes to live on it. Due to the fact that dirt, soap, and the grout itself get into the pores, it is organic and a paradise for fungus. When wet, the seam takes on a different color. Easily cracks at the slightest deformation.
Applicable:
In principle, it can be used both on the floor and in the bathroom. Except that after some short time the seams will lose their presentation and turn into spotty. This is especially true for light-colored grout on the floor. The ideal place is a dry room such as a toilet where, with a good selection of grout, the color will last a long time.
Epoxy grout
This is a grouting compound consisting of two components. The first is a color paste, and the second is a liquid hardener. When these two components are mixed in the proportions specified in the instructions, a chemical process begins. The grout is elastic and very manageable for the first 30 minutes, but then it begins to harden. After the hardening process, the seam appears as if it were made of glass, while it can withstand certain deformations and completely absorb water. From an operational point of view, this is an ideal grout.
The downside of grouting is the price and you need some experience to work with it, it’s not cheap to work with. If you don’t wash it off well, the residue that remains on the tile will be difficult to remove; you will need to purchase a special remover.
Plus: suitable for absolutely any operating conditions. Does not absorb moisture. Easy to clean. Bacteria do not live in it. Resistant to alkaline agents. Has some resistance to deformation. Ideal for showers, washrooms, floors anywhere, splashbacks, the adhesion to the substrate is just crazy.
Silicone grout
This is a grout sealant. It is used for grouting tile joints that are subject to deformation in order to avoid cracks. Well-known manufacturers of cement and epoxy grout always have a sealant in their collection that matches the color of the grout. Which must be used in all internal tile joints. In the seams on the floor where there is a damper gap. For masking seams for hatch . Joint between sanitary ware and bathtub. The junction of floor tiles and wall tiles.
Cons: labor-intensive work for a beginner. If you take care of this grout (wiping away moisture after taking a shower, washing it), it will look like new.
Pros: Very resistant to deformation, good adhesion.
Calculation of grout consumption: formula
You can calculate the required amount of fugue (Pz) using the formula:
Pz = M x K, where
- M – seam length (m/m2)
- K – grout consumption coefficient in g.
The length of the seam M per 1 m2 of tile covering is calculated using the formula:
M = (A + B)/A x B) , where
A and B – length and width of the tile, in m
Coefficient K = W x D x P , where
- W and D - width and depth of the seam in mm
- P – density or volumetric weight of the fugue.
It is recommended to increase the obtained result by 10%.
How to calculate grout for joints when tinting a mixture?
When tinting grout, the intensity of the shade is determined by the amount of dye added to a certain volume of base white grout.
Light shades of colored grout are obtained by adding literally 3 grams of color per 1 kg of dry mixture. With such proportions, the dye increases the weight of the grout very slightly - by 0.3%.
Saturated shades are obtained by adding 30 grams of dye per 1 kg of base mixture. In this case, the mass fraction of the dye is 3%.
From which the obvious conclusion follows: when tinting the grout yourself, it is permissible to neglect the mass fraction of the dye and not take it into account when calculating consumption.
Manufacturers' standards
The grout packages contain information about the required amount of material for the most commonly used tile sizes. In their calculations, manufacturers take into account the average parameters of the tile joint. Information on the consumption of the grout mixture is provided in the form of a table.
Tile size
The tabular data does not contain the entire list of tiles currently produced. For example, they are limited to the range of 12x24x1.2 - 60x60x1.2 cm. And on the packaging of their products they list standard sizes from 5x5 to 20x20 cm.
Applying grout
Seam width
Similar to the overall dimensions of the tile, the width of the gap between the tiles to be filled with a fugue is also indicated in very limited variations - from 2 to 10 mm. In practice, the width of the seam can be greater - up to 20 mm. And in some cases it is necessary to maintain a gap between adjacent tiles of up to 30 mm.
Dry mixture consumption
The grout consumption rate is determined taking into account the density of a particular brand. The manufacturer makes standard calculations based on the following:
- The cladding is laid on a perfectly flat surface.
- Before starting grouting, the tiler cleans the gaps from masonry mortar or glue to a depth of 2 mm.
Comparative table of grout consumption rates from different manufacturers, kg/sq. m
| Tile size, mm | With a seam width of 2 mm | ||
| Ceresit | Litokol | Mapel | |
| 100x100x6 | 0,42 | 0,37 | 0,38 |
| 200x200x8 | 0,28 | 0,25 | 0,26 |
| 300x300x6 | 0,14 | 0,12 | 0,13 |
| 400x400x8 | 0,14 | 0,12 | 0,13 |
| 600x600x10 | 0,12 | 0,1 | 0,11 |
If the dimensions of the tile or the parameters of the seam differ from the standard ones, the grout consumption is calculated individually using the formulas given above.
Carrying out the necessary calculations
When it becomes necessary to calculate the grout per 1 m2, you need to perform a series of calculations that will help you get the desired figure. The operating procedure is as follows:
- One element of ceramic material is taken. Measurements are taken: width, thickness, depth. The total area of the room is calculated. These indicators will help calculate the length of the seams.
- Then the required amount of material is determined. This is done according to the formula: ((A+B)/(AxB))xCxDxE = approximate consumption per 1m2.
In this formula, the letter designations mean the following:
A is the length of the tile in millimeters.
B is the width of the product in millimeters.
C – thickness of the selected material in millimeters.
D – distance between adjacent elements in millimeters (seam).
E – taking into account the grout density, usually about 1.6 kg/dm³.
For example, you can make a calculation and find out how much material is required for a tile size of 30*30 cm and a thickness of one centimeter. The seams will be two millimeters apart. Based on the available data, the following calculation is obtained (everything is converted to millimeters):
(300+300)/(300x300)x 10x2x1.6 = 0.213 kilograms per m2. If we take into account a three kilogram package of grout, then it will be enough for about 14 m2.
There are two more options that allow you to find out how much material is needed for the job:
- Use the services of a calculator, which can be found on the manufacturers' websites. There is only one small problem. Some programs produce calculations with gross errors. Therefore, they cannot always be trusted.
- For calculations, they resort to a table that already contains all the necessary data.
An example of tabular calculations with the most popular tile options:
On a note! Each option has its own error. Therefore, you should not only carefully calculate all parameters, but also make the necessary reserves. It is believed that it would be optimal to add ten percent to the calculated amount.
Average amount of grout per square meter
Mixtures for filling joints are sold in two versions:
- Ready composition: has a thick consistency. This grout is packaged in plastic buckets. They are completely ready for use. They must be used quickly, since the evaporation of the liquid component leads to a change in the properties of the material.
- Dry powder: before use, it is diluted with latex or water in certain proportions specified by the manufacturer. You can prepare the working mixture in small portions.
The consumption of mixtures of different brands differs slightly. Therefore, it is quite appropriate to talk about the average grout requirement per square meter of tile cladding. The main factors are the overall dimensions of the tiles, the width and depth of the gaps between the tiles.
Table: grout consumption for some tile sizes, taking into account joint parameters, kg/m2
| Tile dimensions, mm | Width of intertile gap (seam), mm | ||||||
| 2 | 3 | 5 | 8 | 10 | 15 | 20 | |
| mosaic | 1,3 | ||||||
| 75x150x6 | 0,6 | 1,0 | |||||
| 100x1000x10 | 1,0 | 1,6 | |||||
| 100x200x10 | 1,2 | 1,9 | 2,4 | ||||
| 250x250x12 | 0,8 | 1,2 | 1,5 | ||||
| 250x250x20 | 1,3 | 2,0 | 2,6 | 3,8 | 5,1 | ||
| 300x300x8 | 0,3 | 0,4 | 0,7 | 0,9 | |||
The table shows the consumption rate of the dry mixture. Diluted with water or latex according to the recipe, the fugue will have more weight.
Based on the data in the table, the average width needed to fill joints is:
- 2 mm from 1 to 1.3 kg/m2;
- 3 mm – 0.3 – 1.6 kg/m2;
- 5 mm – from 0.4 to 1.9 kg/m2, etc.
Grout consumption is directly dependent on the width of the seam and inversely dependent on the dimensions of the tile.
Calculation of consumption manually
Consumption (kg/m²) = (ab) / (a * b) * c * d * e,
- a - tile length (mm),
- b - tile width (mm),
- c - tile thickness (mm),
- d—seam width (mm),
- e - grout density (kg/dm³), usually a figure from 1.5 to 1.8.
Consumption = (330 330) / (330 * 330) * 10 * 2 * 1.6 = 0.194 kg/m². That is, a 2.5 kg package is enough to grout a cladding area of 12.9 m². This will not be enough even for a small bathroom.
Grout consumption table.
The amount of mixture for tile joints measuring 300x300 mm can be calculated in 3 ways:
- method of calculating consumption using a mathematical formula: (AB)/(A*B)*C*D*K=Kg/M2;
- using an online calculator;
- practical method.
Correctly calculated consumption of fugue for seams allows you to reduce the repair estimate, and use the freed up funds for other purposes.
To calculate the required mixture consumption for jointing using the formula (AB)/(A*B)*C*D*K=Kg/M2, you should have the following data:
- tile length, mm – A, 300 mm;
- tile width, mm – B, 300 mm;
- tile joint width, mm – C, 2 mm;
- tile thickness, mm – D, equals 4 mm;
- the volumetric weight coefficient of the finished solution is taken to be 1.6.
(300 300)/(300*300)*2*4*1.6= 0.085 kg/m²
0.085*15/100=0.012 kg/m²
For 1 m² of laid tiles, you need to use 100 g of grout.
Formula for calculating the amount of grout.
The mixture is prepared strictly following the manufacturer's instructions, which are printed on the packaging. Neglecting the instructions for preparing the solution and failure to comply with the proportions leads to a deterioration in its physical and chemical characteristics, which entails an increase in material consumption. The mixtures are available for indoor and outdoor use, so when purchasing them, you should carefully read the information on the packaging.
The total consumption is calculated by multiplying the area of the tiled wall by the estimated grout consumption per 1 m².
To calculate, you need to enter data in the appropriate boxes: width, length and thickness of the tiles, the distance between the tiles and the area of the wall on which the tiles are laid. The “calculate” button is pressed. The result appears in the window. If you do not indicate data in the “area to be rubbed” box, then the online calculator will calculate the consumption of the mixture per 1 m² of laid tiles.
Practical method
Many builders determine the required amount of jointing material in a practical way. They buy 1 kg of grout, and then calculate the area of the wall for which this material was enough. The result obtained is applied to the entire wall surface lined with tiles.
- The consumption of the mixture is directly related to the density of the materials used for grouting. The density of the finished fugue is indicated on the packaging of the material and depends on the manufacturing technology, the manufacturer's company, and the composition of the components.
- The consumption of the jointing solution is affected by the size of the tile: the smaller the tile, the more mixture must be spent on jointing.
- The wider the distance between the tiles, and it can be 2-30 mm, the more grouting solution is consumed.
- Another factor influencing the increase in fugue consumption when opening seams is their depth. The depth depends on the thickness of the tiles and the filling of the seams with glue.
In the construction literature, grouting material consumption tables are published, summarizing the average data for different tile sizes. This data can be used for preliminary calculations.
Technical characteristics of Ceresit grout
For different types of Ceresit grout, the technical characteristics are slightly different. Let's give an example - the most popular grout with a rich range of colors, CE 33.
It is obtained from cement, mineral fillers, polymer modifiers and various dyes.
When using the mixture, the following data is taken into account:
- Per kilogram of mixture – 0.32-0.33 liters of water;
- The density of the resulting mixture is 1.75 kg/dm3;
- Consumption – from 60 minutes;
- Frost resistance – more than 100 cycles;
- Grout can be used at temperatures from 5 to 300C;
- Not flammable
This mixture has high plasticity, withstands heat and cold, and is easily applied to seams. It is also important that Ceresit grouts are environmentally friendly. When the seams dry, they don't sculpt anything, so you don't have to worry about harmful fumes.
Ways to save
Despite the established consumption standards, you can save money by grouting ceramic tiles. Below are some useful tips for this:
- Carry out high-quality preparation of the base for laying tiles. A smooth surface without flaws or deformations significantly reduces consumption.
- It is better to knead dry fugue by hand using a small trowel. When using electric equipment and a construction mixer, a lot remains on the mixer and the walls of the container.
- Prepare the material in small portions so that it does not have time to deteriorate (dry out in the container). Dry residue cannot be reused.
- The use of a construction syringe or gun significantly reduces the fugue consumption.
Important! Don't get too carried away with saving. It is necessary to ensure that the tile joint is completely filled and does not have any voids in its structure.
Removing grout from the mosaic surface
When the grout has completely dried (and not just set), you can begin the final removal of plaque. The amount and intensity of deposits depend on how thoroughly the sponge or rag was washed and how often the water in the container was changed.
The most effective way to remove excess grout is to use a hose to spray clean water. There is no need to rub anything, use rags or abrasives. If there is no practical possibility to implement such a method, they resort to the dry method. The best option is felt fabric; it is quite abrasive, but at the same time soft and will not damage the mosaic coating.
The only exception is complex mosaics with a textured and grooved surface. Here you will have to resort to a special solvent that can penetrate into the smallest crevices.
After laying and grouting the mosaic, all that remains is to take care of periodic maintenance of the coating. Splashes should be removed from the surface in a timely manner, wiped dry, and avoid contact with alcohol-containing and alkaline products that deprive the mosaic of its shine.
Scope of application of Ceresit grout
Grouts perform not only a decorative function. Thanks to special components in the composition, they protect the masonry from moisture and prevent the formation of fungus. They also help to better hold the tiles in place.
Ceresit products are suitable for various surfaces that cannot be deformed: plaster, concrete, screed. At the same time, not only ceramic cladding, but also stone and glass can act as a finishing material.
There are Ceresit grouts for interior work. For example, for filling the seams between the floor and the wall, which act as a sealant. Such compositions have their own markings and are not suitable for outdoor use.
How to grout a mosaic?
Grout, incorrectly or carelessly applied to the surface of the mosaic, can ruin the appearance of the coating and negate all efforts to lay the tiles. Let's figure out how to use grout correctly for a decent result.
Cleaning tiles and grout
If we are talking about fresh masonry, then the seams do not require special cleaning. It is enough to wait until the tile adhesive dries - this is at least a day, and preferably two days. After making sure that the mosaic is held securely, remove all plastic crosses (if any) and any remaining adhesive mixture. To do this, it is most convenient to use a foam sponge with a hard side or a large-bristled brush.
Then carefully wipe the mosaic and seams with a damp and dry cloth. If necessary, you can use a vacuum cleaner - it will remove any remaining dust that the rag did not reach.
Making the first batch
Experts recommend not mixing the entire volume of grout at once. It is better to start with a small portion and observe how the composition behaves, and also adapt to the grouting process yourself.
They are guided by the instructions indicated on the packaging of the product - you need to prepare the batch strictly in accordance with it, without exceeding/decreasing the volume of the components. To mix, you should use a metal spatula, a construction mixer, a drill or a screwdriver with a special mix attachment.
The most difficult thing to prepare is epoxy fugue - due to its dense consistency, it is difficult to turn and becomes softer only after prolonged mixing. The cement grout is left for 7 minutes to bind, then mixed again and work begins.
When preparing a cement mixture, the dry component is added to the liquid, and not vice versa. It is better to take a little less water, and then gradually bring the mass to the desired consistency.
Surface protection
Mosaic is very sensitive to mechanical and chemical damage, so it needs protection when rubbing. A special spray will help create a protective layer - it is sprayed onto the entire surface of the cladding in 20 minutes. It is important to wait until the product has completely dried and then begin grouting.
The spray will create a thin film that will prevent the viscous mixture from drying out. When the finishing work is completed, the remaining product along with the protective layer can be easily removed with a soft sponge or rag.
If there is no protective spray, the edges of the mosaic can be blotted with a sponge soaked in water. To make it easier to remove grout residue, the surface is periodically moistened with water from a spray bottle.
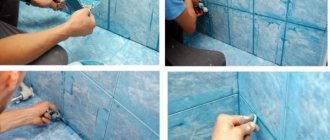
Seam filling
Step-by-step instruction:
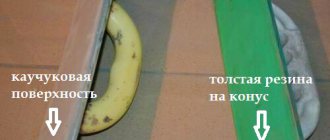
- Take a rubber spatula and scoop more grout onto it.
- Use a wide diagonal motion from top to bottom to move straight across the mosaic, trying to capture as many elements as possible.
- Once again, pass along the surface, pressing on the area between the tiles so that small indentations remain.
- If the area of mosaic tiles allows, wet a gloved finger and run it along the seams. This will help to slightly deepen and level the layer.
The grouting mesh will speed up the process of filling joints. These are fiberglass sheets with perforations and silicon carbide coating. But due to the risk of scratching the mosaic glaze, beginners should not use the device.
Moistening the grout
In the first 4 hours after applying the tile filler, it is recommended to moisten the joints. This is especially true for rooms with low humidity levels and high air temperatures. Wetting will improve the hydration of the solution, strengthen the joints and prevent cracking. Moisten the seams repeatedly with liquid from a spray bottle or a foam sponge well soaked in water.
Removing the remaining grout from the mosaic
Removal of mixture residues will depend on the composition. If epoxy-based grout was used, the mosaic should be cleaned immediately, without waiting for the composition to dry. If the mixture is cement, the residue can be removed after 30 minutes, when a separate section of the mosaic has been processed.
“Epoxy” is removed with a solvent; for cement compositions, ordinary water is suitable. Wash the tiles with a rag or sponge with a hard layer in a circular motion, periodically rinsing the device with water.
You should not put too much pressure on the mosaic so as not to damage the glaze. It is better to wash the rags in two containers - in one to wash off the remaining grout, and in the second - to wash it clean. Complete the process by wiping with a dry cloth.
The grout will take about a day to dry. During this time, the mosaic should be protected from ultraviolet rays, drafts, temperature changes and getting wet.
How to clean and protect tiles from fungus and dirt?
Among the protective agents for tiles and mosaics we can recommend:
- water repellents - impregnations with moisture-repellent properties that create a thin protective layer on the seams;
- polymer varnish for the space between tiles - penetrates into the depth of the grout, creating a more durable protective layer that collects drops on its surface;
- silicone or acrylic sealants - used in “problem” areas where contact with water is most likely (corner seams, areas near the sink, bathroom, plumbing fixtures).
Seams protected from moisture will not accumulate bacteria and fungus. To protect against mold, fungicides are also added to the grout, which do not give the fungus a chance to grow.
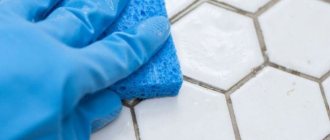
If the fungus still prevails, and unpleasant stains of dirt appear on the seams, the following will help:
- white vinegar - spray it onto the seams, leave until dry, and then remove dirt with a brush;
- hydrogen peroxide - the algorithm of use is similar to vinegar;
- tea tree oil – 1 tsp. dilute in a glass of water, spray on the seams, do not rinse;
- furatsilin – 1 tablet, dissolved in a liter of water, apply and thoroughly wash the seams;
- household chemicals – chlorine-containing and anti-mold agents such as “Isocid”, DALI, “Antifungal”, “Mill Kill”.
Read more about how to remove mold from tile joints in this article.
What color to choose for tile grout?
Attention! To make the tiles look natural in a wooden frame, you should choose several nuances of a darker brown tone as the grout color.
If you want to achieve the most uniform impression possible, the grout color should be as similar as possible to the color of the tile. However, you should be aware that on very bright seams, dirt and discoloration stand out much more.
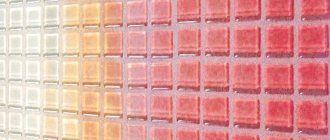
The smaller the tiles, the more significant the grout color becomes to the overall impression. The mosaic tile surface is also a grout area with a much higher percentage of grout used than with large format tiles.
Thus, if the tone of the seam is chosen lighter, the entire surface becomes brighter and vice versa. If the contrast between the color of the tile and the color of the grout is high, the whole thing will look like a small checkered pattern.
Advice! Check the shade of the grout before grouting the tiles when they are dry, as the shade may still change significantly during drying.
The grout decoratively covers the defect in the seam, creates the appearance of a single coating, focusing attention on the shape of the installation pattern.