Tool for working with epoxy grout
This article presents all the tools for working with epoxy grout. Neat and beautifully matched tile seams, applied without any flaw, are the dream of any owner and craftsman, respectively.
As a rule, most owners use conventional cement mixture for the aesthetics of tile joints, but due to low resistance to moisture, cement material has begun to fade into the background. In this regard, one of the alternative options has appeared on the market - epoxy grout for tile joints.
Important! Epoxy grout today can solve many problems associated with tile joints - it eliminates moisture, the growth of fungus, mold and much more. Unlike cement grout, epoxy grout has higher strength with a stated service life of at least 45 years. Sealing joints with this material should be done carefully, correctly and with the appropriate tool, due to the accelerated setting (polymerization) process. This and much more will be discussed below.
List of tools below
Practical purpose of the space between the slabs
Despite the fact that tiles are a durable floor or wall covering that can withstand heavy loads, they require grouting. It is worth understanding why you need to grout the seams between the tile material.
What properties do they have:
- preventing moisture from entering. The composition that is used for grouting joints is not affected by moisture and does not allow liquid to pass under the ceramic tiles. Thanks to this property of the grout, the appearance of fungal microorganisms is prevented, this is especially important for bathrooms, bathhouses or kitchens;
- protection of the product from temperature changes. Ceramic tile material can both contract and expand. To avoid cracking and maintain a solid coating, the space between the tile elements is jointed. This technique creates a specific buffer and prevents damage to the coating;
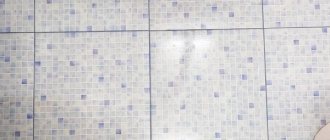
- aesthetic appearance. Depending on the color of the tile covering elements themselves, the color of the grout mixture is selected. Thanks to smooth and neat seams, the color and pattern of floor elements becomes more expressive and the floor looks much more beautiful;
- geometry adjustment. Not all elements of ceramic flooring material have perfectly smooth edges. This drawback is easily eliminated by jointing, which gives the surface a neat appearance.
REFERENCE: due to a correctly performed jointing process, the service life of the floor covering increases. It is especially important to grout joints in rooms intended for regular use, where the floor takes on significant loads.
The final stage of applying a fugue: how to simplify your life
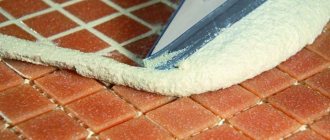
Depending on the quality, the solution can adhere very tightly to the surface. In order for the tiles to retain not only their colors, but also their visual appeal and gloss, excess material must be removed on time.
To remove excess, professionals use two types of tools. A special combined type cellulose sponge will effectively remove dirt and last for quite a long time. This factor is important for large volumes of work.
The tiles must be cleaned of residues.
A foam float is a budget and less durable option, so it is used only when almost all of the excess grout has already been removed. This process is the final stage. If the tiles are still covered with a fugue-colored coating, you can remove it the next day using a felt welding mitt. Well-filled voids can stand for a long time without updating.
Main types of instruments
To grout the space between tiles, a whole list of tools is used. How exactly to use one or another tool and which one to give preference to, as well as their varieties, are described in detail below.
Grout gun
The most convenient tool that makes work easier and reduces repair time by 2 times is a gun for grouting ceramic tiles. It consists of the following elements:
- frame. A special container is inserted into it for filling with the mixture;
- nozzles;
- a plunger mechanism with a piston that allows you to regulate the extrusion of the mixture during operation;
- handles.
This device is easy to use. In order to grout joints with its help, you will need to fill the tube with the mixture, install it in the body and, if necessary, use the nozzle, begin the process.
The mixture is squeezed out by lightly pressing the handle of the device. The required amount of the mixture is squeezed out through the spout of the nozzle and the grout is distributed in the space between the tiles.
Putty knife
One of the most popular tools for filling joints between tiles with a special mixture is a spatula. Tools vary in size, color, material and shape. There are several types of such tools:
- rubber spatulas. The length of the devices varies between 5-50 cm. They are suitable for all types of mixtures;
- metal. It is used when necessary to grout joints using a cement composition;
- round spatula. Used as a tool to form beautiful and even seams. In appearance it resembles an elastic and elastic wire. Thanks to its shape, it makes seams smooth and even.
REFERENCE: To do the work yourself, it is recommended to purchase a set of spatulas in order to understand in the process which one gives the best result.
Other tools
In addition to the above tools, during the work you will need the following devices:
- grater for applying the composition using the slurry method. It involves distributing the mixture through repeated application of the composition, covering large areas of tiles with it, rather than directly filling the joints, such as with a gun or spatula. The tool is made (its working part) from dense rubber. Using a grater, the composition is evenly distributed;
- ironer It is a foam sponge, with the help of which, during work, residues and excess mixture are removed and the seams are leveled.
Popular manufacturers
Grouts from Italian manufacturers are popular on the Russian market. One example is the Litokol , which offers mixtures of more than a hundred shades, suitable for outdoor use (for example, swimming pools), as well as for rooms with insufficient ventilation. The compositions can be stored, as well as the work itself, only at positive temperatures (from +5 degrees), otherwise they will lose their properties.
Another Italian product is Kerapoxy from Mapei . These grouts have almost no roughness characteristic of most products of this type, and they are very resistant to acids and reagents. But the color range is not as wide as that of the previous company - only 26 colors.
Among Russian manufacturers, we can note the brands “Osnovit”, “Fuga” and “Diamant” . The latest brand product is intended strictly for use in the bathroom and toilet. Available in 46 shades. Osnovit grout is distinguished by its high ductility and resistance to temperature changes over a wide range, withstanding values from -50 to +75 degrees. It is not contaminated with mold and mildew. But the brand has a small range of colors - only 29 tones.
Epoxy grout cost
What else might you need during work?
In the jointing process, you need not only tools for applying the mixture, but also for preparing the surface, preparing the solution and other additional devices.
Surface preparation
Before starting the process itself, it is important to properly prepare the surface. First of all, the space between the tiles is cleared of dirt and glue. To clean the space between the tiles, use a knife, carefully cutting off the excess composition, after which the surface is vacuumed.
You can use a soft metal brush during surface preparation. It is also good to use for final cleaning of old grout.
REFERENCE: It is recommended to clean the seams while laying the ceramic elements, using a sharpened wooden stick and sponge. This will significantly save time and effort in the process of filling the joints with grout.
Preparation of the solution
There are many ready-made formulations on sale that do not require preparation. But, if before the application process you need to prepare the composition yourself, then you should do this, strictly following the instructions.
Tools you will need to prepare the mixture:
- rectangular trowel;
- metal spatula;
- drill-driver.
From the listed tools you need to choose the most convenient one. The drill is used mainly for large-scale work in which the solution needs to be stirred constantly.
HELP: it is worth remembering that the time for which the solution needs to be used is limited for each composition and varies from 45 minutes to 24 hours. This point must be taken into account when determining the volume of the mixture to be prepared.
Application of mixtures
To apply the composition into the space between the tiles, it is recommended to use the following types of spatulas or choose the most suitable and convenient one from the following:
- trapezoidal rubber spatula. It is considered a classic type of such instrument, universal. Convenient to use, it makes it easy to apply the composition even in hard-to-reach places, for example, under furniture;
- a rectangular spatula made of thick rubber. This type of tool should be given preference last and in special cases, since it is not very convenient for work and the process takes a lot of time;
- trapezoidal spatula. Used for jointing mosaics;
- corner spatula. It is used both to fill the space between ceramic elements in the corners and to grout the seams of decorative stone.
We also recommend watching - Grouting tiles in the bathroom: types, how to choose and use
When to use these spatulas
This is an important aspect that deserves attention. The grout mixture is applied only after the tile adhesive has completely dried. Please note that pressure is applied to the spatula and the surface (otherwise the grout will not fill all the voids). Therefore, uncured tile adhesive may wrinkle, and level differences will appear on the surface.
On average, the drying process for tile adhesive takes about 24 hours. However, it is recommended to check the manufacturer's instructions on the packaging of the dry mixture.
Tools for cleaning tile grout
The last step in creating seams is cleaning the surface; there are 2 methods. In most cases, preference is given to the “wet” method, because there is no dust left behind. But with the help of dry cleaning, the result is achieved no worse than in the case of the wet method.
Wet cleaning
Use a cellulose sponge, which is moistened with water, wring out a little and sand the seams and clean the surface.
Dry cleaning
A grater with a fine mesh is used. There is no need to wet the seams with water during the sanding process.
What kind of grater is needed for decorative plaster
To create a decorative surface using the bark beetle technology, a special plastic sponge grater for decorative plaster is used. It helps to decorate the wall with different patterns; the patterns are created in different ways by changing the direction of movements when working with a grater. When moving in a circle, you will of course get a circular pattern; if you make movements from top to bottom, you will get the effect of raindrops. Important! Do not press unnecessarily on the surface plastered with bark beetle with a plastic float, so as not to deform the layer.
If you decide to create a soft relief, then you need to use smooth graters; for an expressive structure, there are textured models.
To create a decorative surface using the bark beetle technology, a special plastic sponge grater for decorative plaster is used.
What else should I buy to create reliable seams?
To create beautiful, even and reliable joints between tiles, it is recommended to additionally purchase a special grout pencil. With its help, the appearance of fungus and mold in the seams is prevented and the color of the mixture is restored, since it begins to darken over time.
Using a marker for tile joints, color is restored, dirt, stains are eliminated and disinfection occurs.
Peculiarities
Seamless laying is also no exception to this, and with this finishing method small gaps also appear between the plates. Jointing will involve sealing the tile seams using specialized grout.
This material has the main tasks:
- Decoration of finishing.
- Facilitate future maintenance of the coating.
- Protection against moisture ingress.
- Strengthening the coating for cladding.
- Preventing the accumulation of dirt and bacteria between the slabs.
Special components are added to grout mixtures that can prevent the spread of mold and fungal colonies. Tiles with such seams are much easier to clean. Without grouting, dirt will constantly accumulate in the recesses between the slabs, which is extremely difficult to clean.
Summary of Tool Selection
Each master must choose a tool for himself, focusing on his skills, abilities and ease of work. It is worth taking into account the characteristics of the material with which you will need to work. Everyone decides for themselves which tool is more convenient to apply the mixture.
These are basically rubber spatulas. If grouting occurs on the wall, then it is more convenient to do it with a gun.
We must not forget about sanding using special smoothers.
When choosing a tool, it is important to understand that it will be used to achieve high-quality and reliable seams between ceramic tile elements.
What mixtures are not suitable for a pistol?
Usually, when choosing a grout or sealant, pay attention to its thickness.
It is not advisable to use the following types of mixtures for this device:
- The mixture used for the “Boar” tiles.
- For brick products, especially at the joints between brick and tile.
- For clinker tiles.
- For grouting natural stone.
There are also recommended mixtures for each type of tile. Before buying it, ask the seller whether it is suitable for working with this particular material.
