Fiberboard (Fiberboard) is a popular material in many areas of construction, as well as in the production of furniture, doors and other products. In construction, this material is used more often as a finishing material, for example, for cladding wall surfaces. The slabs themselves do not have the aesthetic qualities to act as an independent finishing material. In addition, if you leave the panel without treatment, you risk starting repair work again soon - wood-fiber panels are susceptible to damage.
Fiberboard boards used for wall decoration can be improved in different ways - painted, applied a protective film, covered with wallpaper. All methods are good in their own way, but if the process of painting is more or less clear, then not many people decide to wallpaper it. In fact, the process is not particularly difficult and anyone can do it on their own.
Wallpapering plywood
Many people still live in old houses that have framed walls and plywood.
In this case, it will be very expensive to carry out a major overhaul of all the walls, so the finishing is carried out on top of the old coating. And in a new building it is much cheaper to build a partition from plasterboard or plywood than from brick. This option is budget-friendly, and the strength and insulating characteristics remain at a high level.
Any homeowner asks the question: “How to put wallpaper on plywood?” and “Is it possible to glue wallpaper on plywood?” after all, the material from which it is made has its own characteristics.
Base - plaster
Plaster is not a good option for a base under a silk decorative layer. To begin with, it is still better to prepare the walls, putty them, and then proceed with installation.
- Clean the entire area intended for applying the decorative layer from chips, dust and dirt. It is especially worth paying attention to crumbling elements.
- Apply at least three coats of primer.
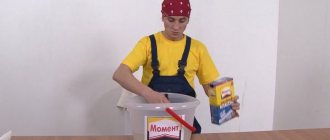
- Dilute PVA glue and apply it to the entire surface, and then you can stick the desired material.
Advice: in any of the above cases, it is better to use already proven methods, even if not the fastest. Then the result will be extremely durable, and it will be easier to glue the wallpaper.
Preparatory work
Gluing wallpaper onto plywood is quite a problematic task. Before gluing wallpaper onto plywood, it is necessary to prepare the walls. It will be easier if the wall surface is initially flat. This is possible during the construction of the partition. It is important to ensure that the surface for the wallpaper is prepared smooth and without flaws. A similar task faces the gluing of walls made of chipboard and fiberboard.
This will allow you to glue the strips without additional processing and alterations. The frame must be level, the plywood sheets must fit together closely without any differences. If you do not follow the recommendations, then after pasting the stripes will be clearly visible on the wall. If the walls are made with differences, the first step is to put them in order.
Sandpaper will help to sand the putty surface
The following materials will be required: serpyanka, putty, sandpaper and spatulas. The recommendation for preliminary work is as follows. The joints of the sheets must first be treated to remove dust, dirt, old wallpaper, etc. If this is not done, then over time cracks will form at the joints.
As soon as the surface is freed from all unnecessary things, the joints are glued with sickle tape. It is important that the line of symmetry of the grid runs along the joint of adjacent panels. Only after this do they begin to level the surface.
To do this, use a special putty for wooden products. With the help of a ready-made solution, the differences will be smoothed out, and the overall plane of the wall will be much smoother.
For best results, putty the wall in two layers.
Once the solution has dried, you need to sand the surface using sandpaper.
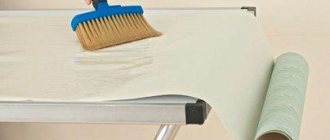
In order for the canvases to stick more securely to the wall, dust must be removed from the surface. A wet broom is best for this. After thorough cleaning, the treated surface should be primed. Deep penetration soil is perfect for this.
Wallpaper for plywood
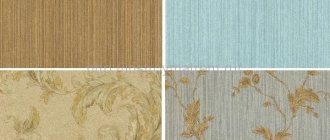
In order for the appearance of the room to look decent after pasting, it is important to use only the appropriate type of wallpaper. Since the paper sheet is very thin, all the unevenness of the wall will be visible through it and the joints of adjacent sheets will stand out, so it is not recommended to use paper wallpaper for such walls. There is an alternative replacement - duplex wallpaper.
This type of coating consists of two layers of paper with a pronounced relief. The canvases have an attractive appearance. They are resistant to dampness, changes in humidity and temperature, and do not fade in the sun. Duplex wallpaper has excellent thermal insulation and strength, so it is difficult to scratch or damage it.
Non-woven fabrics stretch well under load
The next suitable coating for plywood is non-woven vinyl wallpaper. They have an even more pronounced surface relief than duplex wallpaper. Non-woven fabric is much stronger than regular paper and can stretch under load.
Consequently, when the wall deforms or shrinks, the joints between the sheets will be hidden and visually invisible. Wallpaper from a high price category is also suitable for plywood. For example, textile coverings, jute or velor fabrics. It is not recommended to use silk fabrics in this case. They convey all surface imperfections, just like paper ones.
Is it possible to apply liquid wallpaper to plywood? Answer: “Yes, you can.” Liquid wallpaper for plywood is ideal, as well as vinyl. However, when installing them, you will need to properly prepare the surface.
This material will help hide surface defects; they will not tear. Nowadays the construction market offers many types of wallpaper. With their help you can create unique interiors in your house or apartment.
To further decorate the papered walls, you can use separately sold decorative stickers. Canvases with pasted pictures will look very aesthetically pleasing and unusual, and lined walls with plywood will help create the most unusual images.
Application to plaster and whitewash
Liquid wallpaper cannot be applied to whitewash. It is not enough, as many believe, to cover such walls with a primer. Calcareous surfaces become heavily saturated with moisture and begin to crumble, yellow spots appear. Therefore, the coating is sanded completely down to the base material, then oil-phthalic paint or waterproof primer is applied to the wall.
Many people wonder whether it is possible to apply liquid wallpaper to plaster - not only is it possible, but this is the most suitable medium for intermolecular influence. Plaster is a mineral surface and the finishing material “sticks” to it very well. However, the coating also needs to be leveled with a special solution consisting of cement with sand, rotband and putty.
Depending on the composition of the plaster itself, it can absorb a lot of moisture, so it is first treated with 3-5 layers of primer to ensure that all pores are closed. The crumbling plaster must be removed to a solid base.
Concrete walls are puttied with a gypsum binder mixture before priming. Water-soluble primer covers them quite well.
Wallpapering plywood
After completing all the preparatory work and purchasing the desired type of wallpaper, they proceed to the actual pasting. How to paste wallpaper on plywood with your own hands? To do this, you will need the following materials and tools: wallpaper glue, a bucket for diluting, rollers, clean rags, a wide brush, a stationery knife, a rule, a level, a pencil and the wallpaper itself.
Quickly and conveniently apply glue with a roller
In the process of how to properly glue wallpaper, wallpapering should begin with preparing the glue. You need to work with special wallpaper glue. It is necessary to dilute the dry mixture with water in precise proportions. If this is not followed, the adhesive characteristics of the finished solution will be reduced.
Usually the glue is mixed with a drill with an attachment. After thoroughly mixing the solution, it should not be used immediately. It takes 2 to 5 minutes for it to acquire all its basic functions. Then knead again.
Before wallpapering, in order not to stain the floor, it must be covered with old newspapers or film. Please note that the newspaper should not end up stuck to the wallpaper itself.
Wallpapering should begin with measuring and cutting. Then use a tape measure to measure the height from floor to ceiling. We transfer the required dimensions onto a roll of wallpaper. We cut off a piece of canvas according to the rule using a stationery knife.
Mark a vertical line on the wall using a level and a pencil. Now you can paint the wall. Use a roller or wide brush to coat the strip on the wall. It should be slightly larger than the width of the roll. If vinyl or non-woven materials are selected, then the adhesive is applied only to the wall. If paper ones are used, a layer of glue should also be applied to the cut piece.
Is it possible to apply liquid wallpaper to fiberboard: advantages and disadvantages of the material
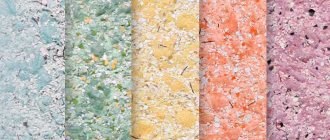
Liquid wallpaper contains particles of cellulose, cotton, less often silk, adhesive and dye. In accordance with the declared texture, additives can include pieces of mica, glitter, flock, silk threads and other types of fillers. The mixture is represented by dry small flakes, soluble in water and forming a smooth or textured coating on the surface with a layer thickness of 2-3 or 4-5 mm. Next, we will talk about the features of this type of wallpaper, the technology of application to various surfaces (plywood, fiberboard, chipboard, etc.).
Liquid wallpaper contains particles of cellulose, cotton, sometimes silk, adhesive and dye.
What to consider when purchasing
Currently, liquid wallpaper is sold both in ready-made form and in the format of a dry mixture that you need to prepare yourself. To do this, you need to dilute the mixture to a mushy consistency in accordance with the instructions presented on the package.
You can choose not just ordinary wallpaper, but focus on options that have decorative elements. For example, glitter, mother-of-pearl or marble chips can add interesting accent details to any room and emphasize the unusual style of the bedroom.
Liquid wallpaper can also include elements of wood chips, dry algae, thread, etc.
Wallpaper that is sold ready-made is called semi-fluid . In appearance, they resemble a thick and viscous mass that is applied to the surface of a wall or ceiling. The appearance of the wallpaper after drying looks like something between ordinary wallpaper and decorative plaster. In order for them to dry completely, a day must pass from the moment of their application.
A surface that is decorated in this way becomes a single covering without visible seams. Flexibility and the ability to use tools to independently determine the required thickness help correct minor surface problems. For example, defects such as small cracks become completely invisible.
The mixtures are sold in sealed packages. When purchasing dry wallpaper, the decorative coating may resemble sawdust in appearance. They contain a special viscous material, pre-impregnated with an adhesive solution. Next, this mixture is diluted with water and applied to the surface.
Expert opinion
Strebizh Viktor Fedorovich, leading construction foreman
easy care: in case of damage or contamination of the surface, you can easily remove the desired fragment using special tools and apply it back. If you want to clarify something, please contact me!
Advantages and disadvantages of liquid wallpaper
The coating, called liquid wallpaper, not only looks impressive, but also has positive characteristics that distinguish it from other materials for wall decoration. Consider these advantages:
Schemes for applying liquid wallpaper.
- Environmental friendliness. The quality is determined by the naturalness of the fibers.
- Ensuring free ventilation of walls. There is no clogging of surfaces after application of the material.
- They are not static voltage accumulators.
- Easy to care for.
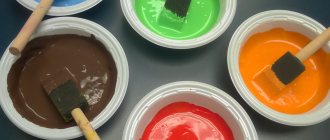
- They allow you to turn the most daring design solutions into reality. The composition can be made in almost any color. To do this, when hovering, colors are added to it, which can be purchased at the same points of sale where liquid wallpaper is available. For example, thanks to “Sena” (a golden-colored additive), you can get a characteristic golden hue. Using Colorat, a liquid color additive, it is quite possible to control the brightness of the background color. “Bumix” - a dry mixture similar to coconut shavings, can give absolutely any shade to the solution. These colors are easy to use: they are added to the main solution and mixed with it. Their dissolution to a homogeneous consistency occurs quickly. Endowed with good resistance to solar radiation. However, even the most ordinary gouache is quite suitable as a special dye.
- High level of heat and sound insulation. Like any material, there are also disadvantages. And the downside is the porosity of the structure, and hence the presence of such a quality as the ability to absorb foreign odors (from cooking or cigarette smoke).
Return to contents
Technology for creating liquid wallpaper coating
Stages of applying liquid wallpaper to fiberboard walls.
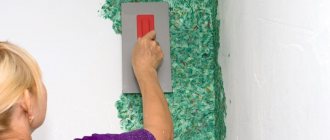
The attractiveness of the finished coating will depend entirely on the method of application and the tool used for this purpose. The mass is distributed over the surface using a trowel or a relief roller, although you can also use a special sprayer - a hopper gun.
Having brought the composition to the desired density, it is quite possible to create stucco decorative patterns and panels on surfaces. If there is a desire to change the color of the previous liquid wallpaper, then simply apply a fresh solution. Liquid wallpaper can be used to mask any surface irregularities. After all, the coating layer can be up to 1.0 cm thick.
Before applying the composition, the surface requires mandatory preparation. Clearly visible cracks need to be filled. The old layer of whitewash must be removed. Then the surface is primed. Before applying wallpaper, the wall must meet the requirements of cleanliness and dryness.
When diluting the mixture with water, take into account the fact of how thick the solution is desired to be obtained in the end. Basically, the solution is prepared as follows: 1 part of the mixture is poured with 4 parts of water. To ensure that there are no unpleasant surprises in the future, the manufacturer's instructions are followed when working. The base background is formed using a sprayer (or a spatula). After 6 hours, the wall is treated with a special textured roller. Its relief is selected based on what pattern they ultimately prefer to see.
Depending on the thickness of the layer, the consistency of the solution, and the humidity in the room, the drying time will be 12 hours - 3 days. The consumption of the mixture per 1 m2 of area will be approximately 0.6 liters (with a layer of 1-3 mm). The service life of the coating reaches 7 years.
To make the coating moisture resistant, it is sometimes coated with varnish. Yes, the wallpaper will stop absorbing odors and moisture, but it will lose one property - it will no longer be able to be ventilated (or “breathable”).
Return to contents
Frequently asked questions about liquid wallpaper
Are they repairable?
The ease of correcting defects in wallpaper is one of the undeniable advantages of the material. For example, cracks appeared on the surface after drying. All actions to correct this issue will boil down to soaking the wallpaper with water and leveling it.
Is it possible to apply liquid wallpaper to fiberboard, chipboard, OSB boards and plywood?
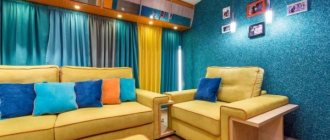
Wall design options using liquid wallpaper on a fiberboard wall.
The answer will be negative if the specified surfaces are not protected in any way. Without proper waterproofing, various complications are possible - changes in the structure of the base material, stains appearing on its surface, and others. That is, the participation of a professional is required in this case. If the slabs have a laminated coating, then it is enough to cover it with primer paint with added abrasive chips (for example, “Ceresit CT 16”). This can achieve high quality adhesion to the surface. If the slabs are not laminated, they are first coated with alkyd enamel and then primed.
There is not enough information about how to apply liquid wallpaper to plywood.
Some experts claim that if you do apply wallpaper, you can end up with a warped plywood surface. In other words, the layer in direct contact with the liquid coating will slightly reduce its area. That is, the effect of “shagreen skin” will appear. And the plywood layer on the opposite side of the sheet will remain the same size. The thinner the layer of plywood sheet, the more it is deformed. The bending will be observed inward, from the side where the wallpaper is applied.
Putty: what you need to know
Everyone knows that the use of putty can correct significant curvatures of the working surface. Using it, it is possible to level out even fairly deep damage in the surface, which can reach one and a half centimeters.
As a rule, putty is purchased dry or ready for application. Of course, a more convenient option is to use a ready-to-use option.
Remember! In cases where the damage to the walls is deep enough, it is necessary to apply putty in several layers. In this case, you must wait until each layer has completely dried before applying the next one.
As for processing with putty, there are no special features here. If you have any questions, simply read the instructions included with each package from the manufacturer.
[my_custom_ad_shortcode3]
Liquid wallpaper
We’ve basically figured out how to glue wallpaper onto plywood. However, along with the usual paper or relatively new polymer wallpaper, there is another solution. But the hygroscopicity of veneer raises doubts: is it possible to apply liquid wallpaper to plywood?
An attempt to apply a wet mixture that takes a long time to dry on dry birch veneer will give a completely predictable result - deformation of the surface. The plywood will begin to delaminate; Chips may rise in some places. So this option is no longer available?
Nothing like this. It is enough to simply protect the veneer from moisture with a primer. Traditionally, ordinary oil paint was used for this purpose; however, water-based liquid wallpaper does not stick to it very well without preliminary sanding.
Fortunately, we live in the 21st century, and you can find a lot of easy-to-use and inexpensive products in stores to protect surfaces from moisture. The most obvious solution is an acrylic primer, which will solve all possible problems at a low cost (also find out how to cut a circle in plywood).
Deep penetration acrylic primer.
It is enough just to drown and putty the nails or screws, apply it in one layer and wait for it to dry.
With this small amendment, the question “can liquid wallpaper be applied to plywood” can be answered unequivocally in the affirmative.
Wallpaper is glued to thin walls in the same way as tiles are laid on plywood, i.e. without any complications, however, quite serious attention will have to be paid to surface preparation. In the video presented in this article you will find additional information on this topic.
Stage one - priming
First of all, the surface is primed using drying oil or another liquid of alkyd origin. They do this in order to reduce the consumption of adhesive, since fiberboard absorbs moisture very quickly. Before applying the primer, it is necessary to thoroughly clean the surface from dust, any protrusions and chips, and clean the joints. Next, the surface is degreased and preheated (up to 50) drying oil is applied to it.
It is recommended to apply drying oil in one layer, since the second will delay the drying process. In addition, there is a risk that unevenness will appear on the surface due to incomplete absorption of liquid.
[my_custom_ad_shortcode2]
What types of materials are used for wall decoration?
The material is not suitable for interior decoration of rooms with high levels of humidity.
To finish the walls, you need moisture-resistant sheets with a thickness of at least 16 mm. The length of one sheet should be slightly greater than the height of the ceiling. Despite the variety of types and varieties of this wooden material, when finishing walls they are most often used:
- FSF is plywood based on resin formaldehyde glue, which consists of birch, pine or beech veneer. It has increased moisture resistance, strength, and is easy to install and process.
- Construction on a glued base. It is made from wood of almost any species, which determines its performance properties.
- Laminated - a material coated with a phenol film that provides moisture resistance to the finished sheets.
- FC is a material made from veneer of coniferous or deciduous trees, bonded with carbide-formaldehyde glue.
When choosing, take into account the purpose and area of the room, brand, type of material, sheet sizes, type of wood used for it.
Which rolls to choose?
Pasting wallpaper onto plywood is a labor-intensive, lengthy process. Its course depends on the selected coatings. Buying the latter should not be difficult: there are thousands of options for paper, vinyl, non-woven, narrow and wide, plain and textured (read about how to distinguish different types of wall coverings and determine which is better here). But if they are purchased to cover plywood sheets, both their appearance and quality deserve attention.
No matter how hard a person tries to bring plywood to an ideal state, it will never be smooth, so thin paper sheets will only emphasize the unevenness of the finishing material. The surface will look decent if covered with duplex materials. This is a two-layer coating with a pronounced relief, which effectively eliminates the problem of unevenness and dents.
Their advantages:
- variety of textures, colors;
- moisture resistance;
- resistance to temperature changes, sunlight (do not fade);
- thermal insulation properties;
- strength;
- ease of gluing.
An alternative to duplex is vinyl coverings on a non-woven backing (find out how to properly glue vinyl wallpaper on a non-woven backing). They also have a pronounced relief, good strength and elasticity, which makes gluing easier (how to glue wallpaper correctly?).
Among other types of coatings, textile, velor, jute, and liquid are suitable.
How to prepare for gluing?
The result of the repair depends on the quality and volume of preparatory work done.
Stages of preparation for pasting:
- Sand the surface using a sander, a flat wooden block or a plastic sandpaper holder.
- Protection from moisture: impregnation of the ends with natural drying oil, the surface with a special composition based on PVA (water, PVA glue, copper sulfate).
- Puttying uneven areas with acrylic putty, filling the seams between sheets with putty.
- Re-grinding the surface.
- Treat the wall with a primer based on wallpaper glue (wallpaper glue and white paint in a ratio of 1:2).
- Cleaning the walls with sandpaper (if necessary).
You can start gluing only after the ground layer has completely dried.
How to putty correctly?
Puttying is necessary to hide rough unevenness of the material, cracks, achieve equal thickness of the sheets and avoid the appearance of stains that may appear in the places where the plywood is attached to the wall.
The puttying stage cannot be skipped.
Gypsum and acrylic putties are suitable for treating plywood walls. Both types have pros and cons, but it is better to choose acrylic:
- Firstly, the putty is sold ready-made and does not need to be diluted with water.
- Secondly, they have good moisture-proof properties, which cannot be said about gypsum.
The disadvantage of acrylic is its high price, but since putty extends the life of the plywood, it is completely worth it.
- The putty is applied with a spatula to the entire surface of the plywood sheet, but you need to start from the joints, recesses from self-tapping screws, and large defects in the sheet.
- First, the most problematic areas are treated with the mixture, allowed to dry completely, then the entire surface is puttied.
- The final stage is the removal of traces from the spatula, random drops, and irregularities.
Solutions
Is it possible to stick wallpaper on plywood, despite the problems described?
Without a doubt. However, surface features will have to be taken into account.
Wallpaper selection
Thin paper wallpaper without embossing is very popular. Their price is more than low; For stickers, any adhesive can be used, including flour paste.
However, for our case they are extremely undesirable:
- The paper will make visible all surface defects - joints and veneer texture.
- Paper has low elasticity and can tear and wrinkle when humidity fluctuates.
So which wallpaper should you choose? The instructions are obvious:
- The preferred material is vinyl. Plasticized polyvinyl chloride will not only provide reliable protection against moisture: thanks to its elasticity, the wallpaper will not tear at the joints of the sheets. However, non-woven wallpaper for painting is not much inferior to vinyl in elasticity.
- Embossed, textured wallpaper, unlike thin ones, will hide both the joints and unevenness of the veneer.
Surface preparation
It comes down to three steps:
- Grinding. First of all, the joints of the sheets are carefully sanded: even if there are differences in thickness, then in the absence of a clear boundary, the seams will not be noticeable.
Tip: A sander will save you a lot of time and effort. Manual processing of joints will be extremely tedious, especially at a great height above the floor.
The photo shows one of the simplest vibration grinders. Its modest capabilities are quite sufficient for our purposes.
- Putty. How to putty plywood under wallpaper? Acrylic composition intended for wooden surfaces. Be sure to putty the seams; At the same time, it won’t hurt to get rid of minor surface defects and recesses from screws.
An important point: if the plywood is nailed with ordinary nails, the caps should be coated with varnish or drying oil. With high air humidity, rust can appear through any wallpaper.
- Primer. Before wallpapering, the entire surface must be primed. A typical solution is to use wallpaper paste diluted with water; however, any acrylic-based penetrating primer for wood surfaces will work.
Is it necessary to glue the joints with serpyanka? The answer depends on the type of wallpaper:
- If, contrary to the recommendations given above, you have chosen thin paper, the serpyanka will somewhat reduce the likelihood of the wallpaper tearing along the joint. However, be prepared for the fact that the putty strip of serpyanka will stand out on a flat wall.
- Vinyl and non-woven fabric do not require reinforcement of seams. The mesh won't do any good; however, no harm can be expected from it either.
Sticker
How to paste wallpaper on plywood with your own hands? Just like on any other surface.
- In the case of heavy, dense wallpaper, it is better to coat both the wallpaper and the wall with glue. The roller, by the way, will save you a lot of time compared to the brush.
- Thin wallpaper is always glued in the direction from the light source (usually from the window). Otherwise, the overlaps of the strips, despite their small thickness, will be noticeable due to the cast shadow.
- How to hang wallpaper on plywood if you have chosen vinyl or non-woven fabric? Of course, end-to-end, without overlapping stripes.
Non-woven fabric and vinyl are glued end to end, without overlaps.
- When sticking, air bubbles from under the strip of wallpaper are removed with a dry cloth; The glue that appears at the edges is removed with a sponge.
- Avoid drafts while drying. Wallpaper should dry at constant humidity and temperature.
How to glue it?
You can glue it after the primer has completely dried. It is advisable to wait two days for this.
You will need the following tools:
- clean dry roller;
- wallpaper glue (read more about how to cook and use it, as well as where to store the paste here);
- dilution bucket;
- clean rags;
- wide brush;
- construction knife;
- rule;
- level;
- pencil;
- wallpaper rolls.
- To hang wallpaper, you need to dilute the glue according to the instructions and let it sit for a few minutes.
- Then you need to choose the place where the first canvas will be glued. You can start from a window, doorway or corner.
- To glue the first sheet, you need to make vertical markings using a level and a pencil.
- Then you can start gluing. If non-woven or vinyl wallpaper was chosen, you need to coat the wall with glue; if paper wallpaper, glue is applied to the back side of the strip.
- After gluing the canvas, press it well with a rubber roller or a dry rag to avoid the formation of stains and air bubbles (read about why bubbles appear and how to glue wallpaper without swollen areas).
Stage two – putty and primer
With the help of putty, differences, defects, and gaps left after facing the walls with slabs are eliminated. In this case, you can use any type of putty - ready-made or prepare it yourself from a dry mixture. But it is better to give preference to the dry mixture; after it, the wallpaper will lie on the surface much better.
Repeated priming is performed after the putty has completely dried. The final stage before gluing the wallpaper allows you to make the wall surface perfectly smooth. This way, the paper base will lie well on the surface.
[my_custom_ad_shortcode3]