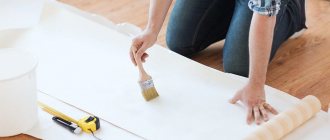
Knowing how to hang wallpaper with one person, you can avoid conflicts and complete the entire amount of work in a short time.
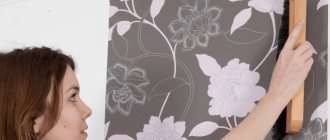
Most often, it is two people who are engaged in wallpapering a room. One stands on a raised platform (stepladder, stool) and waits for the second to cut the required strip and spread it with glue.
Then the wallpaper is applied to the wall and combined with the previous strip. Next, one smoothes it out, removes unevenness, and the other watches the process.
RECOMMENDED ON THE TOPIC
- Tips for choosing a dishwasher
- Tips for choosing interior doors
And everything would be fine, but in most cases such work is accompanied by disputes and often ends in a quarrel. Moreover, all stages of the process can be performed alone.
Rules for wallpapering yourself
When you do the work yourself, you have to look for answers to all questions on the Internet or specialized literature. The set of basic rules is as follows:
- The air conditioner and fan are turned off until the glue has completely dried.
- Doors and windows remain closed to prevent drafts and keep the air moist.
- Pregnant women are not recommended to do repairs so that the stale, humid air does not cause dizziness.
- The air temperature in the room is not lower than +15 and not higher than +32. Slight deviation is allowed.
- It is prohibited to warm up an unheated room with a heater. The heating must be on.
- The drying time of wallpaper pasted on a cold wall increases by 2-3 times compared to the normal period.
- The ends of the strips near the ceiling and floor are cut off with a utility knife, which is drawn along the attached wide metal spatula.
- To determine whether it is possible to glue without adjusting the pattern, you need to read the markings on the packaging.
The stripes are oriented vertically. Wallpaper pasted horizontally is too heavy, wide strips that are poorly fixed with glue on the wall. In order for the process to be smooth, first of all you need to take care of the availability of the mandatory requisites that will be needed for work carried out in stages.
Preparatory stage
First you need to prepare the following set of tools:
- ladder;
- large container for diluting glue;
- cuvette for prepared glue;
- wallpaper ruler, tape measure, pencil, level;
- knife;
- brush from 50 mm wide;
- paint roller (width 250 mm);
- rubber roller for smoothing wallpaper;
- rubber roller for smoothing joints;
- sponge, napkin for cleaning surfaces from excess glue;
- pliers, screwdriver, electrical tape.
You will also need material to cover the floor. This can be cardboard or wide film. If the wallpaper is too heavy, you will need a cone-shaped roller with ribs. They smooth out the joints. When wallpaper requires particularly careful handling, the roller is replaced with a special wallpaper brush. You can purchase a plastic wallpaper spatula. It is used to form geometrically correct angles. If the wallpaper has a nasty texture, you can smooth it out with this spatula, replacing a regular roller.
Which wallpaper do you think is the best?
What tools will you need?
To install wallpaper strips you will need:
- plastic film to cover the floor;
- containers for mixing the adhesive mass;
- brushes and rollers for applying glue to contacting surfaces;
- rubber rollers for rolling joints between strips;
- wallpaper knife and scissors as cutting tools;
- building level, plumb line or laser level;
- pencil, pen or marker for marking;
- a wide spatula used to adjust the length of the glued strip.
All this must be purchased before installation begins. Primer and glue are purchased before the fragments are cut, and in the quantity needed for the entire scope of work.
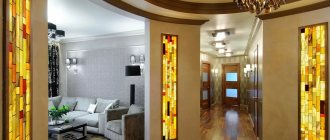
Useful tips
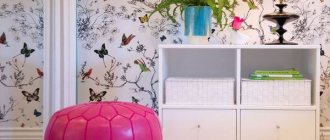
When choosing wallpaper, consider the type of room and the condition of the walls. For the living room, bedroom, corridor and other rooms where the walls are dry and smooth, any type of wallpaper is suitable. For rooms with high humidity: kitchen, bathroom and toilet - choose washable vinyl wallpaper. The shortcomings of uneven walls will be hidden by textured wallpaper, as well as wallpaper with large cells or a dense pattern.
To trim the edges smoothly above the baseboard and below the ceiling, do this before the glue dries. Use a spatula as a stop and keep the cutter horizontally, otherwise the paper may accidentally tear. Useful life hack: to avoid scraping hardened glue from the knife, rinse it with hot water before cutting the edges.
Beginners are generally intimidated by wallpapering, and when they see a battery that cannot be removed, this is a real reason to panic. In fact, everything is not so scary: cut the wallpaper in the places where the pipes are supplied and the battery is attached, stick the wallpaper according to the instructions above, and smooth out the unevenness with a mop wrapped in a clean rag, remove traces of glue. Done, you are amazing!
That's all. As you can see, wallpapering is not as scary a process as it seems at first. Only those who don't try fail. We wish everything goes well and easily for you!
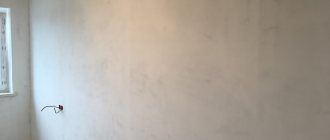
Features of preparing walls and ceilings for gluing
Non-professionals need to take into account that the surface to be pasted must be prepared. For this:
- Remove dirt and remnants of old decorative coating.
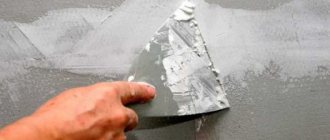
- They putty the surface, eliminating cavities, cracks, and other irregularities.
- Primed. It is easier to apply the primer with a soft roller.
- Wooden walls are treated with antiseptic disinfecting compounds.
The primed surface must dry completely. Only after this can you start gluing.
Nuances depending on the surface
The table shows the types of surfaces on which you can paste wallpaper, but you need to take into account a number of features:
| Surface type | How to glue, what needs to be done for this? |
| Painted walls | The paint is completely removed. The procedure differs depending on its type: water-based, oil-based, acrylic, latex, water-dispersion. |
| Drywall (GKL, GVL, GKLV) | The joints are puttied; it is not necessary to putty the surfaces. |
| OSB board | It is taken into account on which side the laminated coating is applied, on which the wallpaper does not stick. |
| Plaster | Primed. But if it is plaster or other decorative, textured, then it needs to be removed and the wall treated as described earlier. |
| putty | After impregnation of the putty walls with primer, you can begin gluing. Latex finishing putty is removed. |
| Whitewash | Whitewashed walls are washed off until no traces of lime remain on the surface. |
| Plywood | You can glue paper wallpaper and paper-based materials without a primer. |
| Fiberboard and hardboard | The material does not have sufficient strength, which does not allow covering it with wallpaper. |
| Fiberglass | It is removed because it is a suitable base. |
| Old wallpaper | It is better to remove and treat the wall as required by the gluing technology. Instructions for removing wallpaper. |
| Concrete walls | It is enough to prime it if we are talking about a flat surface. Sinks and joints are puttied. |
| Plastic panels | The frame is dismantled. Plastic does not have the ability to hold a load. |
| Betonkontakt | This polymer coating is specifically designed to provide adhesion. |
| Wooden surfaces | The lining or timber will have to be sewn under the plasterboard frame. |
| Glass | Smooth and cannot be used as a base to be wallpapered. |
| MDF panels | It is better to abandon the idea, since the material has weak adhesion. |
| Cork | The cork covering is removed because it is soft and cannot guarantee the safety of the wallpaper under mechanical stress. |
| Styrofoam | The material does not have sufficient strength and must be dismantled. |
| Penoplex | Glue does not provide sufficient adhesion. |
| Tiles (tiles) | Completely dismantled. |
| SIP panels | The surface, if necessary, is puttied at the joints and primed. |
| Clay walls | They are treated with special impregnations to impart the necessary strength. |
FAQ
At what temperature to glue wallpaper
Many recommendations indicate that wallpaper should be glued at a temperature of 23-25°C. However, this temperature regime can only be achieved in summer. Winter, when heating is needed, does not allow working in such conditions (in most Russian cities in winter the temperature in the apartment is 18-20°C).
So at what temperature can you wallpaper walls? Manufacturers of trellises and glue have taken this point into account and recommend finishing work at a temperature of 10-25°C. Therefore, it is not recommended to glue wallpaper in unheated rooms (dacha, veranda) in winter.
When can you open windows after pasting?
Impatient apartment owners try to quickly get rid of the smells of glue and wallpaper. But open windows mean drafts. And in drafts, the glue dries quickly and unevenly, as a result of which the adhesive mass does not have time to create the necessary adhesion to the wall. The result is that the seams come apart or the wallpaper peels off.
When can you open windows? You can open the windows after the pasted wallpaper has completely dried - after 1-3 days (the time for complete drying is usually indicated in the instructions printed on the packaging with the glue). For insurance purposes, it is better to add one day to the specified time.
What to do if the wallpaper bubbles
In practice, a situation often occurs, even among professional finishers, when minor violations of technology lead to the appearance of bubbles and air cavities on the surface of glued walls. This is both unsightly and a potential breeding ground for mold and mildew. How to get rid of bubbles on wallpaper?
Depending on the size of the lagging area, we can advise:
First, re-glue the canvas if there are very large air cavities. All attempts to fix the problem without tearing the wallpaper off the wall will be noticeable.
Secondly, for medium-sized pockets, it is also better to re-glue plain trellises (the mark of the cut will be very clearly visible). Wallpaper with a pattern is cut with a construction knife in the middle of the resulting cavity. The edges are carefully pulled away from the wall using a spatula and the adhesive mass is delivered into the resulting space using a brush. It is not necessary to coat the entire dry surface.
You can disperse the glue with a dry cloth while pressing the seam of the cut tightly. Allow the base of the trellis to soak in glue for 5-10 minutes, and then roll the lagging area with a wallpaper roller to remove excess mites and air. It should be remembered that paper wallpaper stretches from the glue and decreases in size after drying. Therefore, the edges of the cut should overlap. Vinyl and non-woven wallpapers have butt joints.
Thirdly, small bubbles are eliminated using a syringe. The needle must be taken according to the thickness of the glue - the thicker it is, the thicker the needle. The bubble is pierced in a circle, from the edges to the center, at an angle of about 30 degrees relative to the wall.
This pattern of punctures allows you to cover the entire loose surface of the wallpaper, as well as release excess adhesive mass through the punctures when smoothing the problem area. If large folds form, they need to be smoothed out. Small wrinkles will disappear on their own after the glue dries.
What to do if the wallpaper is see-through
The problem of translucent wallpaper after it has completely dried is solved in the only way - by redoing the work done. Therefore, at the preparatory stage it is necessary to try to avoid this headache:
- prime the walls with a special primer (as a last resort, whitewash them with water-based paint);
- buy thick trellises;
- check medium and thin wallpaper for transparency - place a piece of sheet on a bright spot and evaluate the degree of density.
How long does it take for wallpaper to dry?
No one will give a definite answer to this question. There are a lot of factors here. And the type of wallpaper, and the adhesive mass used, and the temperature conditions of the room, and air humidity, etc. The maximum delay is from 12 to 72 hours.
Duplex and paper-based non-woven wallpapers take the longest to dry - up to 3 days. Non-woven wallpaper on a different base (not paper) needs about a day to dry completely, vinyl wallpaper - about 48 hours.
Double-layer paper wallpaper.
You can determine the degree of drying of the pasted wall with your palm - pressing it against the wallpaper. If you feel warm - the wall is completely dry, there is a chill - you still need to wait. In passing, we note that it is strictly forbidden to speed up the drying process with heating devices.
How to glue meter-long wallpaper alone
The technique of gluing meter-long wallpaper alone does not have any special techniques that differ from the above instructions for gluing wallpaper.
Some tips from the professionals
Good quality work can be achieved if you take advice from specialists with extensive experience.
- Before starting work, the room where the work is planned is ventilated and then tightly closed for a day.
- It is better to dismantle the plinth - it can be easily removed (gluing the trellises will become faster and easier). In order not to look for the dowel holes under the wallpaper later, self-tapping screws are screwed back into them.
- It is better to cover the floor with cardboard or newsprint, but not with plastic film (on the film, glue easily gets under the wallpaper when coating the edges of the sheet, as a result of which it stains them).
- Use a stepladder. The table and trestles often leave marks on papered walls when moved to another location. In addition, it is more difficult to install the bottom of the wallpaper using them.
- Use specialized wallpaper glue - universal adhesive does not hold trellises on the wall well.
- Do not join the trellises at the corners - glue them with an overlap (1-2 cm), and then cut with a knife, forming a seam.
- Constantly dry (wash) your hands.
- Do not correct uneven cuts of wallpaper along the top and bottom of the walls. At the bottom, errors can be hidden with a plinth, at the top with a frieze or baguette.
Wallpaper glue
Plastered and primed surfaces are covered with an aqueous adhesive solution. The consistency of the glue should be viscous enough for the wallpaper to stick across the entire width of the strip, but the solution should be fluid so that it can be evenly applied to the surfaces being treated.
Which one is better to choose?
| For what wallpaper? | A type of adhesive solution |
| Paper | Universal, for paper |
| Vinyl washable | Special composition for vinyl |
| Embossed | Special composition or for vinyl |
| Non-woven | Only specially designed |
How to breed?
In order to be able to properly process the contact planes, you need to dilute the granular mass with water. Instructions and dosage are indicated on the package. The solution is prepared immediately before gluing the wallpaper. The optimal amount is for 3-4 stripes.
How glued sites behave
Recently on my Telegram channel I showed a screenshot:
It was a rather old, half-dead site. His domain registration in the .com zone was about to expire, but he was getting some traffic. A suitcase without a handle, in short. The glue gave an almost fourfold increase in traffic on Google (there were 200-300 hosts, now there are 1000-1200). At first Yandex also accepted him as one of their own, but then came to their senses and added filters again (:
At the moment the situation is like this:
Traffic from Google remains stable.
So the simple manipulation of transferring a domain to another zone gives some bonuses.
I have many such sites that have already received all their possible filters and live under them for months. The drop in traffic to them was gradual (from Google), so with 100% probability it is impossible to understand what the sanctions are for them.
A few more screenshots:
And so on.
The trend is the same everywhere.
Where to start gluing?
Before cutting the wallpaper, you need to mark the room, marking the places of future joints with lines. If the room is glazed, the first strip is glued level with the window. Next, the stripes are marked to the corner, and so on in the same direction to the door. Having gone around the doorway, the strips are laid further to the same window. The places under and above it are pasted over last.
When the preparatory treatment of the walls in a corridor or other room without windows is completed, the walls are also marked before gluing the wallpaper. In this case, the doorway can serve as a starting point (if there is enough space nearby to lay a whole strip without a longitudinal bend). Another way is to glue wallpaper from the corner.
How to trim off excess?
Here you will need a flexible ruler; this is a plastic tool 60 cm long; a stainless steel strip is built into its body. It is flexible, so the ruler can be pressed firmly even on an uneven surface. What such a tool looks like and how to use it can be seen in photo 18.