Book a discount on repairs up to 10% for 15 days!
Enter your number and we will reserve a personal discount for you
When preparing surfaces for liquid plaster, it is recommended to level all sections of the wall. But if there are shallow but extensive depressions and bulges, or the supporting structure has a certain angle of inclination, as was previously the case in old apartments in Moscow, the use of liquid wallpaper will not highlight these areas in any way. Here you need to take into account your tastes and capabilities when deciding how carefully to level the walls. Because you probably shouldn't spend too much time preparing the walls by paneling or plastering them.
Another important point when preparing walls for liquid wallpaper with your own hands is calculating the volume of liquid plaster. Consumption may suddenly increase if all small irregularities of more than two millimeters are not completely repaired. Therefore, it is important to exclude such defects. Otherwise, in addition to overuse of wallpaper, spots that differ from the main color may appear on the walls.
General requirements for the working surface
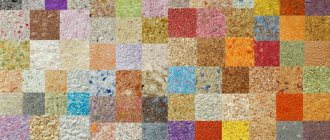
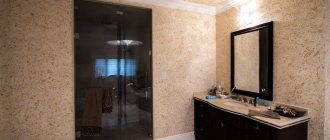
Liquid wallpaper is one of the new trends in decor. They require a perfectly flat plane. The peculiarity of this finish is its ability to draw moisture, dirt, etc. from the surface, especially from a concrete base. Preparing walls for liquid wallpaper requires compliance with a number of rules:
- The walls are cleaned of the previous coating.
- Treat all protruding areas with special compounds. This is especially true for metal elements and fittings, which become rusty over time.
- Taking into account the application of the liquid composition in a thin layer, the surface should have a uniform, preferably light, shade.
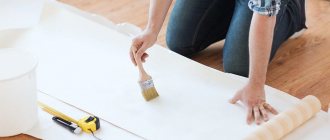
After all procedures, the surface must be primed to obtain better adhesion of the decorative finish.
Taking into account the application of the liquid composition in a thin layer, the surface should have a uniform, preferably light, shade.
Why do you need to prepare the wall surface in advance?
Page navigation
Liquid wallpaper is considered a fairly expensive material, so it is important to properly prepare the walls for their application. Because the material contains several thick ingredients and water, the wallpaper may change shade - become lighter or darker. This will ruin the design of the room.
Also, to save substance consumption, it is worth carefully leveling the surface, strictly following the sequence of work. During the procedure, you need to remove pits and tubercles. This can also be done at home. Thanks to this, the liquid wallpaper will lie in an even layer.
Today, high-quality liquid wallpaper can be purchased at a price of 1000 rubles per package. In this case, the cost of 1 m² will be approximately 250-350 rubles.
Preparing plasterboard walls
The composition is quite plastic and goes well with drywall. Preparatory work is carried out in several stages. Each subsequent layer must be applied after the previous one has completely dried. During the work, it is necessary to ensure sufficient ventilation in the room, since finishing materials absorb moisture well. For the work you will need a standard set of tools: a spatula, containers for solutions, putty and primer mixture, paint and varnish composition (white).
Wall preparation process:
- First, clear the surface of debris.
- Then coat the surface layer by layer with putty mixture.
- Apply a special mesh to the seams.
- Putty the mesh.
- After the walls have completely dried, apply a primer.
- After the primer has dried, apply a thin layer of putty.
Applying paint to treated drywall is justified if there are small seams between the sheets.
The composition is quite plastic and goes well with drywall.
Composition selection
Priming is necessary for strong adhesion of the surfaces of finishing materials and the wall. Therefore, experts disagree on the issue of choosing the composition of the primer mixture. This happens due to the fact that today there are many mixtures suitable for this type of work on the building materials market.
For example, acrylic mixture. It increases the moisture resistance of the surface and improves its appearance. It is applied to the area in an even layer, increases the durability of the front covering, and is odorless. Its components prevent the appearance of mold. Deep penetration soil mixture. Thanks to the presence of active components, the primer penetrates into the pores of the base, binds them and impregnates them. After its application, the surface gains strength and consumes a small amount of water. Concrete contact primer. Unlike a deep penetration mixture, concrete contact is designed to work with dense areas. It creates a rough layer that is aimed at creating high adhesion.
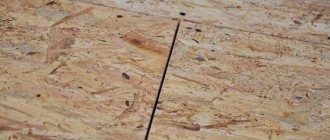
Concrete surfaces
Concrete walls, like any others, must be dismantled from the previous coating, if any. If the walls were previously covered with other types of wallpaper, the coating should be slightly moistened. Soften old wallpaper with regular soap solution. Non-woven and vinyl wallpapers are first cut. Then, clean off with a metal spatula.
Concrete walls, like any others, must be dismantled from the previous coating.
The old paint coating is removed using coarse sandpaper. The water-based emulsion can be removed, just like old wallpaper. Concrete walls need to be plastered in a layer of three to nine millimeters thick. The consistency of the mixture should be such that it easily penetrates into all cracks and crevices, filling the voids.
The water-based emulsion can be removed, just like old wallpaper.
Then the wall is covered with several layers of primer. After it dries, a finishing layer of plaster is applied. To eliminate small irregularities, a mesh is applied to the places or notches are made using a drill. After the solution has dried, go over the surface with sandpaper. For concrete bases, priming is a mandatory process. The solution penetrates deeply into the surface structure and reduces moisture absorption, which is important for the finishing layer.
For concrete bases, priming is a mandatory process.
Wooden surfaces
A relic of the past, but which may occur in some buildings, are walls made of wood or fiberboard, chipboard. Wood absorbs moisture well and subsequently becomes deformed.
Initially, you should ensure the integrity of the coating. The heterogeneous structure of the wood is also taken into account. To treat this type of surface you will need a special putty for woodwork.
Oil-based paint creates a reliable barrier between the finish and the base. If you plan to process a large area, then you should first apply several layers of primer to the wood and only then cover it with water-based paint with the addition of PVA glue.
To treat this type of surface you will need a special putty for woodwork.
Areas with protruding metal parts
Protruding metal parts, if they are not needed in the future, must be removed. Paint over the necessary elements with acrylic paint. Water-based emulsion is not suitable in this case, since yellowness will appear over time.
If rust or oxidation stains appear on the elements, the defects should be cleaned out before painting. If necessary, parts are treated with a rust converter (inhibitor). And only then the alkyd coating is applied.
Protruding metal parts must be removed if they are not needed later.
Surface preparation in old houses
All old coating is removed from the surface. Particular attention is paid to areas with bright shades of old paint and so on. It is important to remove all flaking areas. To level not only the plane itself, but also the color, it is advisable to putty the walls with a gypsum mixture. The layer should be dense.
You can also paint the walls with paint for external work (facade) with the addition of PVA glue in a ratio of 1 part glue to three parts paint. It is not recommended to treat old walls with water-based emulsion, since over time the yellowness from it will seep through the wild finishing composition.
Previously, the walls were painted with a layer of plaster, which over time begins to peel off. You can check “damaged” places by simply tapping on the surface.
It is better to treat previously painted surfaces with a primer filled with quartz sand, which improves the quality of adhesion. It is better to work with a brush rather than a roller. Particular attention is paid to the color combination of old and new finishes. With the original light tone of the walls, liquid wallpaper will look much brighter and lighter after drying. Conversely, on a dark base, dried wallpaper of even the lightest colors will become faded and dark over time.
Sandpaper will help to roughen walls previously painted with oil or glossy compounds, which will not only remove the old coating, but also improve the adhesion of the surface for subsequent finishing.
To level not only the plane itself, but also the color, it is advisable to putty the walls with a gypsum mixture.
Silk plaster primer and analogues
It is important to know
The proprietary Silk plaster primer is acrylic in composition, waterproof, with covering properties and quartz additives.
Branded primer Silk Plaster
If we describe its properties in simple language, it has several features:
Moisture resistance,
After drying, a layer is formed that prevents moisture from the material from entering the base.
Covering effect
The composition is white in color, and after drying, forms a white, uniform surface.
Quartz additives
They create a slight roughness to increase adhesion (adhesive properties of the material).
All these properties guarantee ease of application and an excellent final result.
If you look for analogues, it will be difficult to find a soil that has all these properties at the same time.
Master's advice
As an analogue, a moisture-proof primer is applied and after it dries, 1-2 layers of white facade acrylic paint are applied to give a uniform color and roughness. This option takes longer, and the costs are comparable to purchasing branded Silk Plaster products.
Which primer to choose
It is important not only to thoroughly prepare the surface, but also to select the appropriate compounds for treatment. Much attention is paid to putty mixtures, but the primer fades into the background. However, it provides a lot of advantages:
- Removes dust particles;
- Makes the base more durable;
- Liquid wallpaper lies on the surface in an even layer;
- Improves adhesion.
Some types of primer contain special components that protect the surface from the formation of mold and mildew.
The type of primer is selected based on the surface structure:
- The primer for liquid wallpaper can be universal, based on acrylic;
- Alkyd mixtures are optimal for wooden surfaces;
- If it is necessary to deeply penetrate the primer layer, acrylic compounds are used. They can be used in damp rooms or for processing plasterboard floors.
Quartz solutions also penetrate well and create roughness on the surface, improving the subsequent adhesion of materials. To create additional protection, you can use ready-made concentrates (subsequently diluted in accordance with the instructions) consisting of astringents.
The color of the primer should be white or transparent. The first option is preferable, since white color will create a uniform shade of the entire plane. This is especially true for concrete foundations.
The color of the primer should be white or transparent.
Is it possible to glue wallpaper onto drywall without putty?
Drywall itself is quite smooth, so it would be possible to do without additional finishing, but this is not entirely true. GKL sheets stick to the wallpaper so strongly that if you start gluing them without preparation and preliminary putty (which will make the surface perfectly smooth without joints or roughness), then, if necessary, they are re-glued or replaced, the pieces will come off right with the pieces of drywall. In this case, you will have to do the wall repairs again with a complete replacement of all gypsum board sheets; the only option to avoid repairs is to paste new wallpaper over the old ones.
It is also not recommended to glue wallpaper without putty because the plasterboard coating itself has a greenish-gray color, which will be visible through thin wallpaper, and seams and joints will be visible. If the samples are too thin, the gypsum boards may have their color, making them dull and faded.
There are times when it is not possible to putty all the walls, and the repair must be completed as soon as possible - this is not a problem - wallpapering can be done without it, even despite all the warnings. To do this, you need to choose wallpaper that is dense enough to cover the color, as well as all the joints and flaws of the plasterboard sheets. Experts recommend choosing wallpaper with a complex structure, on a dense fabric base; it is advisable that they be of bright light in order to cover the gray-green color of the drywall and hide all its imperfections. Liquid or natural wall coverings are perfect for this.
Required Tools
Applying liquid wallpaper to walls does not require any special tools. It is necessary to stock up on containers for mixtures, brushes, spatulas, and rollers. Professionals use special guns with compressors to process large areas. The equipment is quite cumbersome in terms of one-time repairs and is unprofitable.
Applying liquid wallpaper to walls does not require any special tools.
Advantages and disadvantages
Although there is a huge difference between liquid silk wallpaper and plaster, there are some characteristics that still unite them. Both types of finishing are used for all types of repairs and wall decoration. Besides:
This finish helps improve thermal insulation and sound insulation.- It adheres perfectly to any surface.
- Using wallpaper and plaster you can correct minor flaws on the wall.
- The result is a smooth surface with no joints, as when gluing regular wallpaper.
- This is an environmentally friendly material, and if a special varnish is applied on top of it, then such walls can be wiped with a damp cloth.
- The material is applied both to flat surfaces and to arches, ledges, and niches.
- Neither plaster nor liquid wallpaper fades.
How to apply liquid wallpaper to a wall
Liquid wallpaper is sold diluted or dry. The last option must be “prepared” in accordance with the manufacturer’s instructions indicated on the package. The mixing process should result in a homogeneous, fairly viscous mass.
The room temperature should be above 10 degrees.
Take a small amount of the resulting mass from the container with a spatula or gloved hand and apply to a section of the wall. Then spread a uniform layer no more than two millimeters thick using a rubber spatula over the surface. As it dries, the thickness will drop to one and a half millimeters.
After processing a square meter of wall, the grater or spatula must be slightly moistened and walked over the treated surface again, as if smoothing the wallpaper. The edges of the area are not rubbed or leveled. The next area will be treated with the smell. Smoothing the corners using a corner spatula will help reduce the risk of wallpaper peeling.
After processing a square meter of wall, the grater or spatula must be slightly moistened and walked over the treated surface again, as if smoothing the wallpaper.
Instructions for mixing liquid wallpaper
When diluting liquid wallpaper with water, the following important points should be taken into account:
- First, water is poured into the container for diluting the wallpaper, and then the remaining components are added.
- You should stir the contents of only one package at a time (it is better not to mix the contents of two packages during one batch).
- After the wallpaper package is opened, it is necessary to completely dissolve all its contents in water. It is not recommended to store the mixture dry after the sealed packaging has been opened.
- The water in which liquid wallpaper is planned to be diluted should have a temperature of 30°...35°C.
- Stir the wallpaper only with your hands. You should not use tools for this that can damage the structure of the wallpaper.
If you were not able to completely use up the packaging included in one batch, you can make a kind of cake from the leftovers, dry it and store it (packing it, for example, in a plastic bag). Subsequently, the remains can be diluted with water, a little glue (KMS) can be added there and used for its intended purpose (for example, to replace a damaged piece of wallpaper).
Wallpaper mixed with water needs to sit for 6…12 hours (depending on the manufacturer’s requirements). After this, the mixture will be completely ready to be applied to the work surface.
Eighth MarchUser FORUMHOUSE
In a large plastic black bucket (the kind sold in hardware stores) I mixed liquid wallpaper, 1 packet at a time (water according to the instructions on the bag). She transferred the mixed mass into the original bag in which it was sold. I calculated the batch for 1 wall according to the indicated bag consumption per number of square meters. Usually 2 packets at a time. I left it to swell for at least 12 hours (you can do it for a day). Mix well before applying.
Finish protection
For additional protection and fixation of the result, a special acrylic-based varnish is applied to the treated surface as the last layer. The varnish is prepared (according to the manufacturer's instructions) and applied to the liquid wallpaper with a wide brush or roller. The varnish can be applied in three layers.
For additional protection and fixation of the result, a special acrylic-based varnish is applied to the treated surface as the last layer.
The final result and service life of the decorative finish depend on how thoroughly the surface is prepared, as well as how correctly the liquid wallpaper was prepared. The process of applying liquid wallpaper to the wall is quite simple and will not be difficult for people who have at least once encountered putty and plastering work.
Preparing liquid wallpaper for application
The process of preparing liquid wallpaper lasts from 10 to 12 hours. Therefore, it is necessary to start preparing them in advance (you can even immediately after priming the walls).
A package of liquid wallpaper may contain several components at once. After pouring all the ingredients (except for decorative additives) into one large container, its contents should be mixed without adding water. Before mixing with water, it is advisable to fluff the mixture with your hands. This is done in order to get rid of stuck together lumps.
Decorative fillers (dyes, glitter, etc.), stored in separate packaging, should be dissolved in water before the main ingredients (dry glue mixed with cellulose and silk base) are added to it. This is always done to create a more even texture.