The nuances of gluing paper wallpaper
Paper wallpapers have a reputation as budget finishing materials, both in price and in design, and, in addition, they are also capricious. Let's try to figure out if this is so.
1. Cheap? And this is how you look: individual models can be bought for 40-50 rubles per roll (“Mirage”). You can hardly find it cheaper. But the most expensive ones are also paper: American Schumacher costs about 130.0 thousand rubles. per handset ($2.0 thousand). Looks like the paper is different.
2. Capricious? Again, it's not that simple. On sale you can find trellises of different structures: single-layer (simplex) and two or more layers (duplex). The first ones are cheap, thin, capricious (difficult to stick on the wall - the seams come apart due to shrinkage during the drying process, tear under your hands when smoothing), short-lived. This is more of a temporary wall decoration.
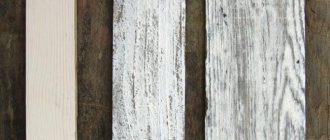
Types of paper wallpaper with basic characteristics.
This behavior of the wallpaper gave new life to the gluing technology that was used by grandparents and their parents - overlap. The thin structure of the fabric allows the seams to be unnoticeable.
Multilayer wallpaper (duplex) consists of a base and a decorative layer, which are firmly glued together. They are more expensive than single-layer trellises, but their service life is 2-3 times longer. In addition, there is no headache when gluing - they are more technologically advanced: they do not get too wet, smooth out well, and are glued end-to-end without any problems.
The multilayer nature of the wallpaper has brought confusion to the concept of paper wallpaper. So, not only home craftsmen, but also some professional finishers classify as such trellises, where the base is paper and the decorative coating is:
- vinyl;
- textile;
- acrylic;
- velours;
- veneer;
- cork;
- bamboo;
- linkrust.
Less commonly, but also paper wallpaper is considered to be a canvas where the base is non-woven and the decorative layer is paper. The properties of the listed types of wallpaper are completely different. We emphasize that paper wallpaper is considered to be canvases where all layers are made only of paper.
Modern equipment has made it possible to organize the production of paper trellises with different textures:
- smooth;
- embossed;
- for painting;
- embossed.
As a result, different surface textures were added to the huge selection of colors and patterns. All this allows you to choose wallpaper to suit any interior style. It should not be forgotten that the royal classics do not recognize other types of trellises. Only paper ones.
In conclusion, one last caveat: imported wallpaper has a different size, which should not be forgotten. Thus, American trellises have a length of 8.23 m and a width of 68 cm. In Europe, the width is 75 or 106 cm and the length is 25 m.
Preparing walls for wallpapering: step-by-step instructions
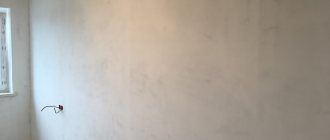
High-quality gluing of new finishes is impossible without proper surface preparation. The wall must be level, clean and dry. Decorative coating will not hide large defects; they will be very noticeable. In addition, an untreated surface holds the finish worse and absorbs a large amount of adhesive solution, which increases its consumption. We will step by step explain how and what to treat the walls with before wallpapering.
Removing old coating
To begin with, the base is completely cleaned. The technology depends on the type of design. The old design is completely removed. To make this easier, the finish is pre-moistened with warm water from a spray bottle. To speed up the process of softening the glue, add shavings of laundry soap, 9% vinegar, fabric softener or a special preparation. The soaked strips are lifted with a spatula and removed. The remains are soaked and removed.
The water-based emulsion or whitewash is washed off. Oil and similar paints can be removed in different ways. The cheapest and most labor-intensive is mechanical. It involves scraping off the paint layer. This is done manually using a hammer and chisel or using a grinder, hammer drill or drill with special attachments. You can use a special remover that dissolves old paint, or a thermal method. In the latter case, the paint layer is heated with a hair dryer and then removed from the base.
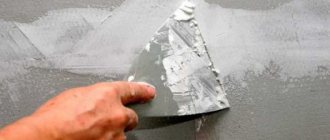
The plastered wall is carefully inspected for cracks and other defects. It is advisable to tap it to identify areas with peeling coating. They need to be cleaned. After all fragments have been removed, the condition of the surface is assessed. If there are many defects, the old plaster is removed completely.
Which paper wallpaper is better to choose?
Giving advice when choosing paper wallpaper is useless. Everyone has their own taste and vision of interior design. However, there are several points that I would like to draw attention to.
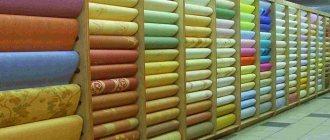
Color spectrum
A variety of colors and shades allows you to consciously choose the desired color scheme. So, for the south side of an apartment or house, cool colors are suitable: gray, varieties of blue and green. These colors have another effect - they visually expand the volume of the room, which is important for apartments in Khrushchev-era buildings.
Warm colors.
From the north side, you need to choose trellises in warm tones and colors. Yellow and beige colors with variations are perfect. Dark, rich shades are recommended for the corridor and hallway.
In the living room you need to be tied to the style of the interior. Any colors can be here. There are only calm undertones in the bedroom. Bright colors are irritating and lead to insomnia.
Density
When choosing trellises, you need to pay attention to one more indicator - density. The strength of the wallpaper depends on it. This affects everything: the heavier the trellises, the easier it is to glue them (they do not stretch or tear), they are more durable - it is more difficult to damage them on the wall. True, this does not apply to pets - they can easily scratch any.
If you approach the selection process professionally, then light wallpapers (density up to 110 g/m2) quickly get wet, as a result they fall apart in your hands, they are difficult to cut on the wall - they tear, gathering into an accordion under the knife blade, medium ones (110-140 g/m2) m2) is easy to glue to the wall, but only end-to-end - those glued with an overlap are difficult to cut, heavy ones (140 g/m2 or more) are difficult to glue in hard-to-reach places due to poor elasticity.
Date of issue
Rarely do any home craftsmen, when purchasing trellises, pay attention to the day of manufacture, batch number and article number. But in vain. Silk-screen printing equipment is filled with paints for a batch of wallpaper. The next time you refill, only in theory can you get the same shade. In practice, the tonality is always violated. In a store or hypermarket, the difference in shades cannot be seen, but after gluing it immediately catches the eye. Therefore, you need to carefully study the text on the insert. Where to look is shown in the photo below.
Release date, batch number, article number.
We glue paper wallpaper in problem areas
The most dangerous places when hanging wallpaper yourself are corners, places behind the radiator and sockets.
One simple rule will help you glue paper wallpaper correctly in the corners of the room. Never, under any circumstances, lay a whole strip on a corner; in the corners, wallpaper is glued only end-to-end, or, in extreme cases, overlapping.
If you are lucky and the corners in the renovation room are fairly even, gluing the wallpaper will be quite simple. We lay one strip on the wall near the corner, with a maximum grip on the next one - 1-2 centimeters. Then carefully cut off the excess fabric with a knife; it is very convenient to use a wide, sharp spatula as a ruler. Same thing with the next wallpaper. If the angle is uneven, then the allowance can be made up to 5-8 centimeters. When the canvas begins to wrinkle, you can make several cuts on the paper and glue them evenly to the wall. We glue the next strip, on the other wall, strictly vertically, drawing a line using a plumb line. Excess wallpaper on top can also be carefully cut off.
To paste wallpaper behind the radiator, you need to follow the same rules as when decorating ordinary walls. If you cannot remove the radiator and completely seal the space behind it, you can decorate with paper just 10-12 centimeters behind the battery on both sides.
Before properly gluing paper wallpaper onto the socket/switch area, you need to turn off the power to the room and remove the casings. Then attach the wallpaper, attach it to the place where the socket is located, and make two crosswise cuts if it is square, and several cuts with an asterisk if it is round. Then the paper is pressed firmly against the edge of the rosette and cut off. If the edges are cut unevenly or there are allowances of a few millimeters left, it’s not a big deal; the excess paper can then be easily tucked under the lid.
Another small nuance that you need to know when hanging classic wallpaper is decorating the walls with borders. You can glue borders only after the new beautiful walls have completely dried. Wallpaper made of paper dries differently, depending on the density of the material and the amount of glue applied - from 12 to 32 hours. Most often, the surface becomes completely dry and ready for re-decoration within a day.
Borders can be glued to wallpaper that is already completely dry.
Which glue for paper wallpaper is better to choose?
In Russia there is a large selection of glue for paper wallpaper. But not every paste meets the mandatory requirements:
- have good adhesion to wallpaper and wall;
- easy to mix, without lumps, to the desired consistency;
- do not leave yellow marks on the surface of the trellis when drying.
Well-known brands most fully meet these criteria. Expensive:
- "Quelyd";
- "Metylan";
- "Kleo"
From the middle price sector :
- "QUALITY" is a good glue with an affordable price. Easy to stir, holds well;
- "Moment" classic. You can buy it for about 100 rubles. It has a thick consistency, which allows you to easily glue both penny simplex and dense duplex;
- "Econ" - German quality does not require special comments.
Among the cheap types of paste are:
- KMC;
- "Bustilat."
If financial difficulties do not allow you to buy a middle and elite class adhesive, it is better to refuse a cheap purchase and prepare the glue yourself at home. In any case, the quality will not be worse. You will need:
- starch - potato or corn (2 tablespoons);
- flour - any (1 cup);
- water - 2.5 l.
You can add wood glue - a little bit - to enhance the effect.
It’s easy to prepare (grandmothers’ recipe and technology): bring 2.5 liters of water to a boil in a saucepan. Mix flour and starch in a bowl, then add cold water in a thin stream. Everything is thoroughly mixed. Hot water is added to the resulting porridge until the sour cream becomes thick. The contents of the bowl are poured into a pan of boiling water and brought to a boil. The paste is removed from the heat. The cooled glue is ready for use. It has many advantages:
- low cost;
- environmental cleanliness;
- high adhesion for about 10 hours, after which you need to brew a new paste;
- easy preparation.
There is only one drawback - when working for several days, daily brewing is required.
Counting the amount of wallpaper and glue
How much should I take? Let's count the rolls. Most often, rolls with a width of 53 and 106 cm are available for sale. They are also called “half-meter” and “meter-long”. European manufacturers also produce wallpaper with a width of 68 cm. The length of the canvas per roll is 10.05 m. It is most common. Vinyl wallpaper with a width of 53 cm is sometimes sold in rolls of 15 m, and non-woven wallpaper for painting a meter wide is also supplied in 25-meter rolls.
We remember the school geometry course, pick up a tape measure, measure the room and calculate the perimeter by summing up the length of all the walls. For example, for a room measuring 3x4 m, the perimeter will be 3+4+3+4=12 m. Multiply the perimeter by the height of the ceilings. We subtract the area of windows and doors from this and get the total area of the walls.
S=(a*b)-((c*d)+(e*f)). S is the required area of the walls of the room, a is the perimeter of the room, b is the height of the ceiling, c is the width of the window, d is the height of the window, e is the height of the doorway, f is the width of the doorway.
We calculate the number of strips as follows: divide the perimeter of the room by the width of the roll. For example, we divide our 12 m perimeter by the roll width of 0.53 m. We get 22.6. Round up and get 23 stripes. For wallpaper with a large ornament or pattern that needs to be combined, designers recommend multiplying the perimeter by a factor of 1.18 when calculating.
Let's count further. The length of one roll is most often 10 m. The height of our room is 2.50 m. For convenience, we need to add another 10 cm to the ceiling height. Thus, we get a strip height of 2.65 m. If we divide the length of the roll (10 m) by this number (2.65 m), then we get 3 full stripes from one roll of wallpaper. Don’t worry about the remainder: they can perfectly cover the space above and below the window or above the door.
Be sure to take one or two rolls to spare. Even a super-professional can easily ruin one or two pieces of wallpaper. It happens. If they are not useful, then whole unpacked rolls can be returned to the store within three weeks after purchase (if, of course, you kept the receipt and labels).
The amount of glue is also determined by the area of the walls. Different types of glue are used for different types of wallpaper. For paper wallpaper, any universal wallpaper is suitable; for non-woven or vinyl wallpaper, you need glue intended only for this type of wallpaper. Any box of glue is equipped with instructions that tell you how to dilute the mixture, in what proportion, and for what area it will be enough.
Materials and tools
Even a beginner in this business can cope with gluing paper wallpaper. The main thing is that all instructions and recommendations are strictly followed, and that the necessary materials and tools are at hand.
Materials you will need:
- rolls of paper wallpaper (quantity calculation is given below);
- universal or special wallpaper glue for paper;
- primer - no matter what some experts say, it’s still worth priming the walls.
The list of tools is impressive. You can find some at home or with friends. The rest will have to be purchased, because... Most of the listed tools are consumables - used and thrown away.
The full list includes:
- stepladder If you don't have one, you can use the table. The main thing is to have access to the ceiling space;
- containers for glue and clean water. You can use 8 or 10 liter plastic buckets;
- a tray (cuvette) for primer and glue;
- a screwdriver with a mixing attachment for preparing glue will speed up the work. If not, you don't have to buy it. You can mix the glue yourself;
- rule. If you are not at home or staying with friends, you can get by;
- a roller with a telescopic handle and a small brush - needed for applying primer;
- plumb line - without it it is impossible to draw a starting vertical line. If you have a laser level, you don't need a plumb line;
- construction pencil or marker;
- 3 or 5 m tape measure - helps to cut sheets of wallpaper;
- utility knife - used for trimming and trimming trellises;
- wide metal spatula - needed for trimming wallpaper near the ceiling and below;
- wallpaper spatula in the form of a wing made of plastic or rubber - smoothes the wallpaper on the wall, removes air bubbles;
- a special wallpaper roller made of thick rubber - needed for rolling trellises to the wall. The population is accustomed to performing operations manually. This trick works with thick wallpaper: duplex. With thin ones, not always - they either tear or stretch, resulting in folds;
- paintbrush or large paint brush for applying glue;
- a towel (napkins) for hands and removing the exposed glue (the glue can be removed with the same success with a foam sponge);
- a small rubber, cone-shaped roller for rolling joints.
Calculation of rolls
There are two methods to determine the required number of tubes.
Method 1. Measure the height of the wall. In this case, you need to measure only the part whose surface is pasted over. This means that if there is a permanent floor or ceiling plinth, the length of the trellis strip will be shorter than the height of the ceiling. The length of the tube, usually 10 m, is then divided by the resulting length of one strip. This way you can find the number of full sheets in one roll.
At the next stage of calculations, the length of the perimeter is determined and divided by the width of the trellis (0.53 m). The total number of sheets is divided by the number of strips in one tube. The result is the desired number. Some DIYers may argue that there are windows and doors whose area is not deducted. The explanation here is simple: there are always unexpected losses. In addition, experienced finishers advise adding 1-2 more tubes to the obtained result. After all, by purchasing more, you can end up with another batch that has differences in color.
The above reasoning can be expressed by the formula: P = T/L x M/K + 1(2) , where:
- P—number of rolls of trellises, pcs.;
- T is the length of the perimeter of the room, m;
- L—tube width (0.53 m);
- M is the length of the trellis, m;
- K—tube length (10 m, 15 m, 25 m);
- 1(2) - additional 1-2 tubes for unexpected losses.
If the picture height is more than 6 cm, 1 trellis tube is added to all calculations for every 6.
Method 2. The height of the ceiling and the area of the room are determined, after which the desired result is taken from the table below. It does not take into account the losses for fitting the drawing.
Table 1. Calculation of the number of rolls of paper wallpaper depending on the area of the room.
| Indoor ceiling height | |||
| Standard ceiling - 2.5m | High ceiling - 2.6-3m | ||
| Room area, m2 | Number of tubes | Room area, m2 | Number of tubes |
| 6 | 5 | 6 | 7 |
| 10 | 6 | 10 | 9 |
| 12 | 7 | 12 | 10 |
| 14 | 8 | 14 | 10 |
| 16 | 8 | 16 | 11 |
| 18 | 9 | 18 | 12 |
| 20 | 9 | 20 | 13 |
| 22 | 10 | 22 | 14 |
| 24 | 10 | 24 | 15 |
| 26 | 11 | 26 | 16 |
| 28 | 11 | 28 | 17 |
| 30 | 12 | 30 | 18 |
Glue calculation
To calculate the number of glue packs, you need to use its consumption, which is indicated on the front side of the pack. Usually this is the number of rolls 10 m long and 53 cm wide, which can be glued with glue from one pack. Then everything is simple: the total number of rolls is divided by the consumption. If the exact number is not indicated on the pack, but a range is given, for example, 7-9 rolls, the average value is taken.
Tool
To complete the work you will need to prepare:
- a stepladder or small table of such a height that you can reach the ceiling with your hand;
- container for preparing glue and water supply;
- paint ditch for primer and adhesive;
- drill or screwdriver with a construction mixer;
- roller and brush for applying working solutions;
- a plumb line or laser level for drawing starting vertical lines;
- pencil and tape measure at least 3 meters long;
- thin stationery knife and scissors for cutting wallpaper;
- soft wallpaper spatula for leveling the canvases;
- a towel, napkins or a piece of soft cloth.
Once the set of tools and materials have been prepared, you can begin to carry out the work.
Preparatory work
Hanging paper wallpaper begins with preparatory work, which can be combined into three independent blocks:
- wall preparation;
- wallpaper;
- glue.
Preparing the walls
The quality of paper wallpaper finishing and durability directly depend on the level of surface preparation. It should be smooth. Otherwise, all the convexities and concavities will hurt your eyes. The process is described in detail in the material “How to prepare walls for wallpapering.” Let's remember what we're talking about:
- Various fasteners are removed from the walls, the room is de-energized, after which switches and sockets are removed. The exposed wires are insulated, after which the voltage can be turned on;
- plinths and trims are removed from the doors. In practice, it has been verified that by slightly losing time on the operation of removing and returning skirting boards and platbands to their place, the passage of the doorway and work with wallpaper near the floor are greatly simplified;
- old finishing is removed - wallpaper, paint, whitewash;
- The plaster is inspected - the walls are tapped with a hammer. If there are bouncing areas, the plaster layer is removed;
- cracks and chips that appear are repaired;
- areas contaminated with soot and grease are cleaned;
- the wall is primed with a deep penetration primer;
- plastered if necessary;
- after plastering, the surface is primed again and then puttied;
- Before wallpapering, it is primed again, but this time under the wallpaper. Many finishers skip the operation of priming concrete walls. Here you can do both. But it is best to prime it - the costs are small.
Attention: in various materials on our website it has been explained more than once that before wallpapering drywall, it must be puttied. Unfortunately, the error keeps repeating itself. Then the owners watch in surprise as the trellis sheets are removed along with the gypsum board cardboard.
Preparing wallpaper
Professionals never combine dry and wet processes when gluing paper wallpaper. Therefore, sheets for all walls are pre-cut. The step-by-step algorithm is as follows:
- The height of the wall is measured in several places. If the difference in length does not exceed 2-3 cm, the average value is taken and the measurements are not returned - the plinth will hide the shortcomings. If the baseboard is not removed, you will have to measure every third sheet. Otherwise, you can cause trouble;
- the roll rolls out on the floor;
- use a tape measure to measure the length of the first sheet;
- The trellis fabric is bent in the opposite direction. The fold is ironed by hand;
- if there is no fit according to the pattern, the tube is rolled back and forth until it runs out;
- Using a construction knife (scissors are inconvenient) the roll is cut along the folds into separate sheets.
When adjusting the color, the work is done differently:
- the cut first sheet is turned face up;
- the roll is rolled out;
- the drawings are combined. The main thing here is not to confuse which side the next strip will be glued on;
Combining the drawing.
- the second sheet is cut from below, at the same level as the first sheet. The top will be cut off already on the wall. If you cut on the floor, you might make a mistake;
- The sheets on the reverse side are numbered.
And so on for all walls. If there is a significant difference in height, everything is done all over again on every third sheet.
Glue preparation
On each package of glue there is a recommendation for its preparation. You need to strictly follow it. After all, even a minimal violation of the proportions can ruin the adhesive mass. All the nuances of preparing glue can be found here.
Paper wallpaper gluing technology
The instructions on how to glue paper wallpaper on a wall have several sections:
- wall marking;
- pasting technique;
- passing corners;
- pasting difficult areas.
Wall marking
While the glue is maturing, you need to choose where to start working. This could be a doorway, a window, a corner. If there are several windows, start with the last one.
Experience shows that it is better to paste the first strip of wallpaper in the corner, 2-3 cm away from the adjacent wall. Markings made in advance using a plumb line, a rule (long ruler) and a pencil will make the work easier, because You cannot focus on the vertical of the adjacent wall - it may have a slight tilt in any direction. The first line is drawn at a distance of several centimeters from the corner. The second, at a distance of the width of the wallpaper sheet. It is useless to continue drawing - the paper, when wet, stretches a little and will definitely cover the drawn lines.
Experienced finishers make such markings on each adjacent wall as they glue the trellises. Useful when going around corners.
Pasting technique
Before gluing paper trellises, just in case, you need to look where to apply the glue: on the wallpaper or the wall. The manufacturer makes a special mark about this on the insert (see photo). In terms of paper, this is 99% wallpaper. Exceptions are made for several types of dense imported trellises - the paste must be smeared both on the walls and on the wallpaper sheets.
Insert with recommendations.
Correct order of work:
- the wallpaper sheet is laid on a flat, dry surface;
A trellis sheet prepared for applying paste.
- Using a large brush or brush, the paste is applied in an even layer to the first half of the sheet. Particular attention should be paid to the edge;
- part of the sheet with glue applied is bent so that the second, clean half remains visible;
- glue is spread on the remaining dry part of the surface;
- the second end of the sheet is bent in the same way, after which it is slightly curled (the diagram is shown below). This operation is necessary so that the glue does not dry and the paper is saturated with the paste. The holding time is given in Table 2.
The wallpaper is impregnated with paste.
Table 2. Wallpaper impregnation time.
| Density of fabric | Time for impregnation, min. |
| Simplex paper trellises | 5 |
| Duplex paper trellises | 7-8 |
| dense | |
| very dense | 10 |
- the soaked sheet is glued to the wall. To do this, the upper part of the wallpaper is opened, the lower part remains folded. Using the markings, the sheet is glued. Use a wallpaper spatula to remove excess glue and bubbles. Movements from the middle to the edges. Removal is carried out from top to bottom. Any glue that gets on the wallpaper is removed with a dry cloth or sponge;
First, the upper part of the wallpaper is glued.
The wallpaper canvas is smoothed with a wallpaper spatula.
- the bottom opens up. All operations are carried out in the same order;
Start of work on finishing the walls with paper wallpaper.
- the canvas is rolled to the wall with a special rubber roller. You can use your hands, but only thick wallpaper;
- The second sheet is glued using the same principle;
- After gluing the second sheet, the first sheet at the top is cut with a knife. A wide metal spatula helps to make an even cut. The strip is removed and the glue from the ceiling is wiped off with a rag. It is important not to miss a moment here: do not let the glue on the ceiling dry out;
The top is cut off.
- After all operations are completed, the joint is rolled with a narrow roller. If the glue has dried in some places, the edge of the wallpaper is carefully pulled away from the wall. The edge of the trellis is re-smeared with paste. Many finishers apply it with their fingers, although the correct method is to apply it with a brush. True, the result is the same.
Passing corners
The outer and inner corners can be passed in several ways. All of them are described in detail in the article “How to properly glue wallpaper in the corners of a room?”
Pasting difficult areas
Difficult areas include window and door openings, sockets with switches and radiators.
With the trims removed, walking through the door is not difficult - the problem areas will be hidden by the decorative elements of the interior door. It's also easy with a window. After the wallpaper has dried, the sheet is cut along the edge of the window with a stationery knife.
A cross-shaped cut is made in place of sockets and switches. The petals are folded inside the box.
Passage of switches and sockets.
How to properly pass the radiators can be seen in the figure below.
This is how the wall behind the radiator is glued.
How to hang paper wallpaper correctly
If the wallpaper needs to be installed with an overlap, then work must begin from the window opening in order to avoid a shadow effect at the joints. In a room with several windows, gluing should begin from the southern opening.
- It is necessary to draw a vertical line along the wall with a pencil, retreating from the window to the width of the strip of wallpaper. To determine the vertical, you can use a plumb line, a level, or a string with scissors.
- Straighten the “wallpaper” folded in half.
- Attach the upper part of the strip to the wall, taking into account the 2-3 cm allowance that is intended for the ceiling plinth.
- Make sure the strip is applied vertically. The rest of the stripes will be equal to it.
- Unfold the lower part of the canvas and glue it to the wall surface.
- Press the canvas with a smoothing motion using a roller or a wide wallpaper brush. Directions of movement from the middle of the strip to the edges.
- The fabric should be pressed most carefully along the edges near the baseboards and sockets. It wouldn't hurt to re-apply glue in these places. Cut off excess with a blade or wallpaper knife.
- When applying the next strip, you need to make sure that it runs vertically, focusing on the glued canvas.
- When gluing butt joints, special care is required.
- The overlap method differs in that the second strip is glued overlapping the first by 2-3 mm.
- To apply the next strips, repeat steps two through seven.
Pasting the outer corner
First, you need to measure the gap between the top of the corner and the edge of the last strip of wallpaper, and cut a strip of this width with a 1-2-centimeter bend beyond the outer corner. And if you make cuts at the top and bottom, you can easily bend the canvas around the corner.
Place the second strip, cut from the previous one, overlapping the first one by 1 cm, even if the pattern does not match.
Internal corner
Measure the required distance. Cut the canvas lengthwise so that it extends 1 cm onto the next wall.
Glue the second strip, cut from the previous one, from the corner. To control verticality, use a plumb line.
Rough stripe
There are cases when the canvas is glued crookedly. Can we close our eyes to this? Keep in mind that it is better to correct a noticed error immediately than to “admire” the curvature of the picture for a long time later.
To correct the situation, do not move the canvas on the wall under any circumstances. So it will definitely break. It is better to carefully remove the entire strip from the wall and re-stick it as expected, or cut off a fresh strip.
How to prevent bubbles from appearing
The appearance of bubbles on wallpaper is possible for various reasons:
- an imperceptible draft ran through the room;
- the trellis sheet is poorly coated with paste;
- wall with defects - there are sinks;
- heavy glue for purchased wallpaper;
- The canvas is not rolled tightly enough to the wall.
Practice shows that even the most experienced professionals experience at least one of the factors - bubbles appear. But here the principle works: if you made it yourself, you corrected it yourself.
Let's look at how to hang paper wallpaper without bubbles, or rather, how to remove them. Solution to the problem:
- If the glue has not set, smoothing it with a dry cloth will help. It is better not to use a spatula or roller - they can stretch the wallpaper in this place;
- puncturing the bubble with a syringe, after which air and glue are removed through the hole. If the glue has dried and only air has been squeezed out, glue is applied under the wallpaper using a syringe. The restored area is rolled to the surface with a roller;
The bubble is removed with a syringe.
- cutting the wallpaper with a safety razor leaves an invisible mark if everything else is done correctly (the technique is the same as with a syringe). A knife, no matter how sharp the blade, is excluded.
Conclusion: if bubbles appear, they can be removed quickly and easily.
Attention: all of the above does not apply to thin wallpaper. Only very large bubbles need to be removed here. Small blisters will disappear on their own during drying - the paper will stretch.
Preparatory stage
In order to hang wallpaper, you will need a number of tools and items:
- Wallpaper knife or scissors.
- Plumb or level
- A wide and thin brush for applying glue and putty to wallpaper joints.
- Plastic spatula for wallpaper.
- Small roller, dry cloth.
- Wet sponge.
- Ladder or stepladder.
- Newspapers, rags, the glue itself.
The room in which the work will be carried out must not be ventilated, the power supply network must be de-energized, and the floor must be dry and clean. Wallpaper glue should be applied on the floor, after laying paper under it.
Walls with remnants of old wallpaper
You cannot leave old wallpaper, as the base must be clean and smooth. This will ensure that the new wallpaper adheres tightly to the wall surface. Where the wall changes its profile, it is very easy to tear off the old coating. It will be most difficult on wide and flat sections of the wall. The joints of wallpaper pasted overlapping can be cut off. If the wall surface has unevenness and protrusions, it must be sanded. If you can’t cut the joints, you can putty them. The width of the putty strip should be about 15 cm. Those surfaces on which it was necessary to apply putty should be additionally primed. Use diluted glue as a primer.
Surface covered with glass wallpaper or painted fabric
You should first treat the surface with a solvent, which will wash away the remnants of the old paint. After processing, putty and base primer are applied.
Surface previously covered with textile or straw cloth
For such a case, you should purchase a specialized product for removing textile coatings. In some cases, the old coating can be easily removed without treatment. After the coating is cleaned, it should be primed and puttied.
Painted surface
Here the procedure is similar to the previous options. We purchase paint solvent and apply it to the remaining old paint. After the paint has become softer, carefully remove them using a spatula. Priming and sanding with a dry mixture of the base are carried out only after all residues have been completely removed.
Note! If you do not remove the remnants of the old paint, the wallpaper should be denser, darker shades, since all the remnants will be visible through the light ones.
Plaster or concrete
In this case, you do not need to purchase any compounds. Here you need to level the surface with a layer of putty, and then apply a primer to it.
Gypsum fiberboard and chipboard
Using putty, you should cover up all the irregularities and depressions from the fastening elements (screws, dowels). After this, prime the base. At chipboard joints, use diluted alkyd paint as a primer. It will protect these places from destruction.
Contrasting surface
If the base is very different in color from the wallpaper being pasted, you need to select a primer of a suitable color, and only then carry out the work. As an exception, you can limit yourself to the joints of new wallpaper, applying primer only there.
What is the best way to glue - overlapping or butt
Paper wallpaper is glued in two ways:
- overlapping, when each subsequent sheet is overlapped with the one already pasted;
- end-to-end
Glued end to end.
It is easy to understand which wallpapers are glued with an overlap - they have an edge strip. On the one hand, you will have to cut off the edge on one side, which is labor-intensive; on the other hand, the gluing process is greatly simplified: all that remains is to fit the pattern, and only if there is one.
This technique is used for thin wallpaper - you simply can’t hang it any other way; in new buildings and wooden houses - shrinkage will not separate the seams. Thick wallpaper cannot be glued overlapping - the seam will definitely be visible, while with thin wallpaper it is almost invisible. You can verify this by looking at the photo.
Overlapping gluing - the seams are practically invisible.
You cannot glue overlapping and embossed trellises, even if they have a low density - 100-110 g/m2 (thin).
Tips for using paper adhesive
All the main points regarding the use of glue are indicated by the manufacturer in the instructions provided on the back of the package. The packaging design is made in such a way that the number of rolls that can be glued using this mixture immediately catches the eye. In addition, the company that manufactured the glue always describes in detail the sequence of actions for preparing the mixture, the proportions used, the order and sequential actions performed. The algorithm for selecting and using glue can be seen in the video fragment
Attention! When calculating the consumption of wallpaper glue, which must be indicated on the packaging, the computer gluing method is used, which involves gluing the canvases to an ideal surface.
In reality, consumption can vary significantly, especially if the surface has a high degree of absorption. The proportions of water and glue that are indicated by the manufacturer on the packaging were obtained experimentally, so they must be observed when preparing a solution for gluing wallpaper. Otherwise, there is a high risk that the mixture will not provide high-quality adhesion between the canvas and the wall, and the service life will be significantly reduced. If you fully follow all the manufacturer's recommendations, you will be able to accurately determine the time frame for preparing the mixture for gluing. After the glue has completely thickened, it is suitable for use.
How long does it take for paper wallpaper to dry?
One of the conditions for the durability of wall decoration with trellises is the correct drying period. It depends on the owners. Therefore, they should know how long it takes paper wallpaper to dry after gluing - 8-20 hours. During this time it is prohibited:
- open windows - the slightest draft is enough to cause bubbles and saggy corners to appear near the ceiling;
- use fans, heaters, hair dryers indoors.
The specific drying time depends on many factors. Among them:
- wallpaper thickness (density) - thin ones will dry faster;
- indoor air temperature;
- humidity level in the apartment;
- How warm are the walls?
It is not recommended to paint wallpaper earlier than 24 hours from the end of the work - there is a high probability of bubbles appearing.
Paper-based wallpaper paste
Previously, our parents prepared the adhesive composition on their own using inexpensive environmentally friendly materials, and not surprisingly, such glue worked, fulfilling its purpose with a bang. To prepare it, we used starch (corn or potato), any flour (preferably wheat, it has a higher viscosity), water, and in some cases wood glue.
Such mixtures had significant advantages. Firstly, it was cheap, because in the era of the USSR funds were tight, and secondly, the mixture turned out to be super environmentally friendly, no chemicals, only a natural product. In addition, the adhesive properties were high, but only if the composition was freshly prepared. The disadvantages include a short period of use - only 10 - 15 hours, so for large areas it was necessary to prepare new mixtures.
The nuances of wallpapering the ceiling with paper
The technique for gluing the ceiling is the same as for walls. There are differences, but they are few:
- work always starts from the window - gluing is carried out deep into the room;
- uneven, crooked ceilings should be leveled with gypsum plasterboard or fiberboard;
- You need a partner, or even better, two assistants - it’s impossible to do all the work efficiently alone.
In conclusion, paper wallpaper seems simple only at first glance. In reality, many nuances arise during the work process. Compliance with the recommendations and conditions of work allows you to get a beautifully decorated interior.
How to apply glue
It is best to apply the glue on a large, flat surface, such as a table or floor. Applying glue is a responsible procedure. In case of poor sizing of the canvases, a good result of the entire work is impossible.
Note! Before you begin, place thick paper or cardboard under your work area.
It is necessary to glue the canvases with glue, as a rule, by placing them on top of each other with an overlap of about 1.5 cm. This will protect the front side of the wallpaper from glue stains. When gluing small pieces, for ease of work, place film or cardboard under them so as not to constantly hold them with your hands. Cover a piece of wallpaper with glue evenly, spreading it with a brush from the middle to the edges of the panel. Bubbles will appear in places where glue is not applied. After completing the application of the composition, fold the strip in half with the pasted side inward and set aside for a period of 5-10 minutes. During this time, the glue will be completely absorbed into the material. Any glue that gets on the front side should be removed with a sponge after wetting it. You should avoid applying strong pressure and friction to the area of contamination; everything should be extremely careful.