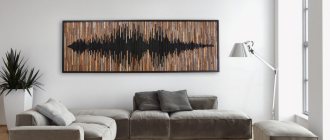
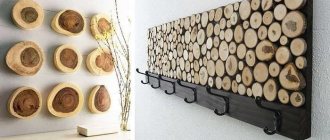
A carved wooden panel will become a real decoration for the interior of a living space. Wooden carved panels are gaining more and more popularity every year. Such masterpieces, made with your own hands, are a real work of art and are unique in their execution. With the help of such products you can organize an elegant design of any room, as well as give it a unique oriental charm. Carved panels harmoniously combine with the interior of any style.
What are wooden carved wall panels made from?
Creating a carved panel is a difficult creative process that requires the master to have special skills and imagination, as well as an understanding of all the intricacies of such a difficult but interesting activity. Not any wood is suitable for making wall panels.
Very often panels are made from:
- Beech;
- Birches;
- Alders;
- Linden trees;
- Teak;
- Oak;
- Pines.
The panels often depict excerpts from life, animals and plants. Miniature wooden paintings are decorated with ornaments and ornate paintings.
Coniferous wood is most often used to make carved paintings.
The decor for panels made of valuable wood can be inlaid with silver or amber.
Carved panels made of oak and teak are considered the most durable and noble.
Tools for work
Truly high demands are placed on specialized carver tools. The skill of the performer plays an important role. But only with correctly selected and carefully sharpened tools will a master be able to demonstrate his skills in full force.
And if a professional easily and at first glance determines the quality of devices for work, then a beginner is invariably lost and can make a mistake.
First of all, you should purchase:
- quality knives;
- chisels (several pieces);
- needle files;
- hacksaws cutting metal;
- clamping device;
- sandpaper of different grain sizes;
- drill and several types of drills;
- wooden bars.
Knives
It is best to buy knives in a specialized store of goods for creativity and hand-made goods. They must be made from high quality steel. If funds are limited, you can temporarily buy simpler knives, but sharpen them well.
Experts speak positively about tools from the Tatyana, Narex and Kogatana brands.
Chisels
At first, instead of chisels, you can use a sharpened screwdriver and file.
When purchasing chisels, pay attention to the following types:
- Flat - a chisel in the shape of an elongated rod with a cutting edge at the end; it is needed during the initial processing of wood.
- Semicircular is one of the most popular types; it can be of varying degrees of roundness: medium, round or sloping.
- V-shaped - necessary when making geometric threads.
Machine
Carving on a machine has enormous potential, simplifying this work and turning it into pleasure. Modern models are not cheap at all, but professionals characterize them from the best side.
The machines can simplify many labor-intensive operations familiar to carvers:
- surface treatment at different angles;
- drilling recesses, grooves and grooves;
- milling;
- the actual carving.
There are huge differences in the sizes of machine models and in the technology of their operation:
- manual;
- milling and engraving;
- laser;
- CNC machines.
To simplify many operations of artistic carving, professionals advise purchasing a CNC machine. But if a novice craftsman just wants to try himself and see if this hobby is suitable for him, a manual machine is quite enough.
Carved wooden panels: what to look for
Working with wood requires special skills, and the ability to create carved panels even more so. This is a whole art using artistic taste, imagination and the ability to correctly emphasize the finishing of the material. Carved wooden panels are a real masterpiece with a finished image that can decorate any room. Such paintings are currently very popular in the decoration of rooms for business meetings of various companies and firms.
Related article: Advantages and types of wooden floors in an apartment
What to pay attention to:
- It is important to choose the right environmental material;
- The material for the panels should be practical;
- Compliance with the panel manufacturing technology is of great importance;
- It is important to choose the right tool for the job, then the process will not be so difficult;
- Most panel elements can be easily made with an electric jigsaw;
- The finished painting is often coated with oil. This method allows you to protect the product from moisture.
At the final stage, the carved product is coated with a thin layer of transparent varnish.
You can create a beautiful composition and an attractive setting by combining wooden interior items and carved panels, complemented by pleasant lighting.
Do not forget that if a carved wooden panel is used in the design of a room, then the rest of the interior should be appropriate.
Handmade wood panels fill the room with positive energy, a favorable aura and comfort.
The service life of carved wooden panels can last several decades.
Composition
After all the parts for composing the panel have been prepared, you can proceed directly to composing the composition from bars and cubes. Mosaics can be based on both color effects and the contrast of light and shadow resulting from the different heights of each piece. Arrange the bars in a way that seems attractive to you - in a strict geometric pattern or chaotically.
Returned home: Russian artists whose careers did not work out abroad
God gave talent in exchange for happiness in his personal life: 5 husbands of Lyudmila Lyadova
Involving minors in begging: why you can’t “give in”
When all the parts are laid out, you can proceed as follows - carefully lifting the plywood by the edge, move all the cubes onto the table, trying not to disturb the pattern of the panel. Now you need to either glue double-sided tape for one row, or it’s good to coat this place with wood glue. Glue a row of cubes. Continue filling the panels in rows, maintaining the composition you like. If you use adhesive tape and it is possible to use a screwdriver, then each cube can be secured on the reverse side using a small self-tapping screw. Wood glue must be allowed to dry in accordance with the instructions for use.
Making a carved wood panel with your own hands
Making a carved wood panel with your own hands is not such an easy task. But it’s still worth trying yourself in this art. The first time, of course, the work will be of poor quality and not particularly neat, but the process of the lesson will give you a lot of pleasure.
Where to start:
- Initially, we select a picture on the basis of which the layout will be created.
- Then we select suitable wood and veneer. We fix the tracing paper on the veneer - this will be the basis of the canvas with the selected composition.
- We create a general background. Various types of wood can be used.
- Using a knife, we cut out the details, excluding nicks and breaks in the design.
A carved wooden decoration can be used as a talisman or talisman.
The panel details are cut out slightly larger than the layout used. At the end of the work, all parts of the panel should be placed in hot sand or salt. In this way, the elements are fired and imbued with color and special depth.
Related article: How and why a butterfly dowel is used
Afterwards, all the parts are coated with glue and assembled into a common composition. And after complete drying, the surface should be opened with varnish.
Carved wood panels are used not only for room decoration, but also as a talisman.
The panel can also be made without parts and a solid block of wood can be used for the work. This activity will require more care and diligence.
Grinding
After all the bars are prepared, it is necessary to clean their edges. This can be done using sandpaper manually or using a sander. This preparation of panel parts will protect your hands from splinters and scratches that may appear while working with untreated wood. And the panel itself will look much neater if all the bars do not have any jagged edges.
Sawdust and fine dust after sanding should be carefully removed from the surface of the workpiece, as it will not allow paint or varnish to adhere well. This can be done with a slightly damp cloth or with tape. If cleaning was done with water, then the bars must be thoroughly dried before painting.
Check and stripe. The best men's trousers for 2022 (photo)
Don't forget about the beauty of your feet: a selection of bright pedicure designs for spring and summer 2021
The only female cosmonaut of Roscosmos became the prototype for the Barbie doll
How to make a carved panel for a bathhouse with your own hands
The components of the decor for a bathhouse play an important role; they create a favorable overall atmosphere. Due to constant changes in temperature and moisture, the material for the panels should be chosen very carefully. It is quite possible to make a carved panel for a bathhouse with your own hands with a minimum of artistic abilities. Before starting work, you need to think through the drawing and prepare a paper stencil. Very often, pictures for bath rooms become curvaceous ladies with equipment or a bath attendant in a steam room. Sayings and quotes on relevant topics are also often used. To work you will need a sharp knife and a wooden plank.
Sequence of work:
- You need to sand the board well on the front side;
- Transfer the drawing;
- Cut out the necessary patterns and contours with a knife;
- Cover the carved areas with a water-based stain, and the remaining areas with turpentine or a solution of linseed oil;
- Attach fasteners to the back of the board.
A carved wooden panel with a bath theme will create a comfortable atmosphere and highlight the unique interior of the steam room.
That's the whole master class of carved panels for a bathhouse. Of course, this is the easiest option for an inexperienced beginner, because the complexity of the entire carving process depends only on individual abilities.
Any panel for a bathhouse will not be spoiled by the phrase “light steam”.
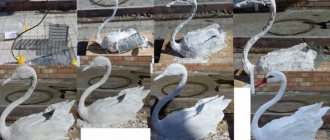
Preparation
I read a bunch of sites on how to dry wood at home, since no one uses fresh saw cuts - they crack badly and can become moldy. To be honest, there is very little information on the Internet on this matter, it is poorly verified, scarce and contradictory. Basically, all the advice boils down to the fact that this should be done in production conditions. In the end, I chose and decided to try the two most realistic methods for me: boil the saw cuts in oil or in a very concentrated salt solution. I outlined a general procedure: file, dry, process, sand. So, vacation came, we went to the village, and I began to act.
Making a carved clock panel with your own hands
The carved panel “Clock” fits well into any interior, adding style and grace to it. Let's consider creating a carved panel made with patterns in the form of cranes on the wall. To do this, we prepare the necessary material and tools.
Related article: Technology of laying walls from expanded clay concrete blocks
Required material and tools for the “Clock” panel:
- A shield glued together from oak slats;
- Wooden base for panels;
- Simple pencil;
- Glue;
- Semicircular chisel and corner;
- Wax-based impregnation or varnish.
So let's get started. To begin with, we determine the area where the clock itself will be located and outline it on the shield. We also apply the prepared sketches to the surface with a pencil. Next, using a jigsaw, we cut out the opening for the clock and all the necessary areas. Using a semicircular chisel, we make the pattern more expressive, focusing on the feathers of the bird. Use a corner to separate the main contours and sand the entire surface. Next, glue the resulting finished carved work onto a solid base and wait until the product dries. Afterwards, we cover the panel completely with varnish or impregnation. Place the watch dial on the glue. That's all, the panel is ready.
You should make a mount on the shield to place the panel on the wall in advance.
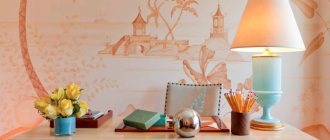
How to decide on the size
It is determined by the interior of the room in which you will hang the picture, and the actual size of the picture itself. If the canvas is small, it does not need a large frame with a wide mat.
Carved wood panel “Ship” (video)
If desired, the panel can be polished at the end, this will give it softness and matte finish. Indonesia is a very rich country in culture, so carved panels by Indonesian craftsmen, who personify the culture and folklore of their people, are especially popular. Like magic, they transform wood into real “living” compositions. Even before the advent of painting, wooden panels were used to convey a vision of the surrounding world and display sacred symbols. Tree in Indonesia means "symbol of strength and life", and carved patterns of flowers and plants symbolize love, happiness and prosperity.
Armchair
In the case of slatted structures, it is better to immediately consider a hybrid option in the form of a chaise lounge - a beach lounger. Other design options in the interior will look too rough.
Portable, lightweight design with a fabric back is easy to assemble and convenient to transport. It is recommended to make the load-bearing elements from maple wood, and the lintels on the seat from cherry, beech, and pine.
To make a chair, you need to prepare the legs: 2 parts 20x40x800 mm and 2 parts 20x40x560 mm each. The lower crossbars are also paired, 10x50x380 mm each. Top 1, size 20x40x380 mm. The crossbar for sitting is also needed in a single copy, 20x40x300 mm. You will also need 5 slats 20x40x400 mm and a piece of fabric for the back 600x500 mm.
The assembly order will be as follows:
- jumpers are attached to a long pair of legs at the top and bottom;
- fabric for the back is stretched over the resulting part;
- The seat is assembled: a jumper is attached to the short legs at the top, then 5 prepared slats;
- chair assembly: the second pair of legs is passed between the lower jumpers of the long part and secured with a movable connection.
- You can first paint or coat the chaise lounge frame with impregnation.
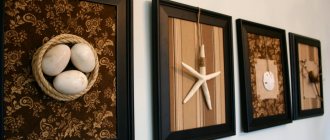
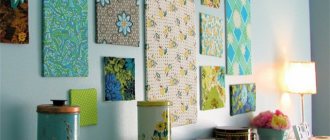
Each photo has a frame
To prevent the edges of photographs/pictures from becoming shaggy, they need to be inserted into plywood frames - a worthy frame for cute things.
The simplest version of a photo frame is done like this:
- a sketch is drawn on paper and transferred to a plywood sheet;
Frame sketch
Note! For frames, scraps of material are often taken, so make sure that the drawings of the plywood frames match the wooden blank.
- cut out the design with a jigsaw;
- sand, coat with varnish or stain if desired;
- If the photo hole is through, it should be smaller. The photo is glued with double-sided tape;
- if the place for the photo is slightly recessed, it is cut to the desired size.
The photo will be pasted here on top
You can cut out a shaped frame and glue it to the sheet, leaving the top part free through which the photo will be inserted. The gap can be closed from above with a cardboard plug or a plywood strip.
Additional Tips
If in a classic interior a panel can correspond to curtains, bedspreads or carpets, then in a modern interior the plot should take the form of glazing, furniture, electrical appliances or fittings.
A panel on canvas with a stretcher is hung on a screw using a rope. But how to make a panel with your own hands if the supporting base is thin cardboard or board?
It's simple - you need to drive several 4-mm staplers into the thematic material, and then tie a rope to them for hanging. In this case, it is advisable to bend the brackets on the front side of the panel if they protrude through the supporting profile.
The beauty of the panel is that it can demonstrate stories through thematic products. For example, to demonstrate a still life with morning coffee, it is enough to glue a bowl to the board, and to the bowl - a brown piece of synthetic fabric with foam swollen from heating. Such a focus of attraction can only be supplemented with coffee beans, a sugar bag and a teaspoon.
General information about fastenings
Any canvases look complete only when they have a frame; they are most often frames made of various materials. The range of framing frames is very wide and the craftswoman can choose any option that she simply likes aesthetically.
With the fastening, the question is somewhat different: here it is important to consider not just how it looks, but also whether it can perform its function efficiently.
We will conditionally divide the fastenings into two large groups. First, we will identify all kinds of hangers, threads and other fastening options located directly on the frame of the picture. They serve as a link between the frame and the wall mounting (screw, nail, anchor, etc.).
The second group is directly those devices and materials that hold our frame on the wall and prevent it from falling. Their choice is also very wide: from classic self-tapping screws to all kinds of hooks, Velcro or even special rails. Moreover, the option of placing on rails (profiles) is becoming increasingly popular and popular, since this method allows you to place several images at once and is exceptionally reliable.
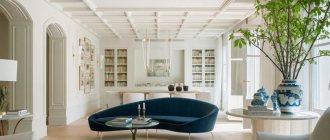
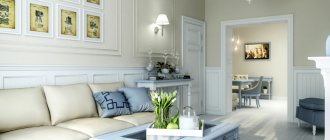
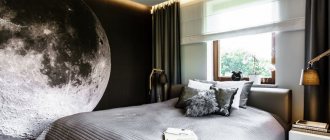
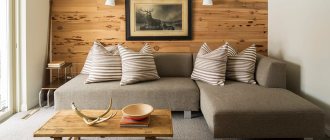
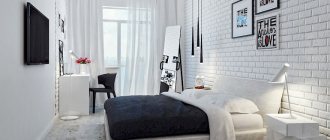
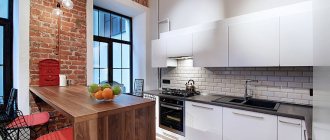
Paintings on boards in the interior
A great way to transform the interior, emphasizing its individuality, can be paintings on boards in Provence or classic style. A trend in modern interior design are paintings on boards in the loft style. Such an industrial style decoration should be contrasting and stand out against the general background of the wall. Large modular paintings on boards can decorate a partition or door in a room. Small decorative elements with images of portraits are placed on wooden shelves. Pictures on boards in the bedroom can decorate the wall or headboard of the bed.