Advantages of homemade plaster
Modern renovation is expensive in terms of both purchased materials and hired labor.
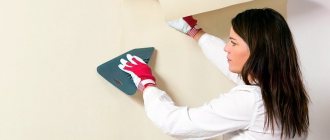
The work of a plasterer-finisher costs a lot of money. Everyone’s desire to save money is understandable and reasonable: no one wants the repair to drag on for many months, if not years, due to the high cost of the material and the work performed. To prevent it from becoming a family curse, you need to look for the most rational way out of this situation. However, the solution is obvious: make the material yourself. This option will suit the vast majority of people who want to make inexpensive and beautiful renovations to their apartment. There are plenty of tools for this, and it’s not difficult to acquire them - if only you wanted to make a pattern.
Garden crafts for swans: ideas, instructions, photos
You can decorate almost any plot of land. To do this, use the simplest materials and plants, make various relief figures.
For example, plant exotic plants on your site in unusual flowerpots in the shape of a bird or animal. Such a product is quite stable, and therefore it will withstand any weather conditions, since durable materials are used for their manufacture. You will also need to stock up on the following materials:
- Plaster – 5 kg
- Plastic bottle (about 5-6 l)
- thick wire
- Long thin cloth or bandage
- Lattices – 2 pcs.
- White paint
- Red paint
- Black paint
- With improvised tools
Ideas for creationProcess:
- Remove the top of the bottle. Place sand in the prepared container (wet it in advance). Make a small hole for the wire. Bend it so that it is shaped like a swan's neck.
- Apply plaster over the bottle using a spatula. Level the surface.
- Attach a rectangular wire to the sides, and also apply plaster along the edges of the product.
- Treat the wire with plaster as well. Then wrap it with a bandage.
- When the plaster dries, reapply plaster over it. Level the surface with a soft brush.
- Wrap the entire surface of the product with a bandage.
- Make the correct neck, form the bird's head and beak.
- On the other side of the bottle, insert the same wire. Bend it, giving it the shape of a tail.
- Cover the wire with plaster.
- Leave the craft for 2 days to dry completely.
- Remove rough edges with sandpaper. Apply paint primer on top of the plaster.
- After the product has dried, paint it: the body with white paint, the eyes with black, and the beak with red paint.
garden swan
The use of textured and structural rollers
A simple way to make textured plaster from ordinary putty with your own hands is to use a special roller.
It is quite simple to obtain the desired quality of finish in this way. Depending on the working surface of this tool, the desired result is obtained - the desired pattern on the wall.
Rollers differ in the material they are made of:
In addition to the listed rollers, there are also tools made of foam rubber, fabric, polyethylene, with a spirally attached cord. With their help you can achieve a rough surface with a pattern.
Important! You should not press too hard on the tool while working - a clear pattern is obtained only with minimal force. The tool must be moved from top to bottom without stopping, pressing firmly against the finished strip.
These tools fall into two categories:
What are they and when to use them
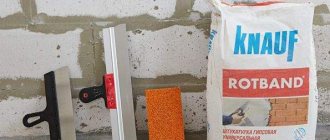
Putty is the preparation of surfaces for final finishing. With its help, they ensure that the wall is (or looks) perfectly flat. It is applied to relatively flat surfaces. If you need to level the walls and make the corners 90°, do this with plaster or drywall. Putty is not intended for this.
Putty is sold in a wide range
Like plasters, putties consist of a binder, filler and additives that give them special properties. They are distinguished from plasters by the use of aggregates - sand - fine fractions. Two types of binders are used - cement or gypsum, sometimes lime and polymer additives are added to them. Accordingly, there are gypsum and cement putties.
There are also polymer putties - acrylic and latex. They are created on the basis of synthetic substances, the properties of which vary depending on the additives. They are not natural, but have a longer service life and can withstand a greater number of freezing/defrosting cycles. For facade work it is better to choose them. Indoors, they are not the best choice, as they have low vapor permeability, which can cause damp walls, the appearance of fungus and mold. They are convenient because they can be used on wooden and metal surfaces.
Brief description of the properties of polymer plasters
According to the type of application, all putties are divided into two types: starting and finishing. The starting ones use larger grains of sand - 0.3-0.8 mm. This results in a slightly rough surface. They are used at the first stage to seal depressions and cracks. In finishing compositions, sand is practically dust with a very fine grain of 0.1-0.3 mm. This allows for a smooth surface.
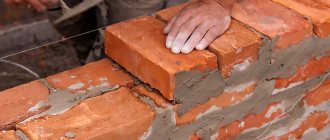
Cement plasters - scope, advantages and disadvantages
Cement plasters are cheaper than gypsum plasters and can be applied in a thicker layer - some compositions are up to 10 mm. After mixing (mixing with water) they can be used within about 3 hours. The plasticity of the composition is affected by temperature and humidity. Usually it is indicated for +20°C and humidity 60-65%.
Cement plasters are universal. They are used both for finishing inside and outside the building. Moreover, most facade compositions are made on a cement basis, as they can withstand more defrost/freeze cycles and create a more durable surface. They also do better in damp areas. If you need to plaster a bathroom or kitchen, it is better to use a cement-based composition.
Cement plaster can be white or gray
The color of cement plasters can be gray, white and ultra-white. This depends on the type of cement used. White compositions are more expensive, since more expensive brands are used, therefore finishing compositions are often made white.
The disadvantage of cement plasters is the long setting time - several days for complete drying is the norm. Several hours should pass before the next layer is applied. From 2-3 hours with a layer of 1 mm, up to 24 with a thickness of 6 mm. Since it is rarely possible to achieve a smooth surface in one layer - there can be three or more - puttying with cement plasters takes a long time. For this reason, their popularity is quite low.
Gypsum putties, their features
The layer of gypsum putty applied is 0.5-10 mm, depending on the type. They dry much faster, which has a positive effect on the speed of finishing work. On the other hand, the mixed composition must be used within 30-60 minutes, so such putties are mixed in small portions. This is not very convenient. If you are going to putty the walls with your own hands for the first time, start with small batches. Gradually decide how much you can produce at a time. Also keep in mind that the consumption of starting plaster is greater than that of finishing plaster - the thickness of the layer is different and you can’t be mistaken in the volume.
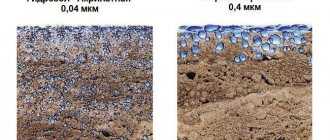
Gypsum plasters without modifying additives are intended for dry rooms. There are also formulations for wet ones, but this must be indicated on the packaging, since they contain hydrophobic additives.
Gypsum plasters are easy to apply
Despite the higher price and short shelf life of the mixed portion, gypsum-based plasters are now more popular. They are more flexible, it is easier to use them to achieve the required surface smoothness, and they are easier for beginners and professionals to work with. If wall putty is still unfamiliar to you, use gypsum compounds.
Homemade finishing tool
It is not necessary to use only those tools that are sold in stores. Having waste materials on hand, you can make a roller that will create an unusual, unique design.
You can use, for example, a ready-made roller, but make your own adjustments to its design. Examples:
There are any number of options for such homemade creativity: polyethylene, twine, rope, threads are used. The foam roller can be used to cut abstract shapes, slits, etc.
Important! When working with structured and textured rollers, you need to work smoothly, without making sudden movements.
Gypsum crafts for home
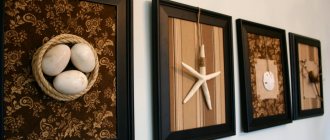
In the home interior, all kinds of decorative products that you can create with your own hands are often used.
Gypsum is used to make stands for jewelry, voluminous frames for photos and mirrors, holders for books and paperweights, vases with exquisite decor, New Year's or holiday toys, and even stucco molding.
Decorative plaster house
A small house made using standard technology from gypsum mortar will help to please your child.
But such a craft will look best if it is based on the idea of a non-standard candlestick, and a night light with a candle inserted inside is used in a nursery or living room, or on a holiday table.
Plaster hand
It is customary to store keys and most frequently worn jewelry in vases or boxes, but you can also make a stand from plaster.
The prepared solution is poured into the glove, when the composition sets, it can be given any shape, and after drying, the material is carefully cut and the craft can be coated with paint.
Decorative plaster from ordinary putty
Of course, one should not discount simple types of finishing, which are quite attractive in appearance, using the most ordinary putty, both starting and finishing. How to make textured plaster with your own hands? Very simple, and this option has been widely used lately. “Branded”, ready-to-use putty costs about three times more than regular putty, and making it yourself is not difficult.
Now let's talk about how it can be made and how to work with a homemade mixture.
Materials for decorative putty plaster:
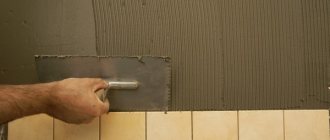
First we apply a layer, which is called the main one - this is done with a wide spatula. When this layer dries, we begin decorating. The methods for creating a textured surface are varied. You can apply the composition with spatulas of various sizes and textures - from smooth to jagged. They can be combined.
You can do this with one spatula, applying strokes in different directions. Even the most ordinary broom, as already mentioned, is used to create a pattern, and the result is achieved when impressions are made on the plaster with a broom - from chaotic to strictly directed strokes.
There are many application methods, you either need to choose the one you like.
Painting
It can be started when the decorative plaster is completely dry. Before painting, it is advisable to treat the plaster again with a primer.
First coat of paint
We paint the entire wall with the main color of the future decorative plaster using a long-haired paint roller. We paint all the recesses, but make sure that the paint layer is not too thick, otherwise the relief will be hidden.
Long nap roller for the first coat of paint
We are waiting for the paint to dry completely.
Second coat of paint
It is applied to create relief depth. If desired, this layer can be a lighter or darker shade than the base color.
Apply the second layer either with a sponge or a brush. We dip the brush into the paint, wipe it lightly on the can and try to spread it over as much of the wall as possible. We work with a sponge in the same way, rubbing the paint on the wall in a circular motion.
Applying decorative putty
Each of us would like to get the beautiful appearance of our own home at minimal cost. One of the easiest methods to get what you want is to buy finishing putty. Precisely the finishing one, if the purpose of finishing is a soft texture.
There are many ways to get a beautiful surface when using decorative putty for walls. Let's give one of them, quite popular.
Tools:
Next, step by step:
It’s still better to work together, because you need to do everything quickly, not allowing the mixture to dry out prematurely, so that transitions are not visible. After all, one of the main advantages of this finish is the absence of joints on the surface.
Of course, this option is far from the only one. It's all about your personal preferences and taste. Your imagination should work for you!
Sketches and stencils
Stencils are divided into multi-layer and single-layer. For bas-reliefs on the walls of residential premises, single-layer stencils are used. They are easier to make yourself. To paint through holes, paints based on enamel, acrylic or water and emulsion are used. Paints are applied to the wall with a sponge or roller, although special aerosols are often used. It is not recommended to use brushes so as not to deform the boundaries of the picture. The roller prevents paint from flowing under the template.
What patterns should you choose to create stencils and sketches? Preference is given to the following motives:
Floral - they allow you to create a natural or surreal picture on the wall. Flowers, branches, and trees always look elegant, fitting perfectly into any apartment interior. In addition, flowers are suitable for every room in an apartment or house, they can be applied to the walls in the kitchen and bathroom. Animalistic. Elegant images of cats and other animals, including fairy-tale and magical ones, look great on the wall. The image of cats is often used. Continuation of the “cat” theme are traces on the wall of lions, tigers, leopards, tiger stripes. Geometric. This is especially true for straight and simple lines, which can look stylish and intricate. Border. The emphasis is on repeating the same pattern several times. Border stencils are characterized by laconicism and a wide variety of themes - from butterflies to simple ornaments.
In order to make a stencil yourself, you should adhere to the following rules:
Print the drawing in the original format or scale it to the desired size. Apply a grid with cells that measure 1 by 1 centimeter onto the drawing. Apply a grid onto another sheet of paper or cardboard that will have larger cells. The grid is needed in order to accurately transfer all fragments of the drawings. After this, the drawing is transferred to cardboard, film, metal. Cut out the template along the intended lines. Cutting is carried out with a sharp knife, which will allow you to get even and clear boundaries of the lines.
Paper templates cannot be used repeatedly, maximum 2-3 times, since the paper softens from the solution. Paper drawings are suitable for making single bas-reliefs. Film and metal stencils are more durable - they are attached to the wall with double-sided tape.
To make a bas-relief on the wall of an apartment yourself, you must adhere to all the recommendations and rules indicated above. Before starting work, a detailed sketch of the future image is created, tools are purchased, and the workplace and wall are prepared. And only then, without haste, you can start working. The process of making a bas-relief will not take much time if you carefully prepare, illuminate the place of work, consult with specialists and make a durable template.
- https://stroyday.ru/remont-kvartiry/interernye-resheniya/barelef-na-stene-svoimi-rukami.html
- https://obustroen.ru/remont/shtukaturka/barelef-na-stene.html
- https://vopros-remont.ru/steny/barelefy-lepnina/
- https://stroychik.ru/steny/barelef-svoimi-rukami
- https://nastroike.com/interier-i-landshaftniy-dizain/453-dekorirovanie-sten-v-tekhnike-barelef-osobennosti-sposoba-poshagovaya-instruktsiya-kak-sdelat-barelef-na-stene-svoimi-rukami
- https://mr-build.ru/dekorativnie-pokritiya/barelef-na-stene-svoimi-rukami-master-klass.html
- https://planken.guru/vnutrennyaya-otdelka/obustroystvo-barelefa-na-stene-svoimi-rukami.html
- https://otdelkasten.com/dekor-sten/barelef-na-stene
- https://remboo.ru/design/kak-sdelat-barelef-na-stene-svoimi-rukami.html
Different application methods
How to do:
Painting methods:
Everything will depend on the drawing. In any case, the background paint is applied in two layers. After finishing the work, two layers of varnish are applied.
Of course, a homemade composition is simple to make, and gypsum-based mixtures are inexpensive, but they will not 100% replace branded decorative putty for walls, which contains marble and granite chips. In no case should it be compared, for example, with Venetian plaster, which is applied only by masters, and even then not by everyone. But nevertheless, the option described above is available to anyone who wants to add variety to the interior of their home. It will give both wallpaper and painting a head start both in appearance and in the durability of the coating.
Source
Crafts from plaster for the New Year
On the eve of the upcoming holidays, various toys and decorations for the home and Christmas tree appear on store shelves.
And for those who are interested in creativity, it will not be difficult to make New Year’s candlesticks and lanterns, openwork snowflakes and stars with additional plaster decor.
Working with plaster is interesting, simple and exciting, it can be a complex and attention-consuming process of making stucco or holiday decorations.
Everyone will find interesting ideas in such needlework and will want to independently implement a project for making decor for their home or garden.
Creating three-dimensional ornaments/patterns using putty
Using the decoupage technique you can create many beautiful works. But very often, one technique is not enough to create a work, so craftsmen combine decoupage with other decorating techniques. In this master class we will talk about creating three-dimensional ornaments using putty. There will be a lot of text and few pictures!))
Perhaps I won’t tell you anything new for those who have been doing decoupage for a long time, but for beginning craftsmen, I hope this information will be useful!
Putty is an amazing material; you can use structural paste instead, but we will talk specifically about the putty that is sold in regular hardware stores.
Let's look at two ways to create a three-dimensional pattern.
1.The easiest way is to apply putty through a stencil. There are different stencils: self-adhesive and regular reusable stencils.
We simply glue the self-adhesive stencil onto the surface and apply putty, filling the “voids” in the stencil. I remove such a stencil by picking it up by one edge, gradually peeling it off from the entire surface.
We apply a regular reusable stencil to the surface and apply putty. But this must be done very carefully so that the stencil does not “ride” across the surface. If the surface to be decorated is flat, the stencil itself will press down under the weight of the putty; in other cases, it is better to secure its edges with masking tape.
Such a stencil must be removed “straight up” so that the design does not become smudged.
If the putty gets slightly under the stencil, leave it there until it dries. Everything can be fixed! When everything is dry, carefully remove the excess with a toothpick, slightly moistening this area (just a little, just a drop of water).
After the three-dimensional ornament has dried, we go over it a little with sandpaper, removing all the irregularities. Then we repeat everything from the beginning. Trying to place the stencil in the same place as accurately as possible, we again apply putty through it according to the existing pattern. Thus, the volume will be “higher” and smoother. After drying, we lightly sand again.
This is what we got!
2.The second method requires more time and accuracy. We print the pattern on the printer, transfer the chosen pattern using carbon paper to the surface. You can draw a picture with a pencil “by hand”.
We put the putty in a bottle with a narrow spout (I used a bottle of PVA glue), add a few drops of water and a little PVA (for strength), the result should be the consistency of “liquid sour cream.” In my opinion, with PVA, the resulting mixture becomes more elastic and “obedient” to work with. And another little tip: when you put the putty into a bottle, tap the bottom of the bottle on the table, then the putty will “fall” on its own, otherwise it will be difficult to place it there (maybe this is obvious, but for some reason I didn’t come to this right away))) ).
We squeeze out patterns from the nose according to the pencil drawing. Each side is dried strictly horizontally overnight. After the first layer has dried, you can go over the necessary places with more putty.
If in some area it turns out very sloppy, then simply erase this area with a damp cloth and apply the pattern again. You can also correct it with a toothpick.
After drying our ornaments, we can move on to painting/tinting. But we will talk about this in the second part of the master class.
You can see examples of my work in my store!))
Source
Volumetric decoupage. Master class on creating a painting
Materials:
- printed images, minimum 10 copies.
- acrylic paint;
- Super glue.
Stages of work:
- You need to print the desired image. It is better to use thick paper. For this type of work, 10 identical images are required.
- The first one is glued onto cardboard. This will be the basis.
- From the remaining 9 you need to cut out the desired images. Cover each of them with several layers of varnish. The first one needs to be made thin so that the paper does not tear, and each subsequent one needs to be thicker.
- We take the backing, apply it to the drawing and trace the outline.
- Then we cut out the part a little smaller than the contour and glue it onto the paper part.
- The next stage is to attach everything to the base. This will give us the first layer.
- Next, you should stick the next layers, aligning their contours with the previous one.
- At the final stage, we touch up everything that was not touched up. We clean from glue. Preparing the work for varnishing.
- Cover with several layers of varnish.
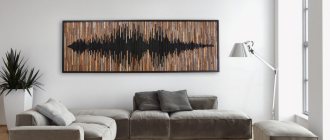
How to make three-dimensional paintings on a putty wall
DIY putty paintings are unusual and interesting. They always make the master proud and delight the audience. For a creative person, making a panel of putty with your own hands will not be difficult.
To do this, you need to have free time, simple tools, and most importantly, desire. And the article will tell you the nuances of performing the work.
Gypsum crafts for the garden
DIY gypsum gardening ideas help decorate your landscape; you can install gypsum flowerpots and stands in your garden and grounds.
Geometric shapes look interesting, replacing decorative benches and used for practical zoning of space.
Garden mushrooms made of gypsum
Another garden craft made from cement and plaster are mushroom figurines that can replace traditional gnomes.
Using the same pattern modeling technique, they work on products in the shape of snails and frogs, ladybugs and even plaster flowers, which are fixed on bushes or trees in the garden.
Gypsum leaves
Unusual shapes for plaster figures are created using natural materials such as leaves of living plants.
It is best to choose large sheet plates for work with prominent and textured veins, which are sure to be imprinted on the surface of the finished product.
Gypsum flower boot
Original gypsum crafts for the garden look unusual, and one of the types of plant pots can be a boot.
Old shoes are thoroughly washed and placed in a container into which a plaster solution is poured. After preparing the workpiece, it is cleaned and the procedure is repeated, and a plastic bottle is used for removal.
Features of the work
Handmade means prestige and sophistication, but the process of decorating walls is quite labor-intensive and requires care and special attention. However, the original design of the wall, the unique design obtained as a result of the work, is worth the time spent on it.
When performing operations, different techniques and tools are used. Their choice depends on the type of pattern, its volume and the materials used.
Advice: A novice artist should not immediately begin creating a painting of great complexity. It is better to choose a simple design in which the elements can be done with a spatula or even with your hands. This will allow you to quickly master the technique of creating a three-dimensional pattern using putty. You can make various shapes and figures on the wall with your hands.
In addition to hands, you will need:
You should choose a putty that hardens slowly. This will allow errors or inaccuracies that arose during work to be corrected before the solution hardens.
In this case you can use:
Tip: When choosing materials for rooms with high humidity: kitchens, bathrooms, you should purchase solutions that protect walls from mold.
How to prepare the base for painting
As with any type of coating, before starting the creative process it is necessary to prepare the surface where you plan to place paintings made from putty.
In this case, the wall should be:
The putty should only be applied to a well-dried primer.
How to create a stem on a wall with a spatula
The instructions for obtaining stems on the surface of the wall using a spatula suggest using two options for performing the work.
According to the first technology, the sequence is as follows:
According to the second option, which is not difficult:
Flower petals are created in the same way. After applying all the decorative elements, the picture is left to dry, and then it is painted with paints.
Tip: If you want to pre-fill your hand, you should use sheets of drywall, on which you can hone the technique, and then move on to applying the design to the wall surface.
How to draw a picture with a syringe
Putty drawings on walls can be done using a syringe. This method allows you to quite simply repeat the existing boundaries and all the outlines of the future painting, as in the photo, leaving the master’s hands clean.
Syringe imaging technology offers:
Preparation
All master classes on bas-relief begin with preparing a sketch. But the very first, preparatory step is choosing the room and wall where you plan to create a volumetric composition.
First you need to think about the interior of the room where the bas-relief will be located. Three-dimensional images can be made in any room, but most often they can be seen in living rooms and bedrooms. Then you need to decide on the wall on which the bas-relief will be created. In this case, you need to take into account how much space the panel will take up, whether there is enough free space for it
Lighting must be taken into account, because
The perception of the work depends on the light. If it is not enough, it makes sense to organize additional illumination of the bas-relief.
USEFUL INFORMATION: The best interior decoration is modular composite paintings for the wall
Now you can choose the appropriate sketch. Beginners should not immediately take on complex multi-layered and very voluminous figures. To gain experience, you can limit yourself to simpler forms: leaves, flowers or fruits. You should not immediately try to complete a complex plot picture where there are many characters. But there is also no point in taking too primitive images: they will not look very interesting.
How to make a three-dimensional picture on the wall using a stencil
A three-dimensional pattern on the wall can be made using a stencil. It can be purchased ready-made or made independently, then the price of the work will be significantly lower.
Tip: For drawings with stencils, you should choose a gypsum composition.
A panel on the wall is a great idea for decorating a room. If you can’t draw a picture right away, don’t give up. You can get acquainted with the video lessons in this article.
Source
Drawing technique
There are several ways to create these unique paintings. The most common:
- With a spatula or palette knife. A small amount of putty is taken on a spatula and laid out according to the pattern. It is better to work out smaller details with a palette knife. Then you need to walk over the not yet hardened surface with a brush to smooth out the unevenness. More thorough leveling is done after the mixture has completely dried with fine sandpaper.
- With a syringe. In this way, a contour drawing is performed along the intended lines. The syringe is filled with the mixture, which should have a thinner consistency than regular putty. It is easier to work with a pastry bag than with a syringe. After applying the volumetric lines of the drawing, while the mixture has not yet dried, all unevenness is corrected with a palette knife and excess fragments are removed.
- Using a stencil. A spatula and palette knife are used to apply the composition. This method is convenient for beginners. A stencil with a design is attached to the wall with tape and a relief design is laid out on it. In this case, a gypsum mixture is more suitable.
- Another original way to decorate a wall is when putty is applied in an even layer over the entire surface, and then recesses are cut along the lines of the design.
Application of textured plaster
High-quality finishing with decorative plaster is an opportunity to make your bold dreams of transforming your interior come true. A relief surface can be obtained in different ways. It all depends on the composition of the dry mixture, into which you can add pigment and additives at your discretion.
Having mastered the skills of distributing the composition over a vertical surface, it is easy to move on to creating a textured surface. With this type of coating it is easy to hide wall defects, and at the same time imitate more expensive finishes, including stone and brickwork.
Unique wall decor can be created in any room:
In this sense, decorative plaster of walls can be considered a universal solution.
Helpful advice! In order to save money, you can take one composition, but vary the color (wall color) and texture pattern. Some formulations differ in composition, which gives additional shimmer, like “Venetian”, it costs more, application is more labor-intensive.
Preparation instructions, rules for working with self-hardening masses
Self-hardening modeling paste can be prepared at home.
From putty, starch and PVA
You will need 3 tsp. PVA and 15 tbsp. l. putties. To reduce or increase stickiness, liquid soap should be added to the composition. If the mass sticks to your hands, you need to increase the volume of soap. If it falls apart, you should add PVA.
From plaster
Gypsum powder is mixed with water until the mixture has a consistency similar to sour cream. You should try to prepare the composition quickly in order to use it before it begins to set. You can slow down the setting by adding glue water.
From soda and starch
Regular glue with modified starch must be mixed with water in a ratio of 1:3.
- After adding 1 part of soda, you need to wait 20 minutes until the mixture swells.
- After this, you can add 2 drops of concentrated liquid soap and mix thoroughly.
- If necessary, you can add more starch. It could be potato.
- To knead, add a little Vaseline oil.
Made from starch, PVA and baby oil
You need to take corn starch, PVA glue, Johnson's Baby oil and baking soda in a ratio of 4:4:2:1, respectively. Then add a couple of drops of Nivea fat cream, citric acid and glycerin. Mix everything thoroughly.
From flour
This option requires 3 components: flour, salt, water. The first 2 of these components are taken in equal proportions. Then water is added. Additional components can be added to change the properties of the mass.
The photo shows step-by-step preparation of the modeling mass at home.
For example:
| Recipe | Description |
| With cream of tartar | The ingredients you need to prepare are:
Preparation:
|
| In the microwave | Have to take:
Preparation:
|
| Without water | For work you need:
Preparation:
|
Papier-mâché recipe
To prepare the modeling mass you need to prepare:
- PVA glue – 250 g;
- plain toilet paper – 40 g;
- dishwashing liquid – 1 tbsp. l.;
- vegetable oil – 2 tbsp. l.;
- starch (corn or potato) – 50 g;
- flour – 100 g;
- lemon juice as a preservative.
Before using the material, all ingredients are thoroughly mixed.
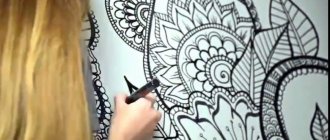
Design techniques with decorative plaster
When first applied, new cladding may seem difficult to apply. Having acquired the skill of decorating a balcony or toilet, it is easy to “get your teeth into” and move on to more important areas of cladding an apartment with your own hands.
Many people have heard that decorative plaster made from ordinary putty is in many ways similar to the method of applying liquid wallpaper. Indeed, working with narrow and wide spatulas, the base is applied to the walls, spreading in a thin layer. In the case of plaster, all that remains is to create a decorative layer.
Note! For interior designers, this type of cladding is considered the most “friendly”. The textured surface goes well with wallpaper, painting, brickwork and “wild stone”. You can make several imitations from one composition, but this will cost several times less.
A textured surface with plaster is an excellent replacement for natural analogues. It can imitate agate, malachite, jasper and opal. The special “mission” of Venetian plaster is to imitate walls, vaults, columns (straight and other convex surfaces) like marble.
What is the structure of the walls?
Before applying decorative putty plaster to the walls, you need to decide on the pattern that you want to create. Several types of textures are used in interior design:
- rock;
- rain;
- bark beetle;
- surface with imitation stone;
- silk effect;
- Venetian plaster;
- plaster with marble chips.
When decorating walls with putty, the easiest way to create a “rock” or “rain” texture.
Stages of creating a surface with a “rock” relief
- To create a decorative coating, purchase a suitable finishing putty from a hardware store. Its composition can be either cement or gypsum.
- Cover the wall, cleaned of old coating, dust and debris, with a layer of primer and let it dry. Then apply a thin layer of putty to the surface and also leave it until completely dry.
- After this, you can begin decorating the wall. Cover approximately 0.5 m² of area with an even layer. The thickness of the putty should be about 3 mm; the easiest way to rub the material over the surface is with a trowel.
- Once you have properly leveled the compound, wipe down the float to remove any remaining material. Then lean the tool against the freshly applied putty and move it to the side by 15 cm. The air bubbles that form under the surface of the trowel will give the wall the desired texture. Try to perform movements chaotically to give the surface a natural look.
- Having reached the end of the processed wall fragment, smoothly tear the tool away from the mortar so that there is no clear mark left on the edge. As you make movements, slightly increase the angle between the wall and the iron. The angle should be approximately 15-20°.
- Having completed work on one area of the surface, remove the remaining putty from the tool and begin decorating a new area.
Some useful tips:
- Chaotic movements during the work process will help give the texture a natural look, but you can show your imagination and make some kind of design on the wall. To do this, you will need to move the tool in a certain direction, following a specific procedure.
- The finished surface will need to be left for about a day to dry completely, after which paint can be applied over the plaster.
Creating a “rain” relief
This drawing on the wall is a little more complicated than the one described above, but the result is quite beautiful. By creating a similar texture on the surface, “rain streams” can be directed strictly vertically, horizontally or at an angle. Let's consider the process of applying textured plaster in stages:
- To begin with, you should apply markings on the wall, focusing on which you will make strokes. The markings are drawn over the entire surface, starting from the ceiling and ending with the floor level. The size of one step should correspond to the width of 3 trowels. When drawing lines, they should not be interrupted at internal and external corners. This work will take a lot of your time, but you don’t need to save energy if you want to see a good result in the end.
- The next step is to stick a strip of masking tape over each marking line. It is advisable to start work from the upper right corner of the wall, and the lower edge of the masking tape should be placed on the line.
- The putty is applied to the wall in a layer whose thickness does not exceed 3 mm. The width of the area to be processed should be equal to the width of the tool, and the length should be approximately 1 m.
- To get an imitation of raindrops on the wall, press the trowel onto the damp putty and peel the tool off the wall. The entire area needs to be treated in this way.
- After the work has been done, thorns will form on the surface of the wall; to give them the desired appearance, the material will need to be smoothed out a little. Remove the remaining putty from the tool, lean the smoother against the still fresh plaster and move the tool in the desired direction. Please note that you do not need to completely apply the trowel to the solution; you should slightly lift one of its edges. The future relief of the wall depends on the force of pressure and the thickness of the layer of applied material.
- Having treated one area of the surface, proceed to a new one. The second strip should overlap the first one slightly.
- To ensure an even texture, do not stop working until you finish decorating the entire wall. Otherwise, the difference in layers will be very noticeable on the surface.
- After the putty has completely dried, correct any excess irregularities and protruding corners by rubbing the wall with fine sandpaper or an abrasive mesh.
Types of mixtures
Decorative plaster is offered on a polymer, cement and gypsum basis. They contain various additives that determine the final design of the wall covering. Sometimes plaster is packaged not in bags, but in plastic containers - these are polymer and acrylic compositions that are completely ready for application and quickly harden.
A budget-friendly way is to prepare a dry composition yourself by mixing dry putty in water with the addition of river sand, PVA, pigment and stone chips. It will look no worse than most “elite” plaster compositions.
Important! When purchasing decorative plaster, see the recommendations. There are universal, external (facade) mixtures and only for interior work.
Design style is an important point when choosing a composition. If you plan to sculpt some decorative elements with your own hands, then it is better to choose a gypsum base. Facade compositions can “exhale” harmful components, but they perfectly hold together the outer layer, which resists the destruction of weather and climatic factors.
Bas-relief with specific examples
Sketch
To make the process of creating a bas-relief more understandable, you should consider the order of arranging such decor using specific examples. We offer you the two most popular options - “lilies” and “tulips”. Having mastered the order of their arrangement, you will be able to cope with the creation of decorative bas-reliefs of almost any complexity.
"Lilies"
Bas-relief "Lily"
First step. Protect the base to be decorated by covering the required area with masking tape.
Second step. Cover the base with putty, let it dry and apply primer. It is best to use primer paint. This composition is notable for the fact that after drying, the grains of sand included in the mixture remain on the base. Thanks to the roughness created, subsequent layers of finishing are held as firmly as possible. On average, primer paint dries within 2-3 hours.
Third step. Using a trowel, apply a starting layer of Marseilles wax to the surface. This material hardens quite quickly, on average within 3-4 hours at room temperature.
Creating a bas-relief
Fourth step. Peel back the film and draw the details of the bas-relief. To do this, you need to secure a transparent plastic film on top of the working surface over its entire length and width. The bottom edge, however, does not need to be fixed - you should still be able to bend it freely.
Creating a bas-relief
Fifth step. Using a marker, draw a sketch of the future “lilies” on the plastic film - stems, leaves, buds.
Creating a bas-relief
Creating a bas-relief
Sixth step. Once the sketch is completely completed, proceed to apply Marseilles wax under plastic wrap according to the sketch. First use a trowel and then a palette knife.
Marseille wax
Palette knives
The Marseille wax used is white in color. To make the created decor more noticeable, coat the finish with a suitable composition. For example, you can use water slightly colored with poppy seed. This type of composition can only be applied to a dried surface.
After tinting, you will immediately see in which places the finishing material needs to be given the outline of stems, flowers, etc.
Your task is to make the planned bas-relief as realistic as possible and consistent with the sketch. This will take you a lot of time, so there is no need to rush to finish everything as quickly as possible. Work carefully, thoughtfully and gradually.
Bas-relief “Lilies” after final decoration
After giving the bas-relief the required shape, let the composition harden and begin applying the second layer of decorative finishing - acrylic paint of the desired color.
Prepare the paint according to the manufacturer's instructions. On average, such paint and varnish compositions dry for 5-8 hours. Specify the specific time in the description of the paint used.
At the end, all you have to do is apply the final layer of finishing - ottocento or another composition with similar properties. Armed with a wide brush, apply a double layer of Totcento to the entire area of the wall to be decorated. The second layer can be applied only after the first has dried. On average, this takes 1-3 hours. You must carefully paint over each element of the composition.
To give the composition additional visual volume and expressiveness, apply white etching to individual areas of the bas-relief.
"Tulips"
Sculptural bas-relief Tulip
Preparation and actual work on creating “tulips” is carried out according to a scheme already familiar to you, namely:
- plaster and primer paint are applied;
- the first layer of Marseilles wax is applied;
- the film is glued;
- a sketch is created;
- the bas-relief is applied directly;
- the surface is covered with paint and etched.
The only specific recommendations can be given regarding the creation of tulips. To make flowers look smooth and realistic, form the buds by hand, and then additionally carefully treat the surface with a slightly damp sponge.
Creating a bas-relief with your own hands is a rather complex, painstaking, time-consuming undertaking that requires significant financial costs. However, with the right approach, you can give the interior of your home a unique look.
Good luck!
Tips for beginners
Each type of decorative plaster pattern is formed on the basis of a specific composition and method of application. For example, to draw three-dimensional “roses” you need a simple base, while “bark beetle” and “fleece” require their own composition.
When creating repeating fragments of a textured pattern, special devices are needed - stencils, roller attachments, and a notched spatula. You can read about their necessity in the recommendations on the packaging so you can purchase them in advance.
When purchasing a mixture for interior decoration, look at the composition; this will eliminate allergic reactions when working indoors.
Types of self-hardening masses for working with crafts
The self-hardening mass for modeling can be made of different substances, the main thing is that it is soft and plastic.
Dough
Many children prefer to sculpt with dough rather than with plasticine.
Its advantages are as follows:
- the dough feels much nicer to the touch than other doughs;
- a figurine made from dough can be coated with any paint and stored for many years, unlike plasticine;
- dough is an environmentally friendly substance. It contains no chemical additives, so it does not cause allergic reactions in either adults or young sculptors.
Due to its environmental friendliness and safety, the dough is widely used in working with educational materials.
Plasticine
This is the most familiar modeling material for children.
Plasticine has the following advantages:
- perfectly holds the elements together, so the child can play with the sculpted figure without worrying that the elements may fall off;
- has a wide color palette, which means that there is no need to paint the products after they are made;
- the same piece can be used multiple times to create different shapes. When a child has had enough of playing with one, you can take it apart and then make a new product from the same material.
However, there are also problems when working with plasticine.
Namely:
- before sculpting, the material must be properly kneaded so that it becomes pliable;
- plasticine firmly adheres to any surface it comes into contact with, especially fabrics, after which it is not easy to wash off. Therefore, when working with it you need to be careful; it is recommended to use a special board.
Today you can find special soft plasticine on sale that solves both of the above problems at once. It does not need to be kneaded before work, and it does not stick to your hands or to the table.
Gypsum
This is a white, freshly burnt powder that does not contain sand or other impurities. This substance is not easy to work with: it hardens 30 minutes after adding water. It will not be possible to reuse it or adjust the finished product. The substance remains plastic only for the first 10-15 minutes. It is believed that gypsum has a positive effect on the human biofield.
Modeling mass
A special modeling mass is an improved type of clay.
This material:
- velvety;
- elastic;
- soft;
- plastic.
It is often compared to chewing gum because it stretches just as well. The self-hardening modeling compound can have different colors and does not stick to your hands.
Modeling paste
The material is in many ways similar to ordinary clay.
Paste:
- plastic;
- pleasant to the touch;
- warms up easily.
There are 2 types of paste, the main difference between which is the method of hardening. One of the types needs to be fired, while the other hardens itself while in the open air.
The main disadvantage of this paste is its modest color range. There are only 2 colors - white and terracotta, so after production and hardening the craft has to be painted.
Papier-mâché paste
This material:
- intended for making crafts based on other items;
- has good ductility;
- does not get your hands dirty;
- differs in ease.
Papier-mâché paste hardens for a long time, so if necessary, you can always correct parts that turned out poorly.
What is important to consider when applying decorative plaster?
The finished paste from plastic packaging is completely ready for application. It is not advisable to open it in advance so as not to change the consistency. Some ready-made mixtures have a short shelf life, so be sure to find and read these recommendations.
The dry mixture is prepared strictly according to the recipe, kneading before application. When the suspension is mixed, it needs to be allowed to swell for 10-15 minutes so that all the additive components that form the surface have time to soak and mix with other components.
It is better to knead in a separate bucket or plastic container, using a construction mixer or drill with an attachment. This will eliminate clumping and heterogeneity. First, pour water (the volume specified in the recipe) with liquid pigment. If the dye is dry, it is pre-mixed and filtered so that there are no defects.
Important! The solution is added to water, and not vice versa, so that the mixture is homogeneous and has the required consistency.
Materials and tools for making crafts
To make a product of any shape and size from gypsum, you must first prepare the mixture itself.
To mix liquid and powder, it is better to use an old and unnecessary container, and be sure to follow the basic recommendations for working with the resulting mass:
- mixing is carried out once in the proportions indicated on the packaging; after drying, the gypsum cannot be reused;
- Dry powder is poured into the container first, it is necessary to make a recess in it and fill in the required amount of liquid;
- water can be poured in portions, which will help simplify the procedure of stirring and removing lumps of dry powder;
- When mixing, it is necessary to achieve maximum homogeneity of the resulting mass, for which you can use a construction mixer.
In order to create various plaster crafts, you may need molds and cuttings, additional material for creativity.
These can be silicone molds, homemade frames made of durable materials, mineral and natural materials that help recreate a certain texture.
Making a mold for pouring plaster
If for all sorts of different shells, fruits and bugs you can find a form and there is no point in making it, then for some details, such as grapes, it is easier to make the basis yourself than to try to find it.
Of course, they can not be cast, but rolled out of putty, but it will look somewhat worse, since this material is more porous when dried.
In general, with a certain skill, you can make any shapes you want using ready-made figurines. We bought one, and then poured out at least ten! And if you want, give them as gifts, or make panels if you want...
Well, let's get started. If we are talking about casting a grape berry, then you need to first roll it out of a thick putty mixture mixed with PVA glue, in the following proportions:
- Finishing putty – 0.5 kg;
- PVA glue – 1 tablespoon;
- Water – 100 grams.
Knead the thick mass, pouring water gradually. Since we gave its quantity approximately, because it can differ significantly when used with different types of putty.
After mixing, form a grape and leave it to dry for about a day. It should not burst, since the mass with the addition of PVA becomes quite resistant to cracking.
By the way, in the same top picture with shells, you can see the wall below, decorated using the technique of decorative strokes. So they need to be made with just such a mixture, based on PVA.
Well, is the grape dry? Let's make the form. For this we need:
- 0.5 liters of silicone;
- Plywood box;
- Self-tapping screws;
- Brush.
Liquid silicone is sold in construction stores, and you can choose any box, you will put a grape in it and fill it with the silicone mixture.
The main thing is that it can be easily disassembled, and then reassembled with self-tapping screws, and the holes can be covered with a mixture of silicone. This is necessary so that you can then easily remove the finished form without damaging it. If you don’t find a suitable box, you can assemble it from sheets of plywood.
We will show you step-by-step photos using the example of filling a figurine, and you can already put whatever you want there
It’s important to understand the sequence, that’s all. And the amount of silicone may be different
A grape needs 100 grams, and an owl shown below already needs 1 liter.
So:
- 1 Place the base in the box;
2 Fill it with liquid silicone;
3 We wait a day until the silicone sets, then we disassemble the box;
4 We take out the base and get a ready-made form for pouring alabaster.
Now let's move on to the most interesting part, forming alabaster figures with your own hands.
Original do-it-yourself flower beds.
Are you not a sculptor at all? But believe me, you can make these creative flower containers.
We need a plastic container, foam plastic, reinforcing mesh. We make a cement solution by adding a spoonful of gypsum directly into the palm with the solution and thus form our “sculpture”
But not all of us are fans of modern abstract art. But you can easily make garden crafts in a classic style.
But, because You are not a sculptor yet, you need a template - it could very well be an old doll.
Because If this is not just a decorative garden figurine, but a flower bed in the shape of a girl’s head, then the top part needs to be cut off.
Then the head is painted. To add texture, the template is first painted with dark gray paint. Allow to dry and apply a layer of lighter paint. After drying, apply a layer of even lighter paint with light strokes.
This is a very simple process, and all the examples of this style that you see in the article were made by teenagers in a craft class.
Garden fountain with leaves.
We will not talk about the principles of creating a fountain in the country. This is the topic of a separate article, and you can read about it in detail here. We will make leaves from cement. >
We need a fairly large sheet, and with the help of cement, we form a copy of it.
After drying, the sheet can be worked out in more detail and painted.
And you will become, almost free of charge, the owner of such a beautiful fountain.