Gone are the days when electrical wiring was laid along the surface of the walls and was available for inspection at any time. For a long time, electrical networks have been hidden under a layer of plaster, mounted in specially punched channels - grooves. After installation, the channels are hidden under a layer of plaster. As a result, the surfaces of the walls and ceilings are completely smooth, which undoubtedly improves the aesthetics of the premises, but at the same time makes it difficult to find wiring defects in the event of a malfunction. What to do if the wiring is faulty? Find her! Today we will tell you how to find hidden wiring in the wall with a multimeter.
Advantages of hidden installation and why you need to know where the wires go
When planning a home renovation or redevelopment, the question often arises of how to find hidden wiring in the wall. External wiring in homes was made before, but now it is rarely used, mainly as an element of a design solution, when the wires are simply attached to the wall.
This is what modern external wiring looks like Source yandex.net
The method of external wiring was abandoned and hidden installation was preferred because of its safety and aesthetics, when the cables are laid in grooves and then covered with putty. During repair work, you have to drill into the walls and in order not to damage the electrical wiring, you need to know its location.
Information about electrification is necessary in the following situations:
- redevelopment of the entire electrical wiring diagram;
- partial replacement of electrics;
- redevelopment of the home itself;
- emergency situations;
- design change.
If the task is to completely replace the electrical wiring, then you can ignore the location of the old wires. However, you still need to make sure that the new and old wiring do not intersect.
Why are they looking for hidden wiring?
Usually, they search for wiring when it is necessary to make a hole in the wall. For example, when installing new furniture or hanging pictures. A little less often, bricked-up cables are looked for during repair work, when it is necessary to move sockets or dismantle walls. Therefore, there are two common reasons that require searching for a wire:
- Simple wall drilling. For installation of furniture and interior items.
- Construction works. Relocating sockets and switches, dismantling walls.
Finding wiring when moving an outlet
If you do not find the wires hidden under the plaster before drilling the wall, then there is a risk of damaging them. A cable broken in the thickness of a concrete wall promises inconvenience and unplanned financial expenses for repairs. The damage site will have to be opened. That is, pick up a tool and chisel the wall to get to the damaged section of the cable.
Additional Information. Most cables are laid at right angles. They run horizontally to the sides or vertically upwards from switches and sockets. This rule allows you to roughly estimate where the wiring runs.
Practical and effective ways to find electrical wiring in the wall
It is absolutely impossible to be negligent in searching for wiring or neglecting the exact location of electrical wires, so as not to face serious consequences.
Based on SNiP and PUE, there are a number of rules and requirements for the installation of electrical wiring in a room. According to these requirements, wires from the junction box must be laid in different directions, but only vertically or horizontally, and in no case diagonally, and the angle of rotation must be 90 degrees. If you are sure that the electrical installation meets all the requirements and, knowing this principle, it will be easier to find hidden wiring.
Correct grooves for electrical wiring Source kabanchik.by
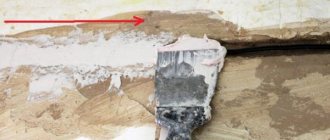
But electrical wiring is not always laid by specialized specialists who make grooves strictly vertically or horizontally. Very often, such work is carried out by finishers who are not specialists in the field of electrical engineering and who do not care how the owner of the premises will drill into the walls in the future and so that he does not bump into a cable. Opening up a wall, making indentations in it and then restoring the cable is not a very pleasant task and is quite expensive.
There are several simple ways to find wiring in a wall without a device:
- Visual inspection.
This method is good when the walls are without wallpaper and you can get to the plaster. Then carefully inspect the walls for unevenness or differences in the color of the plaster.
Since during hidden wiring the wires are laid in grooves and then covered over, these areas may have unevenness and can be detected by running your hand or carefully inspecting the wall. Having found a place, carefully beat off the plaster with a plumber's hammer along the entire groove.
If it is possible to remove the exterior finish, the grooves will be visible to the naked eye Source fishkielektrika.ru
- Search by radio receiver.
The method is not accurate enough (within 10 cm), but it is proven and works. Turn on the radio, tune it to a frequency of 100 kHz and bring it to the wall. Carefully move along the length without touching the surface until the noise increases and a cracking sound appears.
The closer the communication lines, the clearer and stronger the sounds become. Such signals and changes in tone will indicate the presence of wiring. If the radio has an antenna, then its end must be moved along the surface. To use this method, several conditions must be met: the room must be quiet and the wire must be live.
You can use such a radio receiver Source sankt-peterburg.sidex.ru
- Search using a hearing aid.
You need to find older brands of hearing aids. The method is quite accurate and consists of the following: set the device to the “telephone” function, then it responds to electromagnetic vibrations. Bring the device to the intended wiring location and listen until characteristic sounds appear.
- Using a multimeter.
For this method you need a multimeter and a transistor. The first one is turned on for the function of determining a resistance of 200 kOhm, connect the probes to the drain, the source of the device. The pin on the far right acts as an antenna. The essence of the method is that when a transistor enters an electromagnetic field, its resistance changes and this is recorded by the device. The method is quite accurate and has an error of 6 cm.
Even the simplest multimeter is suitable for finding hidden wiring Source allegroimg.com
See also: Companies specializing in electrical and lighting.
- Searching with a metal detector.
The principle of operation is to register a signal that is reflected by a metal object. The advantage of a metal detector is that a hidden cable is detected even without voltage or load. Cheap models will react to all metal parts: in a panel house to reinforcement in a slab, in a wooden house to nails. Expensive models recognize ferrous metal and can detect copper and aluminum. The method is accurate, the error is no more than 5 cm.
- Sensitive indicator screwdriver for working with electrical circuits.
These screwdrivers are easy to use. They work on an electrostatic principle, so they detect the electromagnetic field emitted by live wiring. When you need to check where the cable is laid, take a screwdriver in your hands and, leaning it firmly against the wall, drag it along its surface. The indicator will light up where the cable is laid. The disadvantage is that the detection depth is small - only about 2 cm, the error is high - 10-20 cm, and it is almost impossible to find wires in the wall in panel buildings using this method.
Search using an indicator screwdriver Source elektrik-a.su
But besides identifying a hidden electrical network, there are other functions that this device performs. An indicator screwdriver with the function of detecting hidden wiring identifies where the phase is (in this place the indicator light will light up) and where the zero is (the light will not light up). Using such a screwdriver, there will be no questions about how to find a broken wire in the cable. This is done as follows: take the stripped end or one contact of the plug, then use the tip of the screwdriver to touch the second. If the indicator light lights up, it means the wire is not damaged, but if there is a break, the light bulb will not light up.
Correct wiring diagram
Hidden wires are popular because of the aesthetic appearance of the interior; they are hidden in pre-made grooves, which, after installation, are covered with plaster or alabaster mortar. PUE rules require:
- laying lines at right angles;
- their minimum number;
- with a distance from the ceiling of 150-200 mm.
The specified data refers to the ideal criteria that must comply with the standards.
But often builders ignore them, trying to make diagonal laying in order to save money. As a result, homeowners have to spend a lot of effort checking the localization of the electrical network.
Standard electrical line wiring
Specialized devices for searching electrical wiring, the principle of their operation
Professional equipment will identify hidden electrical wiring with greater accuracy and speed. A wall wiring detector is indispensable in construction, installation and finishing works for detecting the location of electrical cables, metal fittings, etc. The devices differ in principle and operation, and are divided into groups:
- Electrostatic devices sense an electromagnetic field when an electrical charge flows through a wire. The devices are easy to use, have good accuracy and an affordable price. When using, you need to take into account that the surfaces must be dry and there should be no other metal parts in them.
- Electromagnetic equipment has a similar principle, but the wires must be under a load of 1 kW, that is, before searching, plug any electrical appliance into an outlet.
Devices for finding hidden wiring Source sense-life.com
Review of the most used search tools
Not always “folk” methods, given their large error, give the desired result. In this case, you will have to resort to the help of special devices. Before we look at the most popular of them, it is necessary to understand the principle of their operation. There are three types of seekers:
- Electrostatic – the principle of their operation is based on capturing an electromagnetic field that emits a current passing through an electric cable. Devices based on this principle are among the simplest and most affordable. They are most common among both professional electricians and home DIYers. Their determination accuracy is quite high. You can use an electrostatic device only if the walls are absolutely dry and not damp and there are no foreign metal inclusions in them. We are primarily talking about fittings, which are often found in the partitions of panel houses.
- Electromagnetic The devices are based on the same principle of operation as electrostatic ones, but with one difference. The required wires must be under a load of at least 1 kW. That is, before you start looking for a wire leading to a specific outlet, you need to plug something into it. It could be an electric kettle, microwave or something else.
- Metal detectors – differ from previous devices in that they themselves are emitters of an electromagnetic field. When the metal that is in the middle of the cable gets into the range of the magnetic field created by the device, it will cause it to change. It is to these resistances that the metal detector reacts. Advantage devices of this type is that the load on the wires is not necessary. And obvious disadvantage What happens is that the metal detector will react not only to metal in the middle of the electrical cable, but also to all kinds of pieces of wire in the wall, old nails and fittings. Therefore, when purchasing such a device, it is better to buy a more professional model, which allows you to determine the type of metal detected. This feature will greatly simplify your search.
There are also devices with a combined operating principle. The scope of their application, as well as their accuracy, is much higher. With their help, you can not only identify the location of the wiring, but also determine the location of the break or grounding, and detect the phase wire. Such a device will become indispensable if working with electrical wiring is your specialty.
Now let’s take a closer look at the individual models of search devices:
- “Search” device is based on the electrostatic principle of operation. It is equipped with 4 modes of different sensitivity, with which you can determine the location of the cable, which lies at a depth of up to 7 cm. Light and sound indication is used as a signaling device. This device is very easy to use and has a number of additional functions. To search for wiring, you need to select the appropriate mode, in this case the fourth, and simply move the device along the wall. For home use, “Search” is very good and has an affordable price. But it is not suitable for professional work.
- Another popular domestically produced model is a device called "Woodpecker". It can be used by both home craftsmen and specialists. It is both a tester and a signaling device. With its help you can detect an electrical cable under a layer of plaster up to 8 cm inclusive. The device can monitor the operation of fuses, search for phase cables, check the phases of the electricity meter, and look for electrical faults. The principle of its operation is based on the electrostatics of an alternating field. When the device's antenna approaches the wire, the electrodynamic force begins to work and the equipment reproduces a signal.
- CEM LA-1014 tester is a proven and highly accurate device. Using it, it is possible to detect even de-energized wires under a layer of plaster. A characteristic feature of this device is that it is capable of finding faulty and damaged sections of the cable that have melting, short circuits or breaks. The disadvantage of the tester is its response to other metal objects that may be in the wall.
- One of the amateur devices based on the combined principle of operation is called MAG-2. The device combines electrostatic and electromagnetic principles. It has two operating modes that allow you to detect a cable under load or without it. When the cable is found, the device will notify you of this using light and sound indication.
- Signaling devices from Chinese manufacturers MS series. MS-58M device which belongs to the probe tester category, can easily detect both electrical wires and other metal objects. Taking this into account, you need to be extremely careful when working with this device and learn to distinguish by ear the signals it gives. For example, the signal coming from a regular screw in the wall will be different from the signal coming from a power cable. You just need to get used to the device. An interesting fact is that it will not be able to detect an object that is wrapped in aluminum foil. It serves as a screen that prevents the detection of metal particles.
Using any of the above devices, you will cope with the task quite quickly and accurately.
Brief overview of budget models
The most popular budget models of search equipment:
- Bosch Truvo.
Using the device is very simple. The indicator light changes color as the device approaches metal. If the light is green, there is no danger for drilling; if it is red, then there are electrical wires in this place. When the red light is constantly on without blinking, then it is ordinary metal, and if the red light is blinking, then the wiring is live. The device will detect hidden wiring at a depth of up to 5 cm, non-ferrous metal up to 6 cm, ferrous metal up to 7 cm.
Bosch Truvo detector Source umkv.co.ua
- Bison is a professional.
The device will find not only metal, but also wood. The device will detect hidden wiring at a depth of up to 5 cm, non-ferrous metal up to 6 cm, ferrous metal up to 10 cm, wood up to 2 cm. The type of material is displayed on the display in different colors. Indicates the depth of electrical wiring.
- Wall Control.
It can detect not only metal, but also plastic. It has a very durable body that protects from dust and water. It has good scanning accuracy and illuminates the point with a beam. The detection depth of cable is up to 5 cm, ferrous metal – up to 5 cm, copper – up to 4 cm, wood – up to 2 cm.
- Mastech MS6906.
Used to search for metal, voltage, hidden structures. The hidden wiring finder will detect communication lines up to 7.5 cm, ferrous metal - up to 6 cm, non-ferrous metal - up to 3 cm.
Using special devices
There are many different devices on sale, with the help of which searching for wiring in the wall, instead of guessing with coffee grounds, will turn into an interesting and accurate activity. They have the same task, but the operating principles are different.
There are only two ways to detect hidden wiring (this is from the point of view of physics; let psychics deal with branches from the grapevine).
- The direct method is based on searching for the main component - a metal conductor. A fairly simple method, especially since there are a lot of metal detectors that can detect even a small screw in the thickness of concrete and plaster. This is the problem: there may be reinforcement in the walls, fastening elements, the same screws and nails left over from previous hanging structures. All this equipment will be found by a metal detector, especially if it is a budget model. The issue can be resolved by purchasing more expensive models that can at least determine the type of metal (steel, copper or aluminum). And ideally, the screen can show the contours or route of the cable.
- Indirect method : detection of hidden electrical wiring, based on the search for electromagnetic waves that arise when electric current flows. The technique is more accurate (from the point of view of screening out passive metal elements), but the geometric error is quite high. Detectors that detect electromagnetic waves are simpler and cheaper to manufacture. There are also disadvantages: the wire can only be detected if an electric current flows. Often what is required is not just turning on the light bulb, but applying a significant load. The principle is simple: the greater the current, the more intense the magnetic field. This means that it is impossible to find a broken wire in the wall using such a device. In addition, any household device that emits electromagnetic waves (mobile phones, Wi-Fi routers, microwaves) produces active interference that can completely block the search. Moreover, these devices may be with your neighbors; you will probably turn off your electrical appliances.
Finding a cable break in the wall
To find out how to find a broken wire in a wall, you should start by determining which conductor is broken - phase, zero. To do this, probe the contacts with a screwdriver: the phase is in place, therefore, the zero is broken.
To search for wiring damage in concrete walls, various hidden wiring indicators are used. The device moves along the walls horizontally or vertically. When a wiring is found, the device emits a special signal, and if the sound stops, then a break has been found.
This is how a special device works - a locator, which will quickly and accurately find a break in hidden wiring. The principle of its operation is to probe the electrical network under and without voltage. If the cable is de-energized, then a generator is connected to it, which supplies the network with a voltage of the required frequency, to which a special sensor configured to detect the electric field reacts. When the sensor is above a live wire, a signal sounds. At the point where the wire is broken, there will be no voltage or electric field, and the signal will begin to fade.
Professional locator MS6812-R Source prom.st
Finding a broken cable line in a wall is not an easy and time-consuming task. But to save time, it is better to use modern equipment that will find the fault within a few minutes.
In what cases is it necessary to install the wiring location?
Page navigation
There are many reasons to find an electrical wire in the wall. The main reasons are presented below:
- Apartment redevelopment. The procedure is used when it is necessary to expand or move doorways. Otherwise, the cable in the wall may be accidentally damaged.
- Circuit break. Refers to serious problems when the damage is hidden. Then you need to find a break in the phase or neutral conductor, the operation takes a lot of time. In case of breaks, it is better to immediately seek help from a professional electrician.
- Creating additional holes. Before hanging a shelf on the wall, you need to consider the possibility of unpleasant consequences. Checking is necessary even if theoretically there is no line on a given concrete section of a panel house. Some builders violate the rules for laying out cords, which will affect their performance.
Purchasing a new home does not guarantee that electrical cables will be installed correctly. A pre-discovered network will save you from accidental damage, but in this case it is better to involve a specialist so as not to waste time searching on your own.
Finding open circuits
Misconceptions and errors in detecting electrical wiring in the wall
The above describes how to find a wire in the wall using instruments and improvised means. But there are supposedly “folk methods” for detecting hidden wiring, which will not help at all and will take extra time:
- Using a compass . There is a theory that using a compass you can find the cable. But this is a myth, since it is impossible to create the necessary magnetic induction at home for the compass to respond.
Sometimes they try to look for wiring with a regular magnetic compass. Source survival-mastery.com
- Using a magnet as a hidden wiring finder . There is a hypothesis about a magnet tied to a rope and its action: if you move along the wall, it will deflect in the place where the electrical wires pass. And following the vibrations, mark the expected locations of the wires. But this method will not bring any benefit.
- Finding hidden wiring using a smartphone . A very dubious method, based on an installed special application that supposedly can find the cable. Smartphones have a built-in magnetic sensor and, using the application, the phone turns into a metal detector. But such a device will react to anything that contains metal parts in the wall.
Possible causes of wiring faults
To make it easier to identify the area where an unauthorized disconnection of the power circuit occurred, it is necessary to understand what reasons can cause such malfunctions. It should be immediately noted that most often they are caused by errors in the installation of the home electrical network or violations of the rules of its operation. The wiring itself, and even if it is walled up in the walls, breaks extremely rarely, although this option cannot be completely ruled out.
- Very often, contact is lost at terminal connections - starting from machines in the distribution board and ending with sockets, switches or even final consumer devices. A terminal that is poorly tightened or loosened over time begins to heat up and spark, causing the defect to “progress,” which sooner or later ends in the complete disappearance of electrical contact.
Unreliable connection of wires in the terminals is one of the most common causes of malfunctions in the home electrical network.
- Connections in installation boxes, if they are made incorrectly or are of insufficient quality, are another vulnerable point. Particularly dangerous are handicraft twisted wires, which would-be craftsmen simply cover the top with a layer of electrical tape - and consider that this is enough. No, of course, and twisting can be reliable and durable, but sometimes there are such pictures that it would be better not to see them. For example, the presence of copper and aluminum wires in one twist, which is strictly prohibited, an attempt to connect a single-core thick rigid conductor with a flexible stranded one. Or the use of terminals that are clearly not suitable for the current load for a given line. For example, Wago terminals are very easy to install, but still their purpose is rather to switch lines allocated for room lighting. But in the wiring sections from which powerful household appliances are powered, they may well fail.
One of the weak points of apartment power distribution is distribution boxes.
By the way, the reasons listed above, although unpleasant in themselves, are still quite easily diagnosed and eliminated. In addition, usually such breaks do not occur quite suddenly - as a rule, they begin to “signal” to the owners about the growing problem - by flickering light, obvious signs of sparking, the smell of burnt insulation or plastic. That is, if they pay close attention to their electrical equipment, the owners of a house or apartment are given a “handicap” for detecting and eliminating problems.
Typical home electrical problems and how to fix them
It is clear that if you have no idea at all about electrical installation work, there is no point in taking on such a task yourself - it is better to call a specialist. But still, a good owner can fix a lot of things himself. On the pages of our portal you can find detailed instructions for repairing sockets , identifying the reasons for the operation of the RCD or the frequent tripping of the circuit breaker .
It is much more difficult to deal with hidden defects, with breaks in the electrical circuit in sections of wiring hidden in the wall.
- By the way, they also very often appear for reasons, so to speak, of a subjective nature. A “classic” example is drilling a wall or hammering a nail without preliminary “reconnaissance” for hidden wiring in this area.
It’s hard to call this luck, but if after drilling the voltage in the network immediately disappears, then at least the reason becomes obvious. But it also happens otherwise - a drill or nail touches the wire tangentially, breaking the insulation and only slightly damaging the conductor. In such cases, it is possible that the wiring will still serve, and sometimes quite a lot. But at the point where the integrity is violated, leakage currents are provoked (and if there is no RCD, then they cannot be identified immediately), normal conductivity decreases, resistance in the local area increases, and gradual melting of the insulation with subsequent short circuit cannot be ruled out. That is, the final rupture can happen at any time, even after quite a long time, and it will not be easy to compare it with the drilling work that was once carried out.
The results of ill-conceived wall drilling are damage to the insulation of hidden cables, which over time led to failure of the wiring section
Ideally, the owner of an apartment (house) should know exactly the wiring routes in his property and the location of the wiring boxes. The task is simplified if electrical installation work was carried out in strict accordance with the rules and recommendations. That is, all sections of hidden wiring are located strictly horizontally and vertically. However, pictures similar to the one shown in the illustration below were probably seen by many electricians who were called to eliminate accidents. It is clear that with such a “scheme” for wiring a home electrical network, any drilling of a wall or hammering a nail turns into a “lottery”: lucky or unlucky.
Sometimes you see something like this... It’s completely unclear what the “master” was guided by
- The wiring itself, immured in the walls, does not break so often. But this possibility cannot be discounted. Old wires laid many decades ago can especially suffer from such defects. And especially if the house still uses aluminum wiring.
Over time, wiring certainly gets old. This, first of all, is expressed in the fact that the plastic insulation loses its elasticity, becomes brittle, and cracks. Small cracks can cause initially seemingly minor current leaks. Well, the fact that such leaks tend to increase has already been mentioned above.
When laying the wiring, it could turn out to be a conductor hall. It is also quite capable of manifesting itself not immediately, but after a period of time, measured in years. That is, it is almost impossible to make some kind of logical connection with a suddenly appeared cliff. It’s just that in such a local area, due to damage to the normal crystalline structure of the metal, the resistance can increase significantly, which causes overheating, even greater destructuring of the conductor, melting of the insulation, short circuit and other “joys”.
Such accidents are the most difficult to diagnose and determine the specific location of the circuit break. There are practically no external signs. And even if some distant “aroma” of burnt insulation is felt, it is unlikely that it will be possible to find the source of the smell.
All of the above can, of course, happen with any wiring. But if aluminum wires are still used in the house (apartment), the likelihood of emergency situations increases significantly. This metal is significantly inferior to copper in conductivity, corrosion resistance, and mechanical strength. Moreover, aluminum, as many electricians put it, “floats” in the terminals or twists. That is, even a well-crimped contact may well lose reliability over time and begin to heat up and spark.
This is another reason to get rid of old aluminum wiring whenever possible and switch to high-quality copper cables.
What cables should I buy for home wiring?
If we talk about the material, then, of course, exclusively copper. And if about a specific brand and section, then you need to have some important information. more about the types of cables for wiring in a house or apartment in a special publication on our portal.
Briefly about the main thing
Hidden wiring is safe and aesthetically pleasing, but in some cases you need to know where it goes. There are several ways to find out the location of electrical wiring and you need to choose the one that is exactly right.
If a major renovation is being done, then the easiest way is to find the grooves with wiring simply by visually inspecting the wall. In other cases, specialized equipment is used, in particular, a locator.
You can also look for hidden wiring with a radio, hearing aid, multimeter, metal detector and, in some cases, a classic indicator screwdriver.
There are also “mythical” ways to find hidden wiring - with a compass, a magnet, or using a smartphone application. In fact, they do not stand up to any criticism, so you should not waste your time on them.
In any case, you should not assume that this work can be easily done independently, without knowledge of the basics of electrical engineering. At best, this is a waste of time, and at worst, an incorrect result that can lead to a short circuit and fire in the house. Therefore, if you have doubts about your own abilities, it is better to turn to professionals.
Ratings 0
Features of operation of various types of detectors
An important factor is the method of indication. The accuracy of the search depends on this.
- The sound alarm can operate discretely (beeping or not beeping), or smoothly change tone or volume as it approaches the hidden cable.
- The light indication works on the same principle: the lamp can simply light up when the sensor passes over the desired object, or smoothly change brightness. More advanced models use a multi-color scheme: depending on the distance to the cable, either the color changes or the LED scale is filled.
- Professional devices with a display do not differ much in function. It’s just that various information can be displayed on the screen at the same time: type of metal, depth, laying direction.
An image of the alleged artifact can be displayed on the screen: wire, fittings, nail. True, such a “toy” will be too expensive for one-time use at home. They are purchased mainly by teams of electricians.
Fans of modern electronic gadgets will be disappointed. The detection accuracy of such a device is no higher than that of a detector with one light bulb. This is not an X-ray machine where you will see a wire through the wall.
And information about the type of metal, or point artifacts (such as a nail) can be displayed on separate LEDs. So there is no point in chasing fashionable options.
Elimination of broken phase and neutral wires
Having found out the exact location of the cable break and determined its peculiarity (damage to the “phase”, “zero”), you can begin to repair it.
To eliminate a damaged phase wire, follow these steps:
- First of all, you need to disconnect the phase wire.
- Using a hammer or other tool, remove plaster or other finishing from the wall surface. It is necessary to clear the area along the route by approximately 10-15 cm, covering the area to the right and left of the expected center of damage.
- It is necessary to separate the damaged core from the network, being careful not to touch the insulation on other cables.
- It is better to connect copper wiring by soldering. To do this, you need to take an additional piece of a similar product from which the repair jumper is made.
- It is also advisable to first place a polyvinyl chloride or heat-shrink tube on the core of the damaged cable. The ends of the jumper are twisted with the ends of the broken wire, after which the connections are soldered.
- Insulating tape is applied tightly (in several layers) to the repaired area, after which the tube covered with the wire is carefully pushed onto it. This ensures the tightness of the fastener.
Aluminum wires are less amenable to soldering, which also requires special solder and flux. In this case, the most reliable connection method will be the WAGO terminal, and the place of its attachment must be wrapped with electrical tape and additionally covered with sealant.
The wires can also be connected using a junction box. To do this, the insulation is removed from the broken wire, after which its ends are separated in different directions. Using a hammer drill equipped with a special crown, a hole is punched in the wall, the dimensions of which coincide with the parameters of the branch box.
The device is inserted into the opening, after which it is secured with alabaster. The wires are placed in the box, while the damaged wires are connected by color and wrapped with insulating tape. Finally, the box with the restored wires is closed with a lid.
If the cables are placed in special tubes, the damaged wires should be carefully pulled out, and new wires should be inserted in their place using a pulling device.
If the neutral cable is damaged at the beginning of work, it must be disconnected from the bus by attaching the phase conductor. The rest of the process coincides with the regulations described above.
After any type of repair, the grooves are covered with plaster. It is possible to apply voltage to the repaired wiring only after the coating has completely dried.
Universal detector
This device is capable of detecting not only hidden wiring (both live and non-energized), but also responding to foreign materials hidden in the thickness of the wall - non-ferrous and ferrous metals, wood, plastic, etc.
Universal detector BOSCH UniversalDetect
The universal detector is a rather complex device that generates a magnetic field and detects its changes when passing through various media. For example, iron enhances the electromagnetic field, and aluminum reduces it. By analyzing the received signals, the device provides fairly accurate data.
It is worth noting that some difficulties may arise when examining the wall. For example, if two cables are laid side by side, the detector may recognize them as one. But only household models are guilty of this. Professional ones are distinguished by maximum accuracy. True, they are quite expensive. It is irrational to buy a high-tech device for one-time detection of hidden wiring.
Before searching for hidden wiring, it is advisable to test the detector on a structure in which the position of the electrical wiring is already known.
Multimeter
Fluke 117 Digital Multimeter
The multimeter is a multi-purpose instrument that combines a voltmeter, ammeter, and ohmmeter to measure voltage, current, and resistance, respectively. To search for hidden wires, it will have to be modified by connecting a field-effect transistor. It has three terminals - gate, source and drain. The gate serves as an antenna (which is why it is usually extended), and the multimeter leads are connected to the source and drain.
When searching for wiring, the device is switched to ohmmeter operating mode, without paying attention to polarity. The antenna is brought to the wall and research is carried out, monitoring the current readings. Any change in them will indicate the proximity of the electrical cable.
How to test an electrical cable using a multimeter?
Do-it-yourself testing of wires using a tester is carried out in the following order:
- Set the multimeter switch to dial mode (as a rule, an LED icon is drawn opposite this division).
- The black test lead must be installed in the COM socket (sometimes indicated by a ground sign or an asterisk). The red cable is inserted into the socket marked Ω (or R).
- Turn on the tester (if it is not automatically turned on when you turn the handle).
- Touch one probe to another. The signal that is heard will notify you that the meter is working properly and is ready for operation.
- On the wire being tested, remove the insulation from the ends and strip them until a metallic sheen appears, and then touch them with probes.
If the integrity of the cable is not broken, the device will emit a sound signal, and 0 will appear on its display. The absence of sound and the number 1 on the display indicates that the conductor being tested is broken.
The whole process is clearly shown in the video:
Testing home electrical wiring
We will talk about an apartment in which the wiring of power lines complies with modern standards and requirements: each room has a separate line, and its power is supplied through its own “automatic machine”.
If the light in a room suddenly goes out, but in all other rooms it lights up normally, then first of all you need to check whether the light device is working. Before starting work, the power supply to the room must be turned off. If the lamp lamp is transparent, the broken filament will be immediately visible; if not, you will have to test it with a multimeter.
First you need to see whether the circuit breakers in the electrical panel have worked or not. If they are on, the problem most likely lies in the socket, switch, or the light bulb itself, and the wiring is fine. When the machine is triggered, it is necessary to check all elements of the circuit, except the switch, including the switch itself.
The machine didn't work
If the light goes out and the switch remains in the on position, then you first need to ring the switch. If it is working properly, then when the element is in the on position, the multimeter should emit a sound signal, and when it is off, the number 1 should appear on the display if there is no sound.
Further checking occurs in the following order:
- Turn the multimeter into voltage measurement mode, and then check the input and output of the switch.
- If there is a potential difference on the machine, unscrew the light bulb from the socket and touch its central contact with one probe and the base with the other. If there is no signal and the display shows 1 or 0, the lamp is faulty.
- If the check shows that the light bulb is working, you should proceed to testing the socket. Having disassembled the lighting device, you need to inspect the connected conductors and contacts. If a visual inspection does not reveal any problems, the problem is not in the cartridge.
Such a check usually reveals that one of the listed elements is faulty. After replacing or repairing it, the problem disappears.