In this article we will tell you how to beautifully cover a box with wallpaper. Of course, you can also purchase ready-made containers for wrapping gifts and storing various small items, but if “you have time and inspiration,” then why not do some handicrafts? Moreover, this technology is quite simple, and even a schoolchild can do it.
You can decorate simple packaging at virtually no cost
How to wallpaper a box with your own hands: master classes with photos and videos
A beautiful interior lifts your spirits and gives you joy when everything is in its place and does not spoil the appearance of the room.
Decorated cardboard boxes will help with this. Any size can be used to store small items and items. And even a child can wallpaper the box. Content
Features of the decor of wallpaper boxes
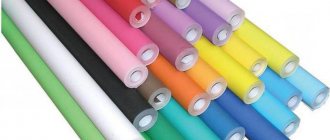
A variety of finishing options allows you to maintain the interior of the room in the same style. For decoration, different types of wallpaper are used: non-woven, paper, vinyl. Combinations of patterns and ornaments, selected in a single color scheme, give excellent results.
Advantages of wallpapering boxes:
- available materials;
- you can get by with leftover wallpaper after renovation; there is no need to buy it specifically;
- supports the texture of the walls and the interior of the room;
- attractive appearance;
- simple work, accessible even to a schoolchild;
- The work process is simple and fast.
Where to apply
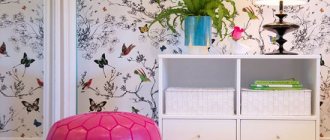
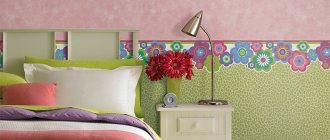
Shoe boxes are widely used for storing small items. Decorated organizers displayed on open shelves attract attention and add additional charm to the interior.
Organizers store:
- Kids toys;
- costume jewelry;
- cosmetics;
- stationery;
- textile products;
- shoes;
- magazine selections;
- tools;
- household chemicals.
Large capacious containers allow you to store large toys. Shoe cabinets - hold puzzles, construction sets, puzzles.
Textile products such as towels, underwear, socks, shoes are placed in small cardboard boxes covered with wallpaper. The organizer is divided into segments to make it convenient to pull items out of it.
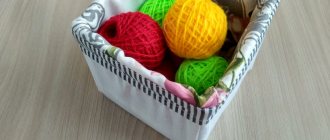
Small cardboard boxes are suitable for storing women's accessories, sewing supplies, materials for needlework and creativity. It is ideal to place jewelry in them.
Advice! For convenient arrangement of skin care products, the boxes can be divided into sections.
Organizers can store various accessories for:
- decoupage: napkins, glue, varnish, brushes;
- drawings: album, pencils, markers, paints and brushes;
- kitchen cleaning: sponges, scrapers, cleaning agent and detergent;
- washing things: bleaches, rinse aids, soap, powder;
- disinfection of the bathroom: for cleaning the toilet, rags, gloves, etc.
Advice!
To store chargers, a box is built in which the carrier and power supplies are placed. Plugs are inserted into sockets, and cords are threaded into pre-prepared holes, this will help maintain order. The holes are reinforced with plastic rings
How to wallpaper a cardboard box
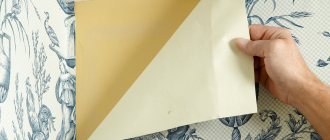
Packaging experts have developed several pasting methods. The simplest of them is to cut pieces of wallpaper to the size of the sides and glue them to double-sided tape.
Master class on wallpapering a box with your own hands:
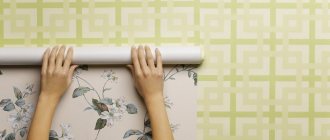
- The remains of the wallpaper are straightened on the table so that they do not curl.
- Place the box and mark the dimensions on all sides.
- If necessary, glue the strips of wrapping material together.
- Cut out 4 strips along the marked contour, 4-5 cm wide and length equal to the height of the box. The ribs are glued to strengthen them.
- Glue the bottom according to the markings.
- Glue the sides one by one, folding them onto the inner surface.
- Cut out the part for gluing the inner base and glue it. If necessary, cover the lid.
Tools and materials
To quickly wallpaper a box, stock up on tools and materials:
Tools to get the job done can be found in every home
In addition to the basic tools, for more comfortable work, you may additionally need clamps, a ruler, and brushes. There are times when a compass is needed.
What boxes can be decorated with wallpaper?
In addition to the appropriate size, when choosing a box, pay attention to strength. For organizers, choose cardboard boxes with thicker walls so that they can withstand the stress of frequent use.
Corrugated cardboard boxes from household appliances are used to store toys. Packaging containers are made of denser reinforced cardboard. If necessary, the walls are additionally covered with a second layer of cardboard.
In order to properly wallpaper the box and increase the service life of the organizer, the ribs are additionally strengthened. To do this, they are covered with masking tape or strips of 2-3 cm cut out of paper.
Thick, glossy shoe boxes are good for organizing a first aid kit, storing cosmetics or jewelry. They are also suitable for organizing storage areas for handicrafts and creativity.
How to glue wallpaper to a cardboard box
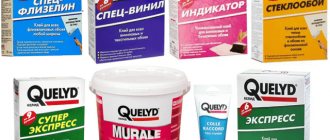
To beautifully wallpaper a box, you need to choose the right glue:
- silicone glue is used with a hot gun, this is one of the fastest methods of pasting, but may dry out over time;
- double-sided tape is easy to use, but if the decorative layer is too dense and heavy, it may come off;
- office glue glues the paper base well, but can leave whitish streaks on the surface, so it is important to ensure that it does not get on the front side;
- time-tested PVA glue will reliably glue any material to the base of the box.
How to wallpaper a shoebox
The procedure for pasting a box with wallpaper with your own hands step by step:
- The edges of the box are covered with masking tape to make them rigid.
- Prepare leftover wallpaper with patterns. Mark the size of the base of the box so that the design is in the center of the bottom of the box.
- The bottom of the box is covered with PVA glue, the fragment is carefully applied and glued.
- Using a stationery knife, cut off the excess along the edges.
- Apply the second fragment to the first side so that the design pattern matches the pattern on the bottom of the box.
- Apply glue to the surface and glue the fragment.
- Using a stationery knife, carefully cut off the excess decor along the edges.
- This is how the remaining 3 sides are covered.
- Check the corners of the box and, if necessary, additionally glue them with PVA glue.
- Start decorating the inner surface. Prepare acrylic paint in a matching or contrasting color. Paint the inside of the box.
- The product is tinted if necessary in the desired color.
- The finished organizer is coated with 3 layers of moisture-resistant matte varnish.
In addition to painting, the inner surface of the organizer is decorated with a beautiful fabric, decoupaged, or covered with wallpaper in a contrasting color.
How to cover a paper box with vinyl wallpaper
Master class on covering a round cardboard box with vinyl wallpaper:
- Prepare the remaining wallpaper and level it.
- Place the box and trace the bottom with a pencil.
- Cut out a fragment along the outlined contour.
- Measure the height of the box and add 2 cm. Transfer the resulting size to the wallpaper, this will be the width.
- Measure the circumference of the box with a centimeter and transfer the size to the wallpaper - this is the length of the strip. Add 1 cm for the joint.
- Cut out the resulting part. Apply glue and leave for 5 minutes.
- Apply glue to the circle of wallpaper and leave for 5 minutes (1).
- Glue is applied to the side.
- Glue the strip, aligning the part along the top of the box.
- The protruding 2 cm of the glued fragment is cut into segments in increments of 15-2 cm. They are folded to the bottom and glued (2).
- PVA glue is applied to the bottom of the box.
- Glue the circle to the bottom of the box, carefully aligning it along the contour (3).
Attention! To prevent vinyl wallpaper from shrinking or deforming, they are first coated with glue and left for 5 minutes so that they absorb moisture and stretch.
Decoupage wallpaper boxes
Decorating a cardboard box using the decoupage technique begins with preparing images. To do this, select napkins to match or print a suitable design on office paper, or cut out a pattern from thin wallpaper.
Office paper and wallpaper are pre-thinned so that the pattern glued on top does not stand out visually:
- Strips of tape are glued to the back side, overlapping each other by 1 cm.
- Press carefully with a rubber spatula or plastic card.
- Carefully separate the top layer using a sewing needle or pin.
- They hold it with one hand and pull the tape with the other, thinning the fragment.
The thin wallpaper image looks great on the box
- Wrap the box in wallpaper. Cover with 1-2 protective layers of acrylic varnish.
- Select an image and cut it along the contour.
- Apply decoupage glue or PVA diluted 1:1 with water to the surface of the lid.
- Carefully attach the fragment.
- Using a fan brush, smooth the pattern over.
- After drying, apply 3-4 layers of varnish with layer-by-layer drying.
The image is torn out of the napkin, this will make the edges less noticeable
Decorating ideas
The decor of a cardboard box covered with wallpaper is done using a variety of techniques.
To preserve decorativeness, the box is coated with 2-3 layers of matte acrylic or moisture-resistant varnish. Non-woven or textured ones are painted to match the interior of the room with paints.
The inner cover is made 3-5 cm longer to make the flap on the side
The inside is decorated with a fabric cover. This method allows you to decorate the sides on the surface of the box by bending the cover. The side is also decorated with ribbons and lace.
The lace can be decorated with half beads, and the lid with organza flowers
The inside is painted with matching paint or a contrasting shade and the surface is protected with acrylic varnish so that the product retains its attractive appearance longer.
Beads, buttons and flowers are painted to match the box
Beads, plywood stickers, buttons - all these elements are suitable for decoration in skillful hands. Raffia and wool threads accentuate the details.
Flowers made of fabric or crocheted give the product a special charm
Conclusion
Recommendations on how to wallpaper a box are useful for craftswomen who want to decorate their interior. This technique allows you not only to improve the appearance of the room, but also to restore order in the apartment by placing small items in self-made boxes.
The second way to decorate with paper
Here is another instruction on how to cover a box with paper:
- Place the bottom of the box on the selected paper and trace it (Illustration 1).
- Cut out the bottom piece so that there is a margin of two to three centimeters on each side (Illustration 2).
- Glue the part to the bottom of the box and fold up the protruding edges (illustrations 3 and 4).
- Place one side on the paper and outline it. Cut out the part with a margin of a few centimeters on all sides. Glue the paper to one of the sides (illustrations 5 and 6).
- Carefully fold the edges of the paper (to the bottom, to the sides and inward). If necessary, make small cuts (Figure 7).
- Cover all sides of the box in the same way (Illustrations 8 and 9).
- You can paint the inside of the boxes with a suitable color paint. It is better to use acrylic (Illustration 10).
- Let the glue and paint dry completely.
The decorated box is ready!
Need advice on wallpapering a box.
Hello! Actually, the whole question is in the title. I urgently needed boxes for household needs in the kitchen. The cupboards and cabinets are full, but I need to put somewhere a 5 or 10 kg bag of flour, as well as a supply of cereals for the dog and food for the cat. I found boxes - one with a bread machine lid, and the second - regular cardboard. There is also a place for them. The whole problem is that I have nothing to cover the boxes with - there is no PVA glue, and I have to go 15 km to the regional center to get it. The trip won't be coming soon. The local store in our village does not have this glue. But there is wallpaper glue. I couldn’t find any clear advice on the Internet about gluing boxes with wallpaper glue. Or don’t bother and sew a fabric cover?
THANK YOU ALL FOR THE ADVICE! I glued it with wallpaper glue - everything holds up fine. And I have quite nice boxes. Oh, just don't judge too harshly.
Fabrics and plastic
used in the design of lodgements.
Light fabrics (silk, crepe-satin) are used to drape the cardboard base of the tray. Velvet can be either draped or stretched over cardboard. Stretch velvet is used to cover shallow figured boxes in boxes.
Flocked plastic with a velvety surface takes the shape of objects when heat treated. Plastic is used for a batch of at least 100 pieces, because molding plastic trays requires special equipment - a mold or pads.
More details about the production and photos of the cradle.
Is it possible to glue wallpaper onto cardboard?
CARDONKINO - exclusive templates for creativity return to page.
KARTONKINO - exclusive templates for creativity pinned post
I am often asked: HOW TO ATTACH PAPER DECORATIONS TO WINDOWS?
Moreover, such questions come not only from beginners, but also from experienced decorators. And there is nothing strange about this, since by exchanging experiences, there is always the opportunity to learn something new.
And in general there are no ideal ways to attach jewelry. They are all different, with their own pros and cons.
But knowing, as they say, the whole list, it is much easier to choose the option that is preferable for you.
The method requires a minimum of time. Scotch tape holds decorations well. It’s almost invisible on the window (from a distance that’s for sure). Can be used with paper of any thickness. After the holiday it is quite easy to remove, and the decorations are not damaged (can be used repeatedly).
I recently learned about this method, and I find it very interesting.
There are no visible fastening elements at all. The decorations are holding up quite well.
The method takes more time. The decorations are disposable. Can only be used with thick paper (for example, whatman paper).
There are no visible fastening elements at all. The decorations are holding up quite well. The decorations are easy to remove and can be used repeatedly.
The method takes more time. It requires very careful handling of paper: if you overdo it with humidity, the decorations will be ruined.
Honestly, I haven’t personally used the last 3 methods; I collected information from practicing decorators.
Try different options and choose which one you like best.
Sweet surprises
A regular bag is a universal container for all sorts of things, not to mention a beautiful gift bag.
Candy will never lose its magical power, everyone likes it so much, that’s why they are the best accompaniment to any gift.
Giving your favorite sweets just like that doesn’t look very elegant. Order special foil packaging in the form of bright bags online.
The most common color designs:
Feel free to choose according to your personal preferences in color and size. Then place the sweets in the middle of our container and decorate the top of the surprise with a neat bow.
Wallpapering
Wooden surfaces are covered with cardboard before wallpapering. The cardboard is cut into pieces of the required size. Then they are rolled up and soaked in water. After getting wet, take it out and dry it slightly. Pieces of cardboard are applied to the wall, nailed at the top with nails with wide heads every 15...20 cm, then it is stretched. The edges of the cardboard are nailed end to end. After drying, the seams are sealed with strips of paper and puttied.
Border for wallpaper
Sometimes pasting is carried out without a border. They do it like this. Below the punched line, either cut edges of the wallpaper are pasted or strips 2–3 cm wide are cut from the wallpaper. The wallpaper is pasted with its upper ends onto these strips, and all uneven ends become invisible.
Wallpaper selection
Wallpaper quality is divided into three groups: simple, medium and high quality. They are produced in rolls from 6 to 12 m long and 50, 60, 75 cm wide. Some types of wallpaper are moisture-resistant, washable with a matte or glossy surface, embossed and smooth. It is preferable to have textured wallpaper that hides small uneven surfaces of walls and ceilings. When choosing wallpaper, you need to know that in natural light the wallpaper looks different than in artificial light.
Preparing surfaces for wallpaper
Wallpaper work is carried out after completion of all general construction and special work, except for exposed electrical wiring and polishing of parquet. Before pasting, plastered walls are smoothed with the end of a wooden block. Cracks and crevices in skirting boards and platbands should be coated with lime-gypsum mortar and cleaned with a flake. The duration of drying of plastered surfaces can be determined by lightly tapping with a hammer or hand. Insufficiently dry plaster produces a dull sound when tapped.
Room temperature for wallpapering
During work, do not open windows and doors to avoid draft winds until completely dry. Wallpaper must be protected from direct sunlight by covering the windows with gauze or other fabric that allows sunlight to pass through. Direct sunlight causes wallpaper to dry out faster and at the same time may fade. Pasted wallpaper should dry no earlier than after 24 hours. During the drying period, the room temperature is allowed up to 23 o C.
Decoupage technique
From an old shoe box you can make a beautiful box for storing various small items:
- For work, choose a small box from under shoes or sandals. It must be clean, without stickers or tape.
- The walls and lid of the box are coated with acrylic paint. The top part is painted white, the side – black.
- On the lid you need to make a frame for the picture. Leave 1-2 cm from the edge and stick tape around the perimeter. The indentation is painted with black paint, then the tape is removed. The result is a frame with smooth edges.
- Then choose any picture depicted on paper, wallpaper or napkins and cut it out.
- The picture is immersed in water, pulled out, and placed face down on a file or oilcloth. Excess liquid must be removed. To do this, gently blot the top of the picture with a cotton cloth.
- The drawing and the place where it will be glued are coated with glue. The glue you choose is decoupage or PVA.
- The film with the picture is turned over, transferred to the lid, carefully straightened, then the film is removed.
- The cover is varnished after the picture has completely dried.
- If the edges of the picture are painted white and shaded with a brush, they will become invisible.
- Additionally, the background or shadows are added to the picture. This will make her more expressive. Acrylic paints are used for work. When the image is ready, the surface of the lid can be completely painted with varnish. The walls can be painted as desired.
It is much more difficult to work with napkins and film, and it is also difficult to cover the product with fabric, so before using such material you need to learn how to work with it correctly. And for inexperienced craftswomen it is better to start their activities with easier designs.
The neighbors showed how they lined the walls in the apartment with cardboard boxes: I’m silently jealous
You can make interesting things from cardboard for interior design or use it as decoration. The latter option is considered very interesting, because it allows you to use environmentally friendly material, decorating it at your discretion using paint or other finishing elements. This material can be considered a novelty in terms of repair.
Tools for work
The process will require the following items: cardboard (you can use old corrugated boxes), toilet paper base in the form of tubes, old newspapers, paper towel tubes, blank sheets of paper, scissors, glue, paint brushes, jute twine.
In the process, you can use other elements that will suit the design or fit well into the style. But stylists advise not to focus on this, because it is important to create a beautiful and at the same time as simple as possible base-covering for the walls.
As for the paint, you need to match it to the tone of the walls or use a regular clear varnish to create a vintage surface. The ideal would be to apply newspapers to cardboard and then fix them with several layers of varnish. This option is suitable for any style and will complement the room with an interesting surface.
Other materials
In addition to fabric and all kinds of paper options, you can use other materials, including using them as additional ones. So, various paints, beautiful decorative stickers, as well as some options for additional decor (sparkles, ribbon bows, and so on) may be quite appropriate. All this can be bought without problems in special stores. With a skillful approach, you can create a very attractive combination. You can decorate any part, both the bottom and the lid.
How to wallpaper a box
Today we will talk about how to properly cover a gift box, not only achieving a pleasing result, but also saving some money. Interestingly, in addition to wallpaper, you can use paper, fabric, film and other materials for this. However, let's talk about everything in order.
What you will need
So, let's start our master class and learn how to beautifully decorate a cardboard box for gifts, both outside and inside. What materials and tools will be needed for work? Here's a short list of everything you might need when decorating a box with wallpaper:
Of course, you need to choose a box that will become the basis for creating a beautiful decoration. One of the main conditions is the strength of the material. It is desirable that the walls of the box are thick, and the corners and joints are connected by reinforcing elements. Packaging from small appliances, for example, an electric kettle, shoes, etc., is quite suitable.
Attention! Despite the fact that a significant part of the packaging boxes from modern technology are made of corrugated cardboard, this material is very suitable. The only condition for its use is that before gluing it is recommended to additionally glue the edges of the box so that they are not damaged in the future.
We select materials
Of course, after that you need to find wallpaper. Leftovers will do just fine, but make sure they are of sufficient size. As for the material from which they were made (paper, vinyl, outlining or textile), it does not matter much. Much more important is the design, style and condition of the surface.
Article on the topic: How and with what to insulate a bathhouse, sauna, steam room from the inside and outside
After that, you have to choose the right glue. In this case, almost any wallpaper adhesive composition will work. However, in this particular case, the optimal solution is to use well-proven PVA glue. It is very inexpensive and glues paper and cardboard perfectly.
And finally, if we talk about the necessary materials, we cannot fail to mention a special protective varnish, the main task of which is to reliably protect the finished product from damage and moisture.
Selecting Tools
As a rule, ordinary scissors or a stationery knife will be enough for you. However, for greater convenience, you can use a whole set of tools that will make your work faster and more convenient. So, in addition to a knife and scissors, you may need: a clamp for temporary fastening, brushes, and a ruler. Sometimes a compass can also be used additionally. Well, now let's talk in more detail about the process itself.
Scheme of work
Despite the fact that there are several common methods for gluing trellises onto boxes among packaging specialists, we will focus on the simplest of them, since it will be easier for beginners who will easily master this technique. Here's a quick guide:
- We take the remaining wallpaper, cut off a piece (this must be done with a margin) and straighten it on the work surface. This could be a floor or table covered with newspapers or film.
- We place our box of shoes or household appliances on the trellises and apply markings. It can be done either with a knife or using an ordinary pencil.
- After this, you need to wrap the sides of the box with wallpaper, folding the edges to the inside. We press.
- Then we remove the wallpaper from the box and carefully remove any unnecessary wallpaper with a knife or scissors.
- Next we move on to pasting. First of all, apply glue to the bottom of the box, place it on the previously outlined place and press the wallpaper to the box.
- After this, apply glue to the sides of the box and press it. And finally, last of all, we glue those parts of the wallpaper that are located inside.
- In order for such gift wrapping to look good from the inside, it must be additionally decorated. To do this, we need to decorate it with beautiful paper (preferably thick), preferably one-color. As an option, noble elegant fabric is quite suitable. The best options may be materials such as velor, satin, tartan, etc. The packaging is finished, now you can move on to decorating it.
Related article: Little tricks: how to visually enlarge a kitchen with a small window
Be sure to watch a useful video, a master class on decorating a box:
Decorating the packaging
Let's first look at such an interesting pasting technique as decoupage. To decorate using this method, you will need to choose some attractive pattern, maybe more than one. As a unique decoration, you can use napkins with a pattern already cut out on them. And in general, any thin paper, such as tissue paper, will do.
Interesting to know! In cases where you decorate using two-layer paper wallpaper, it is advisable to cut out images on one of the two layers, taking care to separate them first.
Now a little about how decoupage is done correctly. Almost all of us are well aware that when it comes to learning any skills, it is better to see 1 time than to hear 100 times. That is why we advise you to familiarize yourself with the thematic video instructions, where the features of this decoration technique are described in as much detail as possible. So, let's look:
Be that as it may, there is absolutely no need to limit yourself solely to the use of decoupage. To solve such problems, there have long been specially developed and tested alternative methods for decorating packaging boxes with the aim of converting them into gift boxes. So, let’s list some advantages and features of using other methods of decorating boxes with wallpaper:
Description of technology
What do we need
Any instructions for performing a particular job should begin with a list of everything necessary. Our case will not be an exception, so first we will figure out what we need.
So:
Corrugated cardboard will also work
- First of all, we are looking for the box itself. Since trellises are a fairly dense and durable material, they are not suitable for small products. To prevent the walls of the box from being deformed during pasting, it must be made of thick cardboard and securely fastened with either glue or metal staples.
Advice! It is best to use shoe boxes, household appliance packaging, etc. Containers made of so-called corrugated cardboard are also suitable, but their edges must be carefully sealed.
- Next - wallpaper. Since we don’t need excessive durability, paper trellises (preferably single-layer) are quite suitable. You can also use non-woven fabric or textiles for work. In general, what is left after finishing the room is what we take!
- The third required component is glue. In principle, wallpaper adhesive is also used for this work, but it is better to buy high-quality PVA. Despite the fact that the price of this material is low, it is an almost ideal choice for decorating small objects.
Set of tools
In addition to the box itself, trellises and glue, we may need varnish to protect the product from moisture and damage, paint (if appropriate wallpaper is used for painting), materials for decoration, etc. It all depends on how you see the result of your work.
Model scalpel with attachments
Separately, it is worth taking care of the equipment.
In principle, a one-time job can be done with almost any cutting tool, but if you want to decorate several boxes, then you should stock up on everything you need according to this list:
- Scissors with straight blades.
- A knife with a replaceable cutting element (a model scalpel will do).
Advice! To avoid damaging the table during work, you can lay a special thick rubber mat on it. This coating self-heals some time after a cut, so you don’t have to worry about the force of pressure on the tool.
- Metal ruler.
- A protractor and compass (needed if the box is not rectangular in shape).
- Stapler for temporary fixation.
- Brushes for glue and decor.
It is more convenient to cut on a special mat
Pasting process
There are several methods for decorating boxes with colored paper and trellises. Below we present the easiest one to implement: you are guaranteed to be able to master it yourself.
So, we carry out the work according to the following scheme:
- Cut a piece of material from the remaining roll. We choose the size of the fragment with a good margin so that there are no joints on the walls of the product.
- We lay out the trellises on a flat surface and place the box on them.
- We draw along the perimeter of the bottom with the blunt side of the knife: this will help us make the folds along these lines more even and clear.
- We wrap the walls with trellises, bending the edges inside the container. At the same time, we try to mark the folds in straight lines, preventing the material from being removed.
Wrap the box as shown in the photo
- Unfold the wallpaper and remove the box. Using a ruler and a modeling knife, cut off the excess material.
- Using a knife or scissors, cut the lines along which we will fold the wallpaper. Mark the folds with a blunt instrument.
Note! If you have drawing skills, then you don’t have to worry about wrapping the product itself, but simply build a pattern according to the measurements taken. In principle, with due care, both methods give identical results.
The pattern can also be created on a computer.
Next we proceed to pasting:
- First, apply PVA glue to the bottom of the box and install it on the decorative material in the marked place. At the same time, you should not apply too much glue, as this can lead to wetness and deformation of the wallpaper.
- Next, we coat the walls and glue the side parts to them.
- Lastly, we glue those areas that should be located inside the container.
To make our box look as neat as possible, we need to “ennoble” it from the inside. To do this, the bottom, and sometimes the walls, are sealed with a single-color material. Most often, thick white paper is used for this purpose, but you can also use beautiful fabric (satin, velvet, etc.).
Result of work
Is it possible to glue wallpaper over old wallpaper?
When can you glue wallpaper onto wallpaper?
Here's what you'll need to get started
Most people are interested in renovating their home as quickly as possible. Therefore, everyone is looking for affordable ways to realize this desire. And if the walls are already covered with wallpaper, then many people think about covering the walls with new canvases without first preparing the surface.
But is it possible to glue new wallpaper onto old wallpaper? Professionals in their field will definitely recommend carrying out a number of preliminary works in order to thoroughly prepare the surface. And for this you will need not only to remove the old canvases, but also to level the wall, cover it with a primer and carry out a number of other necessary actions. But you can always use another option, reducing time and money, and simply gluing new canvases on top of the old ones.
The main advantage of gluing new wallpaper onto old ones is saving effort and time. But at the same time, you need to remember the basic rule of successful repair: the wall to be glued must be clean, degreased and treated with a primer. Only in this case can you count on long-lasting results.
To ensure that the risk of negative consequences is minimized, the following conditions must be met:
- The composition of old wallpaper should be entirely paper;
- Old wallpaper should be firmly attached to the walls;
- The surface should be smooth and not contain three-dimensional patterns;
- Be subtle.
Related article: Curtains-partitions for rooms as a way of zoning
Disadvantages of pasting new wallpaper over old ones
What you will have to deal with during secondary pasting
When deciding to apply new wallpaper to old ones, you need to remember the following disadvantages:
- The aesthetics of the selected pattern is significantly reduced;
- The quality of fastening of new canvases is reduced;
- There is a risk of gluing defects in new canvases, ranging from “bubbles” to partial peeling;
- The service life of the new coating is significantly reduced;
- There is a risk of bacteria and mold developing under the canvas, which are dangerous to human health.
Pasting over paper wallpaper
If the wall is covered with paper wallpaper, then re-pasting the surface cannot be ruled out in order to save time and money. But, having chosen this option, you should carefully check that the old canvases do not have defects, breaks, and that all joints are well connected.
You should also be prepared for the fact that old canvases will exhibit coloring properties, which are activated when wet by the new adhesive composition. As a result, all work will be ruined.
It is better to select a design for new paintings in advance and evaluate the brightness of the old one. If the new layer is too thin, the overly variegated pattern of the base canvas will show through.
It should be remembered that the amount of glue applied must be sufficient. If it is applied excessively, it is possible that the canvases will get wet, which may subsequently fall due to the overall heaviness.
Pasting wallpaper over old ones is allowed only if the old covering is thin and made of paper.
How to stick correctly
So, having made sure that the old wallpaper is holding up well, you can start gluing new wallpapers over them. But, first of all, it’s worth moistening the base a little and tearing off those pieces that are no longer holding well.
New canvases are pasted over, starting with one strip, and you need to give it time to dry well. If the experiment was a success and the strip is firmly attached to the surface of the old wallpaper, then you can continue the pasting process.
If a small amount of “bubbles” appears during gluing, they can be smoothed out with a regular iron or a special spatula, but you can also wait 2-3 days for these defects to disappear on their own.
Directly during pasting, there should be minimal air movement in the room, i.e. work without the air conditioner or fan on, with windows and doors closed. Ventilation in the room is allowed only when the new canvases have dried thoroughly.
Related article: Do-it-yourself connection of a washing machine to water supply and sewerage
Pasting over vinyl and non-woven wallpaper
The surface to be pasted must be perfect
It is almost impossible to glue new sheets over vinyl ones, since the old coating retains its water-repellent properties. In addition, you need to remember that vinyl coverings in most cases have a textured surface, which will be easy to notice after pasting with new canvases.
Non-woven wallpaper is similar in characteristics to vinyl wallpaper, and therefore has similar recommendations. Therefore, it is best to remove them from the wall.
Where to begin
Before you start modifying shoe boxes, you need to provide everything so that you don’t get distracted from the work process by little things:
- choose a suitable box, think over its design;
- choose a comfortable, well-lit workplace;
- find a sufficient amount of material;
- Prepare tools: scissors, stationery knife, tape, glue, etc.
Original lamps from boxes
Selecting materials for decoration is very simple. You can simply paint it with paints, cover it with paper for decoration, colored paper, wallpaper, newspaper, sheets of music, geographical maps, napkins, stamps, jute rope, woolen threads. Products covered with various types of fabric, ribbons, leatherette, and oilcloth also look impressive. Children's boxes can be covered with candy wrappers, sheets from coloring books, stickers, key rings, matches, drawings of animals or favorite characters, parts from construction sets, and mosaics.
The most popular way to decorate shoe boxes is to cover them with paper or fabric.
How to cover a box with paper
Decoration with mulberry leaves
When working with mulberry leaves, it is necessary to take into account that this is a very thin material. If the surface of the box has a pattern, it must be coated with paint before work. Further design:
- The leaves containing mulberry fibers are torn into many pieces of different sizes.
- After the paint has dried, the surface of the box is smeared with PVA glue and paper pieces are glued to it.
- When the mulberry paper has dried, the surface is additionally decorated with various designs or napkins using the decoupage technique.
- At the end of the work, the box is varnished.
A box decorated with mulberry leaves fits into any interior, as it looks like an antique item.
Container for toys
If there are a lot of children's toys in the house, such as blocks, small cars and construction sets, you can make a container for storing them with your own hands. To work, you will need a box of office paper and a self-adhesive roll of film. Pasting occurs as follows:
- To strengthen the sides of the container, cover all folds with masking tape.
- Then the container needs to be covered with self-adhesive tape. This is not difficult to do. The film is cut exactly into squares, which are marked on the back side of the material. The blanks are glued to the container.
For the outside of the box you will need no more than 1 roll. It can be purchased at any hardware store.