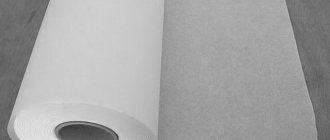
Wallpapering walls has remained one of the most popular methods of wall covering for many years. Because it is a simple, inexpensive method. Also, more and more different wallpaper options are appearing on sale, which can satisfy even the most fastidious homeowners. All these positive characteristics of wallpaper coverings make them so popular. But in order to get a result that will please the eye, you need to wallpaper the walls correctly. We will tell you more about how to wallpaper a wall below.
Features of choosing wallpaper for walls
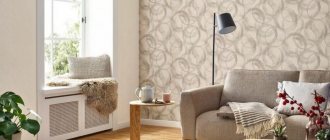
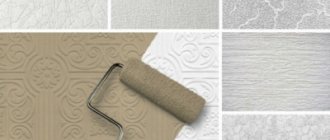
A wide variety of types of wallpaper coverings makes it possible to use them on any type of surface, and select the ones suitable for covering the walls of a particular room. So, when sticking to concrete, even and smooth coatings are more suitable; embossed wallpaper will look good on any type of surface, they can hide small surface defects.
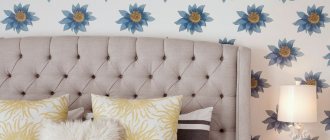
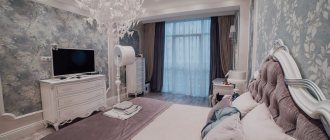
On the south side of the room it will be better to choose cool shades. Colors such as grey, blue, green can visually increase the area of a room. On the north side, on the contrary, warm shades are better suited.
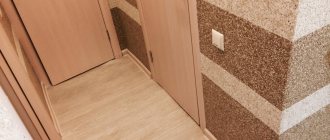
Dark colors are more suitable for hallways and corridors, and washable types of coatings will be very useful. For living rooms, you can choose both light and dark shades; the important thing here is the combination with the interior.
A wide variety of wallpaper types makes it possible to use them on any type of surface.
Preparing wall surfaces for pasting
You can simply glue wallpaper, but the result can be very disappointing. To obtain a beautiful surface, it is necessary to prepare it before starting gluing work. The surface must be even, white, free from dirt and stains. It is not permissible to paste over an uneven wall; to level it you need to use plaster.
If there are old coatings on the surface, such as oil painting, old wallpaper, then, first of all, you need to get rid of them.
Oil paint is removed using mechanical means or chemical compounds. Old wallpaper is first soaked, then it gradually begins to fall off and is removed. If a waterproof film was used, it is first scratched or cut so that water can reach the paper base, then everything is wetted and the coating is removed.
Residual parts of the coating that are not removed immediately can be removed with a spatula. To remove the paint, you can use a chisel and a hammer, but this is a long process, you can also resort to a hammer drill, but, firstly, there will be a lot of dust, and secondly, you can remove part of the wall surface along with the paint, so there will be more unevenness on the wall . It is better to resort to special solutions that cover the paint and after some time it can be removed with a spatula.
Water-based paint and whitewash can be removed using hot water and a scraper.
Oil paint is removed using mechanical means or chemical compounds.
After cleaning the wall, they proceed to covering the defects with plaster, then get rid of the convex elements, they can be removed with sandpaper. And then they move on to mandatory priming of the surface.
This stage allows you to obtain greater adhesion to the surface; there are also primers on sale that protect walls from biological influences.
Carrying out this sequence will make the surface smooth and adhesion to the wallpaper will be ideal.
It is not permissible to paste over an uneven wall; to level it you need to use plaster.
4. Paste modern decorative wallpaper
In public places, regular wallpaper with a printed pattern is in many cases giving way to plain, post-painted wallpaper. Structural, fibrous, paper glass wallpaper is mainly used for this.
.
Structural wallpaper
Made from recycled paper fibers (90% cellulose, wood flour, additives) and featuring a variety of embossed patterns
When pasted, such wallpaper does not wrinkle or stretch; it is glued end-to-end and then painted. For painting, acrylic varnish or silky-glossy latex is recommended.
Fiber wallpaper
differ in their original design - sawdust is evenly distributed between two sheets of paper (Fig. 4). These wallpapers are environmentally friendly and are marked with a special sign - the environmental “blue angel”, awarded for contribution to environmental protection.
The wallpaper is glued end-to-end to avoid damaging the relief texture, smoothed with a soft brush when gluing, and painted after drying.
Embossed paper wallpaper
consist of several layers of paper obtained from heavy fibrous waste paper
Only the top layer is embossed, and the bottom easily lags behind the paper carpet, so during repairs you can remove the wallpaper from the wall “dry”, leaving the bottom layer on the wall as a backing. When gluing, the glue is applied not to the wallpaper, but to the wall.
Glass wallpaper
- the most common type of office wallpaper. In the process of making such wallpaper, glass threads are drawn out, woven into fibers and processed into fabric with the name: “matting”, “silk”, “wicker”, “herringbone”, etc.
Fiberglass wallpaper has many advantages:
- environmentally friendly, as they consist of natural materials (sand, soda, lime and dolomite);
- do not burn;
- neutral to chemicals;
- strong and durable;
- resistant to microorganisms and insects.
When selecting glass wallpaper, it is necessary to take into account their structure - the thinner the structure, the thinner the paint layer should be.
Non-woven wallpaper
replace glass wallpaper in cases where very high wear resistance and durability are not required. During repairs, they can be easily removed by soaking or steaming, whereas glass wallpaper cannot be removed from the wall. Wallpaper based on canvas - non-woven (cellulose) - looks like fiberglass, but with a finer structure
A layer of foamed cellulose is applied to the canvas, which forms the desired texture. Traditional gluing technology. Painting the wall can be done after gluing the wallpaper and before gluing it. Due to the transparency of the base, the foamed cellulose is shaded by the painted wall.
Liquid wallpaper
have proven themselves as an environmentally friendly material with an attractive appearance. Wallpaper is supplied in powder form, consisting of a composition based on natural cellulose fiber, pigment and CMC binder glue.
The powder is diluted in water and applied to any dry, clean surface. Layer thickness 1…10 mm depending on the quality of the surface. The work is performed in the following order:
- the surface is cleaned of dirt and old wallpaper;
- to avoid the appearance of mold and for better adhesion, it is coated with a primer (water-based paint, zinc white or special compositions with fine quartz chips);
- applied to the wall with a spatula and smoothed to the required thickness with a roller.
The highly mobile mixture can be applied under a pressure of 3...5 atm with a special spray gun. The remaining material can be reused several times by soaking it with water.
Textured finishing is carried out after 5...6 hours by rolling with a relief roller or spraying.
In addition to domestic ones, they use wallpaper based on cotton fibers and natural silk, which gives the surfaces the effect of a fabric covering.
To decorate luxury houses, textile wallpaper is sometimes used, butt-glued. Working with such wallpaper requires highly qualified performers.
When supplying textile wallpaper in rolls 2.8...3.1 m high, the following wall pasting technology is used:
- remove trim and other protruding elements;
- place a roll of fabric in a corner and unwind it horizontally, as if wrapping the room around the perimeter;
- stretch the fabric over the walls, like canvas on a stretcher, securing it along the edges with glue, slats, clips, frames, etc.;
- openings are cut out, trim and corners are hung.
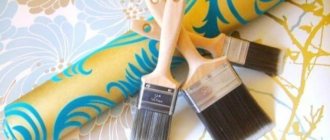
Required tools and materials
In order not to be distracted while searching for tools while working, you should prepare everything in advance. So, for work you will need:
- ladder;
- tray;
- capacity;
- knife cutter and wallpaper scissors;
- narrow metal spatula;
- putty knife;
- plastic spatula / wide rubberized roller;
- small rubberized roller;
- brush;
- roulette;
- pencil;
- level.
The necessary materials are wallpaper and adhesive.
Glue is chosen that is suitable for the type of wallpaper. On the packaging, the manufacturer indicates the consumption of the composition in order to correctly calculate how much solution is needed.
In order not to be distracted while searching for tools while working, you should prepare everything in advance.
Wallpapering the walls
First, you should prepare the adhesive composition for work by stirring it according to the instructions indicated on the package.
Preparing the canvases: measure the height of the wall, add 10 centimeters to the result obtained. The amount will be the length that one stripe should have. The number of stripes is determined by the width of the wall divided by the width of the wallpaper.
It is more convenient to cut strips on the floor; the patterns should also be combined there, but it is covered with film in advance.
It is more convenient to cut strips on the floor; the patterns should also be combined there.
Step-by-step procedure for gluing wallpaper:
- Using a plumb line, draw a vertical line on the wall where the gluing of the strips will begin;
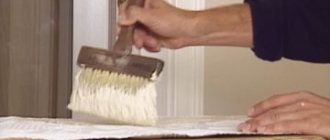
- Apply glue to the strips or the wall with a roller, and use a brush on the corners. The place where the glue is applied is determined by the type of wallpaper (more details about working with different wallpapers will be discussed below);
- rule for spreading strips: spread the first half of the strip, which is then folded without creating folds. Then the second part is coated and also bent towards the middle;
- in this position, the strips lie until they are saturated with the adhesive composition (paper and double-layer paper 5 minutes; dense 7-8; very dense 10; vinyl 8-10 minutes);
- the upper part can be opened and glued to the surface; the drawn line should be a guide. You need to smooth it with a spatula from top to bottom, from the central part to the edges;
- do the same with the second half after disclosure;
- the remains are cut off from both the upper and lower parts with a metal spatula;
- the remaining strips are glued in exactly the same way.
You need to smooth it with a spatula from top to bottom, from the central part to the edges.
Preparing wallpaper
Before you start working with wallpaper, you should make sure that all rolls belong to the same batch, otherwise the wallpaper strips will be of different shades. The floor needs to be covered with plastic film or old newspapers - and you no longer have to worry about a workspace for cutting wallpaper.
Having spread the wallpaper on the floor, you need to measure a length from the first strip equal to the height of the wall with an allowance of 10 cm. Carefully cut the wallpaper using a utility knife or scissors. When cutting the canvas, it is necessary to take into account the step of displacement of the pattern, which is usually indicated in the passport for the wallpaper. It is best to check the information in the passport by combining the pattern and the stripes on the floor, since sometimes the information about the offset step is given erroneously.
When the wallpaper is cut, you need to mark the bottom of each strip on the inside of the wallpaper. This will help simplify your work later. To prevent strips of wallpaper from curling, you should wrap both ends of the cut roll in the opposite direction and leave it like that for a while.
How to wallpaper corners correctly
Before you start gluing the corner parts, you should learn how to properly paste wallpaper on the wall in the corner:
- You should not glue the entire sheet in the corner at once, because then a deviation from the vertical line may occur, and the remaining sheets will also be glued unevenly;
- in corner places, the wallpaper is cut to leave 20-30 millimeters on the adjacent wall. A new strip is glued onto this part overlapping, a cut is made in the middle of the seam with a knife, a metal ruler can help, parts of the strips from above and below are removed, the seam is smoothed with a roller;
- act in the same way on the outer corners.
This instruction gives an affirmative answer to the question: is it possible to glue wallpaper to the walls in the corner.
In corner places, the wallpaper is cut to leave 20-30 millimeters on the adjacent wall.
What equipment will you need to hang wallpaper yourself?
Having figured out what tools are needed for wallpapering, do not forget to prepare a pencil, a measuring tape, a ruler and a triangle for taking measurements and marking the required number of sheets, as well as a plumb line and a cord to align the material along one line. The length of the cord should be equal to the length of the wall plus 1 m. It is convenient to use it for striking a horizontal line along the top of the wall, and also as a plumb line. In this case, you need to hang a small weight at one end of it and beat off vertical lines for even gluing of the panels.
Also, in order to glue wallpaper with your own hands, you will need equipment such as a stepladder, table and chair. A stepladder and a chair can be used for gluing wallpaper, and a table can be used for laying out canvases on it and then applying glue.
The table must be large enough, at least 2.8 m long and at least 0.8 m wide.
Instead of a table, you can use a door leaf, previously removed from its hinges and placed on two stools.
If there is no suitable table, the canvases can be laid out directly on the floor.
It is most convenient to dilute the glue in a bucket, and a drill with a mixer attachment can be used to mix it. However, if you don’t have a drill in your household, an ordinary stick can successfully replace it.
The necessary equipment for wallpapering walls is shown in these photos:
The nuances of pasting walls with different types of wallpaper
Differences in wallpaper materials create the need to follow different technologies, because they have their own nuances in gluing.
Differences in wallpaper materials create the need to adhere to different technologies.
Non-woven
When working with this type you need to consider:
- It is necessary to prepare the walls for gluing non-woven wallpaper, the surface is treated with putty, and it must also be white;
- glue is prepared according to the instructions and smeared onto the surface;
- the non-woven covering does not shrink and the fabric will come apart, but the protruding adhesive solution is wiped with a dry cloth.
The non-woven covering does not shrink and the fabric will come apart.
Vinyl
For such canvases, a special adhesive composition is purchased, they come in different types, and the packaging indicates where it should be applied.
When applying glue to the wall, make a thin layer, and it must saturate the wall for 20 minutes before gluing this synthetic wallpaper.
For such canvases, a special adhesive composition is purchased.
Glass wallpaper
A special glue for glass wallpaper is used. This coating has different back and front sides, so to glue it correctly with the front side, which is rolled inwards, it is better to make marks on the back side.
Adhesives are applied directly to the wall.
This coating has different back and front sides.
Other possible options
Photo wallpapers also have their own specifics; they are thin, so the wall must be carefully prepared. Before gluing, a mark is placed on the surface where the photo wallpaper pattern will be pasted. Carefully verified joining of strips is required. For a non-professional, it is better to choose the regular type rather than the self-adhesive one.
Photo wallpapers also have their own specifics; they are thin, so the wall must be carefully prepared.
The nuances of wallpapering walls on different surfaces
Different surfaces have nuances when covering them with wallpaper; you need to know them in order to get a good result and so that the wallpaper does not fall off in a short time.
Different surfaces have nuances when wallpapering them.
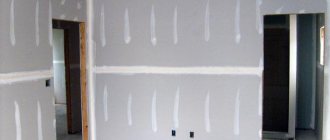
Plasterboard walls
Drywall must be primed before starting work. Otherwise, plasterboard sheets may be visible through the wallpaper, and this will also improve adhesion.
How to glue wallpaper on plasterboard walls, otherwise the scheme of work is similar to the standard steps.
Drywall must be primed before starting work.
Concrete walls
A reasonable question may arise: is it even possible to glue wallpaper to concrete walls? The answer will be yes.
So, how to stick wallpaper on a concrete wall so that it doesn’t come off:
- You can’t glue it directly onto concrete, the surface needs to be prepared, otherwise all the sheets of wallpaper will come off;
- the cheapest way is to glue old newspapers to the base, but it has disadvantages if the room has poor ventilation and over time such a surface will become covered with mold;
- you can use a special product - concrete contact, apply it like any primer;
- use for good adhesion of the substrate;
- puttying the surface, which, like all other methods, will help to obtain good adhesion to the surface.
Puttying the surface, which, just like all other methods, will help to obtain good adhesion to the surface.
Whitewashed walls
Wallpapering a whitewashed surface is only applicable if it is necessary to save time. How to hang wallpaper on whitewashed walls will be described below:
- in places where the calcareous surface is of poor quality, it is washed off;
- corners are cleaned;
- the surface is primed;
- glue is applied to the upper part of the surface and corners;
- the remaining points are performed as standard.
Wallpapering a whitewashed surface is only applicable if it is necessary to save time.
Walls covered with gypsum fiber
Gypsum fiber should also be treated with a primer. It is first necessary to seal the joints with putty to obtain a more even surface. All these actions will help level the surface and improve adhesion.
Gypsum fiber should be treated with the compound.
Gluing and adjusting wallpaper
It is very difficult to find a room with absolutely vertical walls. Therefore, if you glue strips of wallpaper in accordance with the line of the walls, their inclined position will be difficult to avoid. To prevent this from happening, you need to align the first strip of wallpaper along a vertical line. Every few strips you should check that they are positioned correctly, especially when going around corners, so that you can correct the bevel of the wallpaper before the glue dries.
There are several ways to mark a vertical line on a wall.
Marking using a plumb line and a ruler. Having tied a weight to a rope and secured it with a nail or a button to the wall, you need to wait until the weight stops. After this, mark several points along the rope on the wall and use a ruler to connect them into a line.
Marking using a plumb line and chalk. You need to rub the plumb rope with colored chalk and secure the end of the rope to the top of the wall with a button or nail. When the plumb line stops and the rope hangs vertically without changing the position of the plumb line, pull it down slightly so that the rope is taut and press it against the wall, then pull it towards you and release the rope - the rope will leave a colored chalk line on the wall.
Marking with a metal ruler. If the metal ruler has a hole at one end, you need to insert a nail into it and nail it to the wall. After waiting for the ruler to take a vertical position, press it against the wall and draw a line along it with a pencil.
Using a plumb line, you need to draw a vertical line on the wall at a distance from the corner approximately 25 mm less than the width of the panel. To reach the ceiling, you will need a stepladder, chair or table. It is better to clear the approaches to the wall in advance, because the glue dries quickly and it is advisable to work quickly too. The prepared panel must be taken to the wall and the top edge coated with glue should be folded back. Then move the panel slightly upward so that it extends approximately 50 mm along the ceiling to the ceiling, and align the edge with the vertical mark on the wall. In this case, part of the canvas will wrap up and lie on the adjacent wall, covering the corner. Then you need to smooth the wallpaper with a soft cloth or brush in the direction from the center to the edges. Then unfold the lower part coated with glue and smooth it too, carefully aligning the wallpaper folded in the corner. The canvas should extend slightly onto the ceiling and baseboard (Fig. 3).
Having smeared the next cloth, you need to take it to the wall. Fold the top back, press it against the wall and align the pattern with the pattern on the first panel. Then smooth and trim the panel as indicated above. In this way, stick one sheet at a time. Typically, it is convenient for right-handed people to work clockwise, and for left-handed people to work counterclockwise.
Rice. 3. Gluing the first strip along the line.
- Bookmark allowance.
- Line alignment.
- Folded bottom end.
The general technology for wallpapering walls will look like this.
Rice. 4. Trimming the wallpaper at the top edge.
- Allowance on the ceiling.
- Sharp knife.
- Putty knife.
- Stage 1. Carefully coat the canvas with glue, paying special attention to the edges, and let it soak.
- Stage 2. Fold the part of the wallpaper coated with glue, applying glue to glue. This will prevent it from drying out.
- Step 3: Cross cuts can be made using a guide and a utility knife.
- Step 4. Press the plumb line against the wall and mark a vertical line. Pass it along the entire length.
- Stage 5. Carefully unfold the canvas, carefully aligning it along the marked line, and glue it.
- Rice. 8. Trimming the top edge of the strip according to the ceiling level: 1 - allowance on the ceiling; 2 - sharp knife; 3 - spatula
- Step 6. Using a brush or roller, smooth the canvas and remove air from under it.
- Stage 7. Using the back of scissors or a pencil, mark the cutting lines for the wallpaper near the ceiling and baseboard.
- Stage 8. Separate the wallpaper from the wall and cut along the intended line. Place the wallpaper in place and smooth it out. Trim the wallpaper near the baseboard in the same way (Fig. 8).
Removing air bubbles
No matter how carefully you work, air bubbles will still form from time to time. If the bubble is large, located in the middle of the panel and cannot be smoothed out, a simple syringe will help you cope with this problem. You must first puncture the bubble to allow air to escape. Then take a little glue into the syringe and use a needle to pour it under the wallpaper. Now all that remains is to smooth the surface of the canvas.
Pasting corners of rooms
Pasting of internal corners. Wallpapering corners is much more difficult than a flat wall. However, by adhering to a few simple rules, you can get a good result. It should be remembered that two walls forming a corner are rarely strictly vertical.
To adjust the location of the wallpaper, you need to draw a new vertical line right away. The slope of the walls is also the reason that when a strip of wallpaper goes around a corner, folds form on it. Therefore, professional upholsterers prefer to first cut the strip lengthwise into two parts, and then glue each separately: the first - slightly around the corner, and the second - overlapping the first. By cutting the strip in half, you can avoid another problem that will arise if you have to cover the inner corner with a whole piece of wallpaper: if the glue applied to the wall dries quickly, then the part of the strip located in the corner will eventually come off the wall, and any pressure on the it will lead to rupture.
When pasting external corners, these problems do not arise, since during the drying process the wallpaper will cover the wall better. Please note that if the overlap joint is located less than 5 mm from the outer corner, the edge of the wallpaper will likely fray from constant contact with people or furniture. Below is the order of pasting the inner corners from left to right. If you glue wallpaper from right to left, simply change the direction in the described sequence to the opposite.
- Stage 1. Measure the distance from the edge of the last glued strip to the corner at the ceiling and at the baseboard and add 10 mm. Cut the new strip lengthwise, using the larger of the measured distances as the width of the left piece. Glue this piece to the left of the corner and cut it off at the ceiling and baseboard.
- Stage 2. Having glued and cut the left piece of the strip, measure the width of the right piece minus 10 mm. Mark this distance on the wall and draw a vertical line through the marked point.
- Stage 3. Glue the right piece of the strip, guided by the previously drawn line, overlapping the left piece in the corner. Almost always the overlap line will be positioned crookedly, since the angle is not strictly vertical and the slope is large. The slight discrepancy in the pattern caused by this misalignment is hardly noticeable. If vinyl flooring is being glued, the joint must be trimmed twice.
Pasting external corners
Now let’s take a closer look at the technology for gluing external corners.
- Stage 1. Measure the distance from the edge of the glued strip to the corner and add 25 mm. Take these measurements at the ceiling and baseboard. Then cut a new strip lengthwise, taking the larger of the measured distances as the width of the left piece.
- Stage 2. Having pasted the left piece of wallpaper, smooth it to the corner, then cut it: at the top - exactly along the line of the ceiling, and at the bottom - along the edge of the baseboard. After this, the wallpaper will lie on the wall around the corner strictly along the plane. Smooth out the folded piece. Trim the wallpaper from the top and bottom.
- Stage 3. Having pasted and cut the left piece of wallpaper, measure the width of the right one minus 10 mm. Mark this distance on the wall and draw a vertical line through this point.
- Stage 4. Glue the right piece. The procedure for performing this operation is the same as for internal corners (see above). If you are gluing vinyl wallpaper, then you need to trim the joint twice.
If the room has a pipe enclosed in a casing or a protruding stand in the place where the partition was removed, it becomes necessary to cover both the internal and external corners with one strip. It’s better not to do this: even if one corner is vertical, the other, most likely, will not be so. You need to use the same techniques as when gluing wallpaper in the corners of the room. Beveling the edge of the bottom layer of wallpaper makes it less noticeable through the top layer. To do this, you need to cut a piece of wallpaper 25 mm wider than the next part of the wall leading to the first outer corner, and align the pattern in the outer corner. After this, bend 25 mm of the panel onto the adjacent wall and tear it along the edge. Apply the following strips in the same way.
Wallpapering around windows and doors
To some extent, the presence of casement windows in the room influences the choice of wallpaper pattern. Some discrepancy in the pattern near such windows cannot be avoided, so the best way to make it invisible is to use wallpaper with a fine pattern.
When applying wallpaper around doors and windows that have a frame made of baguette, you should fold the wallpaper and release it around the corners of the frame before you begin to smooth it onto the wall. Windows with casements that are not decorated with relief are much easier to paste over; it is enough to cover all four edges of the frame with wallpaper and stick them on the inner sides, overlapping them. With vinyl wallpaper, which cannot be glued overlapping, such an operation is much more difficult to carry out. Each overlap seam must be trimmed twice. To prevent the edges of the wallpaper from rubbing, the joints should not be placed at the edge of the window opening.
Pasting wallpaper in hard-to-reach places
General recommendations. In addition to doors and windows, in each room there are other difficult places to wallpaper - switches, sockets, mantels, end posts of staircase railings, as well as arches of niches and passages between rooms. It is inconvenient to paste wallpaper in such places, but there is an appropriate solution for each case. The main problem is that the glue dries in the time it takes to trim and adjust the wallpaper. Solving this problem is quite simple - you just need to have some glue and a small brush on hand.
Before you start gluing the walls, you need to remove as many “obstacles” as possible from them. Shelves, display cases, etc. are usually secured with screws driven into plugs inserted into holes in the walls. If the room has wall lights, turn off the power at the distribution panel or fuse box, remove the lights from the wall, and disconnect the power wires. Before turning on the power, you need to insulate the exposed ends of the wires with insulating tape. Always turn off the power when working near switches, outlets, or lights.
If you need to paste wallpaper on the wall behind the radiator, you just need to push about 150 mm of wallpaper past the top edge of the radiator, and then fold it in from the sides as deeply as possible. The ideal tool for rolling wallpaper onto a wall is a narrow paint roller for painting the walls behind the radiator. If there is a visible gap between the radiator and the baseboard, you need to stick wallpaper there too.
Wallpapering arches
In this case, additional difficulties are associated with combining the pattern. It is impossible to accurately match patterns on flat and curved surfaces. The best solution is either to use wallpaper without a pattern or with a random pattern, or to cover a curved surface with plain wallpaper that is in harmony with the wallpaper on the walls.
First you need to cover the walls on both sides of the opening. Then cut the panel so that 25 mm of wallpaper can be folded inside the arch. Make small V-shaped cuts on the folded part and press the tabs to the surface. Then cut out two panels of wallpaper 3 mm wide less than the thickness of the arch. Glue them inside the arch from bottom to top so that they overlap on the roof of the arch. The pattern on two vertical sections can be combined. At the top point of the arch, make a cut through the overlap and remove the trim.
Taping the wall around the faceplate
To apply wallpaper in this place, you need to turn off the power and loosen the screws securing the front cover of the switch or socket to the body. Then paste the wallpaper over the trim and press it against the trim to mark the corners. Using scissors, cut through the wallpaper in the center of the overlay. Next, you need to make cuts in the direction of each of the corners of the lining, forming four triangular flaps. Trim the valves to approximately 6mm. In such cases it is easier to work with small scissors. After this, the valves are tucked under the front cover and the wallpaper is smoothed with a brush, pressing it against the wall. Then tighten the screws, pressing the valves with a pad. After pasting the wallpaper, all switches and sockets can be turned on again.
Wallpapering around non-removable objects
To apply wallpaper around permanent objects, such as a mantel or banister end post, you must first apply a strip of wallpaper over the object and cut it roughly to the desired shape. In difficult corners, such as the top corner of a mantelpiece, or corners formed by small radius curves, use small scissors to make a series of small cuts along the edge of the wallpaper to allow the wallpaper to straighten along the wall. Then the resulting tabs are trimmed to 6 mm and all the panels are glued around the object. Now you can cut off all the 6mm panels using a sharp vinyl wallpaper knife and small paper wallpaper scissors. As you work, do not forget to wipe off any remaining glue. We must remember that it is much more difficult to remove dried glue.
Options for combining two types of wallpaper for walls
Using two types of wallpaper will help adjust the layout of the room. More often, such decoration is used in the hall.
To visually lengthen the room, you can paste striped wallpaper on one wall, and plain wallpaper on the other, or with a pattern that barely stands out.
The classic version of vertical design involves the arrangement of stripes at a certain interval; it is possible to change the width and spacing of the stripes on different walls; the stripes can have different patterns and colors. But the wallpaper itself must be made of the same material.
You can also zone rooms using double wallpaper. Different textures and colors of wallpaper will highlight individual areas of the room. This technique is often used in studios, separating the kitchen from the living room half, then the construction of partitions is not required.
Also, with the help of moldings and wallpaper, so-called panels are created. The molding serves as a frame, and the wallpaper fills its contents.
Using two types of wallpaper will help adjust the layout of the room.
Wallpaper makes it possible to realize various design ideas. You can glue them with high quality with your own hands. There is nothing complicated here. You just need to take into account the type of wallpaper and surface.
Final stage
The following recommendations will allow you to achieve the best quality of the pasted surface:
- Any type of wallpaper is always glued with the windows and doors closed. In this case, the room temperature must be at least 18C. And the relative humidity of room air should not exceed 70%. By the way, walls also have some limitations in this regard. They must be dry.
- When gluing paper-based wallpaper, apply glue to the area of the wall or ceiling being pasted; Apply the glue to the strip of wallpaper and let it soak in a little - 5 minutes is enough. When pasting wallpaper on a non-woven basis, apply glue to the area of the wall or ceiling being pasted; the wallpaper is applied to the wall in dry form.
- The first strip should be glued vertically using a plumb line, laser or level. It is better to leave a small margin of length at the bottom and top in order to even out small deviations in height if necessary.
- Glue the next strip end-to-end, carefully aligning all the elements of the pattern. Then the wallpaper should be smoothed with light vertical movements up and down using a soft brush, roller or plastic spatula. Do not stretch the fabric while gluing. We recommend using a seam roller to secure the joints. Excess glue should be carefully removed with a damp sponge.
The pasted wallpaper should dry at room temperature for two to three days, depending on the type of wallpaper. Drafts and heat from heating devices can lead to deformation of the seams.