Pasting ceiling wallpaper is one of the most difficult stages of renovation in any room. This will require special preparation, effort and material. After all, ordinary wallpaper for the ceiling will not work.
They will simply peel off. But the process of applying ceiling wallpaper itself has many features that need to be examined in more detail. Read all the details in our article today.
When should you not glue ceiling wallpaper?
It is better to refrain from this operation if you live in an old house. After all, in Soviet times, ceilings were made of slabs; accordingly, every one and a half meters the surface will have a joint that cannot be covered.
In addition, the slabs often lie at different angles and have unequal heights. This can only be seen after removing the previous coating. If this situation is familiar to you, it will be much safer and more thoughtful to install suspended ceilings that will effectively hide these shortcomings.
Also, do not use wallpaper on the ceiling in the kitchen and bathroom. After all, in these rooms, hot steam rises, and due to humidity, the material begins to peel off.
Thus, the wallpaper on the ceiling in these rooms will not last long. They will likely come off after a few weeks of use. Maximum - in a month.
Preparing the base
The ceiling can be concrete, plasterboard, you can also glue wallpaper onto chipboard and plywood. Before starting the final finishing, the base should be prepared. To do this, it is cleaned, leveled, and cracks and other defects are sealed. All previous coating must be completely removed. After completing this work, the base is primed.
With proper preparation, wallpaper can be glued even to difficult surfaces:
- on a ceiling insulated with penoplex or polystyrene foam;
- old PVC panels that you don’t want to remove because of defects in the rough ceiling that will have to be fixed;
- a surface painted with oil paint, which is very difficult to remove and from which the wallpaper may come off.
USEFUL INFORMATION: Choosing fiberglass wallpaper for painting
In the three above cases, fiberglass is attached to the ceiling. How and with what to glue it to different coatings, read here. After installing the fiberglass, the surface is primed and puttied.
The stages of preparing a concrete base are described in detail here.
Read this article about treating drywall before wallpapering.
What wallpaper is suitable for the ceiling?
You should not take wide rolls, because working with them is not easy. There is no need to try to look for ceiling wallpaper from foreign manufacturers. Basically, only domestic ones produce them.
It is not recommended to purchase wallpaper in too bright colors. They look out of place in any design. The best option is considered to be white or any approximate pastel colors, depending on the design idea of a particular room or apartment as a whole.
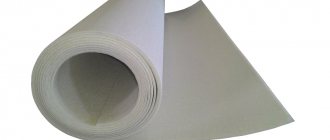
You should also not choose wallpaper that is too thick. After all, they are very heavy for the ceiling. Only specialized materials designed specifically for this surface are needed.
In small rooms, you should refrain from wallpapering with large patterns. After all, this will visually reduce the space. If you choose the right ceiling wallpaper, this, on the contrary, will create a feeling of comfort and expand the room.
What material should I use?
There are special products produced by domestic manufacturers. These finishing materials are presented only in white, but with a variety of reliefs on the front surface. Such wallpaper cannot be painted or washed, which is its disadvantage: over time, dust settles on the canvases and they acquire a yellowish-gray tint.
To decorate the ceiling, dense products intended for gluing walls are also used:
- non-woven fabrics - non-woven fabrics made of cellulose fibers, with a smooth or embossed surface, of various colors;
- vinyl - wallpaper consisting of two layers: a base (non-woven or paper) and a polyvinyl chloride film with patterns, reliefs or a plain coating applied to it;
- liquid wallpaper - are natural materials in powder form: cellulose and cotton fibers, mica, various dyes.
Finishing with such materials does not require careful preparation of the base: thanks to the dense structure of the canvases, minor defects in the ceiling will be perfectly masked. In addition, these types of wallpaper can be washed and used for painting if necessary.
What difficulties arise when gluing on the ceiling?
Do not forget that the wallpaper on the ceiling will always be illuminated, and if necessary, you will not be able to mask the imperfections with a piece of furniture or, for example, a painting. Here every nuance will be noticeable immediately.
You need to remember that the ceiling is the warmest place in the room. Consequently, the glue will dry there much faster. This gives extremely limited time to correct any errors while working with the material.
You should also not forget that you will not be able to avoid seams on the wallpaper. Therefore, it is necessary to come up with a way to disguise the seam joints or make them as inconspicuous as possible.
Is it possible to carry out such finishing?
Help
High-quality, stylish wallpaper will look more elegant on the surface than cheap foam tiles. Whitewash, oil-based or water-based paint tends to crack and crumble over time. Wallpaper pasted onto a prepared base is not subject to such changes and the ceiling will look new for a long time.
Read about all types of ceiling whitewash, including water-based paint.
Finishing with decorative canvases has other advantages:
- low cost;
- possibility of use for the design of multi-level structures;
- wallpaper with a dense base improves the heat and sound insulation of the room;
- decorative material does not “take away” the height of the room, which is important for owners of apartments with low ceilings.
Disadvantages of this type of finishing:
- short service life (on average 4-6 years);
- color fading due to exposure to sunlight;
- It is undesirable to use it in rooms with high humidity.
Compared to suspended ceilings or plasterboard structures, even a beginner can handle wallpapering: the process does not require special knowledge or professional equipment. Find out how to make a suspended or plasterboard ceiling.
Types of wallpaper
There are several types that differ in their purpose and appearance. Among them:
- Paper wallpaper. This is the cheapest category. However, the price here justifies the quality. Paper wallpaper will not last long, so you will soon have to make repeated repairs.
- Non-woven. They are considered ceiling wallpaper and are ideal for painting. Thus, they can act as an independent material. They are moisture resistant, which is a big plus.
- Vinyl wallpapers. They can not lose their original color for a long time, allow wet cleaning, and are also unpretentious in use. This type can imitate a variety of surface structures.
- Fiberglass. They are not subject to mold infection, are also abrasion resistant and non-flammable.
- Liquid wallpaper. This is an alternative to plaster. They are evenly applied to the entire ceiling surface with a spatula.
Advantages and disadvantages
Like all finishing materials, ceiling wallpaper has its own characteristics, as well as advantages and disadvantages.
| pros | Minuses |
| Huge selection of textures, designs and patterns. | Short-lived. |
| Dense structure, fabric sheets have high noise insulation. | Some species cannot withstand humidity, are afraid of sunlight, and accumulate dust. |
| They don't hide the height. And they are suitable for decorating two-level ceilings. | They do not hide ceiling unevenness; they are glued only to a perfectly level surface. |
| Gluing is not difficult. |
Is it possible to glue ceiling wallpaper onto previous wallpaper?
This question falls into the “possible, but not necessary” category. Ceiling wallpaper can be applied to the previous ones. However, this is mostly a waste of time.
The fact is that new wallpaper must be attached to something, and most often glue is used for this purpose.
However, it is absorbed into the previous layer, leaving marks on it. Also, in order for the glue to harden, oxygen is needed. Because of this, bubbles appear on the coating, or the surface completely comes off in some places.
This is explained by the fact that the number of layers causes too much stress due to the massiveness. Consequently, the wallpaper turns out to be too heavy for the ceiling and begins to peel off.
The situation can be made worse if you try to paint the resulting composition. The color of the wallpaper will mix with the shade of the paint. Both layers will become saturated with moisture, and, most likely, the entire structure will fall down.
However, this is only the best case scenario. In the worst case, you will have to tear them off layer by layer for a long time and intensively. This is not a pleasant task and requires a lot of patience.
Additional preparation steps
First of all, you need to make sure that there are no several layers of whitewash on the ceiling. If they exist, it is advisable to get rid of them. After all, it is unknown how they might behave under glue or under wallpaper in general.
Also, we must not forget that to cover the ceiling it will be necessary to turn off the electricity. Accordingly, it is best to start wallpapering in the morning in order to have time to complete all the work before dark.
How to properly glue ceiling wallpaper?
When performing this operation, you need to remember that it requires specialized glue, preferably of high quality. There is no need to save on it. It is on this composition that the entire success of the work done will depend.
Slicing
How to deal with the problem of visible seams? Before gluing ceiling wallpaper, you need to cut the material.
It all depends on the number of windows in the room and their placement. How to glue wallpaper to the ceiling? Ceiling wallpaper should always be applied towards the window.
If there is more than one window in one room, it is recommended to cut the material along the length of the walls. This will help avoid a large number of seams and joints. In the process of cutting wallpaper for the ceiling, the elements do not have to strictly correspond to the measurements.
Make them a little longer. A margin of three centimeters on each side will be enough so that the wallpaper slightly extends onto the wall. If this size becomes too much, it can be cut off at any time.
If you choose wallpaper with a pattern, you must first measure the length of the first strip, and cut all subsequent strips strictly in the same place. This way you can achieve a successful match of pattern or texture. An excellent practice when gluing is not only to apply glue to the wallpaper, but also to treat the ceiling with it.
Preparatory work
All furniture must be removed from the room during renovation. If this is not possible, then move it to one corner and cover it with polyethylene.
You also need to think about a reliable stand with which you can reach the ceiling.
First of all, we prepare the wallpaper, glue and tools - a wide brush for applying glue, a roller for processing seams, a wallpaper brush and scissors.
We clean the ceiling surface from old decorative materials:
- dye,
- wallpaper,
- whitewashing, etc.
How to properly apply wallpaper with glue?
To do this, you will need to turn the piece of material over so that the front side is down. The strip must be located on a flat and clean surface.
Next, you need to dip the brush in the glue and carefully walk it over the entire surface of the material. If you decide to treat the ceiling with glue, you must cover it strictly with an area equal to one strip of wallpaper.
Stages of gluing the first strip:
- Mixing glue. The composition should be made as thick as possible, depending on the length of the wallpaper. While it swells, move on to the next step.
- It is necessary to mark the middle of the ceiling from two different parts of the room. To do this, you can use a coated cord; you will need to pull it back and click it on the ceiling. This will create a straight line that can be used later.
- The light from the window should go along the joints, if you were in doubt about how to glue ceiling wallpaper correctly. In this case, the defects will be less noticeable. As mentioned earlier, wallpaper should be glued along the length of the room in the direction of the windows.
- In the process of wallpapering, simply turning off the electricity with a switch is not enough. It must be turned off on the control panel or the plugs must be unscrewed. This is the only way you can be sure that the wiring will not short out and you will be safe.
- To find out how to apply ceiling wallpaper, or more precisely, how to apply the first strip, just use the instructions from the manufacturer. Do not forget that instructions differ depending on the type of material and manufacturer. General advice can only lead to wasted canvas.
How to calculate the number of rolls
You need to know the width and length of the roll, room parameters, including height, width and length. First, the width of the room is divided by the width of the wallpaper. The required number of canvases is obtained. Then the length of the roll is divided by the length of the room, finding out the number of paintings from one roll. The first value obtained is divided by the second. This gives you the number of rolls needed. The value is rounded up if it is not a whole number.
When making calculations, it is necessary to take into account possible niches and protrusions, the area of windows and doors. If there are drawings on the canvas, then the number of rolls must be increased so that the joint of the drawing between the sheets is correct and matches.
When making calculations, it is necessary to take into account possible niches and protrusions, the area of windows and doors.
Subsequent stages of wallpapering
For efficient work, it is best if at least 2 people work on the gluing. In this case, one can stand on a stepladder under the ceiling, and the other can hand him wallpaper sheets, holding them as high as possible to the ceiling for convenience. This will significantly speed up and facilitate the work process.
We must not forget about the stock on each side of the wallpaper. Three centimeters will be enough, but you can take up to five. If the canvas is too long, it must be cut.
To avoid negligence and stick the ceiling wallpaper as in the photo, you need to use a spatula to carefully remove excess. Scissors or even a sharp knife are not suitable for these purposes. After all, they can leave torn edges.
To organize a continuous gluing process, it would be nice to also have a third partner who could prepare the next piece of canvas. The process must be done as quickly as possible, because then the wallpaper will dry evenly and there will be no unnecessary difficulties.
If, when joining a piece of ceiling wallpaper, small air bubbles begin to form, you must immediately smooth them out with a spatula.
Such an error cannot be corrected later. This procedure must be repeated with each piece of wallpaper. All subsequent (after the first) strips must be glued end-to-end.
As for how to properly glue ceiling wallpaper so that the seams are not visible, you need to slowly pull one strip to the other with your hands. This is done in such a way that ultimately these strips come into contact with each other.
Advice
It should be remembered that all excess glue must be removed immediately.
White rags are better suited for these purposes. It is advisable to stock up on a large number of them. It is important that the rags are dry and clean.
Then it will not be imprinted on the new ceiling wallpaper and will help to carefully remove the remnants of the previously applied glue. The strips that are glued last or applied along the edges of the room must be trimmed further from below. This way you can save both effort and time spent on installation.
Combination options
They provide the opportunity to implement the most daring ideas, creating an unsurpassed design.
Wallpaper and ceiling tiles
The tile can imitate matting, mother of pearl or wood. By combining it with different options for ceiling wallpaper, you can get a rather interesting and original solution.
Two colors
This is an extraordinary solution that will definitely become one of the distinctive characteristics of the room. An interesting combination would be the following colors: purple and beige, white and black, blue and metallic, lilac and pink.
General conclusions
There are an infinite number of ways to glue ceiling wallpaper.
However, the above tips are the most effective and common. They will help even a beginner cope with this difficult task. True, to simplify the work, you will still need the help of one or two friends.
- Date: 02-05-2015
- Rating: 26
A beautifully finished ceiling can create a unique atmosphere in a room. Good results can be achieved using wallpaper.
They will help add coziness to the room, delimit the space into zones and even hide some defects. Working with wallpaper is not difficult, and you can do everything yourself. The main thing is, before gluing wallpaper on the ceiling, prepare everything you need and understand some of the nuances.
Without a well-prepared base, it is impossible to produce high-quality wallpaper.
The diverse world of wallpapers
The modern construction market offers a large selection of different wallpapers: vinyl, paper, non-woven, photo wallpaper, paintable material and other types. When choosing a material, you should be guided not only by your preferences, but also by the interior of the room. Wallpaper should fit harmoniously into the overall picture of the decoration.
It is better to choose special wallpaper for the ceiling.
They differ in that they have two dense layers with embossing applied on top, but at the same time they are lighter than wall coverings. Thanks to the relief surface, they can be used to hide small irregularities and defects on the base. Based on their composition, wallpaper for the ceiling can be divided into paper, non-woven, glass wallpaper and liquid, which fundamentally differ in the technology of application to the surface.
Types of wallpaper for the ceiling.
Recently, paintable wallpaper has become popular. A special water-dispersion paint is used for them. The surface can be painted in one color or applied with a selected pattern.
Glue selection
The criterion when purchasing a product is the weight and density of the wallpaper, the type of base. There are universal products, but experts still recommend choosing formulations designed for a specific material.
The glue is sold in the form of a dry or ready-made mixture (most often produced for glass fabrics). When wallpapering wet rooms, you need to pay attention to ensure that the composition includes bactericidal additives and moisture-resistant components. Such products prevent the formation of mold and mildew.
Table 1. Types of wallpaper and suitable glue
| Material | Brand |
| Nonwoven | Bostik Quelid special interlining, Kleo Ultra, Moment Interlining |
| Paper based | Quelyd Express, Moment wallpaper classic |
| Vinyl | Methylane Vinyl Premium with indicator, Moment Vinyl |
| Heavy, textured, embossed, hot stamped vinyl | Moment Extra |
| Vinyl, textile, paper | Quelyd special moisture-resistant vinyl with fungicidal properties, Kleo Total, Methylane universal premium, Econ universal, |
| Glass wallpaper | Quelyd glass wallpaper, Oskar for glass wallpaper, |
| Textile | Quelyd Murale |
Dry glue is prepared as follows:
- Pour water into a clean bucket and stir to form a funnel - this technique prevents the powder from clumping.
- Gradually add the dry mixture from the pack.
- Stir the solution with a long stick until it reaches a uniform consistency.
- Leave the mixture for 15 minutes to thicken.
This method is suitable for most products. But the exact recipe is indicated on the packaging.
It's worth purchasing seam glue. The brands listed above have this product, and it is suitable for any roll wallpaper.
Return to contents
Before you hang wallpaper, you need to find out how much of it will be needed. To do this, the surface area is measured. When calculating the number of stripes, do not forget about the reserve.
The strip should be 2-3 cm longer on each side and extend onto the walls when gluing. After finishing the work, everything unnecessary can be removed. Remembering that the rolls are 10.5 m long, it is easy to figure out how many will be needed.
The ceiling primer ensures better adhesion of the base to the glue.
The final result depends on how well the preparation was carried out. In order for the room to please you with its appearance in the future, before gluing wallpaper on the ceiling, you need to carefully prepare the surface.
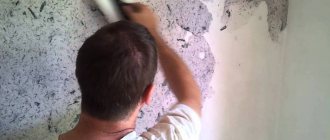
All old coverings must be removed from the ceiling.
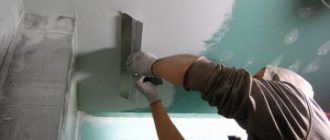
If you plan to stick wallpaper on a plastered ceiling, then the plaster must be removed and the surface primed. All cracks and chips must be filled. Particular attention should be paid to the joints of ceiling tiles.
It is best to use a deep penetration acrylic primer. Apply it in several layers.
Each new layer is applied only after the previous one has dried. Then the surface is treated with sandpaper. This is done to ensure that the surface is even and smooth.
If possible, furniture and household appliances should be removed from the room so that nothing interferes with work. It is better to close the windows in the room, avoiding drafts.
If the apartment is located on the sunny side, you will have to curtain the windows. The sun's rays that fall on the wallpaper will not allow it to dry evenly. It is also very important that the air in the room is not too dry.
Otherwise, the wallpaper will begin to peel off. Moisturizing it is quite simple. It is enough to place several containers of water in the room.
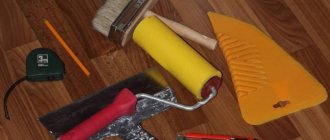
Before you stick wallpaper on the ceiling, you need to prepare your tools. To work you will need:
The control line is only necessary for gluing the first strip of wallpaper.
- knife;
- roulette;
- Ruler and pencil;
- brush;
- glue and container for diluting it;
- paper masking tape for seams;
- rags.
And one more very important thing, without which it will simply be impossible to do anything - this is flooring.
In a small room, an ordinary table can play this role. But for a larger room you will need 2 stepladders and wide thick boards. The boards are laid between stepladders, and you can move freely on them and glue wallpaper.
As for glue, it is better to use a special composition. It consists of strong binders that set quickly and the drying process takes less time.
Return to contents
Wallpapering the ceiling: step-by-step instructions
Before you stick wallpaper on the ceiling, you need to ensure your safety. To do this, you need to remove the chandelier and turn off the power supply to the panel.
The next step is marking the ceiling.
Thanks to this technique, pasting will be easier and the stripes will lie evenly. To do this you will need a cord with two weights at the ends and chalk. The marking can be applied either in the center of the ceiling or at the site of the first stripe.
The direction of the stripes depends on whether there is a window in the room.
If there is, then the strips are glued perpendicular to it, in the absence of a window - along the length of the ceiling. You should start from the corner opposite the entrance. So, the seams between the panels will be less noticeable.
The required number of strips should be cut in advance so as not to be distracted during the work.
You also need to prepare the adhesive composition in advance. Then the prepared strip is laid face down on a flat surface, and glue is applied to it using a brush. Particular attention is paid to the edges.
The technology for gluing the ceiling is no different from similar work on the walls.
A better result can be achieved if you work together with an assistant.
When working with paper wallpaper, glue is first applied to the panel. Working with non-woven fabrics does not require applying glue to the product. Only the ceiling is covered with the adhesive, which is made 10-15% thicker than specified in the instructions.
Elimination of defects when gluing wallpaper.
The canvas is folded like an accordion so that the front side remains inside all the time and does not get dirty. Along the marking line on the ceiling, a paper masking strip is glued under the seam.
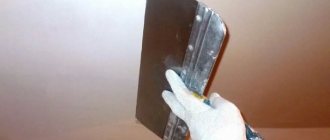
The wallpaper is applied to the ceiling, following the markings. Using a plastic spatula or a regular rag, the canvas is leveled and the air chambers are accelerated. You should go over the canvas several times in one direction and the other, especially along the edge, so as not to leave a single flaw.
After this, you can begin gluing the next strip. It is applied to the edge first and is also carefully aligned.
After all the air chambers have been removed, it is necessary to “tighten” the seam between the strips. The edges should fit snugly together, but not overlap one another. For greater reliability and sealing of the seam, it should be rolled with a rubber roller.
During the work process, you should constantly monitor the result. Each strip should be carefully inspected, and if any imperfections are noticed, they should be removed before the glue is completely dry.
List of required tools
Regardless of the type of wallpaper chosen for gluing, you will need:
- Stepladder, rack.
- Container for adhesive solution.
- Brush, roller for distributing glue.
- Tape measure for necessary measurements.
- A rag, a piece of fabric.
- A stationery or ordinary sharp knife.
- Scissors.
- Pencil, marker for marking.
- A plastic spatula or roller needed to smooth out wallpaper.
The specified arsenal is quite enough for gluing the panels yourself.
Return to contents
If there is a pattern or embossing on the wallpaper, you should carefully monitor its consistency. To ensure that the pattern is accurately joined, only the first strip is cut to size. All subsequent ones are applied to it, precisely aligning the image, and only after that the cut location is outlined.
Separately, it should be said how to glue wallpaper in the place where the chandelier hung. A small hole is made in the panel in the appropriate place.
The edges are then cut in a circle to form “petals”. They should be bent to the sides and threaded through the hole in the wires from the chandelier. If everything is done correctly, when the chandelier is in place, the insulating cup on top will cover the hole.
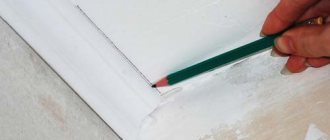
If there is a need to paste wallpaper in a corner, then the material is carefully pressed in by hand and the corresponding mark is applied with a pencil. Then the excess fragment is carefully cut out. You need to do everything quickly so that the glue does not dry out.
If the work results in uneven edges, they can be easily trimmed.
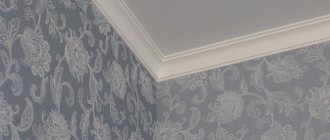
To do this, you need to apply a wide metal spatula and cut the edge along it with a sharp knife. A special ceiling plinth will help hide uneven edges. You can purchase a cornice of any shape and configuration that will fit perfectly into the interior.
Difficult places
Wallpapering the ceiling is also inconvenient because sometimes you need to carefully work around obstacles - risers, lamps, baseboards.
Around heating pipes
This area should be covered like this:
- Use a pencil to mark a dot on the wallpaper where the pipe begins.
- From the near edge, the canvas is cut to this point.
- Make a hole slightly smaller than the diameter of the pipe.
- Carefully tape the riser and carefully remove the excess with a knife.
Around chandeliers and lamps
Before wallpapering, the lighting is turned off. The devices are dismantled, the contacts are insulated and immersed in the ceiling. The strip is pasted as usual. Then they find a recess and make a slot, cut the wallpaper crosswise within the hole and go around the corners. Excess parts of the material are cut off so that the ceiling cup of the lamp completely covers the hole. The edges are pressed with a spatula.
Near the baseboards
Use a wide metal spatula to push the wallpaper as far as possible into the corner between the ceiling and the baseboard. You need to work with paper material very carefully so as not to tear it. Next, apply a spatula to the corner and make a cut along the blade with a mounting knife along the baguette. Remove any leaked glue with a dry, clean rag. Then the edges are carefully smoothed.
On the corners
When gluing a ceiling, one of the most difficult places is the corners between adjacent walls. These areas are covered as follows:
- place the canvas on a vertical surface;
- mark the place where the joint should converge;
- make a cut perpendicular to the sheet along the mark.
Another problem area is the beams. First, paste over the front part. Then the fabric is stretched and brought onto the lower plane, carefully pressing it against the beam with a spatula. The material cannot be cut at the corner.
Content
1.
In this article we will tell you how to glue wallpaper on the ceiling with your own hands. Wallpaper on the ceiling is a solution that allows you to solve several problems at once, with minimal effort. The fact is that from the point of view of process technology, wallpapering the ceiling, although associated with some features due to the horizontal arrangement of the canvas,
in general, it differs little from wallpapering walls. This means that this is one of the least expensive types of work on finishing the ceiling covering.
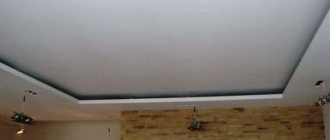
With the right choice of material, wallpaper on the ceiling can create very interesting optical effects.
Using wallpaper on the ceiling is one of the simple design techniques that allows you to visually divide a room into zones. This is especially true, for example, for studios or one-room apartments. Due to its location, ceiling wallpaper is more susceptible to gravity, which means that the risk of it falling off is slightly higher.
This only means that you need to take a more careful approach to the issue of preparation, and actually wallpapering.
Color spectrum
Thanks to a colored ceiling, you can transform the space, enlarge it, reduce it, or give the room a complete appearance.
White
The color of perfect purity, lightness and openness. It looks organic and is an excellent style solution for any interior. Suitable for those who prefer traditional design options and do not accept sudden changes.
Gray
For some, this color is too boring. Others, on the contrary, value it for its noble pearly glow. This design is more likely to suit calmer and dreamier natures.
The photo shows a living room and a ceiling with patterned gray wallpaper.
Beige
Increases space and does not stand out from the overall appearance of the room. To prevent the interior from looking boring, you can add moldings to the ceiling and walls.
Blue
Creates a feeling of coolness, encourages relaxation and is associated with the endless ocean. Fits perfectly into an interior in a modern, rococo, modern or baroque style.
Blue
A classic choice for decorating the ceiling. Reminiscent of the sky and evokes a feeling of freedom, calm and tranquility.
The photo shows a children's room with blue ceiling wallpaper.
Red
Fire and passion. With proper and bright lighting it creates a feeling of chic and luxury. Light furniture in bed colors will add even more shine to the room.
Yellow
Reminiscent of the sun and summer, creates an atmosphere of happiness and carelessness, and gives the room an original look. The yellow ceiling easily matches furniture and accessories in both modern and classic styles.
Green
Promotes relaxation, so it will be especially appropriate in rooms intended for relaxation.
Brown
Ideal for decorating cozy rooms, creating an even more relaxing environment. This color is relevant for the bathroom.
Orange
Transforms the room and favorably emphasizes its expressiveness, filling the room with warmth and optimism.