More recently, a new type of finishing coating, fiberglass, has appeared. It ranked high in the sales rankings. The increased demand is due to the ability to quickly and efficiently get rid of visual unevenness and defects in walls (ceilings). The material itself is environmentally friendly and safe for humans. However, it is not a decorative coating, but only serves as reinforcement. Therefore, after final fixation, painting of the fiberglass is necessary.
Tool
In order to achieve a good result, it is important not only to choose the right coating material, but also to choose the right working tool. Depending on the depth of the pattern on the pasted wallpaper, it is necessary to use rollers with different pile lengths
In addition, other dyeing equipment may be required. The list of basic working equipment for painting ceilings looks like this:
- Rollers of different sizes and with different lengths of pile (depending on the depth of the pattern on the wallpaper).
- Brushes of different widths. They are useful when painting hard-to-reach areas and stripes along walls or corners.
- Paint sprayer. This is a difficult tool to use and should only be used when you are confident in your abilities and have some experience in handling such a device. If you have no experience, it is better to prefer a roller.
Material Specifications
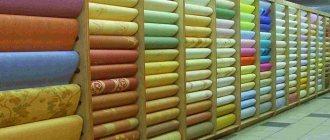
To get excellent results, you should purchase only high quality material. It must have optimal density. It ranges from 25-50 g/sq.m. m. For walls, it is better to buy material with a density of 45-55 g/sq. m. Such a canvas will ideally cover all uneven areas and cracking areas. Usually the material is sold in rolls of 50 m, a meter wide, but there are rolls of shorter length.
For the ceiling, use thinner fiberglass - 25-40 g/sq.m. m. You can glue it to a plasterboard ceiling or walls at a temperature of +10...+25 degrees, but usually this happens at room temperature. Permissible air humidity is up to 60%. When purchasing, you should immediately purchase additional consumables for gluing fiberglass:
- special glue;
- putty knife;
- construction knife.
Options for decorating a web
Fiberglass can be painted or “mirrored”. Let's look at both finishing methods.
Coloring
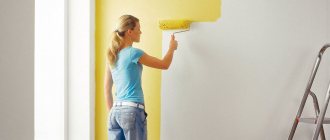
For work inside a living space, interior paint compositions are better suited: acrylic, water-based. Such mixtures do not have a strong odor, dry quickly and do not hide the aesthetics of the web structure. How to do:
- Buy a roller with medium pile, this will make applying the paint more convenient.
- When touching the fiberglass, the roller should not be dry; it should first be soaked in paint.
- To ensure an even coloring, it is better to roller first vertically, then horizontally.
- As soon as the first coat of finish has dried, apply a second coat and the painting is complete.
Usually two layers of paint are enough to get a durable, aesthetic ceiling surface, but it all depends on the owner’s preferences. The main thing is not to overdo it; too thick a layer of paint will cover the cobwebs and make the finishing lining heavier.
Mirror surface effect
The finishing option looks very impressive, but you will have to additionally finish the fiberglass for putty when repairing the ceiling. Stages of work:
- Surface puttying is applied to the web after the adhesive mixture has dried. Dilute the putty thinner than usual to ensure even laying of the layer.
- Putty with a spatula or a thick brush, applying the composition evenly, coating the corners.
- Once the putty has dried, sand the area with coarse sandpaper. Sand carefully so as not to remove the excess layer, from under which the cobweb texture appears.
All that remains is to prime the ceiling and the repair is complete. The surface acquires the smoothness of a mirror and looks incredibly aesthetically pleasing.
If you are going to glue canvas onto a plasterboard floor, the described technology of work is taken as a basis. The nuances lie in preparing the base before gluing the fiberglass. Leveling the surface with putty includes sealing tile seams and holes from self-tapping screws. Then an adhesive layer is applied over the entire surface of the ceiling - this will replace the primer and prevent the last adhesive layer from being absorbed. As soon as the layer dries, you can glue the fiberglass. The work will take time, the consumption of the adhesive mixture will increase, but the result will be a durable reinforced surface, and the gypsum board sheets will not crack or deform. The final cladding can also be either painting or mirror polishing.
The price of the work directly depends on the choice of materials: the thicker the fiberglass, the higher the cost of the product. The cost of the cladding technology is paid off by the long service life of the coating. In addition, such a ceiling can be repainted as many times as you like, which means you can always refresh the interior with new shades.
It is necessary to distinguish between fiberglass and glass wallpaper. Painting web with fiberglass wallpaper has common roots and characteristics, but there are significant differences in the method of production:
- wallpaper is a woven material with a textured structure, gossamer is a product with a smooth structure;
- painting fiber can be painted countless times, wallpaper - no more than 25;
- cobweb – intermediate reinforcing layer, wallpaper – finishing cladding;
- canvas density up to 65 g/m2, wallpaper up to 225 g/m2.
In addition, there is a difference in cost: a cobweb for a ceiling for painting has a price 2-3 times lower than wallpaper, and this is an essential fact for budget repairs.
Painting without putty
Many people are interested in whether it is necessary to putty fiberglass before painting it? Indeed, there is a technology for painting materials without putty. Painting work is done immediately after the surface has completely dried from the glue. No preparation of the base will be needed.
And yet, experienced craftsmen always putty on fiberglass, because without this stage any joints, irregularities, or seams will be clearly visible. Only a layer of putty can completely hide defects in the walls or ceiling. The room will have a more beautiful appearance. Therefore, you need to decide whether you need to putty before painting. It is important to remember that the quality will be much better with putty.
How to putty spider webs correctly?
To putty fiberglass, it is better to use non-shrinking gypsum or fine polymer putty (acrylic, latex, silicate)
It is important not to use coarse putties. Below we discuss the features of puttying on the ceiling and for painting.
On the ceiling
Tip To cover the cobwebs, you will need to apply at least 3 layers of putty with a break for drying.
The material is attached to the ceiling using putty tape or mounting adhesive. If you fix the canvas with a stapler, it may sag. Puttying under wallpaper, panel, clapboard or tile cladding is allowed without leveling significant defects and imparting a white tone.
Technology:- mix the solution according to the instructions until the lumps and paste-like consistency are eliminated;
- Using a wide spatula, moving from the outer corner of the ceiling, apply a layer of putty in semicircular movements;
- do not throw the solution on, but smooth it over the surface, moving from the corners to the middle of the plane;
- after application, cut off the composition with vertical and horizontal movements, removing excess solution;
- Having treated the ceiling with the first layer, without waiting for it to dry, begin installing fragments of fiberglass;
- wait for the solution to dry (up to 8 hours), apply at least 2 more layers with a break for drying.
If the surface is being prepared for painting or plastering, sand the ceiling using a trowel with a P180 attachment in a circular motion. Then dust the base with a vacuum cleaner, do not use a damp cloth. When preparing the ceiling for wallpaper and cladding, this stage can be neglected. Before decorative cladding, apply a layer of penetrating primer.
For painting
The base for painting is puttied using the same technology. However, the process differs in a number of ways regarding materials, coating and defect handling. These include:
- the need to create a flat and monotonous surface;
- mandatory sanding of the final layer of putty;
- applying at least 4 layers of putty to cover the cobwebs;
- use white acrylic putty;
- use a covering snow-white primer on the finish.
Here it is important to achieve a perfectly smooth surface by sanding and multi-layer coating. Each layer is applied 1 mm thick
The total thickness of the coating cannot exceed 10 mm. If the solution gives a yellowish or grayish tint, use a white covering primer.
Advice: On the final layer, it is allowed to add color to the putty to match the finish. Only polymer compounds can be tinted in bulk. For ready-made solutions, use liquid pigment; for mixtures, use dry pigment.
Do I need to putty the fiberglass canvas before painting?
Our technical specialists working on the Wellton Technical Support Hotline 8-800-200-07-03 quite often have to discuss the topic with the client: is it necessary to putty the painting fiberglass before painting? To answer this rather simple question, you need to understand why surface filling is required in the first place. Moreover, as you understand, we are talking about the so-called “finishing putty”, which completes a certain stage of finishing work. It would also be a good idea to understand whether the puttying process is an integral step in working with paintable fiberglass, or whether these are independent works.
Finishing putty is the final “removal” or smoothing of the surface using plastic compounds - finishing putties. At this stage, the smallest defects (small chips and cracks) are repaired. The thickness of the finishing layer is several tenths of a millimeter. In this case, the number of layers can vary from 1 to 3, depending on the required surface quality. For example, to paste a surface with wallpaper, one finishing layer is enough, to paint it - two, and for the subsequent application of decorative textures, you will need to apply at least three layers of finishing coating. In other words, it is clear that finishing putty is used in cases where, as part of a design project, or simply at the request of the customer, the task arises of making the walls or ceiling absolutely smooth or preparing them for further work that requires a particularly even and smooth surface. Sometimes professional plasterers call this process “mirror”. The result of high-quality finishing putty is a perfectly smooth surface that can be painted, wallpapered for painting, or decorative plaster applied to it.
Painting fiberglass is a reinforcing material, which is also a finishing material for painting. Its structure consists of short and incredibly thin glass fibers that form a special “rough” structural surface. According to many owners of apartments and country houses, glued and painted Wellton and Oscar fiberglass canvas creates the feeling of a “warm” wall due to its texture. This is especially noticeable when using high-quality thin-layer, high-covering paints for interior decoration, which perfectly “reveal” the texture of high-quality painting fiberglass.
Thus, we can come to the conclusion that finishing putty allows you to get an absolutely smooth surface, while painting fiberglass helps to give the surface a barely noticeable texture. In addition, as can be seen from the essence of the technology of puttying and gluing painting fiberglass, these are almost unrelated works. That is, of course, you need to putty the wall before gluing the fiberglass paint. But filling the surface of the painting fiberglass before painting is not a mandatory procedure. Judge for yourself. After all, in order to stick paintable fiberglass, or any other wallpaper or wallpaper for painting, you already need to prepare the surface and carry out the finishing putty. Why do a new one after one finishing putty?
Scope of application of fiberglass, its advantages and disadvantages
Fiberglass: description of material
Fiberglass is a fabric made from special glass fibers, onto which impregnation from modified starch is applied. They are based on glass, which, as a result of melting under the influence of high temperatures, forms the finest threads, layered on top of each other in a chaotic manner. The threads are used to make complex weaves - “cobwebs”, which give the material its second name. Next, the fiberglass is subjected to strong pressure, which gives it increased strength.
Where is it used?
Cobwebs are widely used in production related to the production of polyvinyl chloride panels for finishing walls and ceilings, and polymer materials for roofing. Cloths protect pipelines from corrosion during the installation of drainage systems.
And yet, fiberglass finds its main use in finishing work. It is used to reinforce the surface of drywall before applying the finishing layer of putty mixture. The web perfectly levels the bases and eliminates small flaws. Using fiberglass, they solve the problem of cracks on ceiling and wall surfaces.
Fiberglass is also used before wallpapering the ceiling for better adhesion of the material to the base coat.
Advantages and disadvantages
Cobwebs are currently widely used in repairs and remodeling, due to the large number of advantages that this material has:
- not electrified;
- hypoallergenic;
- not deformed. Gluing fiberglass to the ceiling will prevent cracks and chips from appearing;
- fire resistant;
- moisture resistant;
- levels and strengthens any surfaces of ceilings and walls;
- wear-resistant;
- can withstand up to 5 dyeing cycles;
- not afraid of temperature changes and humidity;
- protects surfaces from mold, allows air to pass through well;
- does not pose a health hazard;
- in the process of gluing fiberglass, foamed polystyrene is sometimes used. Thus, additional insulation of the room is carried out.
However, the material has one significant drawback. To work with glass wallpaper, you need to purchase appropriate clothing, since when cutting the canvas or during the process of gluing it, small particles may fall off the web and get into the eyes or respiratory tract.
pros
The undeniable advantages of modern finishing materials include the following:
- After proper gluing, the cobweb turns from a fragile and fragile sheet into a reinforcing mesh that can hide small defects in the surfaces of walls and ceilings.
- The material is practically not afraid of mechanical damage, exposure to water, fire and aggressive substances.
- Does not accumulate static electricity on the surface. Does not attract dust.
- The web contains only natural materials. Eco-friendly material does not emit substances harmful to humans into the air.
- Excellent air permeability.
- The material is non-allergenic.
- During operation, it allows water vapor to pass through well, thereby ensuring optimal humidity in the room.
- Fiberglass prevents the occurrence of fungus and mold.
Important! One of the main advantages of using fiberglass is the ability to apply paint to it almost immediately after gluing and drying. Since the cobweb has the same properties and features as glass wallpaper, the same paint and varnish coatings can be used for its finishing.
Advantages and disadvantages of cobwebs
Fiberglass is not without strengths and weaknesses in the same way as other colleague materials. Traditionally, people talk about the benefits first, so let’s move straight to their impressive list. Cobweb:
- it is considered environmentally friendly, absolutely safe, since it does not contain any harmful or suspicious components;
- sometimes it makes it possible to get by with only the starting putty, without the participation of the finishing type of this coating;
- is not noticed in the accumulation of static electricity, so dust ignores it;
- not afraid of high temperatures, temperature changes, or high humidity;
- durable, it is not afraid of mechanical stress, fire, corrosion;
- makes it possible to carry out work indoors and outdoors;
- it is vapor permeable, which means that mold does not threaten surfaces;
- and the adhesive composition for it do not provoke allergies;
- has no sharp unpleasant odors;
- does not require serious care.
The material can be safely glued to any surface - wood, concrete, brick, plasterboard, ceilings or walls.
There are also disadvantages, these include:
- The ability to “attack” low-quality, inexpensive material with a short service life. Such products will disappoint due to the inconvenience of working with them, inelasticity, and fragility.
- Impossibility of using first grade fiberglass in premises. It contains phenols and formaldehyde resins, which are undesirable components.
- The ineffectiveness of the material if there is a need to hide serious defects - large cracks, chips, potholes. They will have to be sealed in advance.
- The need for protection (gloves, glasses, masks, or better yet, a respirator) when working due to small glass particles.
- Difficult to dismantle the coating.
- High consumption of glue.
One cannot but agree that the disadvantages are still relative, since most of them relate to low-quality products. Therefore, in the “battle” of advantages and disadvantages, the first ones emerge as winners.
Paint selection
Fiberglass can be painted with materials that are suitable for glass wallpaper. Water-based paints are best suited for this purpose; they do not affect the performance of the base material. Such paints do not have an unpleasant odor and are harmless to humans. Contains only environmentally friendly components (polymers, water, targeted additives). There are several types of water-based paints, they are described below.
Acrylic paints
These paints are the most popular, they have many advantages. Easy application and quick drying, coupled with a low price, are the main advantages. Paints can be applied to fiberglass or wallpaper, the coating will be resistant to friction and water. The materials adhere well to the surface and give a beautiful decorative look. Most brands of paint are sold in white; they can be tinted in absolutely any shade.
Latex paints
Such materials have a higher cost. These are water-dispersion-based enamels, without chemicals, harmless and suitable even for children's rooms. The composition contains natural latex, which makes the coating more resistant to water.
Surfaces with latex paints can be periodically washed or wiped with a damp cloth. This material is very economical and allows you to get long-lasting results. If acrylic materials give a matte film, then latex materials give a matte, semi-gloss, glossy film.
Silicone paints
Enamels containing silicone do not get dirty, this is their important advantage. There are no aggressive chemical components here either, so the material is completely safe. Silicone paints can last up to 25 years without losing their external gloss, but their cost is the highest among water-dispersion compositions. The material is waterproof, vapor-permeable, heat-resistant, and not susceptible to mold, mildew, or ultraviolet radiation.
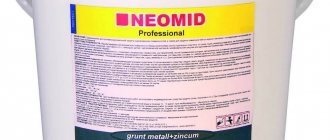
Adhesive compositions for fiberglass
Before studying the topic of how to glue fiberglass, it is better to get acquainted with the features of adhesive mixtures for it.
Types of adhesive composition
Building materials stores sell 2 types of such compositions: ready-made, packaged in plastic buckets, and dry powders in paper bags.
- Ready-made glue (5, 10 liters or larger volume). When purchasing it, you need to check the manufacturing date on the container. Otherwise, you can purchase expired goods, and the result of the work will be the appearance of bubbles. Another potential problem is peeling of the canvas due to poor adhesion. It is recommended to use open containers in the near future, since there is no guarantee that the composition will not lose its characteristics.
- Dry powder. This is a more practical option, since this type of glue costs less, but allows dosed use - only in the required volume. Prepare glue in strict accordance with the instructions on the package. If there are no other instructions, then pour the powder into warm water, stirring constantly. The prepared composition is kept for about 10-15 minutes, because it must swell. Then the glue is stirred again.
The third possible option is PVA, but with only one condition. Fiberglass has a fairly low density, so the glue will soon turn yellow in the light. This color change will definitely affect the light coating. If the choice fell on PVA, it is better to choose dark colors. However, special mixtures are better: they contain additional additives that give the material maximum strength.
Glass fiber adhesive brands
Since fiberglass can be glued using the same compounds as glass wallpaper, the range to choose from is quite wide. The most popular brands include mixtures of several manufacturing companies.
- Quelyd is a French brand. Under it, a large number of different adhesives for wallpaper, wallpaper removers, sealants and mastics are produced. The most popular product for glass wallpaper is Optima.
- Oscar is a Swedish brand, the compositions are produced in Russia. The glue, ready-made or dry, is characterized by minimal consumption and high strength. Additionally contains fungicides that prevent the formation of mold.
- Kleo is another “French”. This company specializes in the production of dry adhesives for glass wallpaper and fiberglass. The products are distinguished by high quality, but affordable price, quick preparation of the mixture, and the same drying time.
- Pufas is a German candidate for surface repair. The manufacturer produces paint and varnish coatings, adhesives, and primer mixtures. Glass wallpaper products are famous for their excellent adhesive properties.
- Bostik is another brand from France. The company produces various adhesive compositions, but the most famous is the parquet mixture. Despite the low price, adhesive mixtures for canvas guarantee reliable coating and easy joining of canvases.
Other worthy contenders include products from Spektrum (Sweden), Nortex, Wellton, Bolars (Russia).
Folk alternative
There is a recipe that allows you to make a decent adhesive composition with your own hands. To do this, mix:
- 1 pack of regular (cheap) dry wallpaper glue;
- 1 kg PVA;
- 5 liters of warm water.
First, dry glue is mixed with water to obtain a homogeneous composition without lumps. After this, PVA is poured in. This sequence allows you to avoid clots consisting of PVA and dry undiluted powder.
Preparation of surfaces covered with fiberglass for painting coatings
| Author: Man of Labor | 9 237 |
| Published 13.4.2015 | Today, manufacturers of finishing materials provide several types of reinforcing materials for walls and ceilings, and painting fiberglass is considered by many to be the most reliable, provided that the work done on it is of impeccable quality. This is a rolled analogue of glass wallpaper that does not have a deep texture, but it cannot be called smooth either. The fabric, which is made by weaving fiberglass threads, has a slight roughness; the coarsest structure is called the “web”. A number of advantages and disadvantages, as well as the technology of pasting with it, can be learned from the article “Treating surfaces with materials to prevent cracks,” and here we will look at how to prepare the surface itself, pasted with fiberglass. After all, although there is a statement that a surface treated with this material is ready for any paint coating, in practice it often turns out to be not entirely true. |
Fiberglass sticker
Before deciding whether it is possible to paint fiberglass and putty it before or not, the material needs to be glued to the wall. In this case, the surface to be glued needs to be prepared - leveled using putty, leaving cracks no more than 1 mm thick. You can refuse leveling only in cases where the wall is already quite smooth and strong.
The main nuances that arise during the preparatory work:
- wide cracks are sealed using a special compound for seams or regular putty, but in several steps;
- when using plasterboard sheets, the joints between them must be puttied and reinforced with self-adhesive fiberglass mesh (“serpyanka”); In order for the already pasted wall to be as smooth as possible, it is desirable that the seams between the drywall and the fiberglass sheets do not coincide with each other, otherwise cracks may appear in these places;
- dried “patches” on the wall need to be leveled using putty and sanded until the surface is almost perfectly flat;
- Before the fiberglass web for painting is glued to the wall, it should be cleaned of dust and thoroughly primed.
Due to the fact that the fiberglass gluing is done overlapping, when determining its area, you should take as the calculated value not only the surface of the walls, but also a small margin (at the level of 5–10%). And as an adhesive, it is advisable to use not ready-made, but dry glue, the characteristics of which are the same, and the price is much lower. During the work, special clothing is used - pants, long-sleeved shirts, gloves, a respirator and a hat. All this will help prevent fiberglass particles from getting on the skin and into the respiratory tract.
Other nuances that are taken into account when sticking include the correct laying of the canvas. Fiberglass sheets have a smoother front side - as a rule, it is located on the outside of the roll. It is she who should look inside the room, while the outside one should be applied to the wall or ceiling. You should also place the canvases so that the pile on them is directed in one direction. Otherwise, the paint applied to the material will have different shades.
The main stages of gluing fiberglass for painting are as follows:
- The roll is rolled out and cut into sheets of the required size, which is selected for the walls taking into account a slight overlap. For the ceiling, it is recommended to choose canvases up to 1.5 m long, which are easier to attach to a vertical surface.
- Glue (prepared according to instructions or ready-made) is applied in a thick layer to the surface, starting from the corner of the room. The width of the strip should be slightly larger than the size of the fiberglass itself, that is, about 1 m.
- The first sheet of canvas is glued close to the corner of the room, pressed with your hands and smoothed using a wallpaper spatula along the entire length from the middle of the canvas to the edges.
- The excess part of the fiberglass is trimmed with a knife along a ruler.
- The canvas, already glued to the surface, is coated with glue until the material is completely saturated. You can determine that the canvas has been completely coated by its color, which should become uniform by the end of the procedure.
The remaining sheets are laid in the same way, but with a slight overlap on the previous ones.
After gluing and alignment, both panels are trimmed along the joint using a ruler. The cut parts are removed, and the resulting smooth seam is once again smeared with glue and pressed with a wallpaper spatula. When gluing corners, they try to get an even joint before cutting - the corner cloth tears more often than others, and a perfect cut will help avoid tears and cracks. After the room has been completely covered with fiberglass, it is left closed until the glue dries completely. Usually this period lasts at least a day. At this time, drafts should not be allowed to appear in the room, otherwise air movement will lead to the material falling behind and the need for gluing it or even re-gluing it.
The procedure for gluing fiberglass
Main features of choosing fiberglass
To carry out work at the highest level, you should not skimp on materials and purchase low-quality products:
- As practice has shown, the optimal density of fiberglass in terms of price-quality ratio is 45-55 g/m2. It is sold in rolls 1 meter wide and 50 meters long. Some retail outlets may cut off the amount you need, sometimes 50 meters is too much.
- To glue the material, you will need a special glue for glass wallpaper; it must be a high-quality composition, since the strength of the entire surface depends on it. And one more nuance: the glue consumption when gluing “cobwebs” is at least one and a half times greater than that of glass wallpaper due to the specific application and absorbency of the material.
There will be quite a lot of adhesive composition, so you should stock up thoroughly
- It is also worth purchasing a smoothing spatula for wallpaper - with its help you will level the material and expel the air from under it.
- Another important element is a construction knife, with which excess pieces will be removed.
Bonding technology
Painting fiberglass canvas is glued to glass wallpaper adhesive
It is important that the glue is good, but it does not have to be expensive. The gluing technology is very similar to wallpapering:
- The glue is applied to the wall or ceiling with a roller or brush. The glue layer is thick, but it needs to be distributed evenly.
- A cobweb is rolled out onto the greased wall, it is well saturated with glue and lays down easily. The canvas must be straightened evenly, without folds or “accordions”.
- Use a plastic spatula or a large stainless steel spatula to remove air bubbles. It’s easier to do this by moving it from the middle to the edges.
- Again, take a roller or brush and apply glue on top of the fiberglass.
- Using a spatula, rub the glue, filling the pores. If there is not enough glue, add more, the excess remains on the spatula.
- The second canvas is glued overlapping with the first. The canvas extends about 2 cm. The sequence is the same: apply glue to the wall, roll out the canvas, and push out the bubbles. Then we take a ruler or a large spatula, a stationery knife with a sharp blade. We apply a ruler/spatula to the junction of the two canvases, cut through both canvases.
The main thing is to make the junction of the two canvases invisible
You shouldn't press too hard - you can scratch the putty and there will be a groove left that will be visible. The task is to cut through both sheets, but not to cut the putty. It's easier to do this with a sharp knife. We remove the excess strips, coat the wall under the joint with additional glue (with a brush), connect and press with a spatula.
Apply glue on top of the second canvas and fill the pores with a spatula. Glue the next strip.
As you can see, nothing complicated. Only all operations must be carried out carefully, achieving the best result that you are capable of.
There are several nuances regarding working conditions. There should be no drafts in the room, the temperature should not be lower than +15°C, humidity should be within normal limits. Keep doors and windows closed until the glue dries. If the sun is hot, it is better to curtain the windows. That's all, actually.
Description of finishing material
Fiberglass threads are woven on a machine, pressed, and at the finish fiberglass is produced in the form of a smooth and even sheet, its density is 25-50 grams. per 1 m2. It is endowed with water resistance, vapor and air permeability, resistance to chemicals, dust-repellent properties, and prevents mold. Gluing fiberglass is an opportunity to quickly prepare the surface for painting. In terms of its technological properties, the material is similar to glass wallpaper, but there is no texture. Thanks to this, paint for fiberglass is applied to its surface many times.
Application areas of canvas
This material is indispensable for finishing work and for the production of building materials. He takes part in the production of:
- aqua panels;
- waterproofing;
- linoleum;
- foam glass;
- printed circuit boards;
- roll roofing;
- glass wool in slabs;
- elements of drainage systems.
Using a painting web:
- prepare surfaces for wallpaper, painting, drywall, various panels;
- They make waterproofing and anti-corrosion protection of pipelines, combining it with mastics or bitumen.
Fiberglass is used as a reinforcing layer, which protects the finishing coating from cracks, shedding and other similar defects. The reverse, fleecy side is almost always on the outside of the roll. The facial one, on the contrary, is ideally smooth; it is often “hidden” inside it.
What paint to paint glass wallpaper: washable latex and acrylic options
Using glass wallpaper in your interior is quite a smart step, especially if you choose high-quality wallpaper for painting. In previous articles, we have already talked about the properties of glass wallpaper, which distinguish them favorably from other similar finishing materials. In this article we will tell you how to paint glass wallpaper, because the finishing layer on the wall should be paint.
Good paint makes painting work enjoyable
Applying paint to fiberglass
Preparation
Most often, home craftsmen are interested in: does fiberglass need to be puttied before painting? This procedure is not necessarily necessary, but highly desirable.
The fact is that fiberglass is far from perfectly smooth. In addition, there are necessarily joints between the canvases, which can become quite noticeable after the glue dries.
Puttying the wall
Putty will eliminate all these defects and make the surface truly ideal. As a rule, it is applied in 2-3 layers, each no more than one millimeter thick. To apply the last layer, a finishing putty is used, which ensures the best smoothness.
After filling, the surface must be sanded with fine sandpaper, thereby eliminating even the slightest flaws on the surface. To make sure that the fiberglass is prepared for painting, you should point a flashlight or spotlight at the treated surface. A beam of light will reveal all existing flaws.
Tools and consumables
To paint fiberglass, you need to prepare the following tool:
- Roller with tray or spray bottle for applying paint;
- Brush for painting hard-to-reach places;
- Masking tape and oilcloth.
Roller with tray
Painting
After the base is leveled, the fiberglass canvas is directly painted. True, it is first necessary to treat the surface with a primer composition. This will improve paint adhesion and also reduce its consumption.
Instructions for applying the paint coating are as follows:
- Before you start painting, you need to protect the surfaces that will not be painted from contamination. You can use masking tape for this. The floor should be covered with oilcloth.
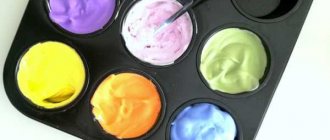
- Next, you need to thoroughly mix the coloring composition to eliminate its heterogeneity. If necessary, you need to add a certain amount of color to the paint. To determine the proportions, you can pre-mix the components in a small volume.
- Then you need to pour the paint into the pan and dip the roller into it. Before applying the coating, the tool should be wrung out on a special platform in the tray. Painting is done from top to bottom, in an even layer.
- After the first layer has dried, to achieve maximum quality of the coating, the procedure must be repeated again.
- At the end of the work, you need to touch up hard-to-reach places with a brush.
Mixing paint with color
At this point the work is completed, all that remains is to wait for the paint to dry completely, after which the walls can be used.
Important nuances
If the finishing is not done by hand, but by craftsmen interested in its speedy completion, they may insist that the surface can already be painted. If you do not putty the fiberglass, then you will have to apply 5-6 times more paint on it, because fiberglass has a high ability to absorb. To glue wallpaper, it is even more necessary to prime the fiberglass and apply a putty layer, because the entire texture of the glass fibers will be clearly visible, and a lot of wallpaper glue will also be used up.
In the future, a large amount of wallpaper glue can lead to damage to the wallpaper under the influence of external conditions. So the question of whether it is necessary to prime and putty is decided positively if the owner wants an excellent look and guaranteed durability of the result.
Even a non-specialist knows how to putty. The finished composition is applied with a spatula as the first layer, it is allowed to dry, then the second is applied, which is sanded after drying with a grinding machine, float or sandpaper. And only then can you paint or wallpaper.
How long does it take for fiberglass to dry?
Fiberglass
It usually dries completely within a day. Someone paints it right away. I would not recommend doing this, but I would advise putting putty (at least 2 layers) before painting. Firstly, if you paint on the canvas right away, the paint goes away immeasurably, it simply gets absorbed into it.
Interesting materials:
How to add a grid in Photoshop? How to add a layer mask in Photoshop cs6? How to add a layer mask in Photoshop? How to add styles in Photoshop 2022? How to add your own color in Photoshop? How to add a color tab in Photoshop? How to add brushes to Photoshop? How to duplicate an element in Photoshop? How to move layers in Photoshop? How to export a GIF in Photoshop?
Summary of methods for preparing fiberglass for finishing coatings
Today, many are arguing about whether it is necessary to putty fiberglass - of course, this is the best way to prepare it not only for thin-layer decorative coatings, but also for ordinary background paints. Putty on fiberglass is especially helpful if the customer does not like the rough structure, which breaks through even after a layer of primer and two layers of paint.
There is a second alternative and debate about whether fiberglass should be primed, and many are inclined towards this surface preparation for painting and other types of finishing. Although the method is proven and reliable, it does not remove the texture of fiberglass, called the “web,” so you need to be aware of this nuance.
Source: mastery-of-building.org
Preparation of fiberglass for decorative coatings
Decorative coatings, first of all, should be divided into thick-layer and thin-layer, since the preparation is carried out in completely different ways. In addition, the process of gluing fiberglass is slightly different: the glue is applied in a thick layer so that when smoothing the fiberglass, it seeps through. This achieves a high load-bearing capacity of fiberglass; the decorative layer under its own weight will not lead to peeling of the fiberglass covering from the wall.
Fiberglass for thick-layer decorative coatings , such as “Marseille wax” and other interior structures, does not require special preparation. Only the fiberglass is primed with primer-paints filled with quartz sand, possibly diluted with water in the proportion specified by the manufacturer. For application, use a brush or roller with medium bristles. If the fiberglass was glued in the “folk” way, that is, with putty, then before applying primer-paint it is treated with an acrylic fine-grained deep-penetration primer. You can read about this method in the “painting work” section, an article about materials for preventing cracks.
Fiberglass canvas for thin-layer decorative plasters and paints is prepared in such a way as to remove its relief structure. To do this, fiberglass is prepared for putty, then puttied with finishing acrylic painting compounds (as practice has shown, they have better adhesion and minimal shrinkage). If it was glued to putty, then it is primed with acrylic impregnations, otherwise no preparation is made. In order to putty fiberglass with high quality, you need to try to complete the work in one thin layer, not exceeding 2 mm in thickness. Then everything follows standard technology: sanding the dried layer and priming.
Preparing fiberglass for painting
The specificity of the fiberglass material is that it has a high degree of water absorption. In this regard, when painting, problems arise with high consumption of paint and varnish material, and painting difficulties are a separate issue. The fact is that when using water-based paints and varnishes, the fiberglass instantly draws water out of them, and the strip rolled with a roller immediately dries out, and the painter simply does not have time to roll it out in an even layer. To prevent such incidents from happening, they learned to prepare fiberglass for painting using the methods described below.
Excessive water absorption can be removed if, before painting the fiberglass, you treat it with either a deep penetration acrylic primer or a primer-paint from the line of purchased paints and varnishes. You can also take the paint and dilute it with water to such an extent that it becomes so fluid that it can penetrate into the smallest pores of the fiberglass. It is important not to saturate the material until it gets too wet, as is done when priming the putty layer (otherwise the glue will become soggy and the fiberglass will peel off from the wall surface). There is a second method of preparation, as for thin-layer decorative textures, described at the end of the article.
Many people recognize only one sensible way to paint fiberglass with modern paints - using types of rollers with medium pile. In this case, the paint is applied in a thick layer, but you need to try to stretch it, otherwise the layer will crack. It is enough to apply the paint in one layer if the fiberglass canvas has been pre-treated with primer-paint, but to “soften” its rough surface, it is better to apply a second, second layer.