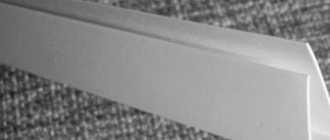
Plasterboard (GKLV, GKLVO) and gypsum fiber sheets (GVLV), along with plaster, are the most common material for slopes of plastic windows.
According to statistics, they are more popular than plastic boards, sandwich panels and, of course, than budget polystyrene foam and expanded polystyrene.
There are general evaluation criteria: susceptibility to condensation and cracks, insulation, simplicity and speed of work, durability, costs.
It should be taken into account that plastic windows also have their own characteristics (tightness, density, expansion coefficient), which affect the behavior of the finishing around them.
Let's consider plasterboard and gypsum fiber for slopes near PVC double-glazed windows, in what parameters they are the best, advantages, disadvantages and features. We will also describe the features of the work, list the difficulties, indicate what to pay attention to, and how to avoid mistakes.
Installation on polyurethane foam
Fastening window slopes with polyurethane foam
You can seal the slope by fixing drywall with polyurethane foam. The sealing is very simple, but it is used if there are few defects on the slopes and the holes are small in size, up to 3 cm. For larger sizes, the defects need to be sealed with foam before installation; the correct method for sealing potholes is using cement mortar or a starting type of plaster. You need to sew it like this:
- Dismantle the old coating, remnants of plaster and foam. Next, large potholes are filled.
- When the holes are dry, polyurethane foam is applied to the drywall from the back side of the material. The foam layer is no more than 1 cm. The material is applied in the form of a snake.
- The plasterboard material is placed on the slope and pressed against it. The pressure on the drywall must be strong so that the foam adheres to the slope.
- After this, the drywall comes off, leaving foam on the slope and finishing material. After 10 minutes the foam will increase in size.
- The drywall is again mounted into the slope and pressed against the wall. If necessary, fix the material with spacers and leave it for up to 24 hours without continuing work.
- The next stage is sealing the drywall seams on the slopes using plaster.
Puttying a window slope
The disadvantages of this design of door and window slopes are quite large. The biggest disadvantage is that the surface will first need to be leveled, otherwise the sheet of drywall will not work. Drywall on slopes may bend during installation. There are voids left on the door/window slope, making the fixation not very reliable. But this is the fastest method for finishing slopes with plasterboard. When a window or doorway is covered with plasterboard, using any described method, the opening is finished with various materials. But before finishing the slopes, you need to do the following:
- The slope is puttyed with a thin layer.
- On the outside of the opening, protection is placed and a corner is formed using a plastic perforated corner, which is covered with putty.
- Another layer of putty is laid down to completely level the surface.
- Finishing material is selected.
Painting is not durable, so for part of the slopes a panel type of material is used, for example, plastic for slopes, instead of plasterboard, PVC panels and other materials, this is a good material, made according to GOST, and is distinguished by its durability. The video shows step-by-step work with drywall; you can use the method for doors and windows:
Creating a slope using the gluing method
This method does not require a startup profile. It is applicable when the surface is fairly flat, but creating a slope by gluing is quite difficult.
- All details of the future slope are cut out.
- The top part is installed first. A special guide corner is screwed to it in advance, into which its upper part is inserted and glued. Precise installation will allow you to avoid mistakes during further installation of the side elements.
- The remaining elements are glued.
In most cases, glue is applied to the entire plane. Typically, the approximate drying time for a specific brand of assembly adhesive is indicated on the packaging. If there is a need to reduce the setting time, then the glue is spread in strips. All work is controlled using a building level.
Installation technology
The main difficulty of the technology is that the frame is built for a specific window with specific wall defects. If you work according to a template, without taking into account the specifics of the situation, the design may end up skewed. Therefore, all work should always begin with careful measurements and drawing.
The creation of the structure should be carried out from the frame to the wall. You should first make sure that the window structure itself is inserted vertically into the opening, without distortion.
The frame design must be rigid enough so that the sheet does not “play” under your fingers after installation. Therefore, it is worth determining the number of jumpers in advance. You will need one in each plane at the corners, and jumpers in the middle part of the plane are placed as needed, depending on the width of the slope.
Read the series of articles on plasterboard: Drywall: types, properties, installation Round plasterboard wall How to level walls with plasterboard Installation of plasterboard partitions indoors
Painting
Painting slopes is quite a problematic task, especially when the surfaces are not puttied very well
Therefore, I strongly recommend that you pay due attention to the putty.
The slopes are painted with water-based paint. Matte paint is more suitable for painting
. For high-quality painting with glossy paint, you need to putty the surfaces as efficiently as possible and “eat the dog” when painting the slopes.
No types of brushes are appropriate here, because all the stripes will be visible. Just a roller! A roller with a width of 15-20 cm made of foam rubber or fleecy polyamide, or something similar is suitable. I like foam rubber ones better; they are easy to paint inside corners by simply pressing the roller into the corner. Any paint smudges should be avoided; any drops should be rolled out immediately. Typically, 3-5 coats of paint may be required for excellent results.
General requirements for window slopes
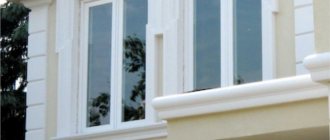
A slope is the outer or inner part of a window opening, which is created due to the difference in the thickness of the wall and the window frame.
Slopes give windows an attractive appearance and also protect the room from cold and dampness
In order to decide how you will finish the slopes (no matter for wooden or plastic windows), you need to consider the following conditions:
- the surface of the slope must have good resistance to weather conditions and mechanical stress, i.e., not peel off over time, not get wet, and not change color under the influence of humidity and sunlight;
- have good thermal insulation, which will prevent the formation of condensation on the surface of the slopes;
- slopes must have good vapor and moisture resistance to ensure high performance properties of the assembly joint, which is achieved by installing windows in compliance with all GOST requirements;
- the surface of the slopes must be resistant to wet cleaning and cleaning, so that the outer surface does not delaminate and stains do not appear on it.
Often after installing windows, apartment owners ask the question: Is it necessary to finish the slopes? There can be only one answer: it is impossible to leave the windows for a long time in the form that was left after the installers’ work. And it's not just a matter of poor aesthetic appearance. There are at least two reasons to make window slopes:
1. Polyurethane foam, which is used when installing windows, gradually breaks down during operation under the influence of sunlight. In addition, when hardening, the foam increases by 5–10% in volume, i.e., it seems to compress itself. This causes a gap to form between the frame and the foam, hence reducing the heat resistance.
Polyurethane foam, which fills the voids between the opening and the window frame, needs protection
2. Foam is not a waterproofing material; it collects moisture, which, when frozen, can damage the integrity of the material. Therefore, the foam must be immediately protected from negative influences.
Nuances of the installation process
Compliance with all recommendations will prevent the appearance of defects not only upon completion of finishing work, but also during further operation. However, often at the initial stage, when measurements are taken and drywall is cut, mistakes are made that spoil the aesthetic appearance of the structure. The most common problem is the formation of a noticeable gap between the joined panels. To correct the mistake, they resort to the use of liquid plastic, but the end result does not benefit from this, since drywall and plastic have significant differences in texture.
In this situation, professionals advise decorating the side and bottom parts of the plasterboard structure with a plastic profile. Its use helps to hide the problem of a loose fit or resulting irregularities.
When forming inclined slopes, it is undesirable to fill the free gap exclusively with an adhesive composition. If the space near the window frame exceeds 3 cm, it is recommended to pre-fill it with a strip of plasterboard, to which the slope itself is then glued.
https://youtube.com/watch?v=sFqrTb5VcBE
Stage five. Installing sheets or how to make slopes from plasterboard
When the solution is ready, they proceed to installing the blanks in the window opening. To do this, an adhesive composition is applied to the back side of the sheet being mounted in tubercles up to 100 mm high and 100-150 mm in diameter. Moreover, the spacing of these gaps is taken to be 250-300mm.
Then the panel (first the top one) with the applied solution is installed in the opening and pressed against the base plane until the marks on the side walls correspond to the level of inclination of the sheet. Excess material squeezed out is leveled with a spatula along the end of the slope. The side panels of the structure are mounted in a similar way.
When performing this work, you should follow a number of recommendations:
- Carry out the work together (while one holds the top panel, the second installs the side panels);
- Check the correct installation of the panels by visual inspection, or using a level or plumb line;
- After the glue has pre-hardened (15-20 minutes), fill all the voids between the drywall and the base plane with the same composition.
Finishing gypsum board slopes with glue
The easiest way to install slopes is to glue them to the wall. No power tools are needed here, and during the work it is impossible to break or damage anything except a small piece of plasterboard. The method can be used in a wooden house and attic windows - it is universal.
The work is carried out in the following sequence: first the upper slope is installed, then the side slopes.
Installing slopes with glue.
- The top of the window opening is measured. A sheet of gypsum board is cut out.
- Glue or putty (preferably finishing compound) is applied to the cut out part along the perimeter and a little in the middle.
- The sheet placed against the wall moves slightly from side to side so that the glue enters all the smallest pores of the wall material and sets.
- The glued slope is fixed with stops - at least two are installed.
- The glued sheet is left until the adhesive mass dries completely.
If the installation distance between the frame and the wall exceeds 3 cm, then strips of gypsum board 4-5 cm wide are first glued to the wall. The space between them is filled with mineral wool. The slopes are glued.
Our portal is faced with the fact that it is not always possible to carry out repairs according to our instructions. We are receiving requests for help in choosing a reliable contractor. We contacted several companies in Moscow. The Relit company, with 22 years of experience, has won our trust: a permanent office on Basmannaya, a spare parts warehouse, experienced craftsmen, a separate manager for each order. There are many positive reviews from clients: they work quickly, carefully, and do not impose unnecessary things. Using the code word STROYGUR there is a 5% discount. Tel.: +7 (495) 023-14-23 (website). PS Dear site visitors, we value our own reputation very much. Therefore, for a long time we did not work with direct advertisers - we were not sure of their integrity. This is the first company that was able to convince the site team that their advertising will not compromise our portal.
Installation of drywall elements
From a whole sheet of drywall, which you have already coated with a primer in advance and allowed to dry, you need to cut off the upper part of the slopes. When you cut out a piece of drywall that matches the parameters you calculated and indicated on the diagram, you can begin installing it. Check all length and width measurements carefully before cutting the piece. No need to waste extra drywall.
Immediately transfer all calculated dimensions onto the plasterboard sheet. Use a regular ruler and pencil for this. You cannot start cutting without marking the cutting line in advance.
Use a utility knife to cut out the top piece exactly along the lines you drew. To do this, attach a ruler to the lines and cut the cardboard along it on one side. Then, with a light blow of your fist from the back of the cut, break through the drywall, as if bending it along the line of the cut.
Before installing the cut part, make sure you have all the necessary materials and tools.
Level-bar
It is important that it has a length that matches the length of the panel you are going to install; Putty knife. It is needed to apply and distribute the mixture over the surface; Cut out plasterboard; Glue.
Now let's start applying the glue. It is best to apply it around the perimeter, and also make several separate islands of the mixture in the center of the plate. Thus, the plate will be fixed much better, because the edges will be securely fastened, and the glue located in the center will be evenly distributed throughout the void under the drywall.
Once you have applied the glue, you can secure it. This is not an easy task and not because it requires physical effort. It is necessary to install the plate evenly so that it coincides with the intended drawing.
The slope must be strictly horizontal. In order to achieve this, you need to check its location after installation. This is done using a level in two directions. But this technology is applicable only for the upper part of the slope.
If there is a need to bring a certain area closer to the wall, you can lightly hit the drywall. It's unlikely to hurt him unless you use too much force. However, you should not pull the part back. This is fraught with serious consequences. Drywall can simply crack. Based on this, it is more advisable to apply a little more mixture. The excess substance can then simply be distributed, filling the empty space.
Craftsmen often additionally secure the upper part of the slope with dowels or create various supports to fix the corner in a suitable position, but this is not strictly necessary. The slope can easily be maintained due to the sheer force of surface tension. It will not allow the drywall to move in space.
As soon as the adhesive mixture holding the top slab has hardened, you can begin installing the side slopes. The side panels are mounted in exactly the same way as the top. Cut out the part of the required shape and size from a plasterboard sheet coated with primer. Mix the adhesive mixture and apply it to the joints using the same technology. Install the drywall piece in the desired location so that it matches the intended drawing. Using a level, adjust the panel to the required location indicated by the marking lines. However, this time the level check is different. The difference is that the test is carried out with a level only vertically in one direction.
Next comes a very important moment. Wait until the adhesive mixture has completely hardened. After this, take the same mixture and cover all the cracks in the plasterboard structure. This is a very important and necessary step.
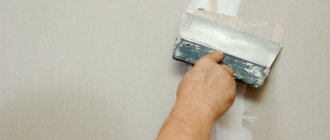
After the slope structure has been completely assembled, you can begin to putty the surface of the drywall. Putty is the final stage of installation of any plasterboard structure. If you are going to make slopes with your own hands, you cannot do without it.
After you have thoroughly puttyed the slopes, the work can be considered complete. However, that's not all. Although the structure is complete and the room is protected from the street cold, the window remains in an extremely unpresentable state. Therefore, it needs finishing. In order to prepare the slope for cosmetic finishing, it is lubricated with finishing putty. Only after this can you begin painting or any other type of finishing.
Moisture-resistant gypsum plasterboard
In the store you can find moisture-resistant gypsum plasterboard by its standard green color. The layers are treated with special moisture-resistant impregnations. They improve the properties of gypsum plasterboard. It is more resistant to high humidity. Recognized as a universal building material. Use in rooms with humidity above 90%.
Sheet thickness 12.5 mm. The main advantage is fire resistant. When in contact with fire, it burns slowly without producing large quantities of acrid smoke. Does not emit toxic volatile substances. Withstands wet and dry cleaning. The scope of application is wider than that of a conventional one. Used to create partitions, multi-level ceilings, and leveling walls.
Preparing for work
Before installing plasterboard slopes, it is necessary to prepare the workplace - clear the area near the window. If there is furniture in the room, it should be covered with polyethylene to protect it from dirt, dust and moisture. Working with drywall is a “wet” type of work.
Slopes for plasterboard entrance doors, like window ones, can be mounted in several ways - using glue, foam, putty or a metal frame.
When attaching elements to the wall surface, use an adhesive mixture based on gypsum, followed by coating with finishing putty.
Polyurethane foam
This material is used to securely fix the window structure and to protect the installation seam from moisture from the street. The installation of plasterboard slopes is carried out to protect the mounting foam from moisture and sunlight, as this leads to its destruction and loss of performance characteristics.
Excess construction foam is removed using a utility knife
Due to its ability to expand, the foam can protrude beyond the boundaries of the assembly seam. Before installing slopes on plasterboard windows with your own hands, you need to cut off excess foam using a stationery or construction knife.
Metering
To make high-quality door slopes with your own hands, you need to take exact dimensions and cut out the parts in accordance with them. In this case, it is necessary to take into account the need to create allowances, since adjustments may be required during the work.
When measuring the niche of a window opening, the slope is taken into account, so the height is measured twice - near the window and near the wall.
Surface preparation
To ensure maximum adhesion of the adhesive composition to the surface, it is necessary to thoroughly clean the base from dirt, dust and fragile finishes that crumble with minor mechanical stress.
After cleaning the surface with a brush or brush, it is washed with water to remove as much dust as possible.
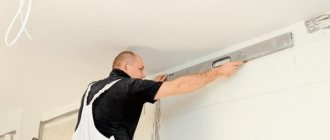
It is important to remove the old plaster layer or paint coating. If the integrity of the wall in the window niche is significantly damaged, it must be restored and leveled
Before installing drywall on slopes, it is necessary to clean the surface
Finishing window slopes at the leveling stage can be done with ordinary putty.
If the installation of plasterboard slopes is carried out using a metal frame, then if there are minor surface errors, leveling may not be performed. The main thing is to remove the damaged plaster layer.
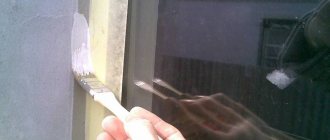
Before making slopes, the surface must be treated with a primer with antiseptic additives to avoid the appearance of mold and mildew. It is necessary that the slopes dry out.
Antiseptic primer prevents the appearance of mold on slopes
The plasterboard slope should be attached with glue perpendicular to the plane of the window. The slopes of plastic windows are fixed to the walls in compliance with their exact horizontal and vertical location. Therefore, before installing plasterboard slopes on the windows, it is necessary to mark their locations using a marker and a corner.
The installation location of the future slope is marked with a marker or pencil
Tools
The tools you will need to prepare are drywall, glue, primer, fasteners in the form of self-tapping screws, materials for thermal insulation, a small spatula, a screwdriver, rags and a water container, foam and profile. You will also need metal scissors, a level and a tape measure.
How to cut drywall
If it is necessary to cut off a piece of drywall in a straight line, then use the tip of a sharp utility knife to follow the intended line. Then lightly tap the surface of the sheet, applying a meter ruler to the line. As a result, the drywall breaks off along the cut line, leaving the cardboard to be cut off on the other side.
The panels are cut using a stationery knife.
If it is necessary to cut out a shaped element, then use a hacksaw with small teeth. Using an electric jigsaw can speed up the work, but be prepared for a lot of dust.
To install slopes on windows and interior doors, it is necessary to use GKLV grade plasterboard.
What types are suitable?
There are only two requirements for plasterboard/gypsum fiber sheets for slopes under plastic windows:
- Thickness: GKLV/GKLVO from 12.5 mm, GVLV – from 10 mm.
- Only moisture resistant (wall).
A simple non-moisture resistant material (ceiling; 9.5 mm or any other thickness) will quickly bubble, even if it is plastered. This solution is only acceptable in perfectly dry conditions. In extreme cases , you can reduce the thickness, but the sheet must be moisture resistant .
For window slopes we use GKLV or GKLVO (green). The last letters: “B” - waterproof, “VO” - waterproof-fireproof.
If we talk about gypsum fiber, then, by analogy, it’s GVLV, it doesn’t have color designations (however, it may be found in some manufacturers). There is also no “GVLVO” marking - this material is always produced fireproof. Gypsum fiber is stronger, so you can be satisfied with 10 mm , but the larger the number, the better.
Manufacturers have their own technologies and solutions, so the color of the material may not always correspond to those accepted according to the traditional scheme - you need to clarify and look at the markings, which must be right on the sheet.
Note. Moisture resistance does not mean that the material is not afraid of water - it simply has a reduced ability to absorb moisture and is more resistant to deformation under its influence.
For very humid rooms, GKLV/GVLV is suitable only with a caveat: there is a high probability that after some time the sheet will become deformed, swell, bubble, or crack. In addition, the above may appear when painting such a panel.
It is possible to use simple non-waterproof gypsum fiber board/gypsum plasterboard (ceiling) for slopes, but the reliability of such a finish will not inspire confidence. It is necessary to use material with a thickness of 10 or 12.5 mm of moisture-resistant type (wall).
How is it different from gypsum fiber?
In this article we will summarize plasterboard (GKLV) and gypsum fiber (GVLV), since the methods, process of work and all its features are identical.
If we compare the materials themselves, then the second one does not have the disadvantages of the first one : it is stronger, stiffer, more durable, less capricious in case of temperature changes, more resistant to moisture, can withstand 15 freezing cycles, while GKLV/GKLVO only has 4 (such temperature changes cause cracks).
Disadvantages of gypsum fiber: almost 2 times heavier, fragile, when transporting it must be handled correctly, however, there are reviews that this disadvantage is greatly exaggerated. Advantages: GVL is much stronger, it is also used for floor coverings, and it has better heat, sound, and waterproofing properties
Advice! Experts for slopes advise taking GVLV, which is somewhat more expensive, but the parameters for the interior element in question are much better.
In this article, if we use descriptions for plasterboard, then it should be understood that the same applies to gypsum fiber sheets, unless any remark is specifically indicated, and vice versa.
GVLV is produced polished and simple (rough) - the latter is taken if the finishing on the slopes will be painted or plastered or any other finishing treatment or cladding will be used.
Gypsum fiber breaks when strongly bent, and plasterboard is easier to give the required shapes, it is more plastic, so it is advisable to use it for slopes in the form of arches, for figured, curved structures.
In all other cases , the best material is GVLV; you don’t have to reinforce the corners for it, although it is advisable to do so . You can also use silicon-based paints and whitewashes, which is undesirable for gypsum boards.
Gypsum fiber is better suited for frame fastening: it holds screws much more reliably without dowels, is not prone to cracking, and does not crumble. But if gypsum board can be cut with a knife (it’s easier to work with), then a hacksaw will be required. It is GVLV that is best used in the kitchen and bathrooms where there is high humidity.
Features of drywall
Typically, the design of slopes with plasterboard is chosen by people who want to carry out repairs on their own without the involvement of experienced specialists. The result is an aesthetically pleasing window with slopes. This is due to some advantages of gypsum boards.
- Thermal and sound insulation properties. If you want to further insulate the room, you can install double slopes with special insulating material.
- Light weight, which allows you to make only a frame for installation without additional reinforcement.
- A perfectly flat surface when using gypsum board sheets promotes faster finishing.
- The ability of drywall to “breathe”, that is, when there are temperature changes or changes in humidity levels, there is no need to worry about deformation of the sheets.
- Environmental Safety. Even in combination with other additives, slopes do not emit harmful gases into the environment.
- The result is minimal waste.
However, you should also take into account the disadvantages of the material during installation work:
- it is necessary to handle drywall carefully during repairs and avoid any damage;
- It is necessary to additionally protect the surface from high humidity, since even moisture-resistant material will become vulnerable after some time when exposed to moisture.
Depending on the room where slopes need to be installed, choose a material of a certain type:
- at an average level of humidity in the room (up to 70%), standard drywall is suitable;
- in conditions where humidity is more than 70%, gypsum plasterboards with antifungal and hydrophobic additives are used;
- in conditions of increased fire hazard, gypsum plasterboards with additives such as fiberglass and mineral wool are suitable; this option is used extremely rarely, but its equally important advantage is its high strength to mechanical stress.
Can it be done on PVC structures?
External slopes are not made of gypsum fiber board , gypsum plasterboard, even waterproof ones, however, like gypsum plaster. There is no need to explain the reason: plaster absorbs moisture and becomes deformed, lags behind, slips, cardboard bubbles. Such products, unlike cement-sand mixtures and plastic panels, are not designed to withstand outdoor conditions.
There are reviews that puttyed gypsum boards with a composition for external work stood as an external slope for about 10 years without any special comments. Perhaps such cases exist, since the material is protected by finishing, but it is unlikely that specialists will give a guarantee of high-quality service in such an environment.
Important! There are two exceptions for finishing made of gypsum, lime (gypsum plasterboard, gypsum board, plaster), even if they are positioned as moisture resistant: outdoor (street) environments and wet rooms with high (above 75%) humidity.
Plasterboard slopes near PVC windows are made only internal . The owners of the premises do such external (exterior) finishing only at their own risk and peril; there is too high a probability that in a short time it will become unusable. Plastic linings or cement-sand plasters are intended for the street.
It is also undesirable to use drywall in rooms that are not wet, but where there is a strong influence of steam and other fumes, for example, in kitchens with intensive work processes (although if the mode is normal, then there are no warnings).
The standards and technical conditions of some large construction organizations specifically prescribe this limitation:
Preparatory activities
First of all, take all your measurements. When preparing sheets of material for decorating slopes, leave slight allowances.
Measurements
Regardless of the chosen method of finishing slopes with plasterboard, perform preliminary preparation of the surface to be decorated. Be sure to remove the existing layer of plaster coating.
Remove old plaster
If the gluing method is used, the surface must be carefully leveled. For this you can use ordinary putty.
Leveling the slope surface
When using the frame method, preliminary alignment can be abandoned in most cases. It is enough just to get rid of the crumbling areas of the plaster coating.
Treat the base with an antifungal agent.
Antifungal primer
After completing all the preliminary steps, you can proceed directly to attaching the plasterboard sheets using the chosen method.
Tools and materials
Making and installing plasterboard slopes is a painstaking task, but to cope with it, you don’t have to be a professional.
It’s important to become familiar with the basic technological processes and have the necessary tools.
To make slope parts you will need a standard plasterboard sheet, primer, paint, and insulation material. There are several ways to attach slopes to a window opening. Depending on the chosen option, you will additionally need to use profiles (CD and UD), polyurethane foam or glue. For installation you will also need a drill, a screwdriver, metal scissors (for cutting profiles), a drywall knife, a container, a perforated angle, a spatula, a level and a tape measure.
Necessary tools for installing plasterboard slopes
Plastic slopes
Special plastic panels for finishing slopes are available for sale. This method is even simpler than installing plasterboard slopes. Plastic slopes are undemanding in maintenance, moisture-resistant and durable. There are panels in various colors.
There are several types of such slopes:
- made of foamed PVC;
- made of plastic on a plasterboard base;
- sandwich panels.
On the rough surface, mount the guide profile near the window frame. Secure the plastic slope in it. The opposite side is attached to the outer corner or also to the profile.
For decoration, an additional plastic panel is installed on the corner. In this way, conventional plastic slopes and models with a plasterboard base are installed.
Mixed method
I would like to dwell on one more method, which is similar to the previous one with polyurethane foam. In this option, an L-shaped profile is attached along the edge of the window frame. Acrylic sealant is poured into it, and strips of drywall are immediately inserted. So the gypsum board is already glued at one end and is located perpendicular to the window. After this, the drywall is attached to the profile with self-tapping screws. After such fastening, the installation of plasterboard slopes will be much easier.
Due to the L-profile, drywall is placed perpendicular to the window
Two-thirds of the formed cavity is filled with mineral wool. It is installed closer to the window. And the remaining void is filled with glue or putty. That's it, the slopes are ready. All that remains is to putty everything.
Instructions for installing plasterboard slopes
Elements cut from plasterboard can be installed:
- on polyurethane foam;
- for putty;
- on the frame.
On polyurethane foam
Any person can “glue” drywall to foam
It is very easy to fix the cut sheets onto the mounting foam. But this can be done right away if there are no large holes on the slopes. If the depressions are up to 3 cm, you can install the slopes right away, only fill the largest potholes with foam first (do not apply a lot, about 1/3 of the volume of the excavation).
If the unevenness is deeper than 3 cm, it is better to pre-fill them with cement mortar or a composition for starting plaster.
The procedure for installing plasterboard door slopes on polyurethane foam is as follows:
- Having prepared the site (removing dust and falling pieces, filling too large recesses with foam), apply mounting foam to the back side of the plasterboard blank with a thin (no more than 1 cm) snake.
- Place the element in place, press it against the wall, the way this fragment should stand.
- Tear it off and put it aside for 5-8 minutes. The foam remained on the wall and on the sheet of drywall. In a few minutes it increases in volume.
- Place part of the slope in place and press it well. Leave in this state until the foam has completely hardened (12-24 hours).
- Seal the gaps between the plasterboard elements and the wall with plaster.
The plasterboard slope has been completed; finishing work remains.
The disadvantages of this method are quite serious. Firstly, the side and vertical surfaces must first be leveled, otherwise you will not be able to install the elements evenly. Secondly, there is a possibility that the workpiece will bend/bend. Thirdly, voids remain. Well, and the most important thing is that the mount is not the most reliable. But the door slopes are made simply and quickly.
For putty
Instead of polyurethane foam, you can “glue” the cut out fragments onto diluted putty:
- Apply cakes of a composition for working with drywall, diluted to a paste (preferably the finishing one, it is more “sticky”), onto the sheets. They should be located around the perimeter and somewhere in the middle.
- Spray the slope cleaned of dust and cracked old plaster with water from a spray bottle.
- Place the workpiece in place and press well. You can rest your palms on the plane and “sway” the fragment from side to side. Feel that the plaster has begun to blur, and the piece of drywall has “stuck.”
- If the fragment stands tightly and does not move, you can leave it until the putty sets (for a day, sometimes two). If an element is held unsteadily and can move, it needs to be supported with something. Preferably at the edges and in the middle. Leave it like this for at least 10-12 hours. Then the supports can be removed and wait for the putty to dry completely.
Methods for applying putty “patches” can be different. The main thing is that the element holds well
The disadvantages of this method are the same. You just need to say that the slopes on the windows in our apartment are made in exactly this way. This happened 9 years ago, and still no problems.
On the frame
A more labor-intensive, but also more reliable and versatile way to install plasterboard slopes is on an assembled frame. The frame is made of wooden blocks or special profiles.
The guides are placed vertically along the door jamb and at the corner. Between them, at a distance of 50-70 cm, small transverse jumpers are placed.
To install plasterboard slopes with your own hands, first assemble the frame. It can be made from profiles or from wooden blocks
There is one peculiarity with this method: measurements are taken after the frame has been installed. The cut out parts are put in place and secured with self-tapping screws.
If the frame is assembled from profiles, screws are needed for metal, if from bars - for wood
In any case, you need to twist it carefully so as not to tear the cardboard. If you overtighten, the plaster may even burst or crumble.
A large number of defects of this kind will lead to the fact that the plasterboard slope will not hold up well.
Installation using putty
Finishing putty can be used as an adhesive material - it has better adhesion. The putty should have a paste-like consistency.
Finishing slopes with plasterboard with your own hands using putty is done in the following way:
- when the surface is cleaned of dirt and dust, it is moistened with water;
- on parts made in advance, putty should be applied in the form of separate islands;
Putty is applied to the panel in strokes - The product is placed in the required position and moved so that the adhesive mass spreads. In this position, the slope is left for 12 hours, supported if necessary; After installing the drywall, install a support
- After a while, the support can be removed and wait for the adhesive mixture to dry completely.
Preparatory work
The reliability of fastening and the durability of the entire structure depend on the quality of surface preparation. At this stage, it is necessary to lay communications (mainly wires) under the future structure. You will also need to remove excess mounting foam on which the window is attached, seal cracks with putty and remove traces of mold. After this, you need to clear the opening of debris.
Taking window measurements
To make the structure as level as possible, use a metal square to measure the distance from the window to the wall. It is recommended to carry out the procedure along the entire perimeter, noting the length at each corner and in the center at the top and bottom.
Plasterboard sheets must be adjacent to the window. That is, it is necessary to ensure that the planes of the slopes and the plastic frame coincide. To do this, you need to apply appropriate marks on the window sill and window, along which the plasterboard sheets will be installed.
Preliminary surface preparation
At this stage, it is necessary to remove the mounting foam and debris that interfere with the installation of the slopes. You should also apply a layer of primer, which will prevent mold from appearing in the future. Without the last procedure, after a few years you will have to destroy the structure and re-treat the surface. The primer is also recommended to be applied to the back surface of plasterboard sheets.
Removing the plaster layer
It is recommended to install slopes on “clean” walls. That is, the metal frame on which the plasterboard sheets are fixed should be installed on a surface that has been previously cleared of plaster. This procedure is due to the fact that the cement mixture breaks down over time, which in the future will lead to a violation of the integrity of the slopes. The plaster layer is removed using a hammer and other devices such as a chisel.
Leveling and puttying
Before installing slopes, it is necessary to repair wall defects that can become “bridges” of cold. In winter, frost penetrates into the apartment through such holes in the walls. To seal such defects, ordinary putty is used.
Leveling the surface is necessary in cases where drywall is attached to an adhesive or polyurethane foam. This stage can be neglected if the work is carried out using a metal profile. However, the frame itself also needs to be leveled to the building level.
Installation using a metal guide profile
This method is used in cases where it is planned to sheathe walls with plasterboard. Therefore, a common frame is created, which takes into account the need to finish the slopes. This method is very fast, because the creation of slopes from plasterboard is carried out simultaneously with wall covering. At the same time, the window opening itself is reduced, although the resulting voids are filled with insulation.
It is convenient to cover the slopes with plasterboard at the same time as the walls
The procedure is very simple. A frame for the wall is assembled from profiles. It is better to use the smallest guide profile near the window so as not to steal a lot of space. The dimensions of the slopes are taken and the corresponding pieces are cut out from the plasterboard. They are attached using self-tapping screws. It is better not to place even a galvanized profile too close to the window. High humidity and dampness have a bad effect on metal.
The void between the planes of the window opening and the drywall is filled with mineral wool. You won’t need much of it, so you can spend money on insulation. The most heat is lost through the window in the apartment, so it would be a good idea to reduce these losses.
The resulting joints are covered with sickle tape and everything is puttied. First you need to putty the screw caps. Even black screws will rust if this is not done. The installation of plasterboard window slopes requires their complete putty. You can cover the corners with painter's tape to ensure they come out even. This will also add strength to them. Such corners must be puttied. The dried putty is sanded with sandpaper and then painted.
Material selection criteria: PVC, plaster, drywall
What should the slopes be made of on the inside of the room, what are the options?
Sometimes the choice still depends on the initial data, for example, for a reinforced concrete opening, plastic materials will be the most suitable, since concrete itself easily accumulates and retains moisture. Or very poor quality of brick laying, which is often observed in “Khrushchev” buildings - sometimes there is almost through-blowing of the wall, and freezing is generally constant. Moreover, often all this has already been eliminated by renovation of the premises and there are no obvious signs. This is where danger lurks - drafts in openings that should be eliminated. And for an additional effect, make the slopes from insulated plastic.
Of course, you can turn to the experts. But if you decide to make the slopes of plastic windows with your own hands, then by and large it all depends on your preferences and skills in working with materials. Main conditions: high-quality preparation of the opening - elimination of all cracks, and proper installation of the window with a window sill
After this, it no longer matters how you design the slopes; any material convenient for you will provide a good result. There are few technologies for constructing slopes: plastering and finishing with sheet materials
Pros and cons of use
Strengths and weaknesses of slopes for plastic windows made of gypsum fiber/plasterboard boards:
| Advantages | Flaws |
| Simple measurements and installation itself (especially with glue). It’s easy to set the angle of dawn: just place the panel or frame profile along the marks. | Drywall is less moisture resistant when compared to plaster, since its solidity is lower, it is porous, and contains cardboard and cellulose. But it is gypsum fiber that is compared with it in this aspect. |
| We immediately get a flat surface - there is no need to carefully level the slope wall, just clean it well. Usually it is puttied, but you can get by with just a primer or even without it. | If damaged, restoration is impossible, unlike plaster. If the panel swells from moisture, it cannot be returned to its original form. |
| The opportunity to make high-quality insulation of the slope easier. Simply inserting the material between the slab and the wall reduces the need for expansion joints. | Insulation and insulation are simpler, but still required. |
| The method is cheaper than finishing with plaster. | It is not enough just to install the panels - you also need to finish them: seal the edges with adhesive, prime, putty, plaster or paint, and before that, strengthen the corners of the wall. |
| High speed of work. On average, one window will take about 45 minutes. up to 3 hours. When plastering, you need to do several layers (three are recommended for slopes) and wait until they dry. | Opening the door suddenly will damage the panel. But this can be solved with special moderators. |
| The humidity in the room should not be higher than 75%. | The strength of the material is low. |
| No special experience is required for installation. This distinguishes the material favorably from plaster, which can only be done efficiently by experienced specialists. | Over time, the finish coat may peel off. |
| The walls “breathe”. The material is completely environmentally friendly and is superior to plastic in this parameter. | |
| Hygroscopicity. When there is an excess of moisture, it absorbs it, and when there is a lack, it releases it, which has a good effect on the microclimate in the room. |
Peculiarity! The main advantages of drywall are as follows: installation does not require special experience, it is much faster (no need to do several layers, etc.), some measures can be neglected (leveling the base), the work itself is much cheaper if you use the services of craftsmen.
Finishing puttying and plastering is simplified; any cladding can be used; the aesthetics of these finishes are equal.
If the adhesive method is used, then the installation is elementary - the slabs just need to be placed on the composition. The downside is the need for finishing with the same plaster without or with subsequent painting, but, of course, this is not as difficult as if the slopes were initially finished with it.
We consider the need for insulation and expansion joints as a feature , since they are required to one degree or another for most types of materials.
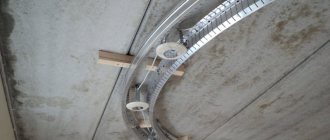
Sealing drywall joints - from installing sheets to puttying joints
One of the final stages of working with plasterboard sheets is sealing plasterboard joints . The durability of the repair depends on how well it was made - after all, if the seams were sealed incorrectly, then cracks will appear at the joints. The advice given in the article will help you avoid such troubles.
Types of edges and gaps between sheets of drywall ↑
First of all, it’s worth talking about what types of longitudinal edges there are. The transverse edge of all types of this material, be it simple, water-resistant or fire-resistant sheets, is always straight and not covered with a layer of cardboard. So, the longitudinal edge could be as follows:
- Direct (PC marking). The joints between such sheets intended for rough finishing are not sealed. This edge, as a rule, is made not on plasterboard, but on gypsum fiber sheets.
- Semicircular, thinned on the front side (PLUK). When sealing seams, sickle and putty are used. This is the type of edge that can be found most often on drywall.
- Beveled (UK). Sealing seams in sheets with such an edge is a very labor-intensive process, performed in at least three stages with the obligatory use of a serpyanka. The beveled edge is almost as common as the PLUK.
- Rounded (ZK). When sealing such seams, drywall joint tape is not used.
- Semicircular (PLC). Processing of joints with this type of edge is carried out in two stages without the use of a serpyanka. It is desirable that the putty be as durable and high quality as possible.
- Folded (FC). Just like the PC edge, it is most often done on gypsum fiber board sheets intended for rough finishing.
There are several other types of edges, but it is almost impossible to see them on the shelves of domestic stores. As mentioned above, most often manufacturers make drywall with edges such as PLUK and UK. Such edges do not require any processing after installation of the sheets, so you can immediately begin to putty them.
If we are not talking about a factory-made edge, but about a self-made edge, which is formed after cutting drywall to the required size, then it needs to be thinned. To do this, a special tool is used that chamfers the edge of the sheet. However, this can be done with an ordinary wallpaper knife with a sharp blade. When processing an edge, you need to cut about two to three millimeters of gypsum from it at an angle of 45°.
When installing drywall sheets, you need to leave a gap of no more than seven millimeters between them. This distance between the sheets will allow them to contract and expand freely with changes in temperature and humidity. For the same purpose, gaps are left - a centimeter between the drywall and the floor and a five-millimeter gap between the plasterboard and the ceiling. All seams are subsequently puttied and covered with plinth on the floor.
How to join drywall correctly? ↑
As with any work, joining plasterboard sheets has its own nuances. Firstly, all joints between sheets must be made on profiles, and under no circumstances should they hang in the air. This rule applies not only to longitudinal, but also to transverse joints. Secondly, if the length of the plasterboard sheet is less than the height of the wall, then the cut and whole sheets must be joined in a checkerboard pattern. In practice, it looks like this: a whole sheet is placed below, a cut sheet is placed at the top; then cut off at the bottom, whole at the top, and so on.
If the drywall on the wall is attached in two rows, the second one must be shifted relative to the first by 60 cm. The sheet width is 120 cm, the first to be mounted is half of the sheet cut along the longitudinal line.
The joining of drywall in the corners is done one by one: first, the first sheet is attached to one of the installed corner posts, and then the second sheet is attached to another profile standing in the corner. The gap between the sheets forming the corner should not be more than one centimeter. Subsequently, a special perforated corner is mounted on the outer corners, and the inner corners are sealed using putty and sickle.
How to seal drywall joints and what do you need to know for this? ↑
After all the sheets have been secured and the “non-native” seams have been unstitched, you can begin to putty the joints . To do this, use a gypsum-based composition, which is diluted with water in the required proportion. In this case, you should not buy a cheap mixture, since it may crack later. Also, for puttying you will need a metal spatula 15 cm wide. They use it to collect ready-made putty, which is applied to the seam. In this case, the spatula must be pressed lightly so that the mixture completely fills the joint. Then serpyanka or paper reinforcing tape is glued along the seam, which is then sealed again.
When gluing reinforcing tape or serpyanka, you need to ensure that their middle falls exactly in the middle of the seam; their cuts need to be overlapped.
The seam must be flush with the drywall - this is verified using a level. This must be strictly monitored, since the gypsum composition is practically impossible to polish. After the putty on the seams has completely dried, you can begin to putty the drywall.
At the end of the preparatory work, the opening is completely cleaned of dirt. Everything is swept and dried. In order not to damage the window or door frame, it is sealed with masking tape and cardboard. Installation is simple, and after installing drywall, the openings are beautiful, smooth and strong.
There are other design methods, but using gypsum plasterboard is simpler and cheaper, especially if the seam on the window or doorway is large.
How to choose material and work features
Drywall is a new generation building material, which is a combination of cardboard partitions and a gypsum base. Thanks to this unusual combination, a strong and durable base is obtained for creating walls, partitions, covering building facades and cladding rooms.
Photo - drywallFinishing window slopes with plasterboard, an entrance door or a balcony window is done only with moisture-resistant material (such as Perlfix and Knauf), which can be purchased at specialized construction stores. Why a moisture-resistant option? Firstly, the window opening is constantly exposed to condensation, and secondly, this cardboard is more amenable to processing. Nowadays, the technology is increasingly used to design metal-plastic windows, under which window sills made of PVC or other plastics are installed.
Photo - plasterboard slope
At the same time, interior work can even be done with ceiling material, since the humidity inside apartments and houses is not so high.
Advantages of plasterboard on windows:
- You can do without complex construction work (plaster and putty);
- You immediately get an even layer;
- Easy to install;
- Durability. The material does not allow the spread of pathogenic organisms, including mold and fungi;
- With proper processing and painting, even in high humidity, drywall will not appear cracks or other signs of use.
But the material has not only advantages, but also disadvantages. What you need to know before making slopes from waterproof plasterboard:
- The material steals centimeters. If you have a small house, then even a couple of centimeters will be quite noticeable, so you should avoid installing it on a profile frame;
- Not all cardboard is washable;
- The coating is quite “capricious” and does not withstand high temperatures and chemicals.
Video: gluing drywall to slopes
How to assemble a drywall frame for a wall with your own hands?
Published by: Avtor 0
The service life of the cladding and the appearance of the room will depend on how correctly the plasterboard frame is mounted on the wall. Insufficiently firmly fixed racks can deform over time, which will cause cracking of the plaster at the joints of the gypsum board or even destruction of the entire structure. But if everything is done correctly, the walls of any room will remain smooth for a long time, and repairs can be reduced to painting or wallpapering when the need arises.
How and with what to seal slopes from the street side - Blog Stroyremontiruy
Often, double-glazed window installers “forget” about the slopes from the street, limiting themselves to foaming them. The owners themselves have to plaster the gaps between the window profile and the slope plane. How to do this correctly so that the window is not blown in from the street and the work does not have to be redone several times a year? About this in the article.
Choosing plaster
To be honest, it’s not a lot of work, but it needs to be done, otherwise moisture will reach the internal slope, and this is a potential danger of fungus appearing in the room. Why do window installers forget about slopes on the street side? It's simple - some install windows, others make slopes. If there is plastic on the side of the room, then the “window workers” also install it, but they don’t like to work with plaster.
Problem with plasterboard slopes
Specifically, my neighbors were breeding dogs. The room for the puppies was kept closed so as not to get drafty, it was ventilated regularly, but not correctly - the air was hanging around one room. Plus there are warm floors throughout the apartment and non-breathable coating on the walls.
You need to foam all the cracks near the window frame, before plastering. Putty with moisture-resistant putty with a mesh, then with moisture-resistant paint. I have plasterboard slopes on 14 windows. In the first winter, one window was poorly foamed, freezing began at the bottom, I drilled holes and foamed it additionally. Everything dried out, the drywall was dry and did not swell, then I painted it and that was it.
I did it almost like in the picture, but I didn’t put in cotton wool, I just foamed the entire space. alez wrote: Worker, what about the location of the battery under the windowsill? Click on the image to enlarge Name: IMG_2729.JPG Size: 44.3 Kb ID: 271596 Do I need to reduce the width of the window sill or is everything okay. are there any requirements regarding this? [*]Which slopes are preferable - plasterboard or plastic sandwich?[*]how to properly perform heat, sound, water insulation of slopes?[*]Is it worth replacing the plastic window sill (by the way, I’m not delighted with it) with something stronger?[*] ]How to install a drainage system correctly? (I suspect that he is siphoning somewhere)
How can you cover a window opening?
To carry out high-quality repair and construction work, first understand the markings applied to the sheets. According to the general classification, the material is divided into four main groups:
- standard;
- moisture resistant;
- fire resistant;
- fire and water resistant.
Standard plasterboard sheet (GKL)
Designed for dry rooms with low or normal humidity (not higher than 68 degrees). Created for:
- decoration of walls in office buildings, children's rooms;
- ceiling decoration;
- creating partitions and other decorative elements.
The sheets consist of a gray cardboard shell surrounding a gypsum core.
Moisture resistant (GKLV)
Green sheets with blue abbreviation. Behind the standard cardboard shell, in addition to the gypsum core, there is a layer of silicone granules and hydrophobic compounds that prevent the formation and proliferation of fungus. Due to this property, sheets are used for finishing rooms with humidity above 70%:
- kitchens;
- public catering places;
- bathrooms;
- swimming pools;
- unheated premises.
A topcoat is required after installation.
Fire resistant (GKLO)
Sheets are gray or pink with red markings.
Attention
By adding clay and fiberglass additives to gypsum, fire resistance is achieved. During a fire, such a sheet does not ignite for 55 minutes.
Used for finishing:
- kitchen blocks;
- electrical panels;
- boiler rooms in production.
Approved for finishing all types of premises.
Moisture-resistant (GKLVO)
The material combines the properties of moisture-resistant and fire-resistant plasterboard, it is universal. The sheets are painted green and have red markings. In addition to gypsum, the core contains:
- silicone granules;
- fiberglass;
- clay.
This composition makes such drywall the most durable and durable. Used for finishing industrial premises and other buildings with high humidity levels that require separate fire safety standards. Suitable for finishing residential premises.
There is also facade plasterboard, but due to the high price it is rarely used.
Flexible
The sheets are light gray in color, the middle consists of a gypsum base supplemented with fiberglass, which explains its flexibility. Designed for creating curved lines, for example, when installing:
- multi-level ceilings;
- radius surfaces;
- arched structures.
Thanks to the sheet thickness of 6.5 mm, it bends well, can be deformed, and is easy to cut. When dry bending, a bend radius of 1 meter is achieved. Wet bending allows you to build a structure with a radius of 300 mm. The weight with a size of 1.2x2.5 m is only 16.4 kg. Designed for interior work only.
Advice
Unscrupulous sellers often try to sell packaging gypsum boards under the guise of ordinary ones. These are extreme plates to protect a stack of sheets during transportation. This measure is provided by the manufacturer, as indicated on the packing list.
When purchasing drywall, it is recommended to pay attention to the condition of the material - the presence of uneven, broken corners, or damage to the integrity of one of the cardboard layers indicates that the packing list is for sale. This is also indicated by the markings.
Common Misconceptions
Some homeowners are sure that making plasterboard slopes with their own hands is inappropriate because they are impractical. This misconception arose due to persistent myths:
- “Drywall encourages mold and mildew.” In practice, if you follow the installation technology and first remember to treat the surface with a primer with antifungal additives, no microorganisms will grow under the surface of the gypsum board.
- “Drywall is afraid of mechanical stress and is easy to break.” Indeed, if you hit the slope hard with something sharp or heavy, it will be damaged. But any other finishing material can be scratched, broken or left with dents. It's not a matter of durability, but of careful handling.
- “Finishing slopes with plasterboard is difficult; it’s easier to plaster.” Compare the cost of high-quality plaster on beacons with the costs of making slopes from plasterboard yourself. After this, the question “Which is easier?” will disappear by itself.
- “Drywall gets damp over time and starts to crumble.” Installation of slopes made of moisture-resistant plasterboard allows you to refute this myth. Nowadays it is easy to find high-quality waterproof material on sale, intended for indoor use. Do not forget that after installation, the surface of the parts is puttied and painted, after which window slopes, even made from ordinary plasterboard, become water-resistant.
Are you convinced that you are capable of installing plasterboard slopes yourself? Then stock up on the necessary tools, materials and get to work