These instruments come in different types, sizes, shapes and finishes. At the same time, the question of how to choose a paint roller depends on the type of work that you are going to carry out with its help.
Design features
Paint rollers have a fairly simple design. They consist of the following elements:
- The clasp is a bracket on which a roller with a fur coat is attached. It has a curved shape. A comfortable handle is installed at the end so that the tool fits comfortably in your hand.
- Lever. It is made of plastic, wood or rubberized material. Special depressions are made on it, repeating the shape of the fingers. This allows you not to be afraid that the roller will slip out of your hand.
- Video clip. It is a cylinder that rotates freely on a clasp. It is made of plastic or metal.
- Coat. Fits over the roller. It can be made of foam rubber, velor or faux fur with different pile lengths. This part of the roller is intended for applying paint.
Thanks to this design, the paint roller has advantages over other tools:
- productivity and speed of painting increases;
- it is permissible to use any type of paint;
- no hairs or other traces of the tool remain on the applied layer;
- paint is consumed less;
- There are no splashes or smudges during painting.
Only high-quality products have these advantages. Previously, in our country, rollers were produced according to GOST. Today, construction stores sell mainly imported goods.
How to paint a wall without streaks
A novice painter needs to know how to properly paint walls with a roller without leaving marks. Before starting work or when purchasing a tool, run your hand over the coating: the pile should quickly restore its original position and not fall out with a slight tug.
No traces of rust or oil are allowed on metal elements, and the roller must rotate without jamming.
In the case of layer-by-layer application, the polymerization time is taken into account: stains are often formed due to violation of the drying time of the paintwork.
Types of rollers by size
Its purpose will largely depend on the dimensions of the roller. For example, when painting walls, it is better to choose a tool with a wide working part, and rollers for corners should be short. The following roller sizes are available:
- Mini rollers. The width of the working part is no more than 150 mm, and the diameter is 15 cm. They are used for working on surfaces with complex terrain.
- Midi rollers. The working surface parameters vary from 150 to 250 mm. Diameter from 50 to 90 mm. Such models are considered universal, as they are suitable for painting all kinds of surfaces.
- Facade rollers. The width of their working surface exceeds 250 mm with a diameter of 80 mm. This instrument is classified as professional. It is used for uneven surfaces of an impressive area. Working with such rollers requires special skills.
You should choose paint rollers by size based on your own experience and skills, as well as the type of surface that needs to be painted. In most cases, a midi roller is considered optimal.
Due to their large size, façade rollers are capable of absorbing an impressive amount of paint. Therefore, working with these types of products is difficult and tiring.
Foam rubber.
We do not recommend painting with them. The liquid is squeezed out strongly. Sometimes, instead of spinning, it simply slides along the surface. Foam rubber may roll to one side. You can apply wallpaper glue with it, but keep in mind that the old foam rubber is destroyed. In practice, there was one very unpleasant case: after gluing thin, smooth wallpaper in a certain direction of the sun's rays, the entire wall ended up with small tubercles. It looked terrible. I had to re-paste the wallpaper. As it turned out, there were many very small pieces of foam rubber under the wallpaper. Such debris is very difficult to notice in the glue, since wallpaper glue has a yellowish tint. But among these rollers there is one for priming absolutely any surface.
He has a thick foam coat. The diameter of the main shaft is only 10 mm. The diameter of the coat is 60-70 mm. They are excellent for priming any uneven surfaces, brick walls, corners. It holds the primer and distributes it evenly over the surface. There are also thin rollers 100 mm wide, with medium pile.
They are convenient for painting narrow slopes, niches, and hard-to-reach places.
Types of rollers based on fur coat material
The main aspect when choosing a paint roller should be the material from which the coat is made. The quality of coloring depends on this. Based on this parameter, the following types of paint rollers are distinguished:
- Polyamide. It is made of artificial fiber, which is characterized by increased wear resistance. The length of the pile of such models can vary from 8 to 20 mm. An excellent option for water-dispersion paints.
- Made from natural fur. Sheepskin is most often used. It copes well with oil and water-dispersion paints and varnishes.
- Velor roller. It is most often used to apply the finishing layer. Suitable for oil paints and alkyd enamels.
- Polyacrylic. Its characteristics are similar to polyamide. Suitable for painting any surfaces with paints containing a small amount of aggressive components.
- Foam roller. It is allowed to be used only for water-dispersion paints. Requires caution when working. Excessive pressure on the tool may cause paint runs. Moreover, the performance of such models is significantly higher compared to taxes made from other materials.
- Terry rollers. Made from polyester. This is one of the cheapest options. Synthetic fiber cakes quite quickly, so the service life of such models is short. Such products can be used when working with acrylic or water-dispersion paint.
- Flocked. This is a short pile roller. It is ideal for working with waterborne varnishes. It is prohibited to use it for water-based paints. It is chosen for painting flat surfaces of small areas.
All types of rollers have their own advantages and disadvantages. It is necessary to choose a specific model based on the structure of the surface and the type of paint used.
Polyacrylic and polyamide rollers are considered the most durable and resistant to aggressive paints. They are allowed to be used with varnishes and enamels.
Wall painting procedure
Before painting the walls, you need to prepare a tool and a flat container for impregnating the roller with paint (with a grooved plane to drain excess enamel from the coat).
The painter should first inspect the surfaces and eliminate any defects found. The appearance of the room after renovation depends on the quality of the preparatory work. Potholes and cracks on the walls are emphasized by the paintwork or the flow of light from the window.
Preparing the room and surface
At the preliminary stage it is necessary:
- Remove furniture from the room or install it in the center of the room. Cover the remaining interior items, windows and doors with newspapers or plastic wrap. Connect the edges of the protection with adhesive tape.
- Disconnect the heating system radiators from the pressure pipes, first turning off the liquid supply with the valves. In winter, the heating system remains in its original place.
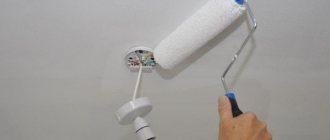
- Remove (if necessary) sockets and switches, wrap the wires with insulating tape or turn off the power supply to the room.
- Clean the wall surfaces from old coating and oil stains, and then remove the dust using a wet method.
- Cover cracks and depressions with putty, saturate the walls with a primer that increases the adhesion of the paintwork.
- Carry out a test painting of a small area to analyze the characteristics of the selected paint.
Priming walls before painting.
Features of painting work
When organizing the process, it is necessary to consider:
- The paint should be mixed with solvent in the ratio specified by the manufacturer. If the proportions are violated, the adhesion and hiding power of the material deteriorates.
- When rolling, it is necessary to minimize the paint layer. Do not go over the same area multiple times due to the risk of swelling of the enamel and changes in texture.
- The finishing layer is applied in the direction of the window opening. The light falling along the paint strips conceals the seam lines.
- If a defective area is discovered, the entire wall must be repainted. In the case of local modification, a zone is formed that differs in color from the main background.
- To search for defects, you need to look at surfaces at different angles and from different distances. To improve efficiency, it is recommended to carry out the inspection with an assistant.
- Before applying paint, it is necessary to saturate the walls well with primer. If the preparation is poor, the enamel does not adhere well to the surface or stains form due to uneven absorption.
- You should not delay the painting process, because due to the evaporation of the solvent, the material thickens and begins to stick to the pile. When working in rooms with a large area, pour enamel in portions and store the remainder in sealed packaging.
- If you plan to decorate a room with paints of several colors, then you need to purchase an individual roller for each shade. To separate areas, use masking tape to provide a clear boundary.
- When applying synthetic-based enamels, it is necessary to provide ventilation for the room.
Direction of the paint layer.
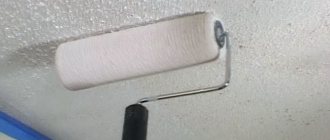
Roller paint application technology
Before choosing a painting technology, it is necessary to analyze the free space along the walls. The W method involves drawing vertical stripes with the edges crossing at the junction.
The technology allows you to speed up work, but requires free space to manipulate a tool with an extended handle. The squares technique is based on dividing the wall into sections at the corners, followed by painting and joining with horizontal movements. When choosing this technology, you should take into account the direction of light from the windows.
Final touches
After finishing the painting work, it is necessary to inspect the walls and eliminate unpainted areas. Then carefully wash the roller coat or dispose of the tool.
It is recommended to remove protective covers from windows and furniture after the coating has polymerized. Otherwise, dust may get on the fresh paint. When the layer hardens, if there are no defects, sockets and switches are installed in place.
Special types of rollers
There are also several unusual types of paint rollers that are used in special cases. Among them are:
- Angular. They are a small diameter wheel with a narrow working part. They are made from velor, polyacrylic or polyamide. This roller for painting corners allows you to carry out work accurately even in the most difficult to reach places.
- Needle-shaped. It has rubberized spikes installed. This tool is designed to eliminate air bubbles that may remain between layers of applied paint. This tool is used when working with viscous paints.
- Structural. This tool is used to create relief on a painted surface. The choice of such models is huge. With their help, you can create the effect of marble and plaster, and apply all kinds of designs.
- For pipes. Such models are made in the likeness of scissors. The clasp has two spokes that can be rotated. Two rollers with fur coats are attached to them. Dimensions are selected based on the diameter of the pipes being painted.
Paint rollers, the types of which are listed, can be purchased at any hardware store. Choose a model based on what you need it for.
Completion of work
After completing the painting procedure, you need to bring the roller into proper shape. To do this, place it in a container with a solvent and remove any remaining finishing. The handle is also well wiped; this is best done with a piece of cloth soaked in a solvent. The roller is then hung in the open air to dry.
Most repair work involves the simultaneous use of several tools. Properly selected devices ensure the durability and appearance of the coating. Try to paint correctly, strictly following the instructions provided, since the result depends on this.
Tips for choosing a quality roller
The stores have a huge selection of paint rollers of various types and sizes. The dimensions of the tool must be selected based on the area of the surface to be painted. For small areas, you can choose a mini roller. For walls and ceilings, it is better to prefer midi models.
In order to complete all the work accurately, it is important to know how to choose a paint roller. It must be durable and of high quality. To do this, you must follow the recommendations:
- Check the selected model directly in the store. To do this, wrinkle the fur coat. If it is severely deformed, it is better to refuse such a purchase.
- Pay attention to the quality of the product. If the seams are clearly visible on it, then it will not be possible to ensure uniform painting of the surface.
- If you need a long-nap roller, be sure to give it a tug. Lost hairs may subsequently remain on the surface being painted. Therefore, it is better to leave such a model on the store shelf.
- When you don’t know how the fur coat material will behave when in contact with paint, choose universal models, for example, polyamide.
- For painting work in an apartment, choose rollers with short handles. If necessary, they can be extended using a special telescopic handle.
- Pay attention to the quality of the metal from which the clasp is made. If it is too soft, it will not be possible to paint the surface properly.
- When you need to paint a surface with paints of different colors, it is not necessary to purchase several rollers. It is enough to buy one high-quality roller and several replacement coats for it.
A roller is an indispensable tool for any painting work. With their help, you can carry out work with the least effort. Even a person with little experience can use such a tool.
Tips for choosing a paint roller (3 videos)
Different types of paint rollers (38 photos)
Surface preparation
Preparatory work is a very important stage of painting work; if done correctly, you will ensure a longer service life for the coating. They take more time than painting; they are recommended to be performed in the following sequence:
- Removing the previous coating. At this stage, it is necessary to eliminate flaking areas and smooth out irregularities. Water-based paint or whitewash can be easily removed with a wet piece of cloth. Then they go over the base with a spatula. Removing waterproof paint and varnish will require more effort; it can be removed with a metal brush.
- At the second stage of the procedure, you need to walk well with a wet cloth over the base and ventilate the room well. You also need to properly remove oil stains, dust and dirt, which can reduce the service life.
- Next, you need to putty the base well to eliminate small cracks and smooth out irregularities.
- At the last stage, the base is treated with a finishing or starting primer, which provides the surface with higher adhesive properties. Now you can proceed directly to coloring.
Convenient design
The structure of the roller is quite common: it consists of a light iron or plastic cylinder, on which a special coating is put on (the so-called fur coat). A handle is attached to the cylinder, which can be of different lengths. This simple and time-tested design allows the roller to remain the most popular painting equipment for applying any type of paint to a wide variety of surfaces (except for curly ones). The tool is used to work with oil, water-based, acrylic, acrylate and latex paints.
The versatility of the tool also lies in the fact that it can be used to apply glue, antiseptic, primer and other watery mixtures.
Instrument care
For long-term further use, you should carefully monitor the tool.
For this purpose, the following materials are prepared:
For each roller you should prepare a bucket of warm water. Add a couple cups of softener to each and mix until smooth.
You can clean the roller with water or dishwashing liquid. Before cleaning, the remaining paint on the roller is rolled out onto newspapers if you place an improvised canvas on the floor.
The sequence of actions is as follows:
If work was carried out with oil paint, alcohol or turpentine should be used. These are aggressive substances that can cope with even severe pollution.
After cleaning, the roller is hung on a nail or hook to dry. If this is not done, the roller pile will most likely lose its original shape and become unsuitable for use. When the instrument is dry, it is covered with aluminum foil or plastic film to protect it from dirt and dust.
If repairs are temporarily forced to stop, the roller should be placed in a plastic bag and placed in the refrigerator. This will preserve the quality of the instrument. However, when storing at low temperatures, it may be necessary to defrost the roller first.
Painting with a roller is a complex and time-consuming stage of repair. However, with a competent approach, the result will be pleasing to the eye, and the costs are not so high compared to the purchase of other finishing materials. The main thing is to follow the technology and not skip the preparatory stages. Painted surfaces will create an atmosphere of warmth and comfort in a residential space, as well as rigor and conciseness in an office building.
Source