According to the recommendations of the designers, only historical styles provide for wall decoration in the form of applying plaster by hand. All others require varying levels of leveling and sanding. In a modern interior, a smooth, mirror-like surface of walls and ceilings is valued. The rating of the best plaster floats for 2022 will help you choose a convenient and high-quality tool for finishing walls.
Why are plaster floats needed?
Plaster is used to level walls made of brick, stone or blocks. Additionally, it is used as a heat insulator against cold and heat. A relatively thick layer of heavy wet composition cannot be leveled and made immediately smooth. As it dries, the surface roughness increases.
The putty is applied in a thin layer and is not able to hide unevenness. Wallpaper and painting will only emphasize the roughness and bumps. The graters remove protrusions, gradually smoothing out all the unevenness and bringing the walls to a state of perfect smoothness. They are classified according to the materials of the sole body and the operations performed: grinding, applying mortar, leveling, grouting.
Before purchasing, when analyzing the parameters of the product, you should take into account the type of plaster, its composition and the required degree of smoothness.
What is grout?
Grouting is the final stage of plastering work, which consists of eliminating the smallest errors, leveling and smoothing the surface by rubbing the dried mortar with a special tool. When using decorative plaster, the main purpose of the grout is to form a certain relief of the working plane.
Applying a finishing layer of fine leveling plaster
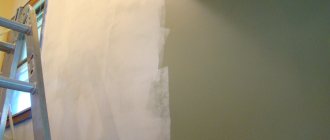
Before grouting, a “covering” is applied to the base - the finishing layer of plaster mortar. The base layer, or primer, is very durable and therefore difficult to process, while the covering ensures uniform filling of uneven surfaces and maximum smoothness when grouting. Rub the plaster after the mortar has set, but before it dries completely.
The best manufacturers
The popularity of models depends not only on ease of use, but also on the reputation of the manufacturer. In 2022, construction tools produced by the following companies remain popular: FIT, Kapriol, TOPEX, Stayer and others. Domestic ones, RemoColor, Zubr, are not inferior to foreign ones in terms of the quality of products and their popularity.
Our rating for 2022 and a review of popular models, according to buyers and professionals, will tell you how to choose a suitable grater for plaster, which company has better and more reliable products.
Grouting plaster
Plastering the surface is the most effective way to prepare the base for the finishing coat, as well as one of the decorative finishing options. To give the plaster layer the desired texture, it must be processed, in other words, grouted. The grouting process itself is simple, but it has its own subtleties and secrets, without which a high-quality result cannot be achieved.
Grouting plaster - photo
How to choose the right tool
The success of sanding plaster and how quickly everything can be done depends on the correct selection of tools. Main selection criteria:
- the type of plaster you will have to work with;
- interior or exterior decoration;
- surface area;
- what finish is being sanded for?
- type of work.
To this should be added the experience of the performer. You need to listen to what advice a specialist gives. A novice plasterer will not be able to handle a tool with a large sole. At the same time, it will take a long time to wipe down large areas of walls and ceilings with a small overlay.
The main mistakes when choosing are to focus on prices. Budget cost does not mean that the instrument is amateurish. The cheapest foam floats require a lot of experience and certain skills. When choosing which model is best to buy, you need to read the characteristics. The handle should be comfortable, ergonomic, the sole should be small, and the pad should be suitable for a specific type of plaster.
What is it for?
The functionality of the tool is to make the surface smooth before final finishing - for grinding plaster.
Previously, homemade structures were used for such purposes. They were a wooden beam with a flat surface with a handle attached to it. A significant drawback was that the material quickly failed because it absorbed moisture and could not withstand temperature changes.
Now you can choose a model from different materials, and they have impeccable performance characteristics:
- convenient design;
- light weight;
- moisture resistance;
- durability;
- large selection of models in sizes and materials;
- low cost.
Also, to level the plaster layer, construction tools such as a trowel and a construction float are used. A trowel, or trowel, is narrower and longer; it is more suitable for removing imperfections and eliminating excess mortar, while a trowel is more suitable for completely rubbing the plaster until an ideal smooth surface is achieved. What are construction floats used for? Their functionality includes both the creation of smooth surfaces and the formation of texture on decorative plaster. In addition, they can be used to create patterns on the walls due to the textured sole.
Where to buy a good plaster float
For amateurs who have never held a grater in their hands or worked with it, the answer to the question “where to buy?” is simple. Visit a specialty hardware store. Hold the tool in your hands and see which handle fits most comfortably. Pick up an inexpensive polyurethane or plastic model and try working with it.
After this, you can select and order online the optimally suitable model. The online store has a huge selection, there are products from different manufacturers, cheap and expensive.
A grater and patience will help an amateur make professional repairs. An interior with perfectly smooth walls looks better than irregularities hidden under wallpaper.
Procedure for grouting
Applying the coating
Step 1. The plastered surface is moistened using a sprayer. This increases the adhesion of the cover to the primer layer. It should be moistened evenly, without gaps and not too much so that water does not flow from the wall in rivulets. This should be done 15-20 minutes before applying the solution. If the working area is large, you should divide it into squares and wet only the area that will be processed.
You can wet the surface with a brush, dipping it in water and splashing it on the wall.
Step 2. To apply the coating you will need a trowel and a metal rule, or a wide spatula.
Rule for plaster
The solution is poured in small portions onto the wall, starting from the top, after which it is distributed as a rule over the entire plane. The rule must be pressed well with your hands so that the solution is more tightly packed into the slightest irregularities. Excess mixture should be removed. The thickness of this finishing layer should not exceed 2 mm.
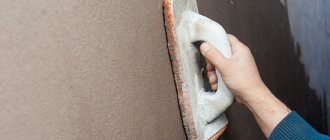
Step 3. When the covering has set slightly, take a grater and begin to rub the surface. Some plasterers prefer to grout at the same time as applying the mortar.
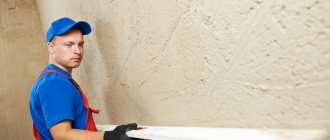
Rubbing the wall with a float
There is no fundamental difference here, and this does not affect the result in any way, the main thing is to thoroughly rub the composition along the plane to eliminate unevenness. Let's take a closer look at both options.
Dry grout
So, if you decide to wait for the plaster to set, the grouting process is performed as follows: take a polyurethane or metal grater, moisten it with water, press it to the surface and smooth the plaster in a circular motion. There is no need to press hard on the grater - this can rip off the fresh solution and you will have to repair the scratches, but there is no point in rubbing too lightly.
Perform movements with equal effort, slowly moving along the plane from top to bottom or horizontally. At the joints of the walls, apply the trowel cloth parallel to the corners and rub with vertical movements, and not in a circle. Where elevations are noticeable, the tool is pressed harder; on depressions, on the contrary, the pressure is reduced. During operation, solution accumulates on the side of the grater, so it must be cleaned off periodically.
Using a metal grater
When grouting a large area, the cover can dry out quickly, making it more difficult to work with. To soften the coating, it is periodically moistened with water. You can use a spray bottle or place a bucket of water next to it and prepare a wide brush with long bristles. The same brush is convenient for removing excess solution from the grater.
Grout with mortar
If grouting is carried out with the application of a mortar, the procedure will be as follows: make the mortar a little thinner than the plaster mixture, scoop a little directly onto a grater, apply the tool to the wall and, with pressure, distribute the composition over the plane. The grater must be held at an angle to the surface. Having smeared the solution, press the float blade against the wall and thoroughly rub everything in a circular or arcuate motion. Try to rub intensively, applying even efforts, then smoothing will occur faster and with better quality.
Grout with mortar
This type of application requires very little solution, but grouting takes a lot of time, and it is better to do the mixing in small portions to avoid hardening. When processing one plane, the intervals between grouting adjacent areas should be minimal - take a break only to prepare the solution. While moistening each subsequent square, slightly moisten the already rubbed edges - this will increase the adhesion of the solution and transitions will not be visible at the border of adjacent areas.
Grouting "round" and "running"
Treating the surface with circular movements is called “circular” grouting. This method allows you to compact the plaster layer well and get rid of all the bumps and depressions. But it still does not provide ideal smoothness, since the circular movements of the grater leave noticeable arc-shaped marks. Of course, such a base is quite suitable for tiles or textured paint, but under ordinary paint these irregularities are clearly visible. Where the smoothest possible surface is required, it is necessary to perform grouting using another method - “running”.
Grouting “in a circle” must be carried out on wet plaster and immediately after grouting “in a circle”. Only if these conditions are met can you achieve excellent results. There is no need for a solution here, and moistening is performed only when necessary. Another important point is that the grater must be absolutely clean, even, with rounded edges. If the tool is not cleaned of the solution, the hardened crumbs will leave scratches on the surface, as well as sharp edges of the blade.
Grouting plaster - methods
For convenience, the surface is treated in small areas - about 1 m2. The grater is pressed against the wall and moved up and down along the plane with measured, precise movements. While grouting, try not to lift the tool from the plaster, and maintain the same pressure all the time. Horizontal or circular movements are not allowed here - only vertical ones.
Smoothing the surface
Smoothing plaster mortar
Smoothing is the final, but optional, stage of surface troweling. Some master plasterers replace grout with it, but only if high-quality factory-made plaster mixtures are used. For smoothing, use a grater covered with felt or rubber, or metal. In general, the process is reminiscent of grouting, only the surface is processed twice: the first time the movements are performed strictly vertically from top to bottom, the second circle is horizontal.
The process of smoothing the cover with trowels
Mix the solution
In its preparation, proportions of materials are used that are similar to those for the base base.
For cement mixture:
- cement - one part;
- sand - three parts.
For cement-lime:
- cement material and slaked lime - one part each;
- clean sand - 3 parts.
In order for the grout to turn out to be of high quality, it is necessary to prepare a mortar mass of suitable fat content - a “lean” mixture does not have the necessary strength, it crumbles during the work, a very fatty mass is difficult to level, and after using a tool, stripes form on its surface. The mortar mixture should be plastic and stick slightly to the spatula blade.
It is easy to select the fat content of the solution being prepared - if it sticks strongly to the tool, add sand; if the mixture does not stick at all, add cement.
The normal mass is easy to stir, has a uniform consistency, and leaves an even, thin mark on the surface of the trowel.
How to prepare the solution correctly? It is best to act according to the following algorithm:
- the sand is sifted on a sieve, the cell size of which does not exceed 1.5 by 1.5 mm;
- the required amount of cement is poured into the container for preparing the solution, sifted sand is added, the components are mixed until smooth;
- Add water portionwise, stir the mixture constantly, achieving the required consistency.
Troubleshooting
Any repair begins with determining the type and quantity of materials required. Grinding plaster is no exception. In order to assess the situation and calculate needs close to reality, the plastered surfaces are examined, areas that need regrinding are marked and, based on this, the type and required amount of materials are determined. At construction sites, a defective list is drawn up, on the basis of which an estimate is drawn up.
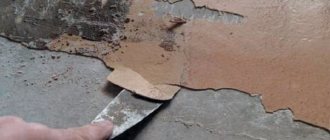
Wallpaper, tile cladding, plaster or paint layer must first be removed. Visual inspection alone is not enough to detect defects. The coating is tapped with a wooden hammer or other instrument, determining by the sound whether the plaster is bouncing. The cracks are opened to find out their depth and cause. The separated layers are removed.
All defects are divided by type:
- requiring stripping to a shallow depth (up to 15 mm);
- areas with deep flaws requiring removal of the entire finishing layer, and sometimes the top layer of the base;
- broken corners.
After inspection, an approximate calculation of the total area and volume of grinding is made.
During the examination, be sure to find out what finishing material is applied and in what layers
It is especially important to find out the strength of the first layer.
Preparing the coating solution
During the work, it is important to pay attention to the homogeneity of the solution. Repeated mixing is organized after sifting through a fine sieve. It is recommended to use the same composition as the plaster with which the surface was previously treated
Then mashing is better
It is recommended to use the same composition as the plaster with which the surface was previously treated. Then the mashing is better.
The relationship between lime paste and gypsum is approximately as follows:
- For dry composition – 1:1;
- For slightly damp plaster – 1:2;
- For wet = 1:3.
Portions of preparing the solution are small, without slowing down the setting. The soil must be leveled before applying covers. The layer when applied will be 2-3 mm. You need to decide in advance what to use to grout the plaster.
During the work, it is important to pay attention to the homogeneity of the solution
Grouting decorative plaster
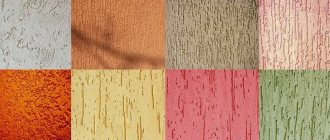
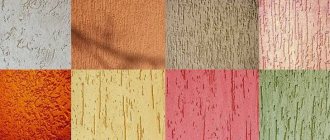
The pattern of decorative plaster is formed in two ways - during application and after the solution has set. In the first case, smooth trowels are used for grouting, which make it possible to remove sharp protrusions on the surface and soften the relief of the pattern; in the second, both smooth and textured trowels can be used, depending on the composition of the plaster.
1 way.
The solution is applied to the prepared base with a spatula or trowel, making strokes in a certain order or randomly. There is no need to level or smooth anything, the main thing is that the layer of plaster is laid in approximately the same layer over the entire area, and there are no missing areas. After application, you need to wait 20 minutes until the solution sets so as not to stick to the instrument. Next, take a grater, moisten it with water, apply the cloth to the surface and, with light pressure, very carefully perform movements in one direction.
Perform movements in one direction
If you press too hard, the plaster will smooth out and the pattern will be blurry. And this way only the sharp protrusions will be smoothed out, the indentations will take on a slightly more rounded shape. Periodically, the grater needs to be moistened for easier gliding.
Method 2.
Grouting decorative plaster
The plaster is applied in a layer of 2-3 mm and carefully distributed over the plane with a metal spatula or rule. The surface should be as smooth as possible, without traces of a spatula, transitions or other defects. Allow the solution to dry a little (15-20 minutes) and begin grouting. It is more convenient to use a plastic grater here. Grouting is done in strips no more than 1.5 m wide.
Movements can be circular, vertical, horizontal, oblique and even zigzag, but always in one direction. This is the only way a clear pattern will appear on the surface.
Perform movements in one direction
Be sure to moisten the grater, and while working, periodically clean it from adhering plaster - its particles fall into the recesses and smear the pattern. Perform movements carefully, trying not to touch areas that have already been covered. After processing one strip, immediately begin rubbing the next one. To prevent transitions between the stripes from being visible, moisten the joints well with water. Do not allow interruptions in work, as the plaster dries quickly and it will be impossible to form the desired pattern.
After finishing the grouting, you should wait until the surface is completely dry and treat the walls with a foam float. Such grinding will give the coating smoothness, remove excess particles of the solution, and at the same time will not damage the design at all.
Prices for various types of decorative plaster
Grinding technique
After the problem areas are repaired, the plaster is ground. Grinding is performed with a tool that fits your hand. Some plasterers use a falcon for applying and rubbing, some use a wide spatula and a rule. The main thing is to grind, achieving the most even layer possible.
Sequence of work:
- The wall is pre-moistened or primed. It is recommended to wet areas up to 2 m2. Some craftsmen use a foam roller for wetting.
- Throw the solution onto the wall, trying to apply it evenly to make it easier to spread over the grip area. This can be done with a wide stripe (when leveling using the rule) or with strokes in a checkerboard pattern.
- Immediately after application, begin to disperse the mixture on the wall surface. This is done with a grater using wide circular movements, or as a rule.
- After waiting until the solution begins to set, grouting or smoothing is performed to level out traces from the passage of the tool.
Grinding is different from plastering, so here are a few recommendations:
- The quality of the surface is better if you use a grater with a felt or felt pad.
- Where the plaster comes into contact with laid communications, cracks are most likely to appear during operation. In these areas it is better to leave a small gap, which, after the composition has dried, can be covered with an elastic acrylic mixture.
- When grinding, a layer of new solution up to 2 mm thick is applied. To prevent it from cracking, when drying, avoid drafts and do not use fans or heaters.
