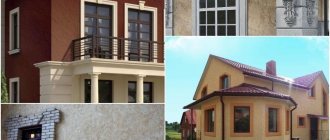
Plaster is used in almost any renovation, and even a beginner knows about this mixture. It is used mainly for leveling walls, but is also becoming popular as decoration. In this article we will look at which plaster is best for leveling walls and which mortar to choose for finishing a bathroom.
What plaster should I use where?
Recommendations for what solution to use for plastering walls with your own hands in different rooms and different surfaces:
| Room | Material |
| bathroom | cement plaster |
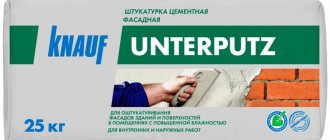
| facade plaster | cement |
| kitchen work area | cement |
| bedroom, corridor, living room | gypsum, cement |
| interior ceiling decoration | only plaster |
| ceilings balcony, loggia, bathrooms | cement |
| in damp, poorly heated rooms | I recommend cement or lime plaster |
| basement with very crooked walls | mortar |
| alignment of the façade plinth | mortar |
| slopes inside | plaster |
| slopes outside | cement |
It is better to sheathe the ceilings of the balcony, loggia, and bathrooms with something. Insulate the ceiling of the balcony and cover it with cement plaster. In bathrooms, you can safely use moisture-resistant gypsum plasterboard on the ceilings. Moreover, it is easier to prepare drywall for painting. It is often called dry plaster. Bedroom, corridor, living room - if the budget is not high, then everything else is cement (except for the ceilings). If the budget is a little higher, then the residential part of the premises is gypsum plaster
These are purely my recommendations, and I use these principles to select a solution. It is impossible to say unequivocally which plaster is better, each for its own purposes. Hope this helps you.
Which plaster is better for leveling walls, gypsum or cement? The conclusion from all of the above is that it is impossible to say which plaster is better. Because each mixture is for different purposes and has its own advantages and certain properties.
Advantages over other technologies
Plaster has many advantages over puttying, other leveling technologies, and rough finishing:
- improvement of heat and sound insulation;
- higher strength of the applied layer;
- minimum requirements for surface preparation;
- versatility (suitable for any walls, as a basis for applying the following materials).
Rice.
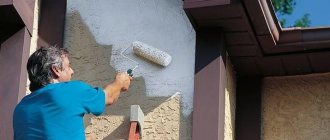
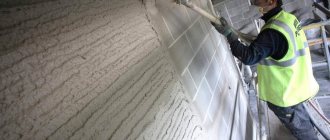
2. Plastering using a mechanized method inside the house It is also important that plastering work does not have to be done manually. It is wiser to turn to specialists in the field of machine plastering, who will complete everything in 1-10 days (depending on the area of the object), making perfectly smooth and durable walls.
Technical characteristics of plaster
Here we will talk about the main properties and characteristics of different types of plaster. Consumption, layer size under different conditions, drying time and much more.
Plaster consumption
Consumption:
- The average consumption of gypsum mortar is 9 kg per 1 m2 with a layer thickness of 1 cm. The cost of 30 kg is approximately $6
- The average consumption per square meter of cement composition is on average 15 kg with a layer thickness of 1 cm. The cost is approximately 25 kg - $2.5
- Consumption of lime material per 1 m2 is on average 12 kg with a thickness of 1 cm. Cost 35 kg - 1.5$ Cost of cement for a bag of lime - 0.5$
I think it will be useful for you to know how much plaster costs, at least approximately. In terms of price, it’s up to you to decide what is more profitable for you and what is more convenient to work with for this price. But as for the choice, I will help you come to this conclusion now. And so, you must decide what work is being performed and where, what your budget is (low, average or above average).
Minimum and maximum layer
| material | minimum layer |
| gypsum rotband knauf | 5mm, in practice 2mm |
| cement plaster | 5 mm, in practice 3 mm |
| Lime plaster | 10mm |
| material | maximum layer |
| gypsum rotband knauf | 50mm |
| cement plaster | 20 mm < reinforcement required |
| Lime plaster | 7 cm with reinforcement |
Shelf life of plaster
If stored correctly, the shelf life of the dry gypsum mixture is 6 months. As for cement, practice shows that if stored correctly, it does not lose its properties for a very long time. But if it has absorbed moisture from the air and become hard in the bag, then you can safely throw it away.
How long does it take for plaster to dry?
Gypsum begins to set in 45-60 minutes if you mix it correctly in clean water. Complete drying occurs after 2 weeks. The cement mixture on a brick wall with a 2 cm layer begins to set after 4 hours. Lime plaster can set differently depending on the amount of cement in the mix. It may set in 30 minutes, or maybe in a couple of hours. How long does it take for plaster to dry before applying putty? You can continue work after complete drying and visual evaporation of moisture from the leveled surface. But complete drying and hardening of cement and lime mortar occurs after 1 month.
The drying of plaster mortars directly depends on the humidity and temperature in the room; as a result, the drying time may vary.
Storing material on the balcony
It is not recommended to store dry mixture on the balcony for two reasons:
- At night, the temperature drops, and in winter, storage conditions in general are greatly violated.
- high humidity or excessive dry air.
The material should be stored in bags strictly according to the instructions indicated on the packaging. By the way, I also don’t recommend storing it in the basement for a long time. In general, I do not recommend storing leftover material and storing it. There is a very high probability that the remains will have to be thrown away over time.
How to apply
Since materials differ in their composition and characteristics, there are no uniform recommendations. Applying cement plaster is not a very difficult task. But it is possible to achieve the desired results only by strictly following the requirements prescribed by the manufacturer in the instructions. By carefully studying the technical documentation, you can find out that:
- In some cases, applying primers to the surfaces to be treated is strictly recommended, while in others it is strictly contraindicated.
- Solutions intended for manual application only have a high viscosity. They cannot be distributed by machine spraying.
- Tools suitable for working with certain types of plasters are useless in combination with other materials.
Remember that even a slight deviation from the specified proportions can create serious problems. If you have any doubts, it’s better to prepare a little solution and experiment on surfaces that you don’t mind. After all, no theoretical knowledge can replace experience.
DIY plaster mixture
With a limited budget for construction or renovation, you have to think about saving. Choosing plaster here is easy: you can save on finishing costs if you make cement-based compositions yourself. It's really cheaper, although it requires additional time and effort. But remember that additives are added to the finished compositions to improve the properties of the plaster. For example, antifungal additives are added to formulations for wet rooms to prevent the development of mold. In compositions for plastering external walls, an additive is added to the antibacterial ones to increase frost resistance. There are also plasticizing additives that make application easier. In principle, you can also add these additives to homemade plaster. You can find them at construction markets or in specialized stores; the standards are written on the packaging. And even taking into account the cost of additives, the savings when making it yourself will be significant - about 30%.
Proportions of plaster compositions for different application techniques
It’s not difficult to make cement-sand or lime-cement plaster with your own hands. Mix the components in certain proportions in dry form, then add liquid components (if any and water), bring to a certain consistency. You can mix it manually with a shovel in a large basin or trough. You can mechanize the process if you have a drill - using a special attachment. The easiest way is using a concrete mixer. With it, things go faster, but large volumes are difficult to produce, especially if you have little experience.
Cement-sand mixture: proportions
The cement-sand mixture is made up of 1 part M400 or M500 cement and 3-5 parts sand. The cement must be fresh, the sand must be dry, sifted through a fine sieve with a grain size of no more than 1.5 mm. Take 0.7-0.8 parts of water. As you can see, the proportions are approximate. Sand can be of different humidity levels, mortar can be used for plastering walls in different rooms, cement can be of different brands. When choosing the amount of water, the main guideline is ease of use. It is necessary to select the composition so that it is not so thick that it falls off the wall, but not so liquid that it slides. This is determined experimentally.
Working with DSP is not easy
There is also a difference in composition depending on the area of application. To plaster exterior walls, take 3-4 parts sand to 1 part cement. To level the walls indoors, more sand is added - 5 parts or even more.
Although DSP is much cheaper than ready-made mixtures, it is more difficult to work with - it does not stick to the wall very well, it takes a long time to dry, and when dry it almost always becomes covered with cracks. But it is not afraid of moisture and for this reason it is recommended for plastering walls in damp rooms, which will subsequently be finished with tiles or wall panels (PVC, MDF or any others). For other types of finishing - painting, decorative plaster and wallpaper - it is better to use cement-lime mortar or gypsum.
DIY cement-lime plaster mortar
Cement-lime plaster is made with the addition of lime paste. Parts of lime are measured out in the form of a dough, then diluted with water to a liquid state and in this form added to thoroughly mixed dry cement and sand.
The proportions of cement-lime plaster are as follows: for 1 part of cement take from 1 to 2 parts of lime paste, 6-9 parts of sand. Water is added to bring the solution to the desired consistency. The sand is the same as for DSP - with a grain size of no more than 1.5 mm, the water is clean, without contamination. Lime dough is better than store-bought. When extinguishing at home, there are still particles that have not reacted. Later, when the wall gets wet, they react and increase in volume, which causes pieces of plaster to fall out. Therefore, it is better not to save on this.
Cement-lime mortar is more plastic, but less durable
The exact selection of proportions is determined experimentally: the mass should stick well to the wall. Walls in any premises can be plastered with a cement-lime composition. The composition is softer, more convenient to work with, and does not crack when dry. But the strength of such plaster is much lower than DSP and this must also be kept in mind.
Good gypsum plasters
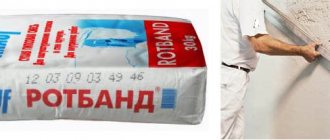
The most popular gypsum plaster is Rotband from Knauf. This is a really high quality product that is easy to use even for beginners. The same company has other products - Goldband and HP Start. They are cheaper, and the quality is quite decent.
The most popular type of plaster is Rotband.
NR Start is a gypsum-lime composition, Goldband is a gypsum composition. The difference between Rotband and Goldyuand is the thickness of the minimum layer. Rotband’s is 5 mm, the second’s is 8 mm. Otherwise, the technical characteristics are very similar - both consumption (8.5 kg/m3 with a layer thickness of 1 cm), and maximum layer (50 mm), and compressive and bending strength. The density in the hardened state differs slightly: ~980 kg/m3 for Goldband and 950 kg/m3 for Rotbabd. Scope of application: any residential and non-residential heated premises, including kitchens with bathrooms.
| Name | Purpose | Color | Layer thickness | Binder type |
| Knauf Rotband plaster mixture | For plastering smooth surfaces of walls and ceilings | White gray | 5-50 mm | Gypsum with polymer additives |
| Plaster-Adhesive Mixture Knauf Sevener | For restoration of old plaster surfaces, including facades | Grey | Portland cement with polymer additives and reinforcing fibers | |
| Plaster Bergauf Bau Interier | For plastering in rooms with normal humidity | Grey/White | 5-40 mm | Cement with polymer additives and perlite filler |
| Plaster Volma-Canvas | For indoor spaces with normal humidity | 5-50 mm | Based on gypsum with chemical and mineral additives |
Volma Layer, Osnovit Gipswell, Eunice Teplon, and Prospectors also speak well of gypsum plaster. They cost less, give good results, but it’s still easier to work with Rothband and the “company”. Based on the results of working with these brands, there are both positive and negative reviews, but in general, the quality is not bad.
Final recommendations
Optimal materials for different types of walls
The most versatile are gypsum-based plasters, which are applicable in most types of buildings.
| Cement-sand | Plaster | Cement-lime | Acrylic based | Silicone based | |
| Aerated concrete | Acceptable | The best option | Acceptable | Acceptable | It is forbidden |
| Brick | The best option | Acceptable | Acceptable | Acceptable | Acceptable |
| Concrete | The best option | The best option | Acceptable | Acceptable | Acceptable |
| Foam block | Acceptable | The best option | Acceptable | Acceptable | Acceptable |
| Tree | Acceptable | The best option | Acceptable | The best option | The best option |
Manual or mechanized plastering?
Machine plastering is faster and cheaper compared to manual plastering. At the same time, the quality of work and its speed are higher due to automation of application.
| Hand plastering | Machine plaster | |
| Speed of work completion | from 10 sq.m/day | from 40 sq.m./day |
| Finishing | needed | surface ready for finishing |
| Average cost of work | 420 rub./sq.m. | 220 rub./sq.m. |
| Foam concrete plaster | Yes | Yes |
| Brick plaster | Yes | Yes |
| Concrete plaster | Yes | Yes |
| Foam block plaster | Yes | Yes |
| Wood plaster | Yes | limited |
Which plaster to choose for leveling walls
You can achieve perfectly smooth walls using drywall, special solutions or plaster. The choice of option depends on personal preferences and is determined by the material from which the walls are made. To level out large uneven areas, it is better to use plaster with a cement or lime base. To finish walls with small potholes and cracks, another plaster is used to level the walls:
- silicone - consists of mineral fillers, silicone resins and pigments, can be used in any room;
- acrylic - includes mineral components and acrylic resins, is prone to flammability, and therefore is not suitable for leveling walls in the kitchen and in areas with high temperatures;
- silicate - a universal mixture consisting of mineral filler, pigments and liquid glass, provides high quality coating;
mineral - the most budget option, allowing you to achieve a unique decorative surface, contains cement, lime and marble chips.
Plaster is used in the process of finishing a room. It is needed to level walls, hide depressions and cracks, seal seams between masonry, etc. Before wallpapering, the walls must be treated with plaster. Otherwise, due to the uneven surface, the wallpaper will overlap each other or, conversely, a gap will appear between the joints of the two canvases. In addition, plaster has good thermal insulation properties - it does not let cold air into the room and does not let warm air out.
Sometimes plaster is confused with putty. Putty and plaster are very similar in properties, but there is a significant difference - plaster is used to level walls with a large curvature and in appearance it is similar to facade plaster, since it contains filler. And then putty is applied to smooth out the grainy texture of the plaster.
Which plaster is best for apartment walls? This question cannot be answered unambiguously, because when choosing a coating, it is necessary to take into account the material of the walls (concrete, brick walls) and in what conditions the plaster will be used (high humidity, normal temperature conditions, etc.). There are several types of plaster based on composition: gypsum, cement, lime, clay. Plasters with gypsum and cement are more practical. Sometimes the binding elements are combined: lime mass is added to the cement-sand mortar.
Rating of the TOP 20 best plasters for 2021
The Russian construction market offers a large number of domestic and foreign plasters with different compositions. They can have universal or specific applications. When choosing a material, it is important to proceed from the basic criteria and correctly evaluate specific operating conditions.
Ratings of plasters for various purposes, compiled taking into account consumer opinions and expert assessments, will help you choose the best option.
| Place | Name | Price |
| TOP 3 best plasters by price | ||
| 1 | KNAUF Rotband | Find out the price |
| 2 | Volma Canvas | Find out the price |
| 3 | Weber Vetonit | Find out the price |
| TOP 3 best plasters for interior work | ||
| 1 | Volma Layer | Find out the price |
| 2 | Prospectors | Find out the price |
| 3 | Ceresit CT 24 | Find out the price |
| TOP 3 best plasters for bathrooms and kitchens | ||
| 1 | Paladium Palaplaste | Find out the price |
| 2 | Volma Aquaslayer | Find out the price |
| 3 | Unis Teplon | Find out the price |
| TOP 3 best facade plasters | ||
| 1 | Unis Silin | Find out the price |
| 2 | Litokol Litoplan | Find out the price |
| 3 | KNAUF Cottage | Find out the price |
| TOP 3 best plasters for machine application | ||
| 1 | KNAUF MP-75 | Find out the price |
| 2 | Volma Gips-Active | Find out the price |
| 3 | Weber.vetonit | Find out the price |
| TOP 3 best cement plasters | ||
| 1 | Mapei Nivoplan Plus | Find out the price |
| 2 | KNAUF Grunband | Find out the price |
| 3 | Volma-Akvaplast | Find out the price |
| TOP 2 best gypsum plasters | ||
| 1 | Rusean Plaster | Find out the price |
| 2 | Prospectors Optimum | Find out the price |
Which plaster is better: dry or wet?
To understand which plaster to choose for the walls in an apartment (dry or wet), you need to understand the properties of all types of coating. Dry plaster is called drywall. The wet method of leveling walls is done using plaster mortar. In this case, the thickness of the coating is adjusted depending on the unevenness of the surface. Each type of wall decoration has its pros and cons.
Drywall consists of three layers: cardboard, a layer of gypsum, cardboard. Dry plaster is used not only for leveling walls, but also for constructing suspended ceilings, partitions, door and window slopes. Advantages:
- ease of installation;
- strength;
- versatility;
- environmental friendliness.
Among the disadvantages are the possible appearance of cracks, lack of resistance to steam and water, difficulty in attaching pictures, shelves, etc. on a plasterboard structure.
Wet plaster is also called monolithic plaster, because after the mixture dries, a perfectly smooth coating without joints remains on the wall. This type of finishing takes more time than installing plasterboard sheets. The master manually applies the finished mixture over the wall and levels it until it hardens. Advantages of wet plaster:
- does not “eat up” space, as drywall does. Dry plaster is fixed in blocks of a certain thickness, while the thickness of wet plaster can be controlled;
- durable. The service life of such plaster ranges from 15 to 30 years. With proper care, the coating will remain in its original form;
- resistance to mechanical stress. If handled carelessly, dents may appear on drywall; this does not happen with plaster;
- moisture resistance. Wet plaster is not afraid of water and steam, so it can be used to level walls in the bathroom and kitchen.
Pros and cons of cement mortar
Cement mortar is used in construction. Its advantages:
- affordable price, high adhesion strength;
- wide choose;
- moisture resistance;
- retains plasticity for a long time.
Minuses:
- Cracks appear after drying.
- Heaviness of the solution.
- The complexity of the plastering process.
- Poor application on concrete and wood surfaces.
- Long hardening time.
There is still no other alternative to cement mortar.
Which plaster is better for plastering walls?
When a renovation takes place in a room, sooner or later the question arises: “Which plaster is best for plastering the walls?” To understand this issue, it is necessary to find out the advantages and disadvantages of various types of plaster.
According to its purpose, plaster is divided into:
- simple - ordinary plaster, with which the walls are leveled for further gluing or painting;
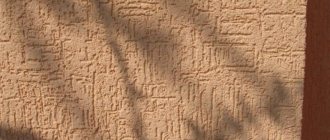
- decorative - used as a finishing touch for walls; it can also level surfaces with small grooves, depressions, and irregularities;
- special - contains particles that change the properties of the mixture. Thus, when barite concentrate is added, the plaster becomes X-ray protective, and if liquid glass and quartzite are added, an acid-resistant mass can be obtained.
Simple plaster, in turn, is divided into several more types depending on the binder:
- cement and sand. The proportions of the main components may vary, depending on the purpose of applying the mass. It has a rough surface, so after drying, a layer of putty is applied to it;
- lime. It is easier to work with such plaster due to the plasticity of the mixture, so the time for applying plaster to the surface is significantly reduced. Cement is present in the mass in small quantities (up to 10%). This is reflected in the strength of the material;
- gypsum. Gypsum plaster does not have waterproof properties, so it is better not to use it in the bathroom. It dries out quite quickly. This property must be taken into account when choosing the amount of dry mixture for dilution with water.
Preparatory stage
Preparatory work consists of surface treatment before applying the first layer of plaster. The nature of the work is determined by the type of foundation:
- Preparing the brick surface. For better adhesion, you need to fix the reinforcing mesh or make indentations in the mortar between the bricks. Next comes cleaning of dust and debris and priming.
- Preparing concrete walls. If the material is not very dense, shallow cuts are made with an ax, then treated with concrete contact.
- Foam block surfaces are coated with a deep penetration primer.
- Preparing wooden walls for plaster. It is necessary to fill the diagonal slats in increments of 5 cm so that the solution is better retained on the surface.
There should be no large protrusions, loose old coating, metal elements, dust or debris on the surface of the walls. Once the base has been prepared and the primer has dried, you can begin the process of applying plaster.
