Insulating the outside of the walls allows you to retain heat inside the room. It is performed at the stage of construction or reconstruction of a building. Modern technology for facade insulation is carried out in two ways. A ventilated façade is a durable frame along the wall, which is filled with heat-insulating material and lined with porcelain stoneware or composite cassettes on the outside. And the second insulation system “wet facade” consists of insulation, reinforcing mesh, primer and requires final plastering.
The work is carried out using water, which is why the epithet “wet” arose. The advantage is that the construction of an expensive frame is not required, and the necessary materials are attached directly to the wall. They are then covered with a beautiful finishing layer.
How to choose materials for wet wall insulation
The raw materials used in the work must have a certain level of water absorption,
frost resistance, vapor permeability and thermal expansion.
The insulation layer for a wet facade can be basalt (stone wool slabs) or polystyrene foam. Plates made of basalt wool with a density of 150 kg/m3. and a strength threshold of at least 15 kPa, are recommended for finishing the facade of a house.
Glass wool is not used as insulation for the plaster system, because the structure of the material is not intended for high loads.
Insulating facades with extruded polystyrene foam is no longer popular because it is more difficult to attach due to weak adhesion to construction adhesive. In addition, this material “does not breathe”, prevents the free conversion of air and steam, smolders in a fire, releasing toxic substances.
It is allowed to insulate the walls of a house with polystyrene foam only of façade grades that meet fire safety requirements. Additionally, for the same purpose, cuts are made from mineral wool.
When insulating a log house with penoplex, the protruding joint of the logs is not removed, because cut crowns will cause the corners of the house to freeze.
The choice of material depends on the thickness of the wall and its composition, on the climatic zone where construction work is carried out, and on the layer of interior finishing.
How to plaster insulation, selection of composition, its characteristics
When insulating using the “wet facade” system, a plaster layer is applied on top of the insulation, which protects the insulation and at the same time serves as a façade finish. Let's take a closer look at what plasters are used for insulated facades and what their features are.
The wet façade system is also called “bonded façade thermal insulation system”, or “light wet insulation”. These terms may be found on plasters packaging and determine their scope of application, so you need to pay attention to them. Basically, thin-layer plasters are used on top of the insulation.
They differ in that the base contains grains of light filler of the same size, usually from 0.5 mm to 6 mm in diameter. The size (caliber) of the grain determines the minimum thickness of the layer of this plaster. Its base can consist of various substances. Hence the wide variety of properties of plasters for facades, and in particular for the insulation layer.
Distinctive features of thin-layer plasters
Thin-layer plasters can vary significantly in their properties, however, it is possible to identify what they have in common.
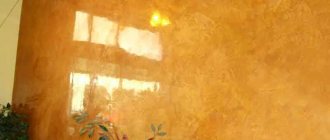
- Thin-layer plasters have bright colors and excellent decorative properties, and are well suited for finishing and decorating facades. They are used not only on top of insulation, but also as a covering for rough and durable mineral plasters.
- Basically, they have increased vapor permeability; plasters can be used on top of vapor-permeable insulation layers.
- The layer thickness is often small, maximum 4 cm.
Vapor permeability is a key characteristic for plaster, which is applied on top of the insulation layer. The finishing surface layer should not have more resistance to steam movement than other layers of the wall, otherwise the wall will get wet in cold weather. The greater the vapor permeability, the better.
One of the manufacturers suggests using their plasters and other compounds when insulating a “wet facade” according to the following scheme
Cement-based façade compositions
The plaster is based on white cement. Common additives are fiber to impart bonding, plasticizers, hydrophobes for moisture resistance. A distinctive feature is low cost and the widest application. It is sold as a dry mixture and prepared at the construction site by adding water with constant stirring in a concrete mixer or with a mixer in a bucket.
But compared to other types of thin-layer plaster, cement (mineral) plaster is more susceptible to cracking, easily absorbs dirt, is less bright, and has fewer colors. Vapor permeability is high.
Thin-layer acrylic based
Acrylic resin is the basis of this material and gives it special properties. Sold in liquid form in a bucket. It is possible to add silicone to the composition, then the plaster can be called “acrylic-silicone”, the main difference of which is greater vapor permeability.
In general, acrylic plasters are characterized by high mechanical strength, resistance to dirt and cracking, and a wide range of colors. Vapor permeability is low, which sharply limits its use.
Silicate (silicon) plaster - based on liquid glass
Silicate plaster is sold in buckets, it is mainly characterized by an alkaline reaction and some danger when working. Therefore, it is necessary to use protective equipment. You can find varieties with the addition of silicone, which can be called polysilicate or polysilicon. They have improved ductility, are better applied to the wall and form a uniform layer. But the resistance to mold, fungi, and algae is lower.
In general, this class is distinguished by the creation of a coating that is resistant to contamination and biological damage. But the composition is more difficult to apply evenly on the wall; skill is required. Vapor permeability is average.
Silicone thin layer
Polymer formulations are designed to be “no downside”. Therefore, their layer on the wall is strong, resistant to stains, very colorful with a maximum number of colors, and easy to work with. Vapor permeability is average.
What to choose for the facade
Information on various types of thin-layer plasters is given in the table
If the insulation in the “wet facade” system is polystyrene foam, then any type of plaster from the above can be used on top of it. Since the vapor permeability of the foam layer is very significant (foam is used on walls made of heavy vapor-proof materials - concrete, solid brick). More details about the wet façade insulation system
For hard mineral wool slabs that are glued to the wall, in this case, only mineral plaster can be used.
As for various silicate or silicone plasters, when choosing them you need to look at the characteristics and scope of application of each specific brand. Vapor permeability may vary.
Acrylic compounds cannot be used on mineral wool. The same conclusions are also true for lightweight aerated concrete insulation, which has recently replaced mineral wool.
Selection by permeability and strength
If the walls are single-layer and made of cellular concrete (how aerated concrete walls are built) or of porous ceramics (read more about warm ceramic walls), then the plaster for their exterior finishing should be more vapor-permeable than the blocks themselves. Mineral, silicone and silicate plasters should be suitable.
But in each case, when choosing a specific brand of plaster, you need to consult with specialists and study the manufacturer’s instructions on the scope of application of this plaster.
A more difficult case is applying a layer of rough (usually mineral plaster) over a layer. If the physical properties of the old layers of the wall are not known, then you need to apply the most vapor-transparent mineral plasters in a thin layer.
The following rule is also always followed. The applied layer must have a strength less than its base. Surface decorative thin-layer plasters should be less durable than the base on which they are applied.
When choosing a finishing composition for insulation and facade, the terrain and possible unfavorable factors for the wall are taken into account. For example, the wall may be predominantly exposed to wind and dust, so a plaster that is very resistant to abrasion and dirt is needed.
The same goes for a house located by the road. If the place is damp and shaded, then the growth of moss and algae is possible; the composition of the plaster, accordingly, must be resistant to biodamage.
Coloring
It is recommended to paint the plaster in bulk, choosing a color close to the future façade paint. This ensures uniformity and depth of color on the façade.
The paint on the facade, in addition to its decorative properties, is a protective layer. All mineral plasters must be painted. Acrylic plasters do not need to be painted.
The plaster over the insulation layer is painted only in light reflective colors. It is unacceptable to paint plasters over insulation in dark colors on the sunny side of the building.
Texture
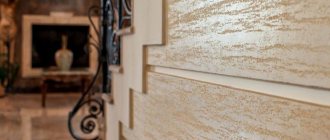
To decorate the facade, most often the finishing layer is given one or another relief - shagreen, lambskin, bark beetle... To add structure, additional granules can be added to the plaster - marble or glass chips, mica, coarse sand... However, the thickness of its layer should not be less than 1.0 cm.
But the final formation of the texture depends on the skill of execution, on the tools used - a roller, spatula, broom, rag... If you have no experience in this matter, then it is recommended to practice on secondary walls.
Thin-layer compositions not only reliably protect the insulation layer, but also have excellent decorative qualities, a variety of bright colors and resulting textures. They are applied not only over insulation, but also over strong layers of cheap mineral plasters.
To apply plaster, you need to coordinate with the weather. It is recommended to invite specialists to carry out this work - finishing the facade with plaster on top of insulation.
You can also decorate the façade on top of the insulation using hinged panels, just like making a ventilated façade with siding
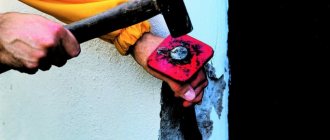
How to fix insulation boards
The insulation is glued to the previously prepared wall surface. The glue is carefully applied
perimeter of the material. This method reduces the consumption of adhesive and ensures the required fastening strength. During work, make sure that the glue covers at least 40% of the insulation area.
After drying for 3 days, the thermal insulation layer is additionally fixed with dowels. The fasteners enter 5-9 cm into the wall, depending on the volume and number of pores. The insulation must be secured with a dowel with a wide head. The dowel cap should be made of polyurethane foam so that wet spots do not appear on the facade.
Stains on the facade appear when using a dowel with a metal head.
Because the metal freezes at the base of the outer surface, and warm air leaves the house, condensation appears. As condensation appears on the surface, it forms a wet spot. Therefore, a dowel with a plastic head is used for façade plastering systems.
To ensure the quality of thermal insulation, it is recommended to follow a number of rules:
- continuous longitudinal joints cannot be formed between several rows;
- the seams of adjacent slabs must overlap;
- the inner side of the slab is pressed against the base of the wall, and the edge of the insulation is pressed against the edge of the adjacent slab;
- Any glue protruding between the seams must be removed immediately with a rag.
Plastering the facade with your own hands - the main stages
Plastering of facade structures is carried out in stages:
- surface preparation;
- fixation of thermal insulation layers;
- installation of reinforcing mesh;
- plastering of insulated surfaces in several layers.
Preparatory work
Work is carried out at an air temperature of +15…+20°C. In cool weather, you will need to make scaffolding around the building and cover the structures with windproof film. Then the surfaces are cleaned of old dyes. After cleaning, the seams are re-filled with putty. The walls are leveled using a primer.
Installation of insulation
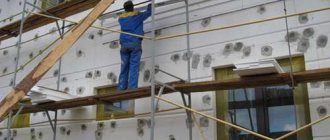
On the prepared surface, insulation boards are glued in rows horizontally. Work is carried out from the lower sections of the facade. The slabs are placed “staggered”, the gaps must be at least 28 cm. Continuous gluing of the insulation is not recommended, because The thermal insulation of the room will be reduced. It is important not to allow a difference in the level of the slabs of more than 3 mm to create a flat surface. After the adhesive base has dried (20-24 hours), the insulation is further strengthened using dowel umbrellas.
Facade reinforcement
To strengthen the base, façade reinforcement may be required. A mesh of glass fibers is fixed to the insulation or using plastic fasteners. The mesh is mounted from the corner areas, then onto the main surfaces. To strengthen the corners, a perforated profile is used.
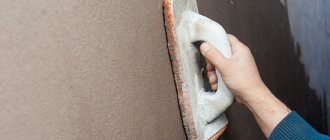
Plastering facade walls
To finish with plaster you will need the following tools:
- primer for priming;
- hammer drill with a set of attachments;
- construction mixer;
- deep containers;
- grater;
- building level;
- spatulas, etc.
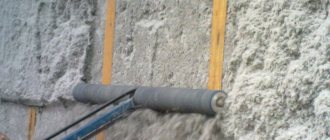
The plaster is applied at least 3 days after completion of the reinforcement. The first spraying with the mixture is done using a trowel. After the mass has dried, priming or surface treatment with a solution is performed. Treatment with the composition is carried out on a wet surface. Silicone or silicate plaster mixtures are recommended to be applied in several layers, then the surface is leveled and rubbed after drying.
The work is completed by painting. In some cases, at the finishing stage, decorative finishing mixtures are used on the outside of the building. Plaster compositions can be applied using different techniques: vertical, horizontal, cross or circular strokes.
The use of tinted plaster mortar will reduce time costs. The color scheme of the coating must correspond to the general style of the building and site.
Installation of the plaster layer
First, the reinforcing mesh is installed. Before work, cover doors and windows with film to protect them from damage. It is necessary to make sure that all hooks are installed at an angle of 30°, no less. It is recommended to stretch the mesh in vertical sections equal to the width of the roll, which is unrolled from top to bottom. The overlap of stripe on stripe must be at least 50 mm.
The mesh is secured with a locking pin. Can be secured by installing two fixing plates on top of each hook. The plates must not be pressed in so that the thermal insulation of the facade does not deform, which is especially dangerous for gas-filled plastic called polyurethane foam. Plastic spacers are attached between the mesh and the insulation surface so that the mesh becomes part of the first layer of plaster.
Advantages and disadvantages
To make the decorative layer stick better, a mesh is installed under it.
The plaster forms a protective layer that stops the destruction of the insulation. Wet finishing withstands temperature fluctuations and is not damaged by frost.
The material has advantages when performing work using technology:
- does not collapse under mechanical loads;
- allows steam and condensate to pass out;
- additionally protects against noise.
In walk-through areas, a metal mesh frame is installed before plastering to prevent chipping.
The process is labor-intensive and requires professionalism during application. Textured plaster takes extra time. The work depends on the air temperature (not lower than -5°C).
Base plaster layer
The first layer, reinforced with mesh, will replace the frame on which the entire wet facade insulation system will be supported. The solution consumption is 15–20 kg/sq.m., the dry mixture is mixed according to the manufacturer’s requirements. The solution is applied with a special pump or spatula, periodically pressing the mesh to the inner layer.
If the mesh is deformed in some places and comes out of the solution with bulges, you need to correct the mistake and fix the problem area with a special nail. To reduce such accidents, it is better to apply the solution from the bottom up. The thickness of the first layer should be the same over the entire surface of the wall.
After applying the base plaster layer, it is recommended to maintain optimal humidity on the wall surface. In dry weather and high air temperatures, the plastered area will have to be moistened.
What type of insulation is optimal for facade plaster?
To correctly select insulating materials for exterior finishing, it is necessary to evaluate the following factors:
- Material rigidity - with sufficiently high rigidity values, you can do without additional strengthening (reinforcement);
- Affordable price;
- High thermal insulation properties;
- The shape is convenient for installation.
In accordance with the listed factors, the best option is stone wool and polystyrene foam. Since the materials are sold in the form of slabs, it is possible to carry out installation without the use of special equipment and obtain the expected result.
How to calculate the thickness of insulation?
To determine the required insulation thickness, you must use the appropriate calculations using the formula:
R ex.=(1/α (in)) + R1 + R2 + R3 + (1/α (n))
In this case, R refers to the heat transfer resistance of the wall layers - their actual quantity must be taken into account in the calculation formula. But α (n) and α (in) are the heat transfer from the outer and inner surfaces of the wall, respectively.
Insulation thickness for walls 27 cm thick R = 0.89 m²*K/W
The actual thermal resistance of the wall should be no less than the quotient of the layer thickness and thermal conductivity of the material.
For calculations, you can use an online calculator, which can be found on the Internet. Alternatively, you can not use calculations at all and use insulation, the thickness of which is 5 cm - this is the most common option, which will allow you to insulate a building in the middle zone, where winter is not characterized by severe frosts.
How to apply a leveling layer
To ensure that the facade plaster on the insulation has a beautiful appearance, apply the following ball of plaster
mixtures. The task is to remove defects of the working surface and prepare it for flawless application of the finishing coating. The solution consumption is 15–20 kg/sq.m. First, moisten the work surface generously. The second layer can also be applied with a powerful pump or an ordinary spatula, provided that physical effort must be made.
The thickness of the ball is formed to be about 10–12 mm, taking into account that the entire three-layer system will take at least 25 mm. The marks on the beacons serve as a guide for leveling the applied solution. The excess is collected in a container and can be used for further finishing work. In summer, it is also recommended to moisturize the second layer.
Choice of insulation
Expanded polystyrene is afraid of ultraviolet rays, so it must be plastered immediately after installation.
The material is sorted taking into account cost, durability, and insulating qualities.
The type of external wall is taken into account:
- for fences with low thermal conductivity (gas silicate, aerated concrete), mineral wool mats are used;
- porous walls (wood, coarse slag or expanded clay concrete) must be insulated with insulation that allows air to pass through, for example, fiberglass with hydrophobic impregnations;
- For brick and concrete, a layer of foamed polymers is used.
The thickness of the layer depends on the type of material; this parameter affects the reduction in the cost of insulating the building.
Expanded polystyrene
Mineral wool slabs are dense, so they hold the layer of decorative coating well.
Lightweight slabs are water resistant, do not get wet when exposed to moisture and maintain their integrity. The insulation layer does not allow steam to pass through and is characterized by increased density. Penoplex contains fire retardant flame retardants, so it self-extinguishes in case of fire.
Negative qualities include:
- release of harmful components when heated;
- destruction under the influence of the sun;
- damage from contact with bitumen and similar substances.
Extruded polystyrene foam, which is of high quality, works effectively for insulation.
Mineral wool
Rolled materials have a soft structure, so the plaster will not adhere to them.
Thermal insulation under plaster made of mineral fibers lasts for a long time. The mats have different fiber structures and are resistant to heat and chemicals.
The material is available in 3 types:
- glass wool - made from molten glass;
- stone wool is produced by melting sedimentary rocks;
- slag wool – melt of blast furnace residues.
The vapor-permeable layer repels moisture well if the composition contains hydrophobic additives. The material is an environmentally friendly type. For convenience, it is produced in two layers with a dense outer and loose inner surface.
Grinding and expansion joints
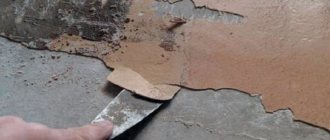
Grinding is done after the solution has moderately hardened. After applying the leveling layer, several hours pass depending on the weather. The tool is a construction float coated with polyurethane.
After hardening, the structure is cut through to form longitudinal and transverse seams. The expansion joint serves to reduce the load on structural elements in areas prone to damage. Danger may arise from an earthquake, ground settlement, or other natural and physical impacts on the structure. The cuts are made with a special tool, dividing the wall into conditional blocks that give the building elasticity. The seams are filled with insulating material, for example, mastic.
The width of the seam is 6 mm, and the distance between the cuts made is no more than 15 m. The extreme seam, going from top to bottom, is made no closer than 150 mm from the corner of the house. The cutting disc must cut through all layers, including the mesh.
How to properly plaster facade walls using insulation
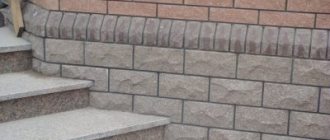
The first thing to do is to install a strip at the level of the plinth, which encloses the thermal insulation layer from below. Most often, the edge of the plank is equipped with a profile that protects the base from water getting into it.
How to properly plaster facade walls
The technology involves installing insulation in corner areas of the house. To protect the corner from various mechanical influences, an adhesive solution and reinforcing mesh are applied to the insulation. It is best to use special corner profiles that are easily pressed into the solution. The profiles are then covered with reinforced mesh. Under no circumstances should reinforcement be carried out in sunny weather. Most cloudy weather without rain is ideal.
The plaster is applied only after the working solution has hardened. Usually no earlier than a day later. The technology must be performed correctly. To do this, the solution is applied with a slight excess, and then equalized using a rule that should move evenly over the entire surface.
Plastering one wall over insulation should be done in one step. Work should not be interrupted. If the process is stopped for at least a day, then in the place where the work was stopped, unsightly traces will remain in the form of a clearly defined interface.
The technology makes it possible to install insulation and apply plaster at temperatures above +5°C. Before plastering over the insulation, the wall surface should be thoroughly dried so that all moisture evaporates.
How to apply a decorative layer
The installation of a wet facade, applied over insulation, ends with a top layer, which
performs a protective function from rain and wind, while at the same time being a design solution.
To form the top layer of plaster over the insulation sheathing, mineral mixtures are used; they are characterized by high air permeability.
Before applying the solution, you need to check whether the previous ball has dried well. It should take 5 days from the day the leveling layer is applied.
Before applying the solution, approximately 12 hours before, for example, overnight, the surface is thoroughly treated with a tinting primer.
Decorative plaster is applied in a thin layer and rubbed in a circular motion. The entire process is performed with the same grater. Bark beetle plaster can be acrylic or gypsum, depending on the method of application. The gypsum-based mixture is easier to apply and is recommended for home use. Acrylic solution requires certain work skills and application experience, so it is often used by specialists.
How to choose the right tools and equipment for the job
Plaster on the facade insulation is applied using the following tools:
- a ladle, scoop or shovel for spraying the solution;
- smoothing grater;
- building level;
- rule;
- foam rollers;
- corner trowel;
- trowels;
- plastic or metal containers;
- set of spatulas;
- reinforcing mesh (when leveling large surfaces), etc.
How to check quality
There are a number of tips that will help determine whether the work on installing thermal insulation is progressing correctly:
- At the preparatory stage, the walls are cleaned of dirt, previous coatings, and stains.
- Without deviating from the instructions, work is carried out with the adhesive composition.
- The insulation boards are fixed evenly.
- There is no unevenness at the joints between slabs or blocks.
- The dowels do not stick out above the insulation.
- The reinforcing mesh is laid in the base layer of plaster.
- Breathable materials are used, the plaster “breathes”.
- From the drains and from the roof, water will not get onto the façade finishing.
- There are no bulges on the surface of the wall, the façade is not covered with bumps.
- There are no cracks on the wall, in the corners of window and door openings.
Installing thermal insulation at home increases the lifespan of the building, significantly improves living conditions and reduces the cost of annual heating costs for the building in winter. It also protects walls from exposure to weather conditions, fungus and shock-absorbing destruction. Under sustained conditions and proper care, good thermal insulation of the external wall of a building can last 25 years.
Similar articles
- Fur coat facade
Facade
plaster
fur coat is the optimal solution for cladding a house.
...
Universal technology
for plastering
facades
using insulation
. Read more - Insulation for exterior walls of a house under plaster
Heat conservation is an important task for residents of private houses in most regions of Russia. Read more
- Bark beetle plaster on the facade
Bark beetle
plaster on the facade.
If, when finishing a building, it is necessary to preserve ...
of insulation
was previously fixed to the wall , it is necessary... Read more - Features of using façade plaster…
Features of using façade
plaster on
polystyrene foam.
...
This porous lightweight material is used as
insulation
under
plaster
for... Read more - Facade plaster: features and types
In addition, such
plasters
cannot be applied to all types of exterior finishes.
If polymer insulation
and surfaces are used... Read more - Facade plastering technology
To decide on
insulation
for
plaster
, read the article.
...
Facade
plaster on
aerated concrete. Read more
Benefits of technology
Finishing the facade with plaster over insulation is used in the design of country houses and country cottages.
Thermal insulation materials are not resistant to high humidity and temperature changes, so an additional plaster layer helps maintain the microclimate inside the home for a long period. Exterior design provides additional protection of the house from the effects of wind, climatic precipitation, and ensures a comfortable temperature and humidity level in the premises.
An additional layer of finishing improves the performance characteristics of the building, gives it a finished look, and increases the service life of the coating.
Advantages of insulating facades with foam plastic and mineral wool
Minvata | Styrofoam |
| Ideal for insulating facades of wooden houses. Here, mineral wool even surpasses foam plastic in its characteristics, according to experts, since it allows air to pass through better. A wooden structure will retain wear resistance precisely when insulated with mineral wool, which supports air exchange. | The material has high thermal insulation characteristics. It is ideal for insulating facades, as well as loggias with balconies, foundations and attics. It is widely used in modern construction, despite the production of more modern materials. |
| Mineral wool can withstand extremely high temperatures. This is relevant when insulating the facades of bathhouse complexes. | Craftsmen are more willing to work with foam plastic. It has a transparent installation algorithm, allowing work to be carried out in a short time, with the highest quality possible. |
| When, when installing an insulating layer, excellent noise insulation levels are expected to be achieved, the best option is to use mineral wool. It surpasses polystyrene foam in terms of sound insulation parameters. | As an insulation material, polystyrene foam is attractive due to its high wear resistance. It withstands sudden temperature changes and negative environmental influences, while maintaining its original technical parameters. Thanks to this, a layer of plaster, correctly applied to the insulating foam surface, will look flawless even after several seasons of use in difficult climatic conditions. |
| Mineral wool does not have such a high density as polystyrene foam. It is capable of transmitting moisture, ensuring its evaporation, and has convection properties. In this regard, many specialists, builders and ordinary consumers - home owners consider mineral wool to be more environmentally friendly than polystyrene foam. | Master builders note that when insulating the walls of bath complexes, saunas and buildings made of natural wood, foam plastic is inferior in terms of environmental friendliness to mineral wool. Polystyrene foam is not capable of providing convection, it does not allow the insulated surface to “breathe”, and does not support good air exchange. |
We provided a table, examined the advantages of both materials as an insulating layer for a facade, and made some comparisons.
Important! One conclusion can be drawn: when providing insulation for the walls of buildings made of natural wood, mineral wool is of greater interest. Due to its ability to maintain air exchange and moisture evaporation, it is ahead of foam. At the same time, it is with polystyrene foam that you can install insulation efficiently, as quickly as possible, with minimal time costs.
Table - technical characteristics of mineral wool
Roll sizes
Slab sizes
In general, it can be noted that both materials have good performance, are modern insulation materials, popular and in demand in the construction market.
Polyfoam sheet
Polystyrene foam size chart
The feasibility of external insulation
When insulating buildings, you should not only provide good thermal insulation performance, but also consider how you can avoid the appearance of condensation inside the walls during the cold season. Due to the change in the temperature of the building wall from minus on the outside to plus on the inside, at the conventional “dew” point, temperature changes turn into condensate, which is contained in the air of water vapor. When you move this point, along the thickness of the wall itself, the material becomes damp, and fungus and mold appear on it.
In the construction industry, the dew point is the temperature at which condensation forms. According to the rules, it should not be inside load-bearing walls.
When using wet facade technology, this point is moved beyond the building wall, thereby maintaining positive temperatures of all load-bearing structures.
Facade siding
A relatively new building material, siding is most often used to construct ventilated facades. If you choose between plaster and siding based on issues of installation speed, then working with the latter will be much faster. There is no need for additional leveling of the walls; there is no need to reinforce them. However, to properly install the siding, you will need a metal profile frame. And this is not the only nuance.
It is important! When arranging the facade, it is necessary to take into account the coefficient of thermal expansion. Its indicator is different even for one house. So, for walls located on the south side it is higher than for those located on the north.
Manufacturers offer a large amount of siding for exterior use. In this matter, pricing policy is akin to plaster. You can choose a very inexpensive material, or you can choose something that will imitate, say, brick. The cost of such material is several times higher. The average price of siding is 320 rubles per panel, the length of which is 300 cm and the width is 20. Thus, 1 m² of not the most expensive siding costs 532 rubles. You also need to add the cost of the frame. One square meter will cost at least 80 rubles. For the work, the master will ask on average 400 rubles per m2. Thus, the total cost of 1 m² of siding for the facade will be about 1,000 rubles.
The sheathed facade is easy to repair. It is quite possible to replace one or more damaged strips. You can sheathe a house in almost any weather, with the exception of temperatures below - 10 ° C and above + 30 ° C. A sheathed house will delight you for at least a couple of decades with one color scheme, which can only be changed if you completely remove all the sheathing.
What is a wet façade?
Insulation of facades with wet plaster is complex work on external insulation of walls and their finishing, which is carried out with wet solutions, such as adhesives and plaster. The coating consists of the following main layers:
- Glue. Thanks to it, thermal insulation boards are fixed and the walls of the building are leveled.
- Thermal insulation is the main insulating layer.
- A reinforcing layer for which a plaster-adhesive base and fiberglass reinforcing mesh are used. This allows you to increase the strength characteristics of the structure.
- Decorative finishing. It is used to protect walls from external influences and shape the architectural appearance of the house.
Plastering facades for the purpose of insulation involves the additional use of the following elements:
- Primer - used to treat the main wall, reinforcing layer and decorative plaster before painting it.
- Disc-shaped dowels - allow you to attach insulation to the wall.
- Perforated corner profile - used to form and strengthen corners.
- Perforated base profile - installed on the lower load-bearing element of the covering structure.
Advantages of wet facades
Using the wet finishing method allows you to create architectural styles that will be in fashion for at least another 20 years. Such houses have an expensive and substantial appearance, despite the fact that their cost is the lowest. The use of basalt wool and plaster has many advantages, among which are:
- significant reduction in heat loss of the building due to reduced thermal conductivity of the entire structure;
- a huge number of existing architectural solutions;
- safety of internal space;
- insulation and plastering of facades not only during construction work, but also if the buildings are already in operation;
- reducing costs for heating and air conditioning of buildings;
- good soundproofing properties of the finish;
- creating a favorable indoor microclimate;
- increasing the service life of the building;
- no load on the building structure;
- low cost;
- ease of installation;
- ease of material replacement and repair.
Disadvantages of wet facades
The disadvantages of this method include the seasonality factor of installation work. According to the technology, laying a wet facade is carried out from late spring to early autumn. If you do not comply with all conditions and standards, then such work will significantly reduce the service life of the facade, causing cracks to form on it.
- Temperature values for work should be from +5 to +30°C.
- It is forbidden to work during rainfall or if there is high humidity in the air, since drying of the adhesive and plaster layers will be difficult.
- For high-quality finishing, it is necessary to protect the facade from exposure to the sun and winds.