Materials Science-(PU72)
Topic 1.9 (b) - Plaster layers, spray, primer, covering
Hello my dear students!
I am pleased to inform you that we will now work using innovative technologies (that is, this blog). I think that this word is already familiar to you! And it won’t be difficult for you and me to work 100 thousand times better and more productive and, most importantly, MORE INTERESTING!!
Our course is designed for 59 academic hours. (48 theoretical and 9 practical hours, 2 hours test lesson). At the end of the course you will be required to take a test.
The course teacher's name is Evgeniy Yuryevich Dmitriev.
At the end of each day you will be required to answer the reflection questions on this blog. Nothing complicated!
So, let's get to work!
Today we are going to learn about:
- Plaster layers
- Splash
- Priming
- Covering
- Coating technique
Spray is the first layer of plaster coating.
Primer is the second layer of plaster coating.
- at 7-9 for soil without gypsum
- by 8-10 cm.
Priming
- this is the main (by volume) layer of plaster coating. It forms the required thickness of the plaster and levels the surface. If the thickness of the plaster is large, then the primer is applied in several layers. The thickness of each of them should not exceed 7 mm for lime and lime-gypsum mortars and 5 mm for cement mortars. The soil is leveled very well.
Covering
Covering
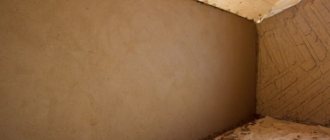
- third and final layer of plaster. Its thickness is 2 mm, decorative cover is 5 mm. The coating solution is prepared using fine sand, sifting it through a sieve with mesh openings of 1.5 x 4-5 mm. The thickness of the coating solution should correspond to the immersion of a standard cone by 10-12 cm. The coating solution is applied to the surfaces manually and by machine over hardened (set) soil, carefully leveling. The covering forms a thin soft film that can be easily rubbed or smoothed over.
Since the sandless covering is applied in a thin layer, there should be no sinkholes, potholes or other defects on its surface. A well-trodden covering has a fine-grained smooth texture that does not require puttying during simple painting. This increases the productivity of painters and reduces the cost of finishing work.
Reflection questions for today:
- What is the spray for?
- What surfaces can it be applied to?
- Why is the spray layer left rough?
- What is soil needed for?
- What affects the homogeneity of the solution?
- What needs to be done to make the cover softer?
- What do you do after grouting?
The plaster coating consists of 3 layers, which are applied sequentially: - spray; — soil; - cover.
The purpose of the first layer is to fill cracks and irregularities on the wall. The spray is applied to the wall without leveling, using a solution that is more liquid, like kefir. When dry, it forms a rough surface that improves the adhesion of the base layer. The thickness of the first layer is from 2 to 5 mm
To apply the second layer, use a solution of a thicker consistency. The soil levels the surface. It is applied in several layers, and each layer should be no more than 7 mm.
The third, top layer is made from 2 to 5 mm thick with a more liquid solution based on finer sand. The total thickness of the plaster layer is: - 12 mm - simple: - 15 mm - improved; — 20 mm — high quality.
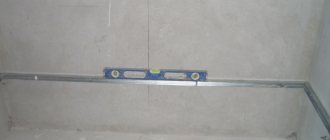
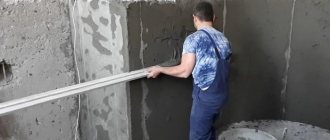
The evenness of the surface is checked with a long rod - the rule. Improved plaster can have 1-2 gaps 3mm deep per length of the applied lath (2m), and high-quality plaster - no more than 2mm.
The first layer of plaster (spray) is applied to the wall in a continuous layer without gaps. You need to throw the solution on the wall in such a way that it does not splash, but sticks to the surface. There is no need to level this layer. It is important that the spray fills all the unevenness of the wall and penetrates under the shingles of the wooden walls. It should cling well to the wall, then the entire layer of plaster will not come off.
The next, main layer of plaster, primer, is applied using a trowel from a falcon or a ladle from a bucket onto the first layer after it has partially dried and set to the wall surface. The consistency of the soil resembles good sour cream or dough. It must be applied in several layers until the required thickness is achieved, each layer being leveled, and the last one - especially carefully.
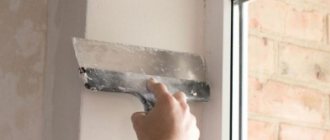
Primer application technology. 1. Using a trowel, apply a portion (2-4 liters) of solution onto the falcon, resting one end of the falcon on the box with the solution and lifting the other at an angle of 25-30 degrees. 2. Adjust the collected portion of the solution, removing the excess with a trowel. 3. Spread the solution or throw it on the wall. Tilt the falcon away from you. Scoop the mortar from the falcon with the end or edge of a trowel, bring it to the wall and with a sharp, but not too strong movement of the brush, throw the mortar onto the wall.
If you are plastering over a metal mesh or shingles, then you should not spread the primer, but spread it with a steel trowel. The same applies to the case of using a mortar without sand for covering. Holding the falcon horizontally in one hand, use a trowel to remove a small layer of mortar. Then, slightly tilting the falcon towards the wall, remove and smear part of the soil with a trowel and, moving it upward, distribute the solution over the wall section. Continue spreading the primer onto the wall, turning the falcon a quarter each time so as not to lose alignment.
Specifics of use
When applying high-quality plaster, certain details should be taken into account:
- When the initial layer is performed using a cement material, it is recommended to do the rest using the same composition. Instead of cement, it is permissible to use only a product based on it, adding lime. Finishing work is suitable for rooms with high humidity and for building facades, since each material has moisture-resistant properties. One of the main advantages of cement plaster with various additives is its low cost. The disadvantages include the low drying speed.
- When the second and subsequent layers are made with gypsum, the spray is made with lime material. This type of finish is suitable for a dry room, as the plaster will absorb moisture. This should be considered a disadvantage. The advantage will be quick drying.
- The thickness of high-quality plaster is 2 cm. When the curvature of the building base exceeds this figure, it is permissible to increase the amount of material, however, after every 1 cm of processing, a reinforced mesh is fixed.
Proper plastering of walls
Plastering walls yourself is a simple process; it is only important to carry out the entire technology correctly.
If earlier this method was used to prevent the entry of moisture into the room and the subsequent “breeding of dampness”, to increase sound and thermal insulation, today plaster also performs a decorative function. Agree, even if this is not textured plaster, but the solution was used exclusively for sealing seams and smoothing out folds, the overall appearance of painted or wallpapered walls looks much neater. Walls are usually plastered after the foundation has settled, that is, about a year or two after the construction of the building.
Properly plastering walls is a job of applying several layers of plaster. One, but massive layer is not enough. This is due to the fact that the thick layer of solution does not have time to set and slides.
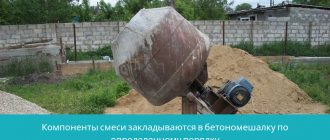
Preparation of mortar for plaster
The first thing you need to do if you decide to plaster the walls yourself is to prepare the solution and the surface on which it will be applied.
To prepare walls for plastering work you need:
- hammer-pick;
- a hammer with a notch (an ax can replace it);
- shoe knife;
- putty knife.
To prepare the solution directly you will need:
- box;
- container for water;
- sieve for sifting sand and dry mixtures;
- a sieve for straining the solution;
- scoop;
- shovel.
It is important to choose the right solution. It always includes three main components:
When mixing all the components, it is important to maintain the correct proportion so that the work is not in vain. The fact is that in the absence of fillers, cementitious materials begin to crack and crumble after drying.
The choice of aggregates and binding materials depends not only on the type of surface that is going to be plastered, but also on the operating conditions and durability of the structure.
What is required by SNiP
For the most complex type of plaster, the requirements are very high. Deviation allowed:
- no more than one millimeter per meter of wall or ceiling;
- less than five millimeters over the entire height;
- up to two irregularities per four square meters, their depth should be less than two millimeters.
The moisture content of the base before starting work should be 8% or less. Permissible air humidity is less than 70%, air temperature is 10 degrees Celsius or higher, up to 24 degrees, otherwise the mixture will dry out too quickly. In winter, the room is insulated so that it does not cool down. Stable temperature promotes more uniform drying of the plaster, the layer becomes durable and uniform.
There are restrictions on the thickness of the plaster cake, which depends on the type of mixture used and the characteristics of the surface. For example, when using Knauf MP-75 mixture for machine application, a layer of 8-50 mm for walls and up to 15-20 mm for ceilings is recommended. For Rotband gypsum composition, the norm for a wall varies from 5-50 mm for walls and up to 15-20 mm for ceilings. Knauf Unterputz cement for walls is applied up to 35 mm thick, and MN Start gypsum mixture is applied up to 30 mm thick.
Grabbing and applying plaster solution
After the solution is prepared and the wall is primed, you can begin plastering the walls. This procedure is performed in stages with a certain time interval.
- The first layer is called spray;
- the second is soil;
- the third is the covering.
You can level an external or internal brick wall using metal guides
The solution can be applied in two ways:
Spreading is a simpler process in its technology, but only thick solutions can be applied using this method. A composition of any consistency can be sketched out, but this is somewhat more difficult for a beginner, since it requires certain dexterity and skills.
using the throwing method . The creamy solution flows well into uneven areas, adheres reliably to them and holds all subsequent layers of plaster on the surface. After the spray has hardened, the primer is applied directly. A mass similar in consistency to dough is either thrown on with a trowel and leveled, or spread with a falcon.
Find out how to plaster foam block walls and why it is important to use a special technique in our review.
Decorative Venetian plaster is a new type of interior decoration, find out more with all the details!
Characteristics of the mortar mixture
Quality requirements during plastering for the finished product:
- All layers of plaster are applied using a solution of appropriate consistency. For spraying and soil, after mixing the product, the material should be filtered through a metal sieve. Cell parameters are 0.3 cm. If covering is performed, the solution is passed through a metal sieve with cell parameters of 1.5 mm.
- The mobility of the material is within the range of 0.5-1.2 cm. This figure is not allowed to be exceeded.
- Another important parameter will be moisture retention. This parameter is 90%.
- Requirements are also placed on the size of sand grains when a product based on cement and sand is used. For layers 2 and 3, the fraction parameters will be 2.5 mm, for layers 1 – 1.5 mm.
- When plastering is done using a finished product, it is necessary to familiarize yourself with the expiration dates of the product. It is recommended to buy material that was manufactured shortly before facing work.
High-quality plaster is the standard for leveling walls, so lime mixture is rarely used for work; it is replaced with dry solutions made from polymer additives.
Plaster leveling
The wider the trowel, the smoother your wall will be.
As a rule, there is no need to level the spray. The exception is those cases when protruding clots of solution form on the surface and must be removed.
But the soil needs to be leveled. This is done either as a rule (in the case of throwing the solution with a trowel) or with the help of a falcon. The latter occurs when applying the solution with the same falcon. The leveling process in this case is similar to the process of spreading primer, only the primer is no longer placed on it, and the pressure on the tool is applied depending on the plane in which it is necessary to level the solution.
Material quality requirements
With high-quality plaster, high demands are placed on the quality of the materials used. They are defined by construction GOST and are also given in SNiP. When mixing the mixture for high-quality wall treatment, you must adhere to certain rules. The finished mixture produced in production must also meet all the necessary standards.
So, to carry out such operations as spraying and soil, the plaster composition must be passed through a sieve with a mesh size of 3 mm, and for covering - 1.5 mm. The mobility of the solution ranges from 5 cm to 12 cm. The ability to retain water in high-quality plaster should reach 90%.
For this plaster it is necessary to use sand with a fraction of 1/2. The mixture used for spraying and priming includes sand, the grains of which do not exceed 2.5 mm, and for coating - up to 1.25 mm. When buying a ready-made mixture in a store, be sure to pay attention to the fact that the appropriate documents are issued with the packaging. They indicate the brand, date of manufacture of the mixture, mobility, substance for the binder, etc.
Applying a top coat of plaster
After the primer has been applied (if necessary, this can be several layers), it must be allowed to set and then brushed over it with a brush dipped in water.
Only after this can the final layer of plaster be applied - the covering. It is important here that there are no large particles of sand in the solution itself, since when grouting and smoothing they can leave behind streaks.
Step-by-step instruction
- Apply the coating solution with a trowel, and use a trowel for leveling.
- The last ones make wave-like movements from bottom to top.
- When the covering layer has dried a little, but not yet completely dry, they begin to rub it with a grater.
- Pressing this tool tightly to the surface, it is moved in circles, while the existing tubercles are cut off, and the solution removed in this way will fall into the recesses, leveling the plastered surface.
Hanging surfaces
Before starting plastering, it is necessary to hang the surfaces and level them using marks and beacons, which can be wooden or plaster.
When hanging, use a plumb line, a level with a rule, or a water level.
Sequence of hanging. In the corner of the wall, at a distance of 300-400 mm from the ceiling, a nail is driven in to the thickness of the plaster. A cord is tied to the head of this nail, which should hang freely to the floor. A second nail is driven into the wall just above floor level. They also hang the opposite corner of the wall, driving in nails.
After this, pull the cord over the nail heads. If the wall is smooth, the nails are left in it. If the cord touches the surface, the protruding section must be cut off.
Next, they begin to install stamps and beacons. A solution or gypsum paste is applied to each driven nail, its front side is leveled at the level of the nail head and the sides are cut off. Marks are required to establish the rule, which is secured with plaster, nails or clamps. Typically, mortar or plaster is applied. After setting, the rule is removed with a hammer. The strip of mortar that remains on the wall is called a beacon.
To hang ceilings, a 3 m long rule is used. In the middle it is strengthened with a level - regular or water. To do this, nails are driven into the ceiling to the thickness of the plaster. Then they take any nail by the main one, put one end of the rule to it, and the other end to one of the driven nails. When adjusting the depth of driving a nail, set the rule exactly according to the level. The remaining nails are installed in the same way, on which stamps and beacons are then smeared.
Working with decorative plaster
Decorative plaster will replace wallpaper and is a very aesthetic and durable solution
Plastering walls with your own hands can be done not only with the aim of removing any defects in the walls, improving their heat and sound insulation properties, and avoiding dampness and moisture entering the room.
Decorative plaster used for design purposes is sold in the form of dry mixtures in containers.
- All you need to do with it is dilute it with water according to the instructions and mix thoroughly.
- It is recommended to prime the walls the day before.
- Afterwards the plaster can be applied to the surface.
- How to do this, in which direction and with what movements depends solely on the desired result, on what kind of relief and what kind of pattern you would like to see in the future.
- It may be necessary to make markings before applying the solution (this is required in order to obtain a certain relief, a pattern that is repeated at approximately equal distances).
- If desired, you can add a little color (paint) to the plaster, or you can paint it after drying in the desired color.
When applying decorative plaster, an ideal flat surface is usually not required. It hides minor defects, but you still need to get rid of large irregularities!
What is it used for?
If improved plastering is intended only to level the walls, then high-quality wall plaster is also used to prepare the base for subsequent processing. It assumes:
- Applying paint.
- Wallpapering.
- Installation of tiles.
- Applying decor, plaster, etc.
Thanks to the quality control specified in SNiP, facing work can be carried out at the highest level. You only need to take into account GOST regarding the material used. The order of operations should also be taken into account:
- the ceiling is initially processed;
- then the walls are plastered;
- the floors will be finished.
The solution is applied to the base using 2 methods: spreading and throwing.
However, the methodology for carrying out work is not the only task. You should understand which plaster will be best for walls and what SNiP requirements are for the cladding material.
Covering, grouting, smoothing plaster
The final finishing processes for plaster are coating and grouting. Instead of grouting, the plaster is often smoothed down. The cleanliness of the finished surface largely depends on the quality of the prepared coating solution. A well-prepared mortar on fine sand of normal fat content is easily, quickly and cleanly rubbed or smoothed, thereby increasing the productivity of plasterers. Fine-grained sand is used to prepare the coating solution. Coarse sand is of little use, as it gives a rough, rough texture.
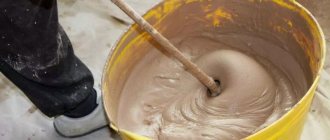
Preparing the solution and applying the coating
The uniformity of the solution plays a big role both in the process of its application and in the grouting. If in some places the covering solution is thicker and, conversely, the grout will have different cleanliness. Therefore, before application, pressed or ready-made solutions must be sifted through a fine sieve and mixed again. The covering is carried out with a solution of the same composition as the previously applied layers of plaster. Fatty solutions give a rougher surface, with more grinding and unground stripes. These solutions are more suitable for smoothing. Thin solutions are not strong enough and do not rub well.
Thickness for different bases
It’s worth noting right away that the layer of mortar on the wall should be minimal. Excessive thickness will cause the plaster to crack under its own weight. Let's look at what the maximum thickness of plaster should be using specific examples.
Brick
Brick walls are characterized by a certain relief, so the minimum amount of mortar should be 5 millimeters. It makes no sense to apply less, as there will be problems with leveling the material. The maximum value can reach up to 5 centimeters. For this thickness it is necessary to use reinforced mesh. The maximum permissible layer of plaster without a mesh should not exceed 2-2.5 centimeters.
Concrete base
Thanks to its structure, concrete adheres well to any finishing materials and has a fairly smooth surface. The thickness of plaster for concrete walls starts from 2 millimeters. The maximum amount of mortar you can apply without using a mesh is up to 20 mm. With reinforced mesh, the thickness can reach 7 centimeters.
Aerated concrete blocks
In their structure, these products resemble concrete, so the minimum amount of mixture is the same as in the previous case. The maximum permissible value can vary from 8 to 15 millimeters. It all depends on the curvature of the walls.
Wooden surfaces
Bonding the mixture to the wood is not so easy. Therefore, before starting work, a metal or plastic mesh is installed on a wooden wall. The optimal cell size is no more than 40 millimeters. The metal mesh is attached to the surface using self-tapping screws, while the plastic mesh is attached with glue. The solution is applied in two layers. The thickness of the first does not play a big role. It is applied to hide the mesh. The thickness of the second layer ranges from 1.5 to 2 centimeters.
Drywall
Drywall itself is a good finishing material, so it rarely needs additional leveling. If there is a need to apply plaster, the minimum layer is 1.5 mm, the maximum is 10. If the maximum amount of plaster is applied to the drywall, it is necessary to first install a plastic mesh.
Insulation materials
As in the case of wooden surfaces, the insulation is plastered in two stages: the first covers the reinforcing mesh - 1.5 centimeters, the second leveling layer - 1-2 cm. These data apply to all types of insulation, including mineral wool and foam plastic.