Finishing materials
Clay walls are plastered on the outside with lime mortars, and gypsum or clay mixtures are used on interior surfaces.
Cement compositions are immediately excluded, as they will crumble due to their heaviness.
The technology requires the application of a rough, finishing and decorative layer.
The table shows the components of the solution for the rough layer and their characteristics:
| № | Components | Characteristic |
| 1 | Clay | Most often it is red, sometimes gray, yellow, white, black. By weight it is divided into light (0.17 -0.27) and heavy, more than 0.27. |
| 2 | Sawdust | They serve as a reinforcing component and give reliability to the solution. Waste wood from lumber production must be well dried; it is not recommended to use fresh sawdust. |
| 3 | Sand | Sand of medium fraction is used, large particles are sifted out. |
First, sand and sawdust are mixed, then clay and water are added.
The quality of the solution is checked by rolling a ball. Its components should not stick to your hands. If, when pressed, the ball changes shape without cracking, it means that the solution is quite elastic.
Preparatory work
For clay walls, a composition with low weight is suitable. Lime-based solutions are used for plastering exterior walls, while clay or gypsum mixtures are suitable for interior decoration. It is not recommended to use cement plasters, since the material puts a large load on the clay surface, and the finishing layer will collapse over time.
The technological process involves the creation of three layers:
- draft;
- finishing;
- decorative.
In order to carry out the initial finishing of the walls, it is necessary to prepare the following materials:
- Clay, which according to plasticity characteristics is divided into light, with indicators of 0.17-0.27, and heavy, with a plasticity level of 0.27. The shade of the clay mortar for plastering walls is also important. The most popular and accessible color is red. In addition, there are white, yellow, black and gray shades. The component composition of clay contains minerals in the form of magnetite or quartz. It should be noted that these elements have high levels of radiation.
- Wood sawdust is carefully dried, previously diagnosed for fungal infections. Fresh sawdust cannot be used; only those that are a year or more old are used.
- Fine sand, allowing you to create high-quality plaster.
To prepare a solution for the rough composition of the plaster, sawdust is combined with sand and water and clay are gradually added.
- The second layer of plaster is formed from cement, clay and sand. Taking into account the different characteristics of clay, proportions are selected optionally, by trial and error. The ratio of the components of the mixture looks something like this – 1:1:3. There are two methods to check the readiness of the composition for plastering walls:
- form a small ball of such a consistency that it will not stick to the skin, and then press it with your palm onto a flat surface. The ideality of the composition is evidenced by the absence of cracks along the edges;
- roll a rope 20 cm long and 2 cm in diameter, make a ring out of it. The correctness of the composition can be determined by the presence or absence of cracking.
Important! The fine finishing of clay walls requires the absence of sawdust in the plaster. This is explained by the fact that they absorb moisture and increase in size, thereby compromising the integrity of the coating.
Elimination of irregularities and cracks
After the wall has been treated with a primer, the damaged clay plaster is repaired. Seal existing cracks and restore areas from which peeling pieces were removed.
Plastering on clay is done with a clay solution prepared in the following proportions: 1 part clay, 2.5 parts sand, sawdust as a binding material.
The cracks are widened to a depth of 1 cm, the sides are formed at an angle of 45 degrees.
Clay is soaked in water for a day
The clay is soaked in water for a day to make it plastic. Add the dry ingredients, then add water to create a solution with a creamy consistency.
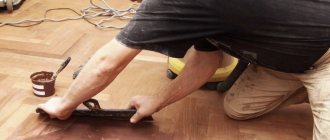
Clay plaster is applied in several ways:
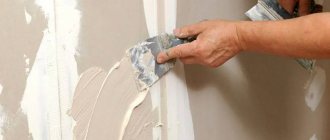
Use a spatula to apply the solution to the damaged area. Rub the plaster over the clay using movements in all directions: along, across, down, up. Then rub with a grater. When the surface is dry, apply two coats of primer again.
For clay, you cannot use plaster solutions made from ingredients other than clay. The cement mortar will not hold, as it does not adhere well to the clay and does not allow the surface to breathe, which leads to the destruction of the lower layer. To learn how to plaster clay walls using mesh, watch this video:
For plastering on mesh, you can use any putty.
Literature
- Smear // Explanatory dictionary of the living Great Russian language: in 4 volumes / author's compilation. V. I. Dal. — 2nd ed. - St. Petersburg. : Printing house of M. O. Wolf, 1880-1882.
- Khata // Explanatory dictionary of the living Great Russian language: in 4 volumes / author's compilation. V. I. Dal. — 2nd ed. - St. Petersburg. : Printing house of M. O. Wolf, 1880-1882.
- Turluk // Explanatory dictionary of the living Great Russian language: in 4 volumes / author's compilation. V. I. Dal. — 2nd ed. - St. Petersburg. : Printing house of M. O. Wolf, 1880-1882.
- Khibat // Explanatory dictionary of the living Great Russian language: in 4 volumes / author's compilation. V. I. Dal. — 2nd ed. - St. Petersburg. : Printing house of M. O. Wolf, 1880-1882.
- Muzanka // Encyclopedic Dictionary of Brockhaus and Efron: in 86 volumes (82 volumes and 4 additional). - St. Petersburg, 1890-1907.
- M. Rusov
, Essay on settlements and buildings of the Poltava province // Collection of the Kharkov Historical and Philological Society, parts 1 and 2. - 1902. - T. 13. - Dictionary of the Ukrainian language, in 11 volumes. - Volume 4, 1973. - page 594. (in Ukrainian: Dictionary of Ukrainian language: in 11 volumes. - Volume 4, 1973. - Page 594.).
- A. P. Pavlov
, Temples of St. Petersburg: an artistic and historical essay, St. Petersburg, 2005.
Wall putty
To properly level the walls, you need to putty them.
Solutions for putty are prepared with a fairly liquid consistency. You can make gypsum putty yourself or buy it ready-made in a store.
The lime-clay mixture and clay-gypsum solution are respectively prepared in the following proportions:
| Clay | Fine sand | Lime dough | Gypsum |
| 6 parts | 16-17 parts | 2 parts | — |
| 1 part | 3-5 parts | — | ¼ part |
If the walls are being prepared for painting, the clay layer must be reinforced with fiberglass mesh, which is attached to nails or a layer of putty.
If the clay is over-moistened, it absorbs moisture and loses strength, so the putty is applied in thin layers, each subsequent layer being applied after the previous one has dried.
Features of clay walls
Having a number of the positive characteristics described above, it is worth noting that a clay wall is somewhat more difficult to finish. Leveling clay walls is only possible with the help of plasters that are lighter in weight than clay. It will not be possible to plaster clay walls with cement-sand mortar. Cement is much heavier than clay and, accordingly, such a solution will fall off. To level clay walls, gypsum or clay based solutions are suitable.
As with any leveling of walls made of other materials, clay walls also need to be prepared first.
Adviсe
Recommendations for repairing and leveling clay walls:
- If the clay crumbles and does not adhere firmly to the wall, you need to remove the entire layer down to the shingles and apply a new one.
- In order for the plaster solution to set better, add PVA glue or make notches on the wall surface.
- If you need to level small areas, you can use clay that has already been applied to the wall. To do this, you need to wet it well and rub it on the wall with a spatula.
- To quickly level gypsum walls, use plasterboard, which is glued with special glue. The walls must be completely dry. If necessary, install thermal insulation. To learn how adobe walls are plastered, watch this video:
Leveling clay walls with your own hands is quite simple if you adhere to the technology for performing the work.
Plastering clay walls is a rather difficult task that will take you a long period of time. Today there are many houses in which the walls are made of clay, so the question of their treatment among beginners arises quite often. Many people want to strengthen the coating, so they are looking for possible options. As you know, clay is a heavy material and you need to work with it carefully so as not to damage the surface. In this article we will look at how to properly plaster clay walls and tell you which solutions are best to use for this.
Preparing the walls
We start with a visual inspection. Damp places and places with traces of mold must be cleaned down to the base of the wall. In clay walls this is usually shingles. If possible, the source of moisture should be eliminated. Such sources may be:
Damp places must be treated with antifungal agents in several layers, and the wall must be allowed to dry for several days. You should not start leveling the surface until the base of the wall is completely dry.
Next, we inspect the wall for the presence of loose plaster. Tap the surface with the handle of a spatula; if the sound is dull, remove the fragile pieces of plaster.
The last stage of preparation will be removing the old finish on the clay plaster. We remove lime, paint, wallpaper with a spatula. You can moisten the old coating with water, this will make it easier to come off the surface.
We sweep away the remaining particles and dust from the wall with a broom. You can proceed to the next stage.
Eventually
Plastering clay walls is quite easy and the process itself is practically no different from treating other surfaces. The main thing is to remember the properties of clay and work carefully so as not to damage it; it is also important to use high-quality materials and tools. As already mentioned in the article, cement mortars cannot be used for cladding. They combine extremely poorly with clay and do not stick to the surface. Professionals use only gypsum mixtures, as this is an ideal option for clay coating. We recommend watching the following training video, it will help you see the whole process and learn more about this work:
Repairing cracks and loose plaster
After priming, it is necessary to restore areas of the walls where weak plaster was removed, and also to repair cracks. To work you will need the following tools:
An important rule for plastering: areas should be plastered with the same plaster that is used to plaster the entire wall. Therefore, we prepare clay plaster for clay walls. The solution will consist of the following parts:
The indicated proportions are approximate, since the clay may already contain sand. Therefore, first you need to prepare 2-3 different solutions little by little and test them on a small area of the wall. You can experiment in small areas while the primer dries on the rest of the surface.
Soak the clay in water the day before use, it should soak and become plastic.
There is ready-made clay plaster available in stores, we recommend using it. There, the components of the mortar are most accurately selected, plastering will be easier and the finished surface will be stronger.
We embroider the cracks with a knife at 45 degrees on each side, 1 centimeter deep. Using a spatula, apply clay mortar to the crack and level it. Movements should be along the crack and across so that the crack is filled completely.
Applying plaster
On the areas where the old plaster has fallen off, we apply the mortar with a spatula (we don’t throw it on, as is the case with cement-sand mortar, but just apply it), and then level it with a construction float. The movements should be in different directions, pull the solution up, down, left and right. Clay is a very plastic material, so this process will not be difficult.
Upon completion of work, wait for the plaster to dry completely. Apply primer to newly plastered areas.
Technology
The technique for applying plasters is the same for any composition. What matters is only compliance with the recipe indicated on the packaging (ratio of water and dry mass) and the time within which it must be used. Otherwise, the plastering technique is the same.
Preparing the base
Work begins on a dry and clean base. If there is an old covering, everything that can fall is cleaned off, cracks are opened, screws and nails, remnants of wallpaper and other coverings are removed.
As sad as it may be, both paint and whitewash must be removed. Paint for the reason that the putty does not stick well to it, and if it does stick, it may later fall off. The whitewash is removed because it is loose. With it, after priming, adhesion is normal, but after a while the finish begins to crack and peel. If you don’t want to redo the ceiling or wall again in a year and a half, you need to clean off the lime.
This is what the prepared surface looks like
After the old coating is removed, remove the dust. If you have an industrial vacuum cleaner, you can use it (you can’t use a household vacuum cleaner - it will break). If you don’t have such equipment, you can first go over it with a dry broom, then with a brush, and finally with a slightly damp cloth to collect the residue.
Primer
Priming walls under plaster is used to ensure that the materials adhere better. Its second task is to reduce the amount of moisture absorbed by the base. This is very important on porous surfaces such as brick, dry plastered wall, etc. On walls that are loose and prone to crumbling, special deep penetration compounds are used. They bind particles of material to each other, increasing the overall strength of the base.
It’s better not to skip the primer
To get a guaranteed good result, it is better not to skip this stage. Even though primers cost a lot.
Primers are sold either as ready-to-use mixtures or as liquid concentrates. The second type requires additional dilution with water. In any case, before use, carefully read the instructions and follow them strictly.
Usually the technology is as follows: the composition is poured into a container and distributed over the surface using a brush or roller. In difficult places - corners and bends, go thoroughly with a brush. If two or more layers are needed, they are applied after the previous one has completely dried.
Tools
To putty the walls directly, you only need two spatulas. One large, with a long blade (300-600 mm) and one small. The small ones take the composition out of the container and distribute it over the blade of the larger one. They also use it to remove the remains from the blade and distribute them again along the edge. A large spatula is needed directly to distribute the composition over the wall.
Surface putty
If the last stage of finishing your renovation is wallpapering or painting, then the clay plaster must be puttied.
The putty layer should not exceed a thickness of 1.5 cm on clay walls.
For puttying, gypsum putty, lime-clay mortar (6 parts clay, 15-18 parts fine-grained sand, 2 parts lime paste), or clay-gypsum mortar (1 part clay, 3-5 parts fine-grained sand, ¼ part gypsum) are better suited. . Solutions must be sufficiently liquid and applied in thin layers several times.
If you are going to glue wallpaper, then it is not necessary to reinforce the putty, and the walls for painting must be reinforced with fiberglass mesh. This mesh is attached to dowel-nails, from top to bottom, or you can apply a horizontal strip of putty on top of the wall and press the mesh into it. We will press down the rest of the mesh gradually, applying putty on top of the mesh.
Clay absorbs a lot of moisture, losing its strength. Therefore, the putty should be applied in a thin layer, the next layer should be applied only after the first has completely dried.
After finishing putty, the wall must be sanded and treated again with a primer.
This, in fact, is the whole process of leveling clay walls. If you followed all the recommendations described above, then the clay wall will last you a long time and will help keep the space in your home environmentally friendly.
However, if this process seems too labor-intensive to you, there is an easier way to level clay walls - installing plasterboard sheets.
Leveling with plasterboard sheets
When installing plasterboard sheets, do not forget that this method of leveling the walls will noticeably reduce the space of the room.
When preparing walls for this method, it is necessary to eliminate traces of dampness (the plasterboard sheet gets wet and destroyed due to moisture), and installation can begin immediately. Place thermal insulation material between the wall and the plasterboard sheet; this will be an additional advantage of this method of leveling the walls.
After installing the plasterboard sheets, you should seal the joints of the sheets with putty and completely fill the plasterboard with finishing putty. When it dries, sand down any uneven surfaces, treat the wall with a primer and you can begin finishing with wallpaper or painting.
Decide for yourself which method you like best. Our last recommendation: do not rush to make repairs as quickly as possible, let each layer of coating dry completely, be it antifungal agents, primer or putty. This is the main condition for the strength of clay walls.
Source
Creating a finishing coating
After the finishing layer has dried, they move on to finishing the clay walls. The process occurs in several stages. The surface of the clay walls is rubbed with fine sandpaper. Then apply the primer in two layers, allowing each of them to dry completely. Next comes the turn of plastering the clay walls with gypsum plaster, which is decorated at your discretion. You can use wallpaper or paint it.
Finishing clay walls requires a special approach, taking into account a lot of nuances. Sometimes finishing is carried out with lime-based plaster, without the inclusion of cement. In addition to the gypsum composition, asbestos is used. The quality of the clay affects the composition of the solution proportions at all stages of repair. It is important to carefully monitor the presence of radioactive minerals.
If you follow the recommendations for creating environmentally friendly housing, use high-quality materials that contribute to the formation of a beneficial indoor climate, you can reduce money expenses while getting the home of your dreams.
Walls
Clay walls are found not only in old houses. The modern trend of green construction increasingly gives preference to building houses exclusively from environmentally friendly materials. In both cases, clay on the walls poses a number of questions to the master about the correct way to work with such material and convenient methods of finishing it.
Table of contents:
Advantages and disadvantages of using clay
Clay has been one of the main building materials for many centuries ago. Today its use in construction is not so relevant. However, the positive qualities of this material indicate that its use is largely justified.
1. Clay is a material of natural origin. Its natural deposits are large, and getting to them with your own hands, without resorting to the services of expensive equipment, is quite possible. In addition to clay, you will also need sand and sawdust. But these materials are also inexpensive and available.
2. Clay does not cause reactions in allergy sufferers.
3. Walls plastered with clay-sand mortar perfectly absorb water vapor and odors, thereby maintaining an optimal level of humidity in the room and providing natural air filtration.
4. This natural material, combined with environmental friendliness, has good thermal insulation properties. In a house where the main component of the walls is clay, it is not hot in summer, but comfortable and warm in winter.
5. To finish clay walls, ordinary gypsum putty can be used. Subsequently, you can wallpaper and paint in the same way as on walls made of other materials.
Clay walls also have some disadvantages:
When starting to decorate clay walls, you should study the features of the work and do not forget about them during the repair process. This article will discuss the main issue of finishing clay walls - putty, and also provide detailed instructions for puttying clay walls. But before you start, you need to go through the preparatory stage.
What tools and materials are needed?
When starting to repair and decorate clay walls, you will need the following tools:
The materials needed are:
Preparing clay walls
First of all, it is necessary to remove all old coatings. This applies to both whitewashing and various paints and wallpapers. To facilitate the process of removing old coatings, the walls can be wetted. The swollen top layer of clay will be easy to clean.
The technical features of clay wall smears are that this base is relatively soft and free-flowing.
Before you start leveling the walls with putty, you should check the clay surface for damage. To do this, tap the wall with the handle of a trowel or spatula. A dull sound and slight movement will indicate places where the clay has moved away and may collapse. To prevent the new renovation from having to be redone due to a fallen piece of the wall, it is better to remove the dangerous area in advance.
If there are cracks in the clay smear, you need to do the following:
Even in the case when the clay plaster is made at a high level, the walls are even and smooth, the components of the composition are kept in ideal proportion, it is necessary to prepare the clay walls for applying putty.
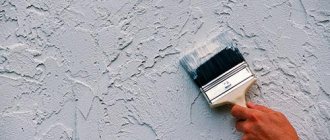
The clay base needs to be strengthened. To do this, use a deep penetration primer. Penetrating into the coating to a depth of up to a centimeter, the primer, when dry, tightly glues the particles of the loose base, preventing them from falling apart and preventing excess moisture from passing through. At the same time, priming clay walls increases the level of adhesion between the base and the subsequent finishing layer, and also prevents the formation of mold, since primer mixtures mainly contain antiseptic additives. It is also necessary to treat with a primer those places that have been cleaned of weak parts. Before applying putty, you need to prime the clay twice, drying each layer well.
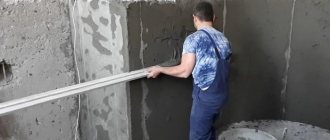
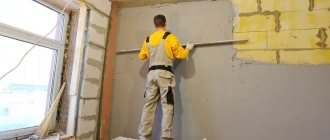
Making the walls smooth
An important step will be to determine the evenness of the surfaces. In old houses there are often walls that are far from ideal. Some were originally built without proper alignment, others were painted by not very skilled craftsmen. As a result, carrying out modern renovations in a room with such walls will result in significant expenses for leveling. Therefore, before starting work, determine the degree of evenness of the walls and ceilings using a building level, usually plumb lines and threads stretched along vertical marks. Professional builders use special laser levels to determine planes.
As mentioned above, different mixtures can be used to correct clay walls. This can be a clay-sand mixture, a lime-clay solution (clay, sand, lime dough in a ratio of 6:15:2), a clay-gypsum mixture. But it is most convenient to level clay walls with putty.
The layer of starting putty should not exceed 1.5 cm, although the maximum allowable layer for gypsum plaster is 3 cm per application. Therefore, experts recommend correcting deeper unevenness using clay solutions, or using drywall for leveling.
Important! Plastering or repairing defects on clay walls can only be done with substances lighter than clay. So, cement mortar is not suitable for this purpose. It will not be able to adhere properly to clay and will quickly fall off.
EVERYTHING is puttied with clay!
Clay itself is a rather inconvenient material, and over time, clay begins to crack, crumble and become a big disadvantage, and the processing of clay walls itself becomes a problematic and time-consuming task.
Correct putty for clay
Before you understand the principles of clay putty, you need to study the clay itself and its characteristics, advantages and disadvantages.
Important! There is fungus on the walls, how to fight it? HERE!
Clay itself is a rather inconvenient material, but now it is considered something like exotic, fragile and in need of care.
Clay and its properties
To begin with, it is worth considering clay as a material, studying its advantages and disadvantages.
Clay is a material that has been used for many centuries, first as a base for dishes, then as a building material, both for interior and exterior spaces.
The popularity of the material is a debatable point - but for some people who live near clay deposits this is the only option.
How to properly lay a vapor barrier on the ceiling?- Is it possible to glue wallpaper on whitewashed walls?
- Imitation of a brick wall made of gypsum plaster
Advantages of clay:
· Material without harmful additives, can work like a sponge and absorb all hazardous substances contained in the air.
· Easy to recycle, since when decomposing it does not release any hazardous substances into the environment.
· Clay is a material that can be reused, without a specific “expiration date”.
· The most inexpensive material for construction work
· Does not require any impregnation and can itself serve as a preservative for wood.
Disadvantages of clay:
· A narrow circle of specialists capable of working with this material.
· Almost every year the clay surface needs cosmetic repairs.
· It is afraid of water, but when wet, it dries quickly, and the clay forms cracks that need to be repaired.
DIY clay putty
In order to properly putty the surface, first of all, you need to completely prepare the base for the putty.
Examine the base, inspect whether there are lagging surfaces; they need to be carefully knocked off and covered with plaster again.
You can also do this with clay, because clay is a reusable product.
You just need to find a good primer that is ideal for clay.
As for leveling the surfaces, it’s even easier here; we soak the base and use a wide spatula to remove the top uneven or most protruding layer.
This method will greatly facilitate the further process and save putty.
If you find wet or fungus-covered areas, you need to find out the cause of the excessive moisture and remove the source.
After the surface has completely dried, reusable surface treatment with antiseptics is performed.
If the old finish does not fall off, then you can simply repair the cracks and plaster a little with the same clay.
After all the preliminary work, you need to prime the walls; do not forget that clay absorbs water well, so it is better to walk over the surface several times.
If you don’t want to correct all the layers several times, attach a mesh to the frames and secure with a construction stapler.
Then cover it with a thin layer of putty, as you want the surface to dry quickly and prevent moisture from being absorbed into the wall itself.
If you are confident enough in your abilities and you have an ideal surface (without cracks or unevenness), you can immediately apply a thin layer of finishing plaster onto the mesh itself (although this option is more for experienced professionals).
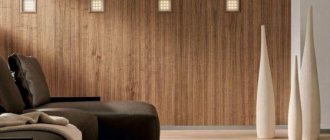
On a completely dry and treated surface, you can glue wallpaper, paint or cover it with decorative plaster.
Plaster on clay
Just like with putty, the surface must be carefully prepared, the old plaster, if it comes off, must be removed, then the walls must be coated twice with a special priming solution, the second layer must be applied only after the first has completely dried.
If your goal is simply to eliminate minor defects, then you can use gypsum-based putty; this mixture copes well with cracks and minor defects.
After the wall has completely dried, it is recommended to prime it.
If the wall is uneven, then it must first be leveled using gypsum plaster for all surfaces.
After the plaster has dried, you need to apply a finishing layer of putty in a thin layer (no more than 3 millimeters) using a spatula.
After sanding, the wall needs to be re-primed; the primer is also allowed to dry and then covered with putty on top.
Usually this is where the final finishing can be completed; as a rule, more is not needed.
After plastering is completed, the clay walls are given a final coat of primer and allowed to dry. Now we have a ready-made option for painting or wallpapering.
If you want to prepare a surface for painting, it is better to use a universal multifunctional mixture; this mixture is perfectly fixed and creates a smooth surface and is resistant to mold.