Required Tools
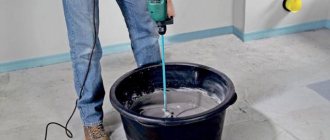
The process of applying putty is simple, but it requires the use of special tools. A drill with a mixer attachment is required for mixing. It will come in handy when the master dilutes the dry powder with water. While it is mixed with water, lumps will form in the container. To get rid of them and make a homogeneous mixture, you need a professional nozzle.
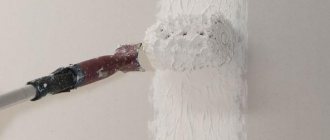
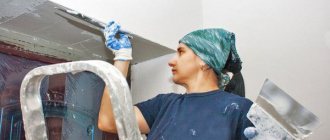
The second tool required is one spatula or a whole set. Experts recommend using at least two spatulas during the puttying process. A wide tool of 40-50 cm will be useful for applying the main coating and a small spatula for correcting small irregularities. The smaller the spatula, the more hard-to-reach places you can treat with the building mixture. If you have experience in construction work, you can use a trowel to putty walls - a construction accessory that allows you to smooth the surface.
In order for the paint layer to adhere firmly to the surface, it must be primed after puttying. After priming, the wall will be covered with a thin film. For this you need rollers and brushes.
You need a small spatula like this Source allremont59.ru
In order for the mixture to lie evenly, it is necessary to apply test beacons to the surface before starting work. They are made using a laser or spirit level. But sometimes even after applying the coating, the wall turns out to be uneven. Then a rule will be needed. Preferably a long metal one, because it is convenient for them to level thick layers.
Dried wall putty can be rubbed down if you want to get a spectacular and beautiful coating. To obtain a textured finish, sandpaper or fine sandpaper is needed. 240-grit sandpaper is suitable for grouting the finishing putty. If the farm has a manual skinner, then it is worth using it. The tool is a device that has a handle with special clamps for attaching the skin. It makes the process of processing the wall easier.
Be sure to have special clothing for work. It is necessary to protect your hair with a headscarf and your hands with gloves. To prevent dust or small particles of the dry mixture from entering the respiratory tract, you need to work in a mask.
Technology
The technique for applying plasters is the same for any composition. What matters is only compliance with the recipe indicated on the packaging (ratio of water and dry mass) and the time within which it must be used. Otherwise, the plastering technique is the same.
Preparing the base
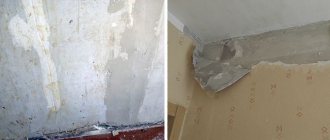
Work begins on a dry and clean base. If there is an old covering, everything that can fall is cleaned off, cracks are opened, screws and nails, remnants of wallpaper and other coverings are removed.
As sad as it may be, both paint and whitewash must be removed. Paint for the reason that the putty does not stick well to it, and if it does stick, it may later fall off. The whitewash is removed because it is loose. With it, after priming, adhesion is normal, but after a while the finish begins to crack and peel. If you don’t want to redo the ceiling or wall again in a year and a half, you need to clean off the lime.
This is what the prepared surface looks like
After the old coating is removed, remove the dust. If you have an industrial vacuum cleaner, you can use it (you can’t use a household vacuum cleaner - it will break). If you don’t have such equipment, you can first go over it with a dry broom, then with a brush, and finally with a slightly damp cloth to collect the residue.
Primer
Priming walls under plaster is used to ensure that the materials adhere better. Its second task is to reduce the amount of moisture absorbed by the base. This is very important on porous surfaces such as brick, dry plastered wall, etc. On walls that are loose and prone to crumbling, special deep penetration compounds are used. They bind particles of material to each other, increasing the overall strength of the base.
It’s better not to skip the primer
To get a guaranteed good result, it is better not to skip this stage. Even though primers cost a lot.
Primers are sold either as ready-to-use mixtures or as liquid concentrates. The second type requires additional dilution with water. In any case, before use, carefully read the instructions and follow them strictly.
Usually the technology is as follows: the composition is poured into a container and distributed over the surface using a brush or roller. In difficult places - corners and bends, go thoroughly with a brush. If two or more layers are needed, they are applied after the previous one has completely dried.
Tools
To putty the walls directly, you only need two spatulas. One large, with a long blade (300-600 mm) and one small. The small ones take the composition out of the container and distribute it over the blade of the larger one. They also use it to remove the remains from the blade and distribute them again along the edge. A large spatula is needed directly to distribute the composition over the wall.
Need two spatulas
The blade of a large spatula should be made of stainless steel. It should be flexible, without nicks or scratches. If you look at it in profile, you can see that its ends are slightly bent to one side. This was done specifically so that when puttingtying walls or ceilings, stripes from the edges of the blade would not appear on the surface. You can also work with a straight spatula, but you will not be able to get rid of the streaks, as a result - after drying you will have to compare them, and this is a long and dusty job.
You will also need a container in which to mix the putty and a construction mixer or drill with a stirring attachment. It is better to take a plastic container - a bucket or basin with high sides. Pay attention to the shape of the bottom. The transition from the bottom to the walls should be smooth. Then it is possible to mix the entire composition without residue or lumps.
Wall putty technique
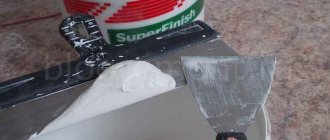
In general, everything has already been said, but let’s focus specifically on the process and sequence of work. First, the putty is mixed. Water is poured into a bucket, the dry composition is added to it, making sure that there are no lumps. You need to wait a while until the whole mass gets wet, then you can stir. Kneading can be mechanical or manual. This is indicated on the packaging with the putty. When you have achieved a homogeneous composition without lumps, you can begin work.
Large imperfections are covered first
Apply the putty to the wall using a large spatula. The composition is applied small on it, forming a roller two to three centimeters wide and about a centimeter high on the edge of the blade. If the composition is thick, you can take more solution; if it is liquid, it can flow, so the roller is made small.
Step 1. Starting putty . If there are large irregularities - more than 3 mm, they are first covered with starting putty. If the unevenness is only in places, only these are repaired, bringing them to the same level as the surface. If there are a lot of them, you will have to putty the entire surface. When working, it is advisable not to exceed the maximum permissible layer thickness, otherwise cracks may appear or the finish will fall off. If there are no significant irregularities, you can do without this layer. But in this case, the consumption of the finishing composition will be greater, and it costs more than the starting one.
The thickness of the putty layer that remains on the wall is adjusted by the angle of the spatula. If it is strongly inclined towards the wall, the layer remains thicker; if the angle is closer to a straight line (60-70°), it can be 1 mm.
There is another technique for applying putty. It is called "na sdir". In this case, the spatula is placed perpendicular to the wall. As a result, only pores, streaks and other defects are covered, and consumption is minimal. But this technique only works on smooth walls, without deviations in geometry. Puttying uneven walls with differences of more than 1-2 mm using this method is impossible.
Step 2. Leveling the first layer . After the starting layer has dried (the time indicated on the packaging), take sandpaper for sanding and use it to smooth out the most prominent irregularities. Most often these are stripes, but due to inexperience, bumps may also appear. After sanding is completed, dust is swept away from the walls with a broom, then brushed with a dry brush.
You need to smooth out any uneven areas with sandpaper.
Step 3. Finishing putty of the walls. A layer of finishing putty, no more than a few millimeters thick, is applied to the cleaned walls. At this stage, you should try to get a flat surface by carefully leveling the composition. Leave to dry.
Step 4. Aligning the final layers . For this stage, take a mesh with a finer cell. They try to get a smooth surface. Good lighting is necessary for normal results. The absence of defects is also checked with the palm of your hand.
That's all. Next, step 3 and 4 are repeated until you are satisfied with the result. A little about the extent to which it is necessary to level the walls. It all depends on the type of finish you choose. If the walls are puttied under wallpaper, there is no need to achieve perfect smoothness. Even the thinnest wallpaper hides small differences. Multilayer paper wallpapers - duplex or triplex - are less demanding on the surface. A more even base is necessary for a non-woven base, as well as for all vinyl wallpapers except foam and textured ones.
The requirements for putty for painting are higher. The paint does not hide even the most minor flaws, so it has to be leveled to perfection. Up to six very thin coats may be needed.
How to make smooth corners with putty
You saw several methods in the video - just remove the mass well from the very corner. Everything seems simple, but in practice it turns out to be difficult and not very smooth. For beginner plasterers, there are special corner spatulas for the outer and inner corners.
After applying a certain amount of putty to the corner, they apply it, removing the excess and forming an ideal line.
It's easier to work with them. Spatulas for creating smooth corners using putty
How to choose putty
The most difficult thing at the first stage is deciding what to putty on the walls with. Building materials differ in components:
- gypsum;
- polymer;
- cement.
Varieties of mixtures Source stroyfora.ru
Each variety has its own characteristics, pros and cons. Gypsum mixtures are usually chosen for reasons of economy: the cost of the compositions is lower compared to other types. Gypsum putty does not shrink and is perfectly leveled. There is also a drawback: putty is negatively affected by moisture, so it is better not to use gypsum mixtures in the kitchen, bathroom or other rooms with high humidity levels. Cement putties do not have this disadvantage. They can be used in any room. But you need to be prepared for shrinkage.
Polymer putties are the most preferred material to prepare the surface for further finishing. They are not afraid of humidity, they do not shrink. After applying the putty, the surface is completely ready for further finishing. However, polymer mixtures are much more expensive.
Another method of classifying putties is based on the purpose of the mixture. All compositions are divided into three groups:
- leveling , which are applied at the very beginning of finishing work;
- decorative - the walls are covered with putty at the finish, the coating is final;
- universal , which can be used at any stage of wall redecoration.
Decorative putty Source yandex.net
All starting coatings have similar characteristics. They are characterized by high strength and large grain size. Apply after plastering in a thick layer of 3-20 mm. The finishing coating, on the contrary, is applied to the wall in a thin layer of up to 4 mm. Using the finishing mixture, you can hide minor defects in the wall. However, the main disadvantage of decorative putty is its low strength.
If you need a product that combines the properties of both decorative and finishing mixtures, then it is better to choose a universal putty. They are a little more expensive, but they are durable and have a perfectly smooth coating. It is recommended to use universal putties for those walls where there are no large flaws.
Regardless of the purpose of the composition, the putty can be dry and already diluted. It is better to choose dry if you need to store the composition for a long time. In addition, dry putty allows you to save money: it costs less than ready-made putty. If you purchased a liquid mixture, you will not need a special mixer. The putty already has the required consistency. It produces less dust. Ready-made formulations have their drawbacks:
- high price;
- more shrinkage;
- cannot be stored for a long time, the purchased mixture must be used as soon as possible;
- Suitable only for applying a thin layer of putty.
Preparation of dry mixture Source pol-exp.com
See also: Catalog of companies that specialize in finishing and facade materials and related work
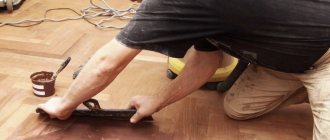
Lighthouse wall putty
The materials are no different from the starting putty. The only difference is that beacons are used. A lighthouse is a wooden, plaster or metal strip that is set strictly vertically, checking the verticality with a level. The beacons are attached to the walls using some kind of gypsum mixture; it dries quickly, after which you can proceed directly to puttying.
The same applies to alignment along horizontal lines. In this case, a rule will come in handy for leveling the putty layer. By following these recommendations, after starting work, a flat surface is obtained. To ensure the quality of the work, you can check it with a level. This type of finishing is used quite rarely. Reason: its cost is significantly higher than the starting putty, although visually they are almost the same.
Puttying walls along beacons. Photo — vipconstruction.kiev.ua
Preparing the wall: removing the old coating
Preparing the room involves removing furniture or protecting things from dust. It is better to cover the floor with newspapers or transparent film.
Before you putty the walls for painting, you need to prepare the surface. It must be clean. These coatings are removed:
- leftover paint;
- scraps of plaster;
- wax;
- formwork;
- old whitewash.
Preparing the wall Source msgo.com
If there are grease stains, you need to remove them. Old wallpaper (especially if it is poorly glued or has swelling) is removed. If you have difficulty removing the wallpaper, you can moisten it with water. When dirt and remnants of old repairs have been removed, you need to apply a primer. This is necessary to ensure good adhesion, that is, a good connection of the putty with the wall surface.
One layer of primer of small thickness is enough. To ensure that the coating is applied evenly, it is necessary to use construction rollers.
Features of preparing the working mixture
In order for the mixture to obtain the desired thickness, it is recommended to follow the mixing instructions. The dry mixture in the bag should be dry. If the material has hardened, this may make the mixture difficult to use. The layer will not be uniform and defects will appear.
The dry mixture should be poured into a container and, adding water, mix the solution. The finished solution should not have lumps and be of uniform consistency.
After preparation it is necessary to work immediately. Otherwise, the finished mixture may harden and become unusable.
Main stages
The methods of applying putty depend on its type - starting, finishing, lighthouse. When working with starting putty, you will need to stretch a construction mesh onto the wall. This will allow you to apply the mixture in a thin layer. The walls must be covered completely, evenly distributing the material over the surface. This will help achieve perfect smoothness. Experienced craftsmen give this advice: ideal evenness can be achieved only with the help of a coarse mesh.
Two spatulas are often used in work Source remontdoma24.ru
Applying putty to drywall
Drywall is often used to decorate a room. The material is inexpensive and has an attractive appearance. In order to figure out how to putty plasterboard walls, you need to follow the following sequence:
- Apply primer with a long bristle brush.
- Fiberglass mesh is glued to the area of corners and joints.
- The corners are puttied and rubbed down after drying.
- A small amount of the mixture is applied to the trowel and spread onto the surface.
- Using a wide spatula, apply the mixture in an even layer and smooth it out.
The work must be carried out slowly, making sure that all cracks and irregularities are filled evenly.
It is advisable to putty the drywall before painting or wallpapering.
Video description
Useful video about finishing putty:
If you know how to properly putty a wall with a finishing coat, you can achieve perfect smoothness. Special finishing mixtures are used: only they can eliminate scratches and gaps.
Since the wall has already been pre-prepared, the finishing coating will coincide with the main one. Therefore, a thin layer of the mixture is sufficient. However, before finishing, you need to make sure that the previous layers are applied correctly. The finish will not save you from remaining bumps or cracks. It is necessary to provide good lighting to see all small irregularities.
Final wall putty
After completing the starting or lighthouse putty, proceed to the finishing putty. It is done with finishing putty mixtures. It is this putty that gives the wall surfaces perfect smoothness. The smallest cracks or pores are eliminated. It is important that the finishing putty completely coincides in plane with the previously prepared surface, so it must be applied in a very small layer.
If the starting or final putty is done poorly, you will not be able to correct the situation with the finishing putty. Therefore, first try to make the surfaces of the walls perfectly smooth. Only then proceed with the finishing putty. Its main goal is a beautiful smooth wall surface.
The finishing putty is carried out under special lighting, this allows you to see the smallest irregularities. Photo — vipconstruction.kiev.ua
Treatment of cracks in walls
If the wall surface is not initially ideal, there are cracks, then there are special tricks on how to properly putty the walls for painting. Gypsum mixtures or santegypsum are best suited for this. The latter feels more elastic, but takes longer to harden.
Artificial crack expansion Source archidea.com.ua
First, you need to prepare the wall in the usual way - remove dirt and stains. Algorithm for working with cracks:
- Slightly expand the crack in width and depth.
- Lightly scratch the crack along its entire length with a sharp object to make it easier for the gypsum putty to cling to the wall.
- Treat the crack with a primer.
- Apply putty.
Starting surface putty
Putty is performed using coarse starting material. It's not difficult to find. When purchased, it is called “starting putty.” To remove large differences in walls, to hide grooves and holes, this putty is convenient to use. The thickness of a layer of such putty applied at a time can reach 1.5 cm. Allow the previous layers to dry completely. Only then proceed to applying the next layer of putty.
In order to obtain the highest possible quality of putty surfaces, a special painting mesh is installed on the wall, and the putty is distributed evenly over the entire surface. In this case, the walls are completely covered with putty.
The advantage of this technology is that when using a painting mesh, the putty fits perfectly onto the surface of the walls. And the surface itself becomes stronger and smoother. Moreover, the coarser the painting mesh, the smoother the treated wall surface.
Starting wall putty.
Procedure for applying putty
The first step in wall putty is preparing the mixture. If you use dry putty, you will need a container of sufficient size to mix the composition. A small amount of water is poured there and powder is added. First, you can mix the mixture with a regular spatula. But to get rid of lumps, you still need a drill with an attachment. It is necessary to knead the putty until it has a homogeneous consistency. The main sign of the mixture’s readiness is elasticity and thickness. Properly prepared putty sticks to the nozzle and spatula.
Theory: what is putty
Putty is a mixture of water and a dry compound. The dry composition may contain only gypsum powder or gypsum powder with the addition of chalk, cement, plasticizers or other fillers.
The question often arises: what is the difference between putty and putty. Nobody really knows the answer to that. The composition of putty and putty is the same, the application method is also identical. So it turns out that both of these names mean the same material intended for leveling walls.
Putty and putty are different names for the same composition
Mixture application techniques
Despite the fact that the method of applying the mixture was indicated above, the home craftsman should know what types of finishing work exist. There are three main techniques for plastering walls. The first is the classic one, during which the putty is applied to the wall manually. Its main advantage is the ease of processing wall joints and hard-to-reach places. The master feels the small irregularities better and eliminates them with the help of additional layers of putty. The main disadvantage of the method is that processing walls takes a lot of time and physical effort.
Manual application and leveling Source obzorkuhni.ru
How to make smooth corners with putty
Technique on how to level corners using putty, a large number. The greatest simplicity is characterized by this:
- inspection of the corner and identification of defects;
- setting the level and identifying deviations;
- applying the mixture in a thick layer;
- installation of a metal or plastic corner;
- applying the mixture and leveling it using a wide spatula.
This method is used for corners with a large number of defects. If the room has relatively even corners, you can use a corner spatula.
After the mixture has dried, the corner must be leveled using coarse sandpaper.
Corners need to be reinforced with metal corners or a special mesh
Wall treatment for painting and wallpaper
Puttying walls for painting has its own nuances. The final coating of paint does not hide a single flaw. Therefore, for high-quality painting it is necessary to carefully level the walls. The following operating procedure is recommended:
- Apply the first layer of leveling putty.
- Leave the putty until completely dry. It’s better to spend at least 12 hours on this.
- If there are noticeable unevenness, you can apply a couple more layers.
- Leave each layer to dry.
- Apply a layer of finishing putty to remove cracks, irregularities, and other minor defects.
- A smooth surface is achieved by finishing the wall with sandpaper.
The amount of mixture used and the number of layers applied depend on the density of the wallpaper. If you plan to glue thin wallpaper, it is enough to apply the preparatory mixture in three layers. If the wallpaper is thick, then you can reduce the number of layers to two. This way you can paste the wallpaper without blistering.
What are they and when to use them
Putty is the preparation of surfaces for final finishing. With its help, they ensure that the wall is (or looks) perfectly flat. It is applied to relatively flat surfaces. If you need to level the walls and make the corners 90°, do this with plaster or drywall. Putty is not intended for this.
Putty is sold in a wide range
Like plasters, putties consist of a binder, filler and additives that give them special properties. They are distinguished from plasters by the use of aggregates - sand - fine fractions. Two types of binders are used - cement or gypsum, sometimes lime and polymer additives are added to them. Accordingly, there are gypsum and cement putties.
There are also polymer putties - acrylic and latex. They are created on the basis of synthetic substances, the properties of which vary depending on the additives. They are not natural, but have a longer service life and can withstand a greater number of freezing/defrosting cycles. For facade work it is better to choose them. Indoors, they are not the best choice, as they have low vapor permeability, which can cause damp walls, the appearance of fungus and mold. They are convenient because they can be used on wooden and metal surfaces.
Brief description of the properties of polymer plasters
According to the type of application, all putties are divided into two types: starting and finishing. The starting ones use larger grains of sand - 0.3-0.8 mm. This results in a slightly rough surface. They are used at the first stage to seal depressions and cracks. In finishing compositions, sand is practically dust with a very fine grain of 0.1-0.3 mm. This allows for a smooth surface.
Cement plasters - scope, advantages and disadvantages
Cement plasters are cheaper than gypsum plasters and can be applied in a thicker layer - some compositions are up to 10 mm. After mixing (mixing with water) they can be used within about 3 hours. The plasticity of the composition is affected by temperature and humidity. Usually it is indicated for +20°C and humidity 60-65%.
Cement plasters are universal. They are used both for finishing inside and outside the building. Moreover, most facade compositions are made on a cement basis, as they can withstand more defrost/freeze cycles and create a more durable surface. They also do better in damp areas. If you need to plaster a bathroom or kitchen, it is better to use a cement-based composition.
Cement plaster can be white or gray
The color of cement plasters can be gray, white and ultra-white. This depends on the type of cement used. White compositions are more expensive, since more expensive brands are used, therefore finishing compositions are often made white.
The disadvantage of cement plasters is the long setting time - several days for complete drying is the norm. Several hours should pass before the next layer is applied. From 2-3 hours with a layer of 1 mm, up to 24 with a thickness of 6 mm. Since it is rarely possible to achieve a smooth surface in one layer - there can be three or more - puttying with cement plasters takes a long time. For this reason, their popularity is quite low.
Gypsum putties, their features
The layer of gypsum putty applied is 0.5-10 mm, depending on the type. They dry much faster, which has a positive effect on the speed of finishing work. On the other hand, the mixed composition must be used within 30-60 minutes, so such putties are mixed in small portions. This is not very convenient. If you are going to putty the walls with your own hands for the first time, start with small batches. Gradually decide how much you can produce at a time. Also keep in mind that the consumption of starting plaster is greater than that of finishing plaster - the thickness of the layer is different and you can’t be mistaken in the volume.
Gypsum plasters without modifying additives are intended for dry rooms. There are also formulations for wet ones, but this must be indicated on the packaging, since they contain hydrophobic additives.
Gypsum plasters are easy to apply
Despite the higher price and short shelf life of the mixed portion, gypsum-based plasters are now more popular. They are more flexible, it is easier to use them to achieve the required surface smoothness, and they are easier for beginners and professionals to work with. If wall putty is still unfamiliar to you, use gypsum compounds.
How to properly prepare the surface for puttying under wallpaper?
- Before renovation, we clear the room of furniture: everything that is possible is removed. There will be a lot of dust.
- The floor is covered with newspapers or film.
- Before puttying, it is necessary to thoroughly clean the walls of old wallpaper or paint, grease, and dirt.
- To make the wallpaper easy to remove, it will be enough to moisten it well. If they fit tightly to the wall and do not form voids, they can be puttyed without dismantling the canvases.
- Special requirements for removing old whitewash - the walls are completely cleaned. They must be washed and then allowed to dry naturally. If fungal or mold damage is found on the surface, you will need to treat the walls with an antiseptic.
- The final stage of preparation is applying one thin layer of primer. It is necessary to wait until the solution has completely dried and only then begin to putty. The priming process is similar to ordinary painting. The primer is poured into a tray: from it the material can be easily drawn onto the roller.
Advice
If you plan to paint the walls after leveling, then you need to putty the base carefully. Paint will not hide small defects or flaws that can easily be hidden under wallpaper.
Speaking of words
Putty or putty – how to say it correctly? On the packaging in the hardware store it says this and that. Maybe this is for different jobs? I wouldn't be mistaken.
Putty and putty are the same thing, and putty is still correct, although academic dictionaries do not prohibit putty. The etymology (origin) of this word is not simple, but it is instructive, so it’s worth a little distraction before work.
The original Russian mass construction is wooden. Before finishing, cracks in wooden walls were sealed with tarred tow - towed. By the way, the tow was pushed tightly into the grooves with a special tool - a swan. Hence the fawning. In modern Russian this word has a completely different meaning, but how it came to life like this is a separate story.
With the development of stone architecture, a German tool appeared in the use of finishers - a spatula (spathel; “spathel” in Russian transcription), which, in turn, is a direct descendant of the Latin spoon (spatha). To distinguish the preparation for finishing stone walls from wooden ones, it turned out to be enough to add just one letter to the usual word, and putty appeared.
But then, it turns out that putty is still better? From a spatula! In Romano-Germanic languages - certainly yes, but not in Russian.
The point is not which language is good or which is bad. Great literature has been created in classical Chinese, the language of the most primitive, isolating type. German can be very musical, just read Heine in the original.
The Romano-Germanic languages developed under the strong influence of Latin and follow the Roman principle “Rem verba sequuntur” - the word follows the thing. In them, it is generally accepted to name a process by an instrument, and the meaning in context is obtained using function words or their absence and arranging words in the proper order.
East Slavic languages developed independently and proceeded from process, action. How the word “axe” acquired its sound and spelling is the subject of much research, but it comes from the concept of “to cut with a powerful direct blow,” and not from “compact, strong, hard, sharp.” This rid our language of articles, function and modal verbs and made it almost indifferent to word order (“yellow shoes” and “yellow shoes” - try saying that in English), but extremely sensitive to the effect on the root of a word. The difference between an axe, a knife, a saber and a chisel is hidden so deeply that it’s better not to delve into it. Neglect of this circumstance, especially in combination with the long-term influence of the West (owners - overlords, a large flow of illiterate labor migrants, etc.) can make an outwardly complete and even melodious language viscous and inexpressive.
To be specific, the word “putty” is organically included in Russian only in two cases: either it means that the operation is performed on the spatula itself, and not by it, or as a figurative expression. By analogy: the walls are laid out, not brick; nails are driven in, not hammered. You can nail, but not a nail or a box; You can thresh, but by destroying or dividing, and not by creating or gathering together.
The addition of “sh” to “paklyovka” did not touch the root of the word, and its semantic load remained consistent with the essence of the concept being expressed. The use of “putty” in professional speech is justified as figurative: it already means that the plasterer is speaking, and not a mere mortal. In the same way, it would not be a mistake for a sailor to call a bench a jar and a toilet a latrine.
A note on linguistics: the Russian language has experienced the strongest influence from the East, but the languages there are of the incorporative type, the root in them is the holy of holies. Therefore, the Russian, having borrowed from the Tatars, which turned out to be useful, survived the linguistic invasion without damage to itself and even with benefit.
How much putty to take
Before starting work, figure out the amount of putty needed to complete the work. Common data:
- For “start” - 1-1.2 kg per square meter with a thickness of 0.6 to 3.0 mm.
- For the “finish” the indicators are different - 300-500 g per square meter with a thickness of 0.5 mm.
The parameters discussed above are indicative. For a more accurate calculation, it is necessary to multiply the following parameters: number of layers, thickness and area. On average, it turns out to be 75 kg per room of 40 square meters. meters.
Sealing seams takes about 1 kg per 4 square meters of drywall.
Particle size value of mixture ingredients
Lime is an important component in such mixtures, and the size of its particles is important. It must correspond to the base fraction, otherwise the solution will be of poor quality.
The quality of the putty is determined by the parameters of the filler fragments: the smaller the fractions, the smoother the final layer and smoother the surface. Mixtures with particles smaller than 0.15 mm do not require subsequent grinding.
Therefore, a correctly selected putty composition will help you achieve the desired effect faster. It is recommended to pay attention to the time during which the solution retains plasticity:
- compositions where cement is the binding element are suitable for work for 2-5 hours;
- gypsum mixtures set in an hour;
- polymer putties remain plastic for a day.
Subtleties of using additional materials
Additional materials may be used during the puttying process.
Let's briefly look at the features of such work:
- Reinforcement. This is done after applying one or more layers. Protects the surface from damage and removes unevenness.
- Fiberglass. Apply after two or three layers of putty. The wall is cleaned and primed, after which glue is applied and the canvas is applied. Next, the surface is again treated with glue, which is stretched with a spatula.
- Painting mesh. Protects against cracks, applied before painting. Apply after one or two layers of putty and cleaning the wall. Above equals “finish”. The excess is cut off with a knife, after which two layers of putty are applied on top.
Selection of putty mixture
There are several types of putty for leveling walls. They differ both in purpose and composition. Various manufacturers have their own special components that give the finished solutions certain qualities.
In general, we can distinguish mixtures intended for pre-treatment, as well as for finishing. There are also universal solutions.
Which mixture is best suited for renovating a particular room? It all depends on the qualities of the solution being created.
The composition of the material can be:
Which type is suitable must be determined in each specific case.
Having decided on the qualitative composition of the mixture, add a small amount of water corresponding to the information on the packaging.
Note! Dry mixtures are lighter, so they are more convenient to store and transport. Ready-made solutions have the best qualities.
Leveling walls with putty requires careful preparation. The material created after adding water should have a creamy appearance.
Important! It is imperative to take into account that the prepared solution dries very quickly, so it is better to make batches in small portions, timing the time of their use.