Many people are afraid of it like fire, but for me personally, renovation is wonderful. This is an opportunity to implement new ideas and transform the space around. But before choosing wallpaper, furniture or curtains, it is necessary to go through an inevitable stage, including preparing surfaces for final finishing. It is at this time that these scary words for many are used: plaster, putty, primer, self-leveling floor, etc.
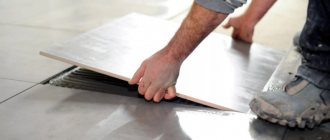
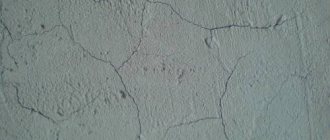
Perhaps any adult, even one who has never dealt with repairs, has an idea of what putty is and what it is needed for. Simply put, this is the final leveling layer on the walls before painting or wallpapering. And although after the completion of the repair the putty is not visible on the walls, a lot depends on it. If it is of poor quality or applied without following the technology, the walls will soon begin to crack or the putty will begin to come off in layers, along with the finishing coat.
Purpose and scope
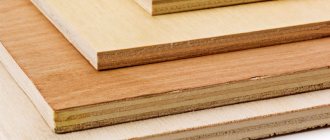
Typically, PVA putty is used for finishing bases made of concrete, brick, wood, foam blocks, cinder blocks and other popular building materials. The product is suitable for treating previously plastered bases or walls covered with a basic building mixture. After puttying with a PVA-based product, the following can be applied to the surface:
- water-based paint;
- latex paint;
- lime whitewash;
- oil paints and emulsions;
- adhesive compositions.
PVA putty is considered the most suitable for interior work in rooms with low and medium humidity. It is not suitable for the bathroom, kitchen and other rooms where the humidity level is too high.
Homemade PVA-based putty and the advantages of ready-made mixtures
The polyvinyl acetate emulsion is easily diluted in water and, when dried, creates a smooth film with good adhesion. At the same time, it penetrates deeply into the surface of the walls and is compatible with most building materials. Therefore, PVA-based putty is universal in use for interior work. The low cost of the components and their availability for free sale allows you to make the mixture yourself at minimal cost.
PVA based putty
PVA glue as a basis for a universal finishing material
My friend Vadik and I each have several lonely aunties, whom we help whenever possible. At the dachas, they did the repairs themselves and as they saw fit. It's time to tidy up your city apartments. Therefore, there was no need to be bored. All work was carried out under the lessons of economy and proper use of materials.
It was useless to resist, and we widely used:
- polyvinyl acetate emulsion - PVA glue;
- chalk;
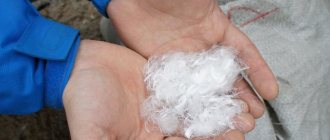
- talc;
- carboxymethylcellulose is the dry base of CMC wallpaper glue.
All components were cheap, dissolved in water and were freely sold in stores or stored on mezzanines since the “old” times. Don't be surprised by the complex chemical names of commonly known substances. One of the aunts was a chemist and taught the others.
PVA-based putty is universal and can be applied to almost any material. Otherwise, the surface is primed with PVA glue diluted in half with water, and adhesion is ensured both with the wall and with the paint applied on top.
When creating the finishing putty, PVA serves as the base. Chalk is used as a filler. It is not necessary to pour talc, but it has a fine fraction and contributes to the formation of a smoother surface. CMC is used as a plasticizer, making the putty soft and once hardened, it can be sanded with less effort.
During the industrial production of putty, protective substances are added that repel rodents and insects, repel dust and bind the soluble components of the mixture, making it resistant to moisture. Additional latex-based plasticizers prevent cracking.
Budget renovation option for retirees
Finishing walls with PVA-based putty
PVA-based putty has a slight odor, characteristic of glue. After drying it disappears. All components are natural and harmless. There are many recipes for making it. Each manufacturer has developed its own formulations. They include natural substances, fibers and polymers. For dry mixtures, the amount of water is indicated on the packaging and the proportion should be maintained.
Composition and technical characteristics
PVA-based putties are universal products that are in demand due to their good adhesive properties and affordable price.
The main component of the putty is polyvinyl acetate. According to GOST No. 520-20 of 2003, this connecting element has high bonding ability. PVA glue firmly connects various materials. Due to this quality, the technical characteristics of the mixture are of a higher quality compared to similar solutions.
Additional substances form additional properties and functions of the suspension with PVA. These include:
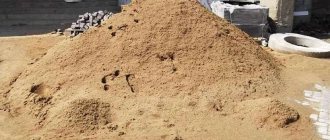
- chalk - acts as a filler;
- talc - creates the necessary fine fraction for a smooth surface of bubbles and potholes;
- various antiseptics - protect against fungus, mold, pathogenic microorganisms;
- additives - provide deratization and disinfestation.
The main and auxiliary components of the putty in the right combination provide the main technical characteristics, which are presented:
- optimal density;
- sufficient viscosity;
- plasticity;
- high adhesion.
How to prepare real decorative plaster from putty and PVA
Decorative plasters are experiencing a real renaissance today! Their popularity is associated with dynamically changing interior design trends, which draw inspiration from natural and minimalist solutions. With their help, not only subtle wall structures with a touch of brightness are created, but also strong and characteristic effects such as concrete or marble.
Fans of non-standard solutions will appreciate the charm of original mixtures, because the effect that can be achieved with their help will always be unique. One such solution is plaster made from putty and PVA. Such plaster can completely change the character of the interior, define its style and turn an ordinary room into a spectacular and timeless space.
This special mass allows you to obtain different shapes and textures, as well as create patterns and indentations on the surface of the wall. The surfaces treated with it have an irregular, often porous structure; they are waterproof, but at the same time, they perfectly transmit water vapor - plaster can be successfully applied in places exposed to moisture.
The advantage of such plaster is also its ability to hide any defects on the walls underneath and its high resistance to damage. When you get tired of the wall color over time, you can simply repaint it to give the structure a fresh look.
Main Ingredients
Decorative plaster differs slightly from conventional compositions, since in order to create some relief it must remain plastic for a long time. In addition, after the layer is completely dry, it must be durable and reliable. It is very important that the exterior finish is easy to clean from dust. Before making decorative plaster with your own hands, you need to find out what are the main ingredients of the mixture and what are they used for?
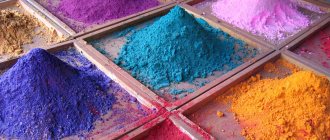
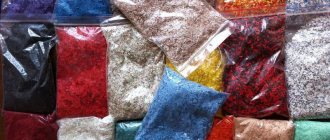
The base can be putty, and PVA glue can be used as a binding ingredient. It allows the solution to remain plastic for a long time, which allows you to achieve the desired texture or pattern. The filler can simply be a pigment that will color the composition in the desired color. Solids:
- marble pieces,
- quartz sand,
- granite chips
- synthetic elements.
These ingredients are added in the smallest quantities.
Putty is a highly malleable material, similar in texture to clay or dough, and is commonly used in home construction and renovation as a sealant or filler to fill holes and small cracks.
PVA glue is one of those few things that is difficult to replace - both on the construction site and during renovations. It improves the physicochemical properties of solutions and gives them better viscosity. Plasters made with this glue become more flexible. When added to dry mixes, the PVA construct acts as a modifier, improving their processing properties and improving adhesion to various surfaces.
Production rules
You can turn putty and PVA glue into a decorative material yourself. This will not be difficult, although it will require additional waste.
To create a mass, you need to take 6 kg of ordinary putty powder and place it in a previously prepared clean container, then pour 2 liters of water and 0.2 kg of PVA glue and mix. In order for the mixture to be thick and properly prepared, proportions must be observed. Thus, for 2 liters of water you will need 6 kg of dry putty and 200 g of PVA glue. This ingredient requires about 3-6% of the total weight of the prepared solution. The more glue, the longer the coating will dry, but at the same time it will be much stronger. Fillers are also added depending on the desired appearance of the plaster.
What fillers would you add to decorate decorative plaster?
Application methods
Before applying the first coat, carefully prepare the base surface by removing moisture, dust, dirt or residues of previous coatings. Hygroscopic surfaces of gypsum or wood must be pre-treated with a primer mixture.
Then mix the putty thoroughly and apply it using a clean, well-polished steel spatula in a thin layer of no more than one millimeter. It is not advisable to apply a greater thickness; there will be a risk of slipping, and the drying process will take much longer.
After three hours, you can apply a second layer on top of the first. After another day, you can begin sanding the surface using fine-grained sandpaper and treating it with a polishing polyurethane sponge, and after finishing polishing, use a vacuum cleaner to remove loose small particles of putty. After this, the wall or ceiling is ready for whitewashing, painting or wallpapering.
Significant irregularities are first corrected by plastering. It is not recommended to apply putty in a thick layer.
How to mix putty for walls: recommendations from professionals
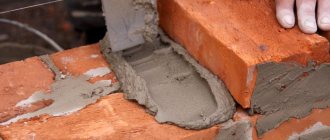
Putty is an excellent way to level walls; today the construction market offers a large selection of mixtures with different compositions. In this article you can find answers to the following questions: how to hang finishing putty for walls at home; how to properly hang wall putty in the right proportions. You can putty on any surface: wood, concrete, drywall, metal, brick.
Types of putty
During the repair, several types of material are used, cement-based mortar, gypsum putty, ready-made mixtures - used to complete the putty work.
- Cement putty. Contains many functions for working with walls. Also used for facades. Positive qualities include: good material strength, moisture resistant. Most often, walls are leveled with it. Negative features: difficult to sand using mesh or sandpaper. It is better to use for decorative work, finishing coating, under tiles, painting, wallpaper gluing. With the listed materials you can easily hide the rough structure of the mixture. It is not plastic, so cracks may form. The dry mixture must be diluted at room temperature. It will take several days to dry and then sanding is necessary. A self-prepared solution can be stored in air for no more than a day.
Types of putty for walls
- Gypsum putty. Used for interior work - ceilings or walls. Not suitable for coating external surfaces. At high humidity, the main component - gypsum, loses its properties and breaks, this indicates that there is no moisture resistance. This type of material is divided into finishing and starting coatings. Starting mixtures have a rough texture, but they level the surface well and seal gaps and cracks. The maximum thickness of the applied layer is 5 mm. Finishing mixtures have a smoother texture. Apply in a thin layer. For practical results you need to use a combination of these types. Can be sanded well. Eco-friendly and safe for health. Pricing policy is below average. No wasted drying time.
- Ready-made acrylic-based solution. Together with latex, they are included in the general group of polymer materials. This option is more suitable for finishing putty. Some call it jewelry material. The layer applied to the surface contains 1 mm. Often used for delicate work, for the perfect look of a wall or ceiling. Well used for painting. A master can do an excellent job with this material, and the finished surface will have a glossy effect. No pungent odor. Latex putty is very flexible and costs quite a lot per package.
How to dilute putty for walls
Putty material is distinguished by the size of the granules. Ready-made or dry putty is divided into:
- The starting one, which is most often rough-relief. Used for the first layer to level the surface. Its layer reaches 2.5 cm.
- The finish, which is distinguished by its smoothness. Used at the end of work, to complete. Its layer is 1 mm.
Tip: when purchasing a finishing material, make sure it has excellent ductility. This will guarantee that after drying the applied layer will not show cracks.
How to prepare putty for walls
It is not necessary to overpay and purchase ready-made material. Many people wonder how to hang wall putty at home? You can prepare the putty by hand. If you make a homemade mixture correctly, it will be no different from the store-bought one. Today there are many different ways
There is another frequently asked question: how to dilute store-bought dry putty for walls at home? You will need: bucket, water, construction mixer. Cooking method:
- Fill the bucket with water.
- Take the required amount of dry mixture and dilute with water.
- Stir until a homogeneous mass is formed, without lumps.
- Before you start mixing, the packaging indicates the proportions and ratio of water to the mixture, instructions for use, they must be read carefully.
How to dilute putty (video)
PromAlpForum
- Links
- PromAlpForum Rules
- Unanswered messages
- Active topics
- Search
- our team
What to add to cement-sand mortar for plasticity?
- print version
What to add to cement-sand mortar for plasticity?
- Quote
Post by midshipman2 » Feb 17, 2012, 10:49 pm
Re: What to add?
- Quote
Post by Nunataaq » Feb 17, 2012 10:51 pm
Re: What to add?
- Quote
Post by marina1966 » 17 Feb 2012, 22:55
Re: What to add?
- Quote
Post by rezo » Feb 17, 2012, 10:56 pm
Re: What to add?
- Quote
Post by RedFox » Feb 17, 2012, 11:04 pm
Re: What to add?
- Quote
Post by midshipman2 » Feb 17, 2012, 11:25 pm
Re: What to add?
- Quote
Post by Nunataaq » Feb 17, 2012 11:39 pm
Re: What to add?
- Quote
Post by RedFox » Feb 17, 2012 11:41 pm
Re: What to add to cement-sand mortar for plasticity
- Quote
Post by Kuzma » 18 Feb 2012, 01:42
Re: What to add to cement-sand mortar for plasticity
- Quote
Post by VUY » 18 Feb 2012, 13:15
Re: What to add to cement-sand mortar for plasticity
- Quote
Post by A&V » 18 Feb 2012, 15:39
Re: What to add to cement-sand mortar for plasticity
- Quote
Message from Sanych from Murmansk » 19 Feb 2012, 21:07
Re: What to add to cement-sand mortar for plasticity
- Quote
Post by alpinoid » 19 Feb 2012, 21:44
Re: What to add to cement-sand mortar for plasticity
- Quote
Post by alpinoid » 19 Feb 2012, 21:48
Re: What to add to cement-sand mortar for plasticity
- Quote
Post by RedFox » 19 Feb 2012, 22:35
Re: What to add to cement-sand mortar for plasticity
- Quote
Post by midshipman2 » 20 Feb 2012, 21:42
Re: What to add to cement-sand mortar for plasticity
- Quote
Post by IgAr » 24 Feb 2012, 00:22
Diluting the solution correctly
Initially, you need to figure out how to add PVA glue to the cement mortar in order to achieve the desired results. The share varies between 5-20% of cement, and in some cases drops completely to 1-2%:
- Screed 5-12%;
- Tile adhesive 20%;
- Concrete is diluted with 200 grams per 10 liters;
- Plaster mixtures take 50-70 grams per 10 liters.
Cement production technology, season and additives used affect the ratio. Each master has to calculate proportions individually to achieve the desired result.
The mixing process has one important nuance. The glue is not poured directly to avoid the formation of lumps and poor quality impregnation of the material. Achieving the result becomes possible if you initially pour glue into water (not vice versa) to a ratio of 1 to 2, gradually stirring. And the resulting composition is already added to the cement in a standard way.
Alternatively, Latexkol and Inter Plast AT can be used. The compositions are made on a polymer basis, so the first is suitable for preparing tile adhesive, and the second helps to reduce cement consumption. The only disadvantage of analogues is the cost.
Identifying uneven wood floors
Wooden putty should be applied to the prepared surface, which must first be examined and all irregularities identified. There are several ways to do this:
- We select rotten and rotten boards and replace them with new ones.
- To take measurements, before puttingtying wooden floors, the surface must be cleaned of dust, dirt and other elements.
- Using a building level that requires precision and care.
- A laser level that is installed at the highest point on the floor. Marks are placed where the rays appear, which are then used to determine the degree of unevenness.
- Mounting level, preferably long. You should start working from the corner. The level is placed against the wall, a mark is made, after which the tool moves further. After measuring the entire perimeter of the room, you can determine all the unevenness of the wooden floor.
Self-production of material
If desired, you can easily make the putty mixture yourself. All components for it are sold in construction and hardware stores. You will need:
- PVA (glue) - 1 part,
- chalk (talc, baby powder, sawdust dust, dry gypsum plaster - to choose from) - 2.5 parts,
- plasticizer (dry wallpaper glue or glycerin, drying oil) - 0.05 parts.
As a plasticizer, some introduce casein glue, liquid or grated laundry soap, but with drying oil the smoothness of the composition is the highest. The addition of this component cannot be ignored, otherwise working with putty will be labor-intensive. First, the dry ingredients are mixed together, then they are diluted with PVA, after which other liquid ingredients are added to the mass.
You need to make sure that the homemade putty resembles thick sour cream, since a too liquid product will go on unevenly, with sagging. Sawdust is added if the mass is planned to be used to seal cracks, and for finishing puttying of walls it is better to add white components to the composition.
How to fix topiary in a pot with plaster casting
Differences between alabaster and plaster
Alabaster is a fast-hardening type of gypsum, it is used only in construction: it will not be possible to put a splint on a broken leg, but alabaster is ideal for fixing topiary in a pot.
Method I. Filling with liquid solution
In a separate container, mix alabaster or gypsum with warm water until a homogeneous mass without lumps is obtained, the proportion is 1:1. We seal any holes in the pot, fix the trunk at the bottom with plasticine or stones. If a flexible cable is used, twist a loop at the end and install it on the bottom. Fill the topiary pot with plaster to the desired level. We recommend this method if you have time to wait for the fill to dry completely.
- ❮❯
The method is very convenient, the plaster probably won’t have time to set, so you can slowly fix the barrel in the desired position, as well as remove drips and wash everything
In addition, the surface is perfectly smooth, which is important if you plan to decorate with small elements, for example, coffee beans. However, such a solution dries within 12-24 hours, depending on the volume of the pot.
Method II. Filling with a thick solution
We pour gypsum into the topiary pot, slightly below the calculated level for pouring. Slowly add water, thoroughly stirring the solution until the consistency of thick sour cream is obtained. Immediately insert the barrel in the right place and, without delay, wipe away the drips and remove the excess solution.
- ❮❯
The method is universal, and most importantly, it allows you to fix the topiary in a pot very quickly: alabaster hardens completely in 2-3 hours. In this case, everything must be done very quickly, because the solution sets in 1-2 minutes. This filling method is not very convenient for small, deep and narrow pots: it is difficult to quickly knead the solution to the desired state. We recommend using a thick fill only when it is necessary to continue decorating the tree of happiness as quickly as possible.
Recommendations for pouring plaster
- Choose white plaster (alabaster). The gray mixture is usually of very poor quality, dusty and does not harden.
- Wash utensils and kneading utensils immediately. Plaster sets very quickly and is difficult to wash off.
- You must immediately wipe the pot if there are any drips or stains of the solution.
- Place pieces of polystyrene foam or sponge, or foil balls into the pot. Plaster expands and the container (especially ceramic) may burst. There were precedents. Not relevant for wooden, iron and plastic topiary pots. If the foam floats in the liquid gypsum solution, slightly glue the pieces to the trunk, walls or bottom of the pot.
- Carefully seal drainage holes in flower pots (especially if the bottom is embossed and there are several holes).
- Use warm water.
- Treat the plaster surface with PVA glue after drying. The decor will stick much better.
- Wait until the plaster is completely dry: if the moisture does not evaporate, the trunk may rot.
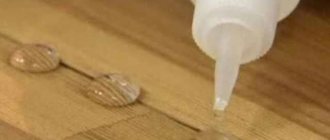
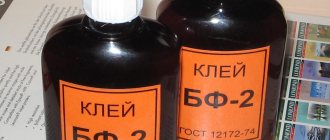
How to clean PVA glue?
Even with the most careful use, no one is immune from accidental contact of glue on clean surfaces. If it is fresh, then only a damp cloth will suffice, which will easily wipe off the adhesive. If the stain is dry, you can pre-treat it:
- medical or ammonia;
- vinegar;
- refined gasoline;
- acetone or white spirit;
- turpentine;
- baking soda.
It is important to remember how to remove PVA glue from clothes. Before pre-treating the stain, it is better to try applying a little of any solvent to an inconspicuous part of the fabric, because it can react with it and ruin the item. If no changes occur, you can use a sponge or brush dipped in soapy water. It is permissible to wash pre-treated items in a washing machine.
What you need to know
Wood floor putty has some characteristics that should be taken into account when finishing work. It is important to consider the following nuances:
- Putty loses elasticity when exposed to negative temperatures. In this regard, it is better not to repair wooden surfaces outdoors in winter;
- The permissible level of width and depth of cracks for sealing must be within 10 mm. Otherwise, it is better to perform preliminary caulking;
- If the wood moisture content is more than 12%, the visit must be thoroughly dried.
Related article: How to remove dust from a concrete floor?