To install the Armstrong ceiling, you need to purchase components for the frame and facing slabs. In order not to make a mistake with their quantity, you need to know how to calculate the material consumption for the Armstrong ceiling correctly. This will allow you not to overpay for excess and, at the same time, buy a sufficient amount of material.
For the convenience of those who are planning to install such a ceiling, a special online Armstrong ceiling calculator is posted on the websites of selling companies and construction companies. You can use this calculator, or you can make more accurate calculations yourself. To do this, you need to know the structure of these suspension systems.
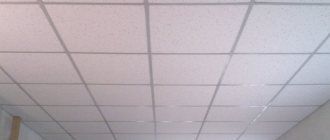
Suspended ceiling Armstrong
Advantages of Armstrong suspended ceiling
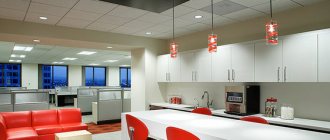
If you need to quickly and inexpensively install a ceiling in rooms with a fairly high ceiling, then a good option is the Armstrong suspended system. This design is very popular both among ordinary consumers for the design of residential and utility rooms, and for finishing the ceiling surface in public buildings. After all, it has a lot of advantages. In addition to the modern appearance, such suspended structures are practical and easy to use.
Armstrong suspended ceilings belong to the class of lightweight structures; they do not create loads on load-bearing structures
Among the main advantages, the following should be noted:
- the possibility of free access to ventilation systems and lighting fixtures;
- speed of installation and disassembly, the ability to replace, if necessary, individual parts without removing the entire ceiling;
- high percentage of light reflection of the tiles, which allows you to save on electricity;
- good noise-absorbing characteristics;
- environmental cleanliness and safety.
hiding irregularities, small cracks and other defects on the main ceiling;
Since Arstrong suspended ceilings are in great demand in the construction market, you can purchase any accessories that make their installation easier (for example, ventilation grilles and built-in lighting fixtures, etc.)
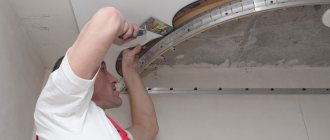
Preparatory activities
Before installing Armstrong, you need to do some preparation. This ceiling will completely cover the base base. Therefore, the old finish on it needs to be removed. If the paint is securely on the surface, it can be left. If a finish, for example a piece of plaster, falls off over time, it can deform the installed panels. Therefore, it needs to be removed and the defects filled with putty. If you are installing a ceiling in a room where there is a high probability of leaks, you need to waterproof the base surface.
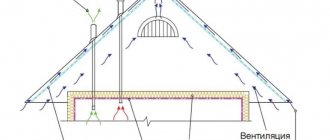
Since there will be a certain space between the two ceilings, noise and heat insulation is sometimes placed in it. The insulation is laid and covered with a water-repellent film. If foam is used, it is attached directly to the base surface with dowels.
For waterproofing, a special waterproof film is used Source potolok-exp.ru
Device and components
So, the main design detail is a metal frame, which is attached to the original ceiling and walls of the room. This box has the following components:
A wall (corner) profile is sometimes also called a perimeter profile due to the fact that it is mounted directly on the wall along the perimeter of the future ceiling. Most often this is an L-shaped profile. The supporting profile is a metal lath installed parallel to the wall profile and has a length as close as possible to the length of the room. They act as guides for the entire structure. The transverse T-shaped profile acts as a connector of parallel load-bearing rails, thereby forming cells for installing Armstrong ceiling slabs.
The pendants are two metal rods connected to each other by a butterfly spring. One rod tends upward, ends in a tight loop, and is attached to a fastening unit. The second one rushes down, ends in a hook, and clings to the support rail. Thanks to the spring, you can adjust the length of the suspensions: when compressed, its rods can be moved apart and moved as much as necessary; By releasing the “butterfly”, you will fix the hooks quite firmly. Manufacturers announce the presence of three options for this component: standard adjustable from 120 mm to 150 mm, shortened - from 75 mm and extended - up to 500 mm. Basically, when installing a suspended ceiling, a standard type Euro suspension is used.
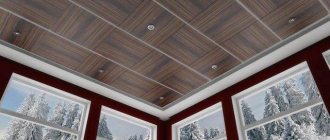
The fastening unit is a regular dowel with a hook at the end. This role can be played by a self-tapping screw or a metal collet, depending on the material of the actual ceiling and the planned load on the assembly itself. The slabs are the directly functional part of the Armstrong ceiling. Previously, coverings of two sizes were used - 120cm x 60cm and 60cm x 60cm. Today, the first ones have become history, and square slabs are used to decorate the ceilings.
I would like to dwell in more detail on the coating. So, there are six varieties of Armstrong:
Economical. The cheapest type of slabs, which absorbs moisture very easily, even if the room is simply humid. Because of this, they can quickly lose their shape or bend.
Luxury – “Prima”. More durable than the previous type, moisture resistant, and have increased sound insulation.
Moisture-resistant "Armstrong" speaks for itself. You don’t even have to worry about flooding from your neighbors above. The slab does not deform or become heavier under the weight of moisture.
Acoustic – provides maximum soundproofing. Most often used in noisy rooms: shopping and gaming rooms.
Hygienic type of ceiling slab, designed for use in premises with increased sanitary requirements: catering, medical institutions.
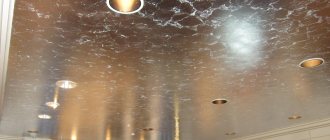
Designer “Armstrong” is not found very often, but even in its rare cases it remains very popular. Mirror, glass, wooden slabs and slabs with 3D patterns are an excellent solution for rooms with an original design.
Speaking about the materials from which suspended ceiling slabs are made, we should mention metal, plastic, mineral fibers (mineral wool), polycarbonate, wood, steel and aluminum.
Types of Armstrong suspension systems
There are several varieties of such structures, differing in design, size, technical properties, and, accordingly, price.
Among the most common are:
- economy class ceilings ( Baikal and Oasis ). They are in great demand in the construction market due to their low price, high quality and excellent design;
- functional ceilings ( Prima ). They have additional protection against moisture. So, even if the humidity is 95%, such slabs, according to the manufacturer, do not change their shape;
- acoustic ceilings ( Ultima ). They have excellent sound-absorbing characteristics;
- hygienic ceilings ( Bioguard ). They are coated on top with a special composition that protects them from the effects of hot steam and fat adhesion;
- designer ceilings designed for special design of the ceiling surface.
For each room in the house you can choose your own optimal type of Armstrong ceiling
All types have a similar device, which you need to know in order to calculate the required amount.
Specifications
When choosing Armstrong ceilings, pay attention to the following indicators:
- Light reflection - in some models of slabs the level reaches 85%, which allows you to save up to 25% of electricity on lighting. Smooth white slabs Plain, Retail Board, Scala Winter reflect light best.
- Sound absorption means the transformation of sound energy into thermal energy (divided into classes A - E). The highest indicator is characterized by low-density OR slabs;
- Thermal conductivity - 0.056 W/m*°C.
- Sound insulation (sound distribution) - reduces sound transmission between adjacent rooms by 43db. Acoustic ceilings are especially effective.
- Moisture resistance - 70-99%. For rooms like the kitchen and bathroom, panels with an indicator of at least 95% are chosen. This ceiling does not deform and remains flat. Duna Supreme, Newtone, Bioguard panels have increased resistance to moisture.
- Fire safety - from KM0 to KM3. Their use depends on the class of the room. Ceramoguard and Newtone products are completely non-flammable and are installed even on escape routes.
- Air permeability - there are two classes of products: A (high) - up to 25x10-3 kg/m² hour Pa and B (low) - more than 25x10-3 kg/m² hour Pa.
Most technical characteristics are indicated in the panel certificates.
Hanging frame
It consists of:
- metal T-shaped guide profiles 3.7 m long;
- transverse profiles 1.2 m long;
- longitudinal profiles 0.6 m long;
- metal perimeter corners 3.0 m long;
- adjustable hangers for fixing the sheathing to the load-bearing floors.
Along the perimeter of the room, corners are mounted on the walls using dowels and self-tapping screws. Guide profiles are inserted into them, with their ends parallel to each other The guides are fastened together using transverse profiles with a pitch of 600 mm.
As a result of these simple operations, a mesh frame is formed in the described case with the size of each cell being 1200x600 mm, and after installing the longitudinal profiles, square cells of 600x600 mm are formed. These are the standard sizes of Armstrong facing slabs .
It should be noted that there are other models of slabs measuring 610x610 m according to American standards. Therefore, when purchasing, you should carefully study the label, paying attention to the dimensions of the slabs.
How to calculate the number of materials
Calculation using a calculator
The calculator for calculating a ceiling made of mineral wool slabs makes it possible to determine the required amount of materials instantly, without delving into the principle of its construction. For this you will need the following data:
- Ceiling area in square meters.
- Ceiling perimeter in linear meters.
Advice. If there are protrusions, niches, columns in the room, then they need to be taken into account when calculating the perimeter. The data obtained is very approximate
Design Features
To accurately make all the calculations, you need to accurately understand what is to be calculated. To do this, you will need to find out what is included in this structure and what materials need to be purchased for its construction.
The basis, as in any suspended solution, will be a frame attached to the floor slab with hanging fasteners. Sheets of decorative coating, which can have different shapes and sizes, are fixed to this frame. On all walls, it is necessary to attach a special wall profile, which will hide the edge of the base and serve as a decorative element.
Cladding slabs
They can be inserted into the frame from the inside or outside. It depends on the type of sheathing.
The most commonly used cladding is:
- mineral wool plate;
- mineral fiber board;
- gypsum board;
- metal (steel or aluminum) plate;
- mirror plate;
- acrylic glass plate.
The final price of the finished ceiling depends on what material was chosen.
The supporting frame for the ceiling made of galvanized profiles consists of several standardized products
Calculation of components for Armstrong suspended ceiling
It is worth considering that the length and thickness will further influence the required amount of materials for the suspension system.
There are two ways to calculate materials for an Armstrong suspended ceiling: using an online calculator at home or in a hardware store, and yourself .
The easiest way is to do this yourself, knowing the perimeter and area of the room, in order to know the approximate cost of the building material.
This can be easily done using the table below:
| Name | Multiplication factor | Calculation example | Quantity |
| Panels 60x60 cm | 2,77 | S*2.7750*2.77 | 138,5 |
| Main guide, length 3.77 m | 0,21 | S * 0.2150 * 0.21 | 10,5 |
| Cross bar 0.6 m | 1,388 | S*1.38850*1.388 | 69,4 |
| Longitudinal strip 1.2 m | 1,26 | S*1.2650*1.26 | 63 |
| Ceiling plinth | 0,17 | S * 0.17 * 250 * 0.17 * 2 | 17 |
| Suspension | 0,96 | S * 0.9650 * 0.96 | 48 |
| Lighting | 0,2 | S * 0.250 * 0.2 | 10 |
S – in this table the area of the room. As an example, a sample calculation of the components for a suspended ceiling for a room of 50 m2 is given.
Lighting devices according to this scheme are calculated based on normal conditions. Another option for counting lamps is that you will need one lamp per 5 m2 . Do not forget, however, that devices can have different power. Therefore, it’s easier to consult a store consultant about a specific model.
The amount of fasteners is calculated based on the hangers used plus spare elements. Approximately, 3 dowels will be required per 1m of profile if the fastening step is 30-40 cm.
Material calculation
To calculate materials, you need to know the dimensions of the room - length and width. They are used to calculate the required number of tiles and profiles. The calculation includes several stages.
Formula for calculating the area of a rectangular ceiling
- Determine the required number of tiles. To do this, calculate the area of the room by multiplying its length by its width in meters. The result obtained is divided by the area of one tile; for a standard size of 60x60 cm it is Sp = 0.36 m. The result is rounded to the nearest whole number.
Example: for a room 3.5x5 m, room area Sк = 3.5x5 = 17.5 m. Number of tiles Nп = 17.5/0.36 = 48.6. After rounding, the total is 49 pieces.
- Calculate the number of wall profiles. To do this, determine the perimeter of the room by adding the lengths of all its walls, and divide it by the standard length of the corner profile of 3.0 m.
Example: room perimeter Pk = 3.5+5+3.5+5 = 17 m. Number of wall profiles Nsp = 17/3 = 5.66 pieces. After rounding up you get 6 pieces.
- Find the number of supporting profiles. They are usually placed along a short wall at a distance of 0.6 m from the wall and 1.2 m between the profiles. The number of profiles in a row is found as follows: divide the width of the room by the standard profile length, equal to 3.7 meters, and round the result to a larger integer. The number of rows is determined by dividing the length of the room by the installation step of the supporting profiles of 1.2 meters, rounded to the nearest whole number. The number of profiles in a row is multiplied by the number of rows.
Example: for the example room there will be one profile in a row, since the width of the room is less than the standard profile length. The number of rows is 5/1.2=4.16 rows, after rounding – 5. Total – 5 load-bearing profiles.
- The number of longitudinal profiles is found as follows: the length of the room is divided by the profile length of 1.2 m and rounded up; The width of the room is divided by an installation step of 0.6 m and rounded down. The results are multiplied.
Example: the number of rows of longitudinal profiles is 5/1.2=4.16, after rounding it is 5. The number of profiles in a row is 3.5/0.6=5.8, after rounding down it is 5. Total required 5x5= 25 pieces.
Ceiling frame prices
ceiling frame
Calculation of a suspended ceiling made of plasterboard
In a similar way, you can calculate the required number of components for a plasterboard suspended ceiling.
Key elements to consider:
- ceiling, rack and guide profiles;
- fasteners;
- pendants;
- connecting elements;
- screws and dowels.
For a single-level ceiling you will only need guides, ceiling profiles and direct hangers as fasteners.
If desired, you can also install conventional ceiling plinths in addition to those intended by the design.
Optional equipment
It is impossible to imagine a suspended ceiling without beautiful ventilation grilles, ceiling lights and other additional equipment. The “Honeycomb” ventilation grille is installed without hangers.
Ventilation grille “Honeycomb”
The “Honeycomb” ventilation grille is made of impact-resistant plastic and is mounted in suspended ceilings without special hangers. Its dimensions are 595x595 millimeters, thickness 8 millimeters, cell size 25x25 millimeters. This grille copes well with its functions and fits into the interior of the room.
There are four types of luminaires for suspended ceilings:
- Recessed lighting has been around for many years and is distinguished by its reliability and ease of installation and operation.
- Overlays are mounted directly on the ceiling surface on suspensions. The use of such lamps allows you to reduce the gap between the base ceiling and the suspended ceiling.
- Decorative lamps are designed to improve the appearance of a room.
- LED panels are durable and economical.
How to count the number of profiles
Based on the selected type of base, you can calculate it in several ways.
For example, if the cell has dimensions of 60x60 cm, you can fix panels of almost any size and all joints will fall on the plane of the base. But if the joint falls into an empty space, then this section can simply be attached from the top side using self-tapping screws.
In order to make calculations, you can use the following formula:
L * (W/0.6 - 1) + W * (D/0.6 - 1), where D is the length of the room, and W is the width.
As practice shows, this is an approximate calculation. Often there are many small parts left that can no longer be used anywhere.
Do not forget that you should always buy 20% more material in case of an unexpected situation. If the distance between the parts is 40 cm, a crossbar must be placed at the junction of the two parts.
calculate the required number of profiles for drywall using another formula: L * (W/0.4 – 1) . The resulting figure is equal to the total length of the profile. But a few centimeters will be needed to make the crossbars. Therefore, it is worth adding 10-15% to this number.
The number of guide profiles is easier to calculate: you will need as many of them as the perimeter of the room.
Nuances
Of course, not all rooms are ideally suited to these formulas. The length may be different from the size of the guides and may be more than 3.7 meters. In this case, you can use connecting elements, adding the necessary pieces of parts.
However, in this case, a larger number of necessary elements will be required, since the profiles will have to be cut into shorter ones. Therefore, you need to make a reserve. To the resulting figure you can add 10–15 percent “for scraps.”
The assembly will take place without any unpleasant surprises if you thoroughly prepare for it in advance. Such preparation must necessarily include an accurate, rather than approximate, calculation of all the necessary components.
How to calculate the required number of elements
The easiest way is to calculate the length of the wall corner. To do this, you need to sum up the entire length of the walls at the place where the element is attached, the entire perimeter, including beams, protruding parts of the walls, niches, etc. Divide the resulting amount by the standard length of the corner - usually 3 m - and round up to get a whole number. That is, if the perimeter of the room is 40 m, then the number of corners will be 40: 3 = 13.3333... Rounding, we get 14 corners.
To calculate the number of main and transverse guide elements, you should make a drawing that will show the location of the ceiling elements.
Armstrong ceiling design diagram
Most often, it turns out that the ceiling area does not allow the use of a whole number of cells, leaving surpluses. Ideally, all elements should be arranged across the ceiling area in such a way that smaller cells are located evenly around the entire perimeter. In practice, it often turns out that the remainder is too small to divide into two parts, and you just have to place the cut panels on one side of the room.
Requirements for work
Installation of slabs should be carried out only after completion of all construction and installation work, including all “wet” processes, as well as installation of floors and glazing of windows. The heating system must operate so that the room temperature can be maintained within the range of 15 - 30°C. Relative air humidity should not exceed 70%, if the material allows, then 90%. Installation of massive lamps, air conditioners, etc. should be carried out by hanging them on independent supporting structures. In the case of laying an additional layer of heat or sound insulating material on top of the slabs or installing built-in lamps, the number of pendants should be increased in proportion to the increase in the weight of the ceiling.