Hammer paint is often used on gates, entrance doors, pipes, forged products, etc. It creates a beautiful finish that looks good on similar surfaces. In addition, it serves as excellent protection against the formation of corrosion as a result of environmental influences and mechanical stress. How to dilute hammer paint in order to get the desired result and not worsen the appearance will be discussed below.
Scope of application of hammer paint
By painting the surface with this paint, an imitation of embossing is obtained. Most often it is applied to protect metal from rust; it is used for those items that should have an attractive appearance. For example, designers use it to highlight interior items with metal elements.
Not all formulations can be used indoors; this information should be viewed on the packaging of the specific product.
They are actively used for painting forged structures. This coating makes them aesthetically complete; it is popular to paint fences, doors, and gates with it. It is also used for painting automobile parts, production machines and other similar equipment. But when working, it is important to choose the right product to dilute the paint; not all types are suitable for this purpose.
By painting the surface with this paint, an imitation of embossing is obtained.
Main characteristics
Hammer paints for metal are formed by a combination of acrylic, epoxy and alkyd-styrene substances. To bind them together, crushed fine glass and aluminum powder are used. Liquid dye has a high level of adhesion. Once it hardens, a very strong protective layer appears on the surface of the metal.
The introduction of metal powders increases the strength of the paint coating, but makes this mixture unsuitable for spray application. You will have to work manually (with a brush). Modern samples of hammer paints contain different types of color dyes.
This material is very resistant to temperature changes, so it can be used safely up to 80 degrees Celsius. There is no need to scrupulously clean and prime the rusty surface (while other varnishes, paints and enamels necessarily require such preparation, but even with its careful execution they do not always adhere well and stably).
The painting process is very simple and easy, and the painted layer is not sticky.
Even vibration cannot destroy its layer, and its anti-corrosion properties last for at least 6-7 years. Hammer paint is safe for humans. If you use it to touch up defects in the base coating, the difference in their tone will be barely noticeable.
Features of working with hammer paint
This coloring agent should be applied to a horizontal surface, therefore, when it comes to doors, fences and other surfaces that are located vertically, they should be dismantled and placed vertically, or a more viscous composition with a quick drying time should be selected.
Before applying, you should stir the composition well so that some of the components do not remain at the bottom. You should adhere to an even application, make 2-3 layers, between them you need to wait about 30-40 minutes until the base is dry. Temperatures during work should not be too high; in a home environment, ensure good ventilation.
You should adhere to uniform application, 2-3 layers are made.
Consumption per 1 m²
The component composition of each paint is selected individually, so the consumption per 1 m² often varies. In addition, the application process is influenced by:
- Temperature and humidity.
- Processing method.
- Condition of the base.
We present in the table the amount of consumption for the products of each popular brand:
| № | Name | Packing | Consumption, ml/m² |
| 1 | Alpina Direct | Can 0.75 l; 2.5 l | 100-120 |
| 2 | Dali 3 in 1 | Can 0.75 l; 2 l | 83 |
| 3 | Dufa Hammerlack | Can 0.75 l; 2.5 l | 142 |
| 4 | Hammerite hammer | Jar 0.25 l; 0.75 l; 2.5 l; 5 l | 100 |
| 5 | Kudo aerosol | 0.52 l can | 520 |
| 6 | Panzer straight to rust | Jar 0.25 l; 0.75 l; 2.3 l | 125 |
The consumption of the composition is indicated taking into account processing in 1 layer. The average value can be taken as 150 ml/m².
How to choose a solvent
Before thinning hammer paint, you need to select a suitable thinner. The solvent should be selected based on the manufacturer’s recommendations, which are indicated on the packaging. For conventional formulations, toluene or xylene is used.
You cannot use solvents other than those specified by the manufacturer for Hamerite paint. A special diluent has been developed for this composition, which helps improve the properties of the composition. Other products created to dilute paints may worsen the result.
The solvent should be selected based on the manufacturer’s recommendations, which are indicated on the packaging.
Conclusion
The technology of painting with hammer paint is not complicated; it is more difficult to choose the right enamel and accompanying components. Now that you know what this paint is and how to use it, you can count on a high-quality result of your painting work (see also the article “Dye for cement: what composition to choose”).
You will find more useful information by watching the video in this article.
What and how to paint the garage inside and out? We will not go through all the possible options, analyzing their advantages and disadvantages: we will have to.
The balcony is an integral part of a residential apartment, so when carrying out renovations one cannot fail to pay attention to its interior decoration. From point of view.
Of all natural materials, natural wood, due to its unique appearance and noble warm tones, is the most widely used.
Hammer paint tools
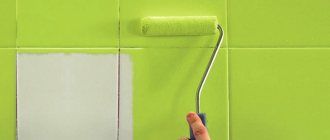
For painting work, you can use all the tools intended for this purpose: a roller, a brush, a spray gun, and painting compositions in cans are also available for sale. The roller should be chosen with a fur base; foam rubber can be corroded by paint. If it is necessary to paint vertical products, use a spray gun. It is convenient to paint small surfaces with a spray can.
For painting work, you can use all tools designed for this purpose.
Subtleties of application
Hammer coating is fairly easy to apply. However, it is worth considering that surfaces can only be finished with it at temperatures ranging from +10 to +25 degrees. The humidity level should not exceed 83%.
When you paint this or that base with a similar composition, you should pay attention to the thickness of the applied layer. It should not exceed 100 microns
This thickness is suitable for the proper formation of a high-quality anti-corrosion layer.
In order to distribute the color mixture over the base, you need to use the tools provided for this:
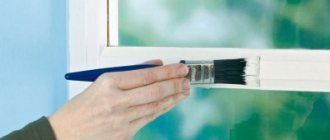
Brush. This method of applying the coloring composition is the most popular. In this way it is possible to finish bases of small size and simple configuration. As a rule, for a greater protective effect it is recommended to apply 2-3 (maximum 4) layers of paint
Particular attention should be paid to edges and corners. If you plan to carry out more serious decorative work, then you should stock up on a high-quality brush with natural bristles.
Roller
Hammer paint can also be applied using a popular tool - a roller. It is recommended to use this method of application if you plan to process fairly large and flat surfaces. Before application, blacksmith paint must be diluted in proportions of 9 to 1, using a special solvent. Then the resulting mixture should be carefully applied to the surface of the base. A roller with short fur or wool pile is ideal for this.
- Aerosol. Applying the coloring composition with an aerosol is very convenient and simple. Moreover, it takes very little time and effort. This treatment option is most often used when there is a need to touch up minor defects on small surfaces. Painting of the bases should be done in accordance with the instructions, which are usually indicated on the can. Forge spray paint should be applied in 3-4 thin layers. After applying the first layer, wait for 2-3 minutes, and then treat the surface again. With each new layer, the interval between applications should be increased to 15-20 minutes.
- Pneumatic sprayer. For finishing larger and more impressive areas, a pneumatic sprayer is ideal. However, for such devices you need to select paints of suitable consistency. In accordance with the instructions, hammer paint in powder is diluted in a ratio of 2 to 1. To achieve the proper decorative effect, experts recommend applying a “zero” layer to the base. It is a very thin coating that should be left on for 1-2 minutes. With the further formation of subsequent layers, the starting layer will become thicker.
- Airless sprayer. For finishing large surfaces, you can use the airless spray method. For such design options, it is necessary to dilute the color mixture in a ratio of 1: 9. In order for the mixture to acquire the optimal consistency, the sprayer must be shaken thoroughly.
For details on how to paint metal with hammer paint, see the following video.
Which brush is suitable
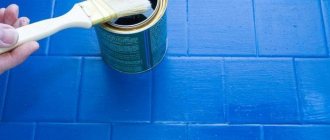
A brush is used as a classic method to paint surfaces. It helps to paint hard-to-reach places, but the choice of hammer paint must be made correctly. Regular bristles can crumble when in contact with a similar composition, so it is important to choose high-quality bristles that will withstand painting and will not leave elements on the surface.
It is important to choose high-quality bristles that will withstand painting and will not leave elements on the surface.
Compound
Modern hammer effect paints solve 3 problems simultaneously:
- Rust transformation . Elimination of iron oxides and inhibition of their growth.
- Anti-corrosion priming . Covering the metal with a protective film to ensure adhesion.
- Final enameling . Creation of a stable, leveling layer on the surface.
The composition usually contains the following components:
- Pigments : inorganic dyes with anti-fade properties.
- Binders : acrylic, alkyd resins.
- Solvents : ketone and paraffin compounds.
- Fillers : zinc phosphate, silicone, glass powder, aluminum powder.
It is aluminum powder and a combination of dyes that create a unique hammered texture.
Hammer paint painting algorithm
Coloring is carried out in several stages to obtain a durable result and an even coating. Perform the following steps:
- The surface is cleaned of all types of contaminants; if there is old paint, it is removed and the surface is degreased;
- The paint is mixed; if necessary, it can be diluted with a solvent;
- Apply the composition in an even layer using the selected tool. You need to work at a fast pace, the coating hardens in a short time;
- Each layer should sit for 30-40 minutes to dry, usually 2-3 coats are required.
Complete drying occurs within a day. At this time, mechanical impact on the coating should not be allowed.
Coloring is carried out in several stages to obtain a durable result and an even coating.
What to do if the solution is too liquid?
If, after dilution, the paint has become much thinner than it should be, then a number of measures need to be taken to return it to a thicker consistency.
- Add undiluted enamel from the jar and stir thoroughly.
- Let the liquid enamel stand for 2-3 hours with the lid open. The solvent begins to evaporate and the paintwork quickly thickens.
- Place the container with liquid enamel in a cool place. The lower temperature will cause the material to thicken quickly.
- When using white enamels, you can pour a small amount of chalk or plaster into them and mix well.
- Use a spray gun with a small diameter nozzle and apply several layers at once.
Correctly selected enamel viscosity will help significantly relieve the load on the spray gun and will not cause it to wear out. This will increase the service life of the spray gun and make painting quick and of high quality.
Disadvantages of hammer paint
The product also has negative sides, you also need to know them in order to accurately decide whether to choose hammer paint:
- It is difficult to apply on smooth surfaces and embossed areas; if an unpainted area remains, then rust will form in this place, and the entire coating will then be subject to corrosion;
- It is not compatible with other paints and varnishes; if you do not remove the old paint layer well, you will have to deal with hammer curling;
- Difficulty in removing the coating.
If an unpainted area remains, then rust will form in this place, and the entire coating will further be subject to corrosion.
Popular colors and brands
At the dawn of hammer paint, the color scheme consisted mainly of gray shades. Now the number of tinting has increased. The subtitle photo shows the most popular ones. These are white, black, gold and even pink.
As for popular brands, their list looks like this:
- Alpina;
- Dali;
- Dufa;
- Hammerite;
- Kudo;
- Panzer.
The color in the picture may differ from the actual color. Before purchasing, you should ask the store consultant for a sample for an accurate visual assessment.
Advice from the experts
A number of recommendations and advice from experts can make coloring easier. The following tips stand out:
- Do not work with hammer paint at high humidity and temperature;
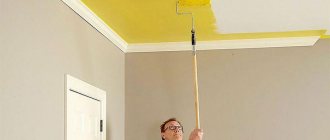
- It is advisable to paint vertical surfaces with a spray gun;
- It is recommended to sand glossy surfaces before painting;
- The new product must be cleaned of factory grease by thoroughly degreasing the surface.
It is advisable to paint vertical surfaces with a spray gun.
Hammer dyes can give the surface a beautiful and even layer that will protect it from negative environmental factors. But you need to work with it while observing some of the features described in the article.
Varieties
There are the following types of hammer paint:
ML-165. Produced on an alkyd-styrene base. Characterized by good adhesion and heat resistance (withstands up to +130°C). Suitable for painting any surfaces
Disadvantages include a negative impact on the respiratory system during the application process, as well as a high fire hazard, so precautions must be taken. NTs-221. Designed for decorative purposes, ideal for exterior and interior renovation work, and has a fairly low price
However, it does not protect painted products from corrosion or heat. EP-1323 ME. Epoxy product 2 in 1 (that is, primer and paint). Excellent metal paint with anti-corrosion effect and thermal properties. Used for painting construction equipment, cars, gates, doors, fences. Can be applied to rust and cast iron products. Hammerite. A very expensive and high-quality coloring agent made in England. Made on the basis of alkyd resins and silicone additives, thanks to which the protective effect is significantly enhanced. It is not recommended to apply the composition using a spray gun, since this device will not provide the desired effect and will also increase the consumption of the dye.
Making hammer paint at home
Some craftsmen have gotten used to making hammer enamel themselves. To do this you need to prepare the following ingredients:
- varnish (UVL-1) – 96.8%;
- aluminum shavings – 3-6% – ensures the creation of a hammer effect;
- soot – 0.2-0.5%. This component gives the coating a dark tint;
- silicone oil – forms relief.
Enamel ml-165
The first three components are mixed until the chips stop floating. To change the shade, add colored enamel (no more than 30% of the total mass of the composition). Next, add a few drops of silicone oil. Painting should begin immediately after production. Most often, homemade hammer compounds are used for painting vehicles.
Safety requirements
The operating principle of a pneumatic spray gun poses virtually no risk of serious bodily injury, but poses a more hidden threat to the eyes and respiratory organs. Paint mist generated during tool operation easily penetrates into the lungs and other unprotected areas, causing serious damage to health. LMCs based on organic solvents have an accumulative effect, which means that their sediment cannot be removed from the body. Safety precautions when working with a spray gun boil down to the use of protective elements and preparation of the room.
The main protective equipment of a painter:
- Respirator mask (or half mask) with a filter.
- Safety glasses (if half mask) with a tight fit to the face.
- Painting overalls. If the painting process becomes your daily activity.
The room where the material is sprayed must be dry and well ventilated (no draft). The surface should be installed at an obtuse angle in relation to the light source (or vice versa, the light in relation to the surface). Thus, the smallest unevenness of the layer will be noticeable. Painting should be done outside in dry, windless weather.
Surface preparation
Before figuring out how to paint correctly with a spray gun, you should pay attention to an earlier stage of work. Surface preparation before painting is of fundamental importance in the entire process, on which the reliability of the adhesion of the material and the final appearance depend. Despite its importance, the preparation process is quite simple and requires only a little attention.
A good surface for painting should be washed (not greasy), sanded and dry. If there is dirt or grease on the element being processed, the density of adhesion of the paintwork material to its surface will be minimal, which will lead to easy abrasion of the material and the formation of bubbles. Sanding with fine-grained sandpaper forms tiny grooves on the surface, and at the same time levels it to an almost ideal (for the human eye) state. Light roughness allows the paint to penetrate into the “pores” of the element being processed, which significantly increases the strength of the gluing. Excess moisture, such as dirt and grease, does not contribute to the overall picture and causes the applied material to peel off.
Painting technology
- The technology of painting with a spray gun is based on the correct position of the tool during spraying. In relation to the surface, the device should be positioned straight. If the spray gun tilts during operation, the distribution of paint in the spot will be uneven.
- It is necessary to pull the trigger of the tool, opening the paint supply, 10-15 cm before the start of the surface to be treated. Otherwise, the edges of the product will be painted poorly or, on the contrary, excessively (depending on the speed of drawing). You should also stop spraying by moving the tool 10-15 cm from the opposite edge of the part.
- Painting should be done overlapping, starting a new line about half or a third of the previous one. It is better to do this from top to bottom, from left to right.
The speed of movement of the spray gun during operation depends on the thickness of the paint and your requirements for layer thickness. The average spray speed is 1 m in 2 seconds. Excessive delay can cause smudges, and fluctuations in driving speed will affect the uniformity of the paintwork. Confidence in movements appears only through experience, but getting a decently even layer at an amateur level can be achieved even by an ordinary user, without experience with the instrument.
In addition to the basic rules for operating a spray gun, there are certain features of working with different types of surfaces in different positions.
Vertical surfaces
The simplest method of painting is when the straight surface to be treated is installed in a vertical position. In this case, spraying occurs in horizontal movements, from the top of the part to its bottom edge. In this work, it is enough to adhere to the standard rules outlined above. For a more visual representation of the process, we recommend watching a short, informative video on how to use the spray gun correctly.
If the surface is wooden, it is better to arrange it horizontally with fibers, which will ensure better absorption of the mixture into the texture.
Horizontal surfaces
The standard design of a pneumatic spray gun with a lower or upper tank does not allow it to be used in a 90° inclined position (the paint will not go into the nozzle). In such cases, vacuum tanks or airless types of devices are used, where paint is supplied under pressure through a hose from a container standing on the floor.
If you have a pneumatic spray gun and are tasked with using it to cover the roof of a car, its trunk and other surfaces, you should do this as follows. We start from the far edge, and use straight spray lines to move to the nearest end of the part. In this case, the tool can be slightly tilted, which is an exception to the rule (if the tank is not vacuum). We attach a video where painting horizontal surfaces with a spray gun is clearly demonstrated.
Ceilings
The process of whitewashing or painting ceilings requires the use of a stepladder or tool extension. Since the working distance of a pneumatic spray gun (from the nozzle to the surface) does not exceed 30 cm, and a strong tilt is not desirable, it is not advisable to use it for such tasks. The most suitable type of spray guns for painting the ceiling are airless devices, which can be equipped with a special rod that allows painting without the use of stepladders, ladders or scaffolding.
When painting the ceiling with a spray gun, you should start from the corner and use small, horizontal lines (no more than a meter), overlapping and uniformly spraying the paint over the surface. The material should be applied in at least 3 layers. The video below clearly demonstrates how to use a spray gun with a mini-compressor (similar to a pneumatic one) when painting a ceiling.
Complex figures
In addition to ordinary, flat surfaces, the type of work painters do sometimes throws up unusual objects to work on. Pillars, grilles, shaped parts and other elements with many edges require special treatment when painting.
If an object has sharp edges, paint them first. Next comes coating the sides. If a round tube or pole is painted, the process occurs in 4 stages (according to the cardinal directions): the northern side is processed first, then the western, then the southern and finally the eastern. The main thing is that the painting goes in a circle.
Painting three-dimensional objects requires more care than working with a straight surface. The tool should be moved smoothly, trying to follow the curves as accurately as possible. At first glance, this activity may seem quite complicated, but if you have an understanding of how to use a spray gun and basic experience, you can easily get a very decent result.
Test Spray
Having prepared the surface, paint, room and protective equipment, it’s time to move on to painting. If you have previously had positive experience working with a spray gun, you can proceed to the main surface. If there is no previous experience or it is unsuccessful, it is recommended to carry out a series of test sprays on waste paper (cardboard, newspaper) in order to calibrate the air supply, material and torch size (so that the spray gun can work most effectively).
Calibration of a pneumatic spray gun is a rather delicate process with many features, to which we have dedicated a separate topic on our website. If you want to make your work easier and get a decent result, we recommend that you read the detailed guide “ How to set up a pneumatic spray gun
».
Essentially speaking, you must obtain the correct shape of the spray torch (an elongated oval) by rotating the tool's controls. This process, with commentary, is clearly demonstrated in the video below.