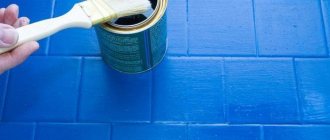
Tile is often used for tiling a bathroom. The tile has the necessary properties for many years of operation in conditions of high humidity and frequent temperature changes. However, the cladding loses its decorative qualities over time. Using paint for ceramic tiles allows you to restore the former beauty of the cladding, but you need to choose the right material.
How to paint tiles: paint and brushes
The choice of coloring composition depends on how large-scale the decorative work will be. If you plan to only partially renew the coating, paint individual elements or apply a pattern, special durable paints - enamels or auto enamels - are suitable. They fit perfectly on a flat ceramic surface, which makes them indispensable for this type of work.
But due to the high cost of enamel products, it is not advisable to use them to completely renew the surface. The same applies to water-dispersed products. As a rule, tiled kitchens have high levels of humidity, which makes water-based paints unsuitable for use.
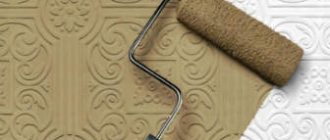
You can't paint tiles with just one brush, so you'll have to get a whole set. It should include brushes with different bristles and lengths. Small short-pile ones will be used for finer work, wide ones with long pile - for continuous application over large areas.
Advice! You can create a matte velvety coating on the tiles using a foam roller.
Updating tiles: technology for applying designs or patterns using a stencil
Patterns can significantly diversify the surface design. If there are no artistic abilities, then you can resort to drawing a picture using a stencil. The selected pattern is printed and transferred to cardboard or other dense material. The stencil is attached to the base with masking tape.
The tool for applying paint is either a foam rubber swab or aerosol paints.
If there are no artistic abilities, then you can resort to drawing a picture using a stencil.
What color should I paint the tiles?
No one can guarantee that painted tiles will look impeccable. Therefore, it is better for an inexperienced master to abandon bright shades in favor of more muted pastel colors. It is necessary to ensure that the tile does not become the interior center of the kitchen, but acts as a pleasant, neat background for other design elements.
Painted tiles, which will blend with the palette of walls or furniture facades, will be less conspicuous and will not draw attention to possible flaws.
Those who like to get creative can act more boldly - bright shades, stencils and templates are suitable. Paints of rich colors will help turn a boring ceramic coating into a real panel or a colorful painting. As a base, you can use white paint, which will act as a canvas. But it is better to resort to this option when you are confident in your own abilities and good taste.
If the task is simply to refresh and renew the coating during repairs, choose a color from the same range, but more saturated. If desired, you can focus on individual elements by painting them in a contrasting tone.
Possible color options
Which type of staining is suitable depends on the reason for using this technology. So there may be the following options:
- Wear of material when a low-quality type was chosen;
- Surface decoration, in this case, they use stencils and create new designs to get an original design. You can get a different interior cheaply;
- Restoration work, when for various reasons the original coating has become damaged and the pattern needs to be restored. Then it is advisable to resort to the services of professional artists so that the drawing comes out worthy. But first you will have to prepare the base so that the layer holds securely.
It is advisable to resort to the services of professional artists so that the drawing comes out worthy.
Composition selection
Suitable options for painting kitchen tiles are the following compositions:
- acrylic - economical in consumption and easy to use, even a beginner will be able to handle them easily;
- epoxy paints are the most durable paints that do not wear off, retain their rich color for a long time and are not afraid of moisture;
- latex - resistant to high humidity, do not form bubbles on the surface, have a bright palette and do not emit unpleasant odors;
- silicone - water- and vapor-proof mixtures, withstand temperature changes, cover large gaps well, and fit well on almost any coating;
- oil-based – hold tightly to the surface, but can crack over time, which creates difficulties for restoration work;
- alkyd - dry quickly, do not crack or fade, allow you to create matte, semi-matte and glossy effects;
- silicate - have water-repellent properties and low contamination, but due to high alkalinity they have a small color palette.
It is not recommended to use silicate dyes on surfaces that were previously painted with alkyd or acrylic products.
The immediate process of transformation
Before painting the tiles, you need to apply a primer. Commercially available primers usually come in different types, and are a liquid composition for restoring an old surface or creating a new, uniform surface.
If you need to paint a smooth, dense surface (laminate, tile, glass, plastic), primers are used on surfaces that do not absorb water (high adhesion). They adhere perfectly to very dense and smooth surfaces. This is the optimal solution to the problem of how to paint tiles. But you can’t paint over the primer either. First, the primer is allowed to dry, then a putty layer is applied, and this is also allowed to dry.
On video: how to choose the right primer.
There are tips to paint the tiles in the bathroom without resorting to a second layer, but even special paints and primers that do not contain quartz sand will not give the wall such a refined look as applied putty. Special compositions with all biological additives, antimicrobial and antibacterial properties, water-emulsion and waterproof, adhere much better to a puttied surface that has been sanded with sandpaper to a perfectly smooth state.
The kitchen interior may not require such a specialized coating as the walls in the bathroom, where it is constantly damp, but perhaps it is worth taking care of purchasing a high-quality and long-lasting product so as not to have to deal with new repairs in the near future.
Preparatory stage
Proper preparation is the key to successful work. You need not only to select consumables and tools, but also to find out whether your cladding is suitable for applying coloring compounds.
What kind of tile can be painted?
Craftsmen claim that any ceramic coating is suitable for painting. The only exception is tiles laid in areas that are constantly in contact with water. These include the floor in any room, the walls of the shower stall and the ceiling in the bathroom, which is constantly exposed to steam. The humidity level on these surfaces is exceeded, so even the most durable paint composition will not last as long as stated by the manufacturer.
In the kitchen, the influence of steam is not as great as in the bathroom, so the scope of paint will be wider. It can be used to paint ceramic floor coverings, work aprons, or the entire surface of walls if they are tiled.
Selecting tools
In order for the result of painting work to be as presentable as possible, it is necessary to prepare a set of tools and equipment in advance:
- a soft household sponge, preferably made of foam rubber;
- dry, clean rags;
- roller with foam rubber or fine-haired coating;
- a set of brushes suitable for the selected type of work;
- paint container or tray;
- a stick for mixing the color mixture;
- masking tape;
- stationery knife;
- fine-grained sandpaper;
- construction protective film;
- stamps and stencils - if you plan to make an ornament or pattern;
- work suit, respirator, glasses.
Choosing paint
The kitchen is an enclosed space with specific internal environmental conditions, so the choice of composition must be approached from this point of view. As practice shows, the best choice for painting ceramics are:
- acrylic paints – a wide variety of shades and ease of use;
- epoxy paints dry quickly and have almost no odor;
- auto enamels - suitable for making patterns and creating accents on the coating.
Epoxy paints are difficult to work with, so it’s best to practice on a small, inconspicuous area first. This will help you get your bearings and see how the composition behaves on the surface.
To preserve the original shine of the enamel, you should choose glossy compounds. Satin paints are good because they create a semi-matte velvety finish on which drips, splashes and dirt will not be visible.
In addition to the coloring mixture, you will also need other consumables:
- soap solution from any foaming product (dishwashing soap, laundry soap, etc.);
- alcohol-based cleaner to remove dirt;
- epoxy primer;
- paint thinner;
- water or oil based varnish for finishing.
Vinyl film
A simple way to make your bathroom attractive and bright is to stick a colored self-adhesive film on the tiles. This finish has a number of advantages:
- Easily and quickly sticks to tiles and other smooth surfaces;
- Available in a large number of colors;
- has no smell;
- does not require drying time.
The only tools you need are tailor's scissors. Surface preparation for gluing the film is standard - cleaning and degreasing. You can cut out shapes of different shapes from the film and create ornaments.
For the bathroom, you should choose a material marked wave 3 - it can be washed with detergents. The ideal option would be to add an image of a brush. This film can be cleaned with an abrasive and rubbed with a hard bristle, but it costs more.
The film is translucent. If the tile is not white, then it should be coated with a light primer to create a background.
Painting tiles in the kitchen
Painting tiles in your kitchen space can be a fun project. Unlike laying tiles, the process will not be labor-intensive, allowing you to realize creative ideas and bring creative ideas to life.
Define boundaries
Before starting painting work, you need to decide on the area beyond which paint will not be applied. It is worth focusing on the recommendations indicated above - do not paint the tiles in those areas where frequent accumulation of steam and constant exposure to liquid are expected.
If you wish, you can use paint in these areas, but you should keep in mind that such a coating will not be durable.
Experienced painters advise painting in “wet” areas along the perimeter or border - this will allow you to isolate problem areas and focus on nearby ceramic tiles.
Prepare the surface
Any type of coloring composition will work well only on a thoroughly washed and treated surface. First of all, the tiles need to be cleaned of dirt, paying special attention to the areas near the stove, where a whole layer of fat forms over time.
A lot of dirt accumulates in the joints between the countertop and the apron, in places where there are joints with furniture and plumbing fixtures. You need to wash the tile seams no less carefully - mold and bacteria “love” to live here.
If cracks are found during inspection of the seams, they will have to be repaired. To do this, in problem areas, the grout is removed and the seams are filled with cement fugue. After the cement has dried, the tiles must be washed again, removing any remaining material.
A soap solution is used to remove grease and dirt, and a hard dish scraper or cleaning powder will help enhance its effect. After degreasing, the surface must be rid of the soapy layer - for this purpose, use a rag soaked in vinegar, which neutralizes alkali well.
The best way to remove “soapiness” is a solution of purified water and ammonia in a 1 to 1 ratio.
Apply paint base
If you plan to completely cover the tiles with paint, it is recommended to treat the base with fine-grained sandpaper for better adhesion. But when it comes to covering a large area, sanding will be labor-intensive and time-consuming. In this case, it would be wiser to use a primer instead of sandpaper, which improves the adhesion of the tile to the paint.
For these purposes, it is recommended to choose a special primer - it should be labeled as a primer for glass, fiberglass, plastic or ceramics. A high-quality product will not only provide excellent adhesion, but will also help mask areas with cracks, chips and other flaws.
The next stage is started only when the primer is completely dry. Although the instructions for some drugs indicate that they dry out in just an hour, experts advise waiting about a day.
Artwork
The algorithm for painting ceramic tiles is no different from processing any other surface. First, you need to protect the areas that will not be painted - the floor is covered with construction film, and the edges of the tiles are covered with masking tape. They can also create certain configurations and painting geometry according to a pre-planned pattern.
If stencils have been prepared for creating ornaments, they are also glued at this stage.
Templates are the easiest to use - these are ready-made drawings and ornaments that you only need to outline or fill with paint. In this way, you can create a themed interior in the kitchen - decorate the corners of the apron or make an accent in its center. Another option is to create a continuous ornament - it can run along the perimeter of the tiled area, decorating only the upper, right or left parts.
Important! You need to glue the tape and patterns so that their edges fit tightly to the base. The paint will leak through loose areas and the pattern will turn out sloppy.
If the area to be painted is large, it would be wiser to use a roller with dense short pile. Small amounts of work can be handled with a paint brush; it can also be used to paint hard-to-reach areas and decorate individual fragments of ceramics. The strokes should be confident and uniform, without streaks or omissions.
Select color for seams
The simplest option for painting the seams is solid, when the space between the tiles is given the same color as the main area of the tile. If you want to create a bright contrast between the seams and the tiles, you will have to put in a lot of effort. First, cover the seams with masking tape and paint the entire tile in the base shade.
After the paint layer has dried, the tapes are removed and pasted onto the tiles so that the seams remain free. Then the space between the tiles is painted with the selected shade and left to dry.
The color for the seams can be chosen based on contrasts - white/black, yellow/black, blue/white. Another design technique is the choice of similar pigments from the same palette - pale lilac and rich purple, blue and azure, beige and brown, etc.
Protect your new coating
As a finish, you can use a clear water-based urethane varnish - it will protect the coating and help fix the ornament. The area is opened with varnish after 2-3 days, when the last layer of paint has thoroughly dried. Apply the varnish in two layers with a thin brush, and in one thick layer with a roller.
The tiles on the floor that have been updated with paint, as well as the tiles painted with oil paint on the wall, must be varnished.
Create ceramic paintings
If you have basic artistic skills, you can try to create a panel painting on ceramics. The tile reserved for the painting must be degreased and treated with fine-grained sandpaper. The design is applied to the tile plane with a pencil, and the contours are outlined with a thin brush with oil paint.
After 30 minutes, when the outline “sets,” the elements of the drawings are filled with acrylic paint for ceramics.
The acrylic composition must be applied with point movements, holding the brush at a right angle to the surface.
Use it wisely
Painted tiles require more careful handling than regular tiles. Prolonged exposure to steam, liquids, high and low temperatures can ruin even the highest quality coating. Epoxy enamels crack when exposed to direct sunlight, and oil paints swell when exposed to water for long periods of time.
Ceramics with ornaments and paintings should not be washed with hard brushes or rubbed with abrasives or cleaning powders. It is better to choose acid-free detergents that do not corrode the design.
Preparing for painting
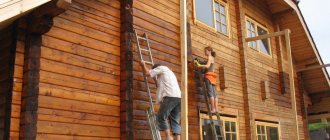
Work on painting tiles begins with preparing the surface and the room itself. To begin with, it is recommended to clear the room of furniture and interior items that may interfere with the work. It is recommended to cover anything that cannot be removed with plastic wrap to prevent drops of paint from falling onto the surface. While the paint on smooth objects can still be wiped off, the upholstery of the upholstered furniture cannot be saved without dry cleaning.
It is advisable to cover the furniture with film
The surface of the tile itself also needs preparation. If you neglect this stage, the layer of paint and varnish material will quickly begin to peel off and crumble. The surface of the tile is first washed with some cleaning agent. If the tiles are painted in the kitchen, then it is important to remove all grease stains - the paint will not stick to them. You can degrease the surface using a special liquid or use vinegar or an alcohol solution.
Washing ceramic tiles
Then, as soon as the tile is dry, it is carefully sanded with sandpaper - it is necessary to make the surface slightly rough. Only in this case will the paint stick well. If the tiles on the floor are rough in themselves, then you can do without the grinding step.
On a note! Not only the tiles are sanded, but also all the joints between them.
It is also important to inspect all tiles before painting to make sure they are intact. Damaged elements must either be removed and replaced with new ones, or repaired.
How many layers should I apply?
One layer of paint is only sufficient if it is the basis for applying the ornament. In this case, you shouldn’t make it too thin - the new dye should cover the previous shade well.
In most cases, the paint is applied in two layers, and if there is a need to make the shade as saturated as possible, a third layer is applied. Each previous layer must dry for at least 12 hours, depending on the type of composition. Re-coating the tiles is done perpendicular to the previous one - this way the surface will be treated more thoroughly.
What to do with seams
The structure of the dried joint mortar is loose. It absorbs moisture and dirt. Fungus appears in the space between the tiles.
The seams must be periodically treated with protective mixtures. Before painting, use a spatula or a special tool for cleaning seams to remove the top dirty layer of mortar. To ensure the ideal appearance of the wall, grouting should be done after finishing.
If, according to the design, the seams should clearly stand out and have a contrasting color, stripping and grouting are done after painting the tiles. The solution is given the desired color.
The second option is to tidy up the seams before painting the wall. Then, using a template or masking tape, draw lines of the selected color between the tiles. The paint for tile joints must be waterproof. You should pay attention to formulations with sealant; choose a bottle with a special tip that allows you to draw thin lines directly from the tube.
Decor secrets
Here are some recommendations from experienced craftsmen that you can take into account.
How to achieve a 3D effect?
The 3d effect involves the creation of a three-dimensional relief pattern on ceramic tiles. You can implement this approach on your own using gauze from which certain shapes are cut out. They are attached to the surface of the tile, and a primary layer of enamel coating is applied on top.
After the enamel has completely dried, take a coarser roller and paint from a different palette and paint over the gauze pattern again.
How to preserve a drawing for a long time?
To ensure that the paint does not rub off and looks like new for a long time, it is necessary to give it time to dry completely - this usually takes about 3 days.
Not only epoxy water-based varnish, but also oil-based polyurethane will provide good protection for the design. Oil-based coatings take longer to dry than water-based coatings, but serve as an excellent barrier to moisture, protect the surface from scratches for a long time and are characterized by a long service life.
Apply the varnish in two layers - but first you need to make sure that the components of the varnish coating are compatible with the components of the paints that were applied to the ceramics.
Selection of grout
There are five types of grout according to the quantity and size of filler:
- Sandless;
- With fine filler;
- With large filler;
- Polymer;
- Epoxy.
Sandless grout
This includes cement, satengypsum, tile adhesive and other mixtures. They do not contain large particles; when diluted, they become a homogeneous mass. Best suited for sealing joints between tiles up to 3 mm thick.
Sandless grout can be any color.
Grout with fine filler
It is based on cement or gypsum, but there is a mineral filler. This is usually quartz sand of small diameter. This grout can be used to seal seams from 3 to 8 mm wide.
Grout with coarse filler
The composition is similar to grout with fine filler. But it can include not only quartz sand, but also granite chips and other mineral additives. It is used to seal gaps between tiles from 8 to 15 mm wide. Most often used for grouting joints between floor tiles.
Important
The wider the seam, the coarser the sand should be. It prevents tile grout from shrinking and cracking. Due to strong shrinkage, the grout may peel off, so choose wisely.
Polymer grout
This is a grout based on one of five polymers, or mixtures thereof:
- Silicone;
- Acrylic;
- Polyurethane;
- Latex;
- MS polymer.
Such grouts are essentially sealants. Mainly used on walls. With their help you can seal seams of almost any thickness. Ideal for the bathroom. They remain elastic, which prevents cracks in the tiles due to temperature deformation. Available in pistol-sized tubes and larger containers.
Acrylic (left) and silicone-acrylic (right) grout.
Epoxy grout
Consists of epoxy resin and hardener. Epoxy grout for ceramic tiles is highly resistant to stains and chemicals. It can seal seams of any width. But application requires skills and experience.
Photos of work before and after
A selection of before and after photographs will help you get an impression of the options and results of painting tiles.
Grout
Grout can be applied in two ways.
- If you paint it and the tile the same color, the grout should be flush with the tile. To do this, use a spatula or flat scraper. Remove excess with a rag or sponge.
- The second option is to apply the grout by pressing it into the seam. This method is used when the grout and tiles differ in color. You can press it with a special rounded scraper or just with your finger.
Grout, like paint, has a drying time. Some set completely in high humidity, others like dry air. Consider this before painting tiles or starting to use the bathroom.
Applying the coating with a spatula.
Examples in the interior
DO YOU HAVE ANY QUESTIONS?
Ask a specialist
Beautiful examples for inspiration
The easiest option is to cover the tiles with an even, monochromatic layer, but if you want to create an original design, use stencils. This idea is easy to implement and inexpensive, and there are a great many options for patterns in stores - from colors and geometry to children's drawings.
If you have artistic talent, you can do without a stencil, simply depicting any motif you like on the walls.
Another simple way is a repeating print. It’s easy to draw dashes, dots, stars, and stripes on the tiles yourself.
The photo shows the result of using stencils on the floor
Approach repainting tiles responsibly, prepare the tiles and use high-quality paint - then your work will last for many years.
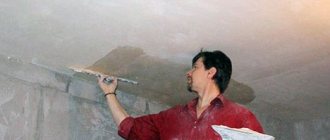
Applying varnish
To secure the paint layer, coat it with varnish. For this purpose, acrylic compounds are commercially available that create a solid base. If desired, it can be polished, bringing it to perfect condition.
Cosmetic repair of flooring
By analogy with the corridor, the bathroom is by default one of the most accessible areas in the apartment. Therefore, a floor lined with porcelain stoneware or tiles must be covered with wear-resistant compounds. The best options are auto enamels, slate, epoxy, and polymer paints.
An example of self-painting existing floor tiles with chalk paint to update the interior of a room during a redecoration is shown in this video
The main nuances in this case are:
- the plumbing remains in place, only the removable screens/panels of the bathtub are dismantled;
- a light background on a dark tile will have to be applied in several layers and, conversely, a white tile is painted over with dark paint in one step;
- work begins from the corner farthest from the door and ends near the doorway;
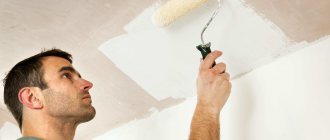
- floors are usually painted last, after ceilings and walls.
Spray cans, sprayers, and spray guns are rarely used here, since the floor area is small.
Design Variations
There are many options to create a new original interior using paint. The master can give free rein to his imagination; the following variations can be taken as a basis:
- Full coloring;
- Partial color renewal in the required areas;
- Creation of patterns, drawings, images.
There are many options to create a new original interior using paint.